


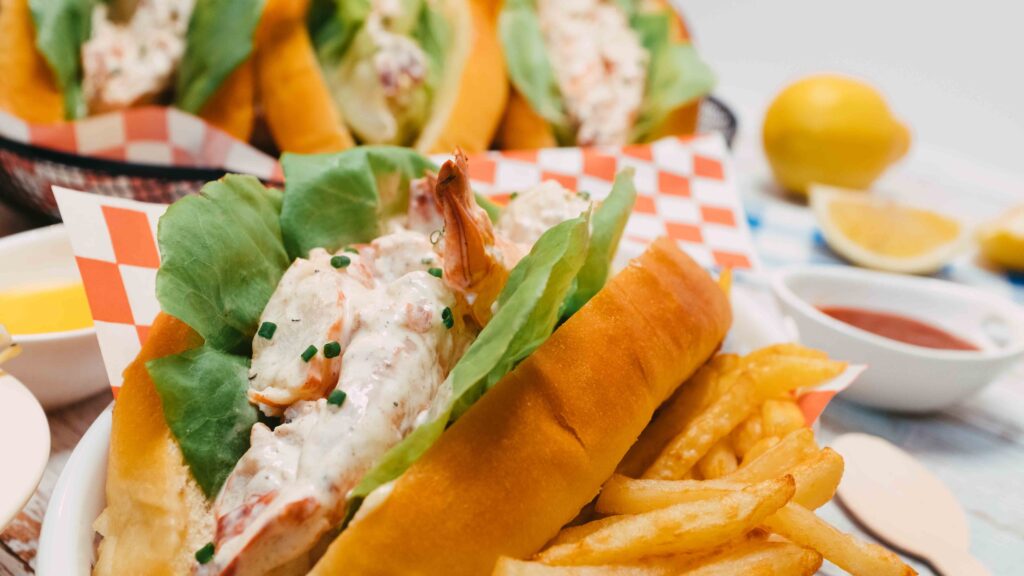
Makes 4 larger-than-average sandwiches
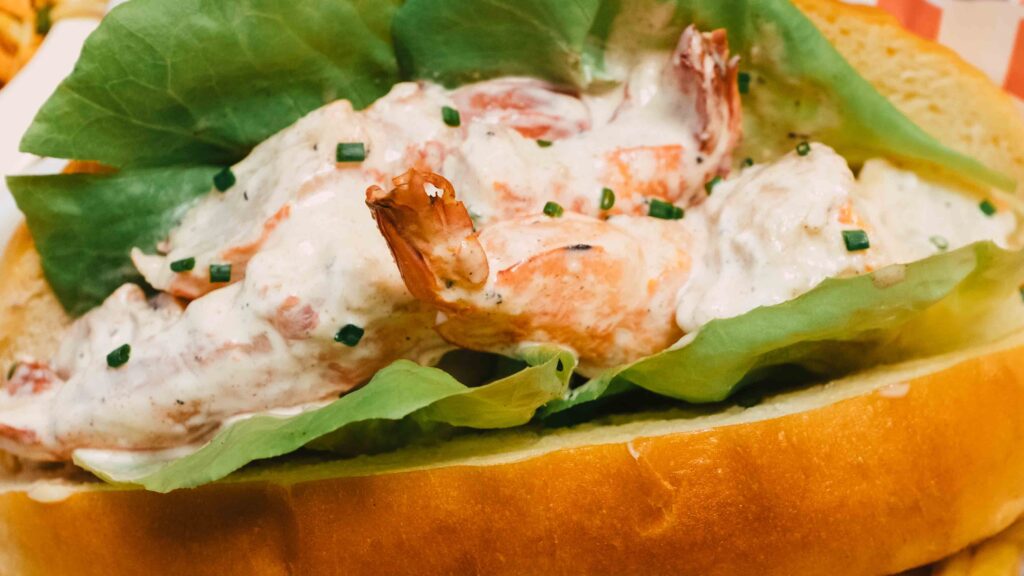
This isn’t your regular hot dog using any ol’ hot dog bun. Featuring made-from-scratch New England style buns, this salad-sandwich is our take on the esteemed Maine Lobster Roll! In our recipe, we’ve swapped out the lobster for jumbo tiger prawns, which are locally available and just as meaty. And while the protein component may not be 100% true to the rolls’ origins—served with homemade fries and fresh coleslaw on the side—these Tiger Prawn rolls are 100% seafoodelicious!
At a glance
– This recipe comprises New England hot dog buns + tiger prawn filling + coleslaw + French fries.
– You will need an 8×8 inch metal brownie pan and some thick aluminium foil for the buns, a 5-litre steamer pot & basket to steam the tiger prawns, as well as a 2-litre saucepan to poach them, and a 3-litre wok/deep fryer for the fries.
– This recipe has been broken into 5 stages for ease and comprehension. Please read the entire recipe from start to finish before beginning.
Stage 1: New England hot dog buns
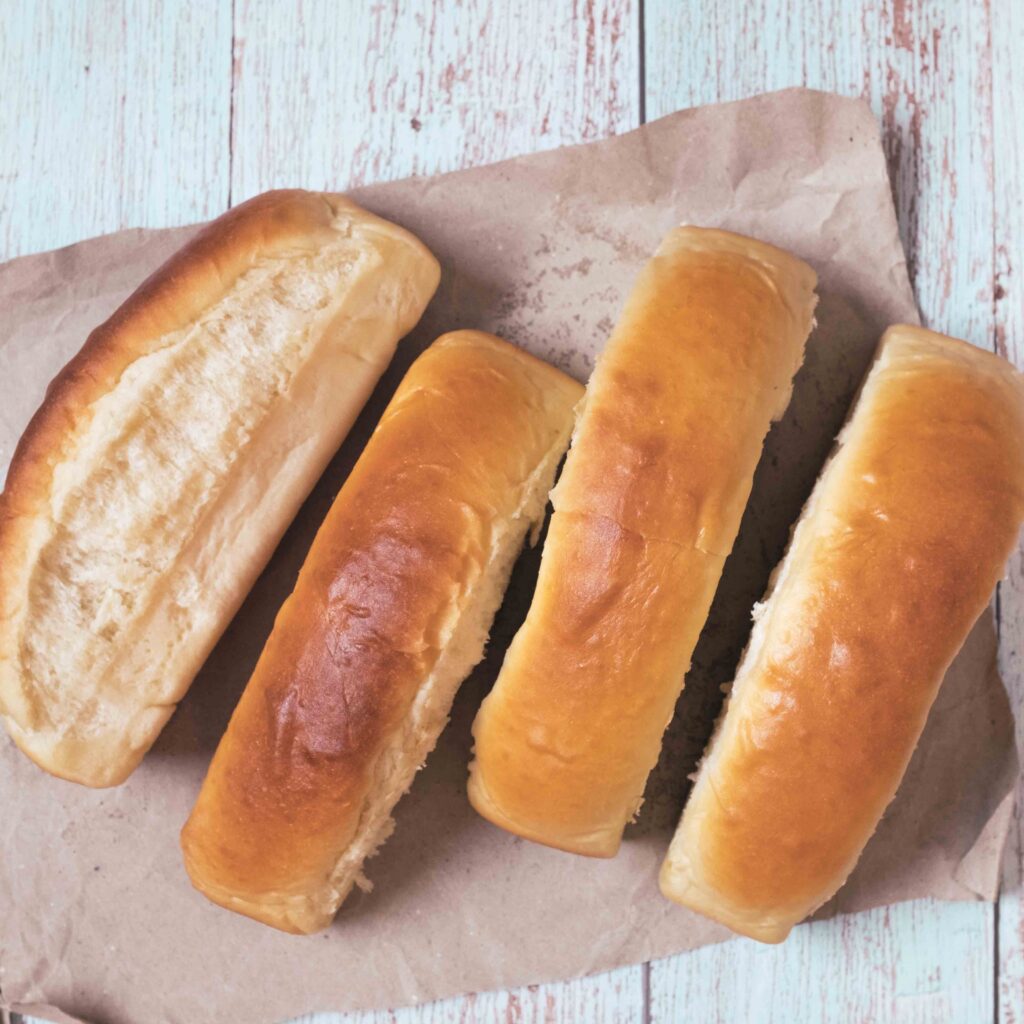
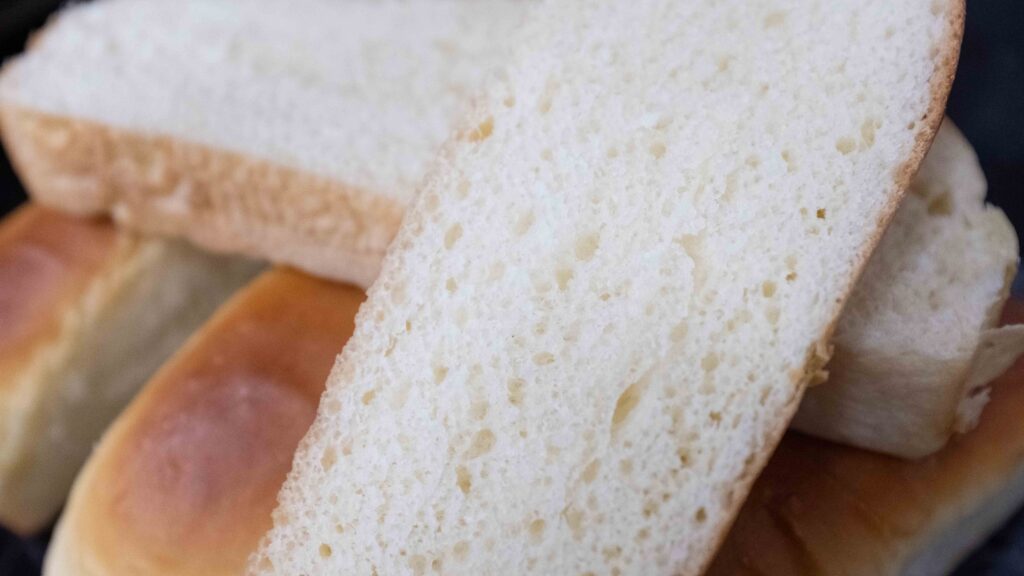
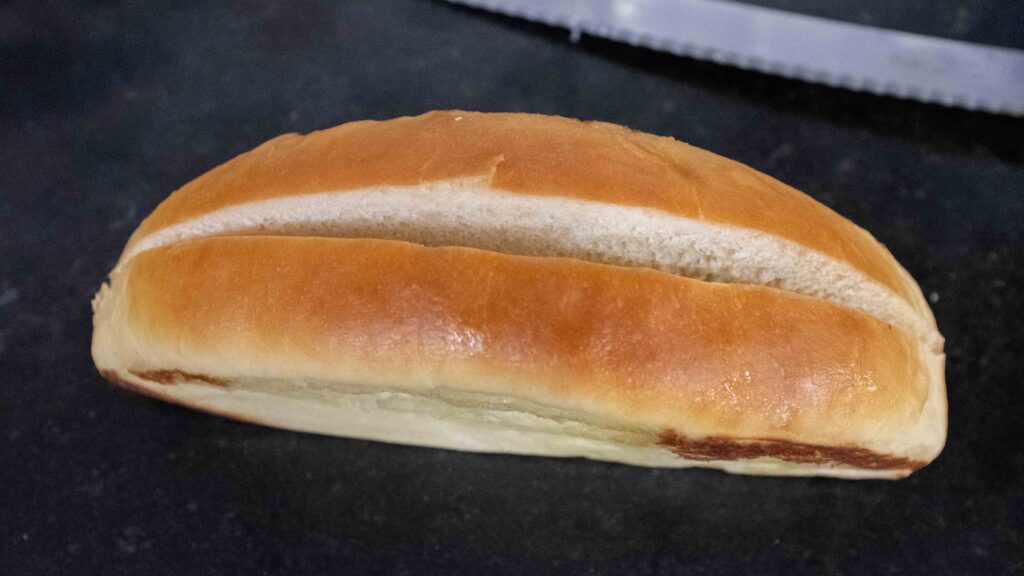
The New England style hot dog bun aka split-top or top-loading bun is unlike a regular hot dog bun. Not only do they stand upright, but because they are made in a special pan that bakes them as one large loaf, the individual buns have tender white walls rather than browned sides, which can be buttered and toasted. Much like dinner rolls, these buns are made with an enriched dough—which means lots of fats and dairy to make them soft.
Ingredients
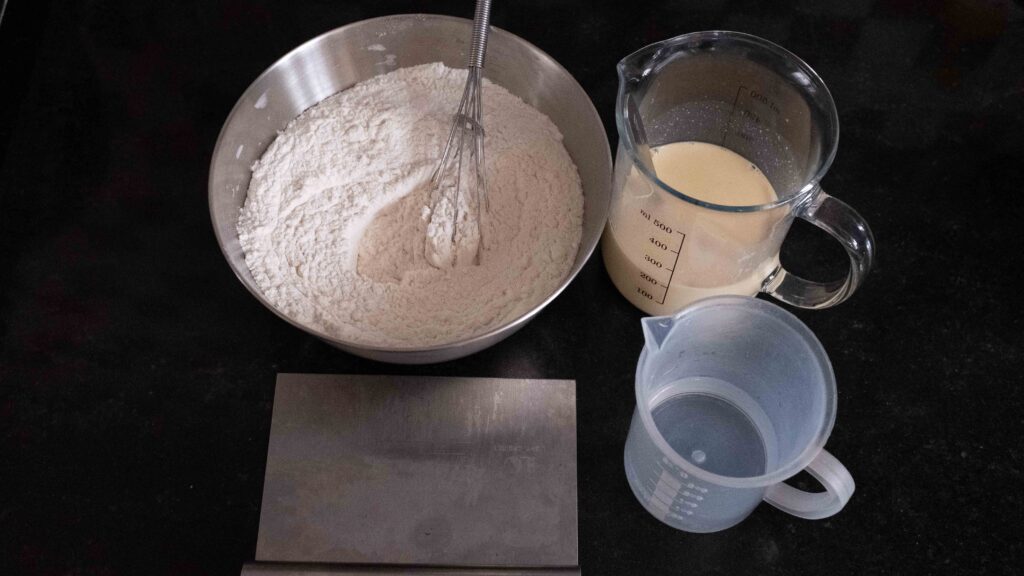
1. 350 gm all purpose flour
2. 1 tsp bread improver powder
3. 20 gm milk powder
4. 1 ½ tsp instant yeast
5. 85 ml UHT milk at 43OC or whole milk boiled and cooled to 43OC
6. 85 ml warm water (43OC) + 60 ml extra if required
7. 1 medium egg (50 gm) at room temperature
8. 1 tsp fine sea salt
9. 1 ½ tbsp. granulated sugar
10. 40 gm unsalted butter, softened
11. Baking spray to grease the bowl and baking pan
12. Egg wash; 1 whole egg + 1 tbsp. water
13. Butter glaze; 1 tbsp. softened salted butter
Prep
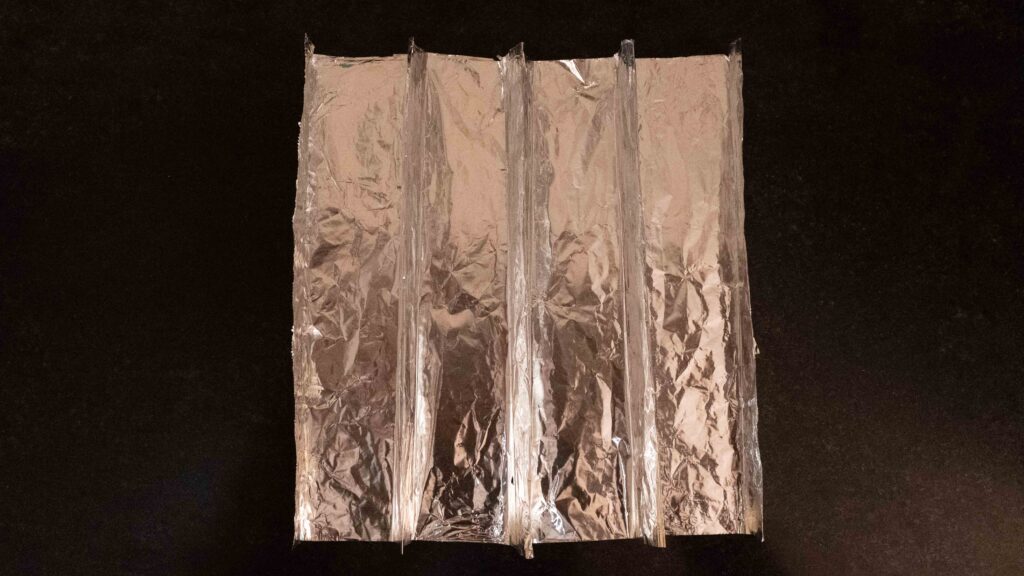
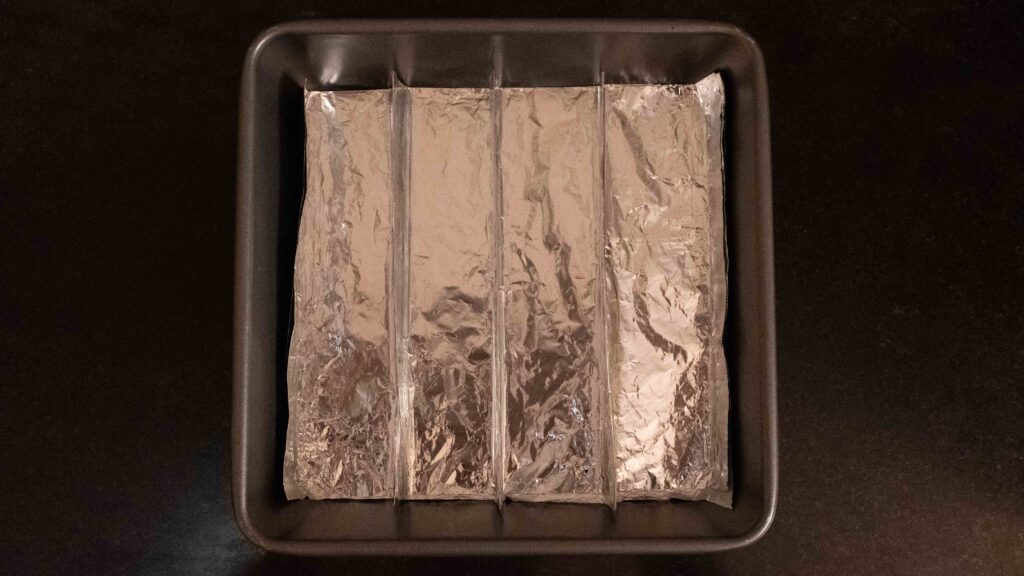
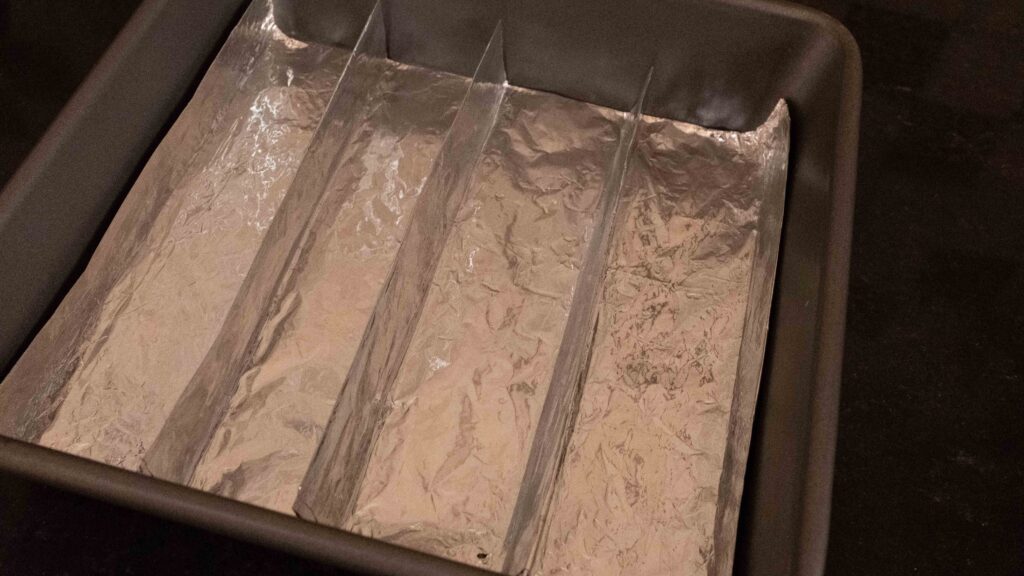
1 – To make a DIY New England hot dog pan using a 8×8 inch brownie pan, see this guide and follow all the steps. See the images just below for what your aluminium foil mould should end up looking like.

Method
1 – In a large bowl, combine the flour, bread improver, and milk powder. Whisk well to combine. These are your dry ingredients.
2 – Add the warm milk to a medium bowl and sprinkle the instant yeast onto the milk. Whisk to dissolve the yeast into the warm milk. Now add 85 ml warm water and the egg, and whisk once again to combine. This is your wet mixture. Reserve the leftover warm water in a separate bowl in case it’s needed later.
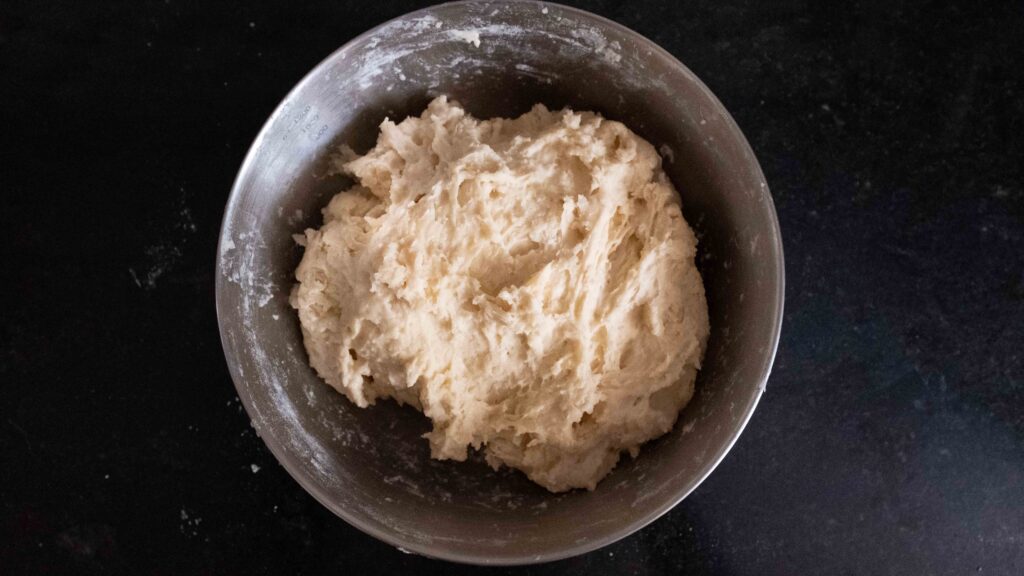
3 – Add the wet mixture to the large bowl of dry ingredients. Using your bench scraper, fold the mixture together until you no longer see any dry, floury bits and you have a cohesive, shaggy dough. I added an extra 10 ml of warm water. Cover the bowl in cling wrap and leave the dough to rest at room temperature for 30 minutes. This will allow the dough to fully hydrate and develop the gluten.
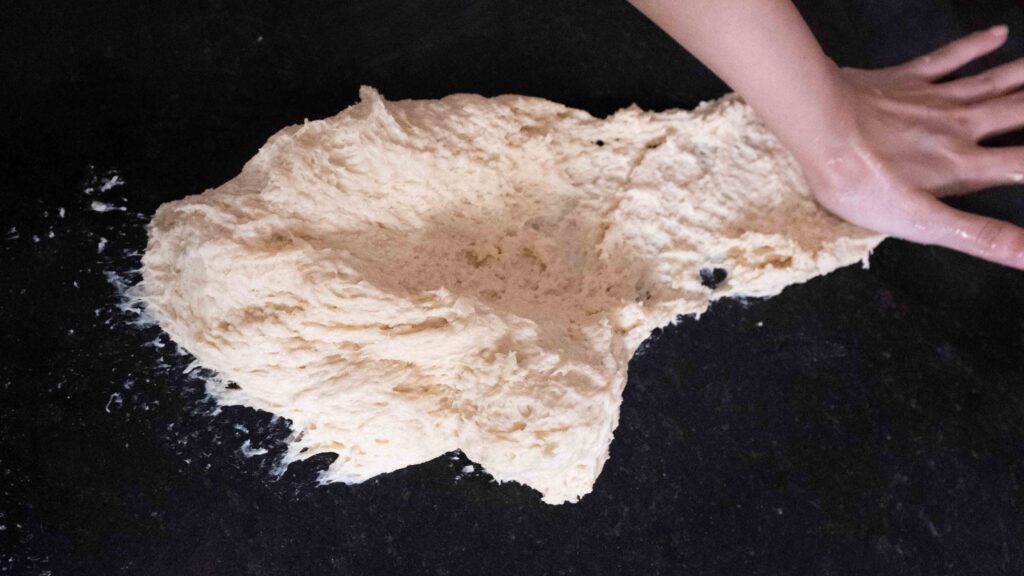
4 – After 30 minutes, use a bench scraper to tip the dough out onto your work surface. Your dough will be incredibly sticky. Don’t panic by adding more flour.
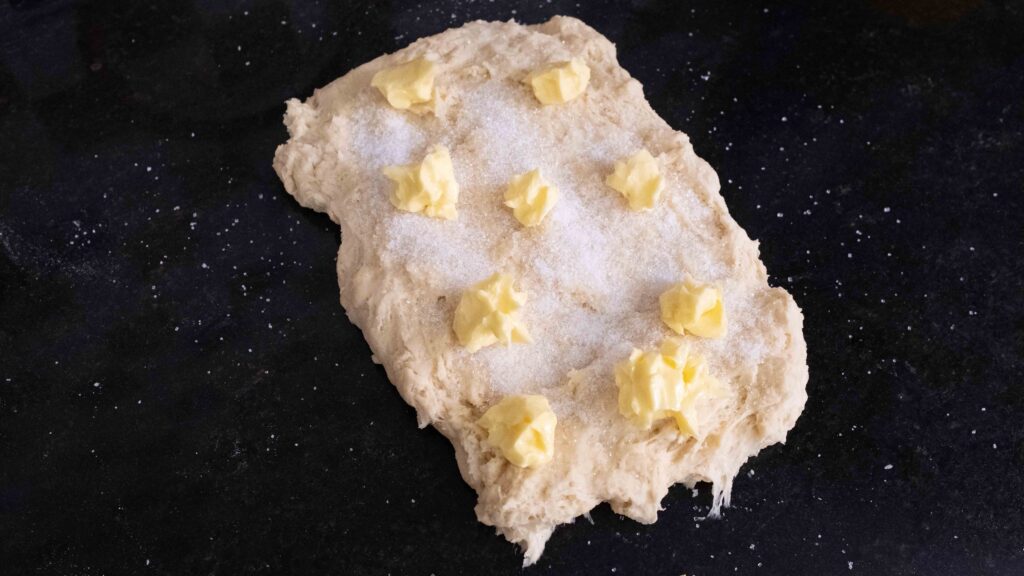
5 – Using your hands, shape the dough into a rough rectangle. First sprinkle the sugar and salt onto it and then place globs of softened butter onto the rectangle of dough.
6 – Grab your bench scraper and begin cutting and pressing the sugar, salt, and butter into the dough.
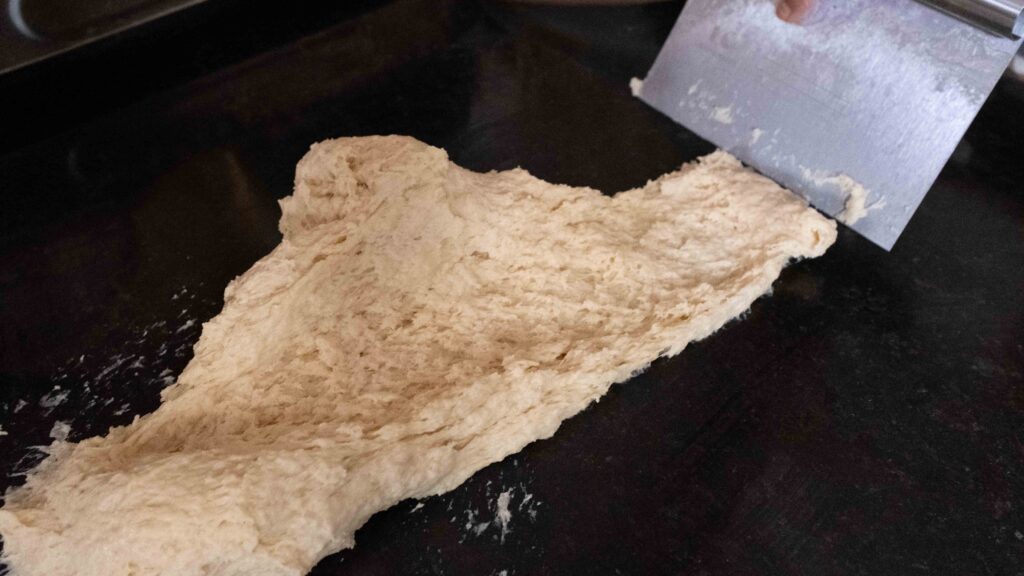
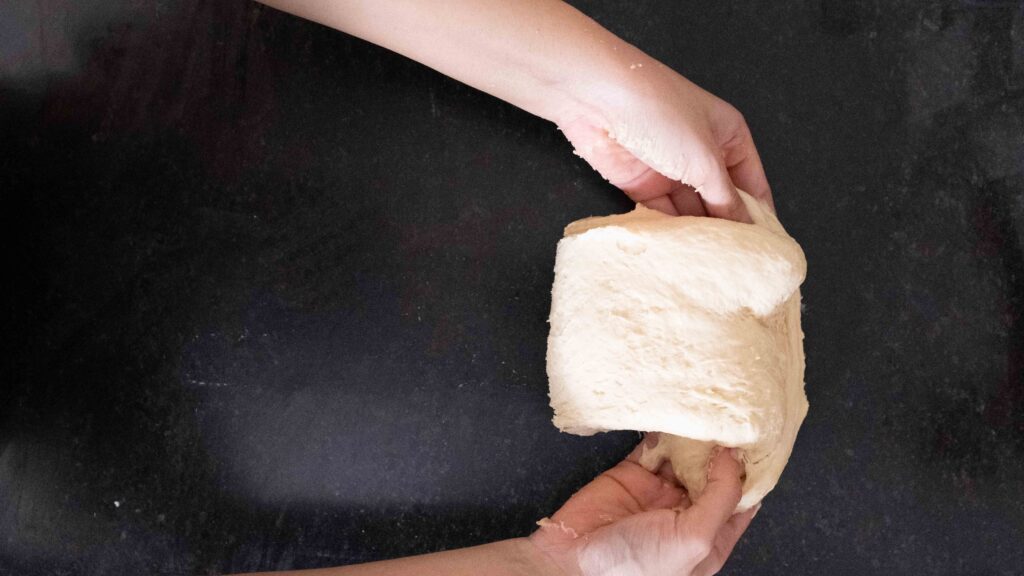
7 – Using the heel of your hand, stretch and spread the dough outwards and away from you, and then gather it back towards you in a single mass with the bench scraper. Repeat this for the next 5 minutes. This hands-on technique, known as ‘fraisage’ will fully blend the sugar, salt, and butter into the dough.
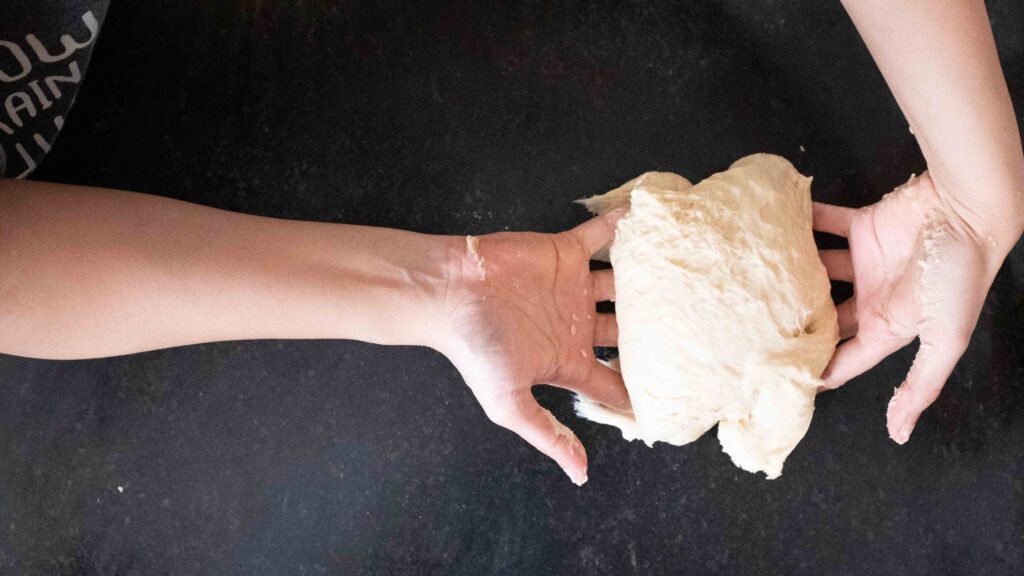
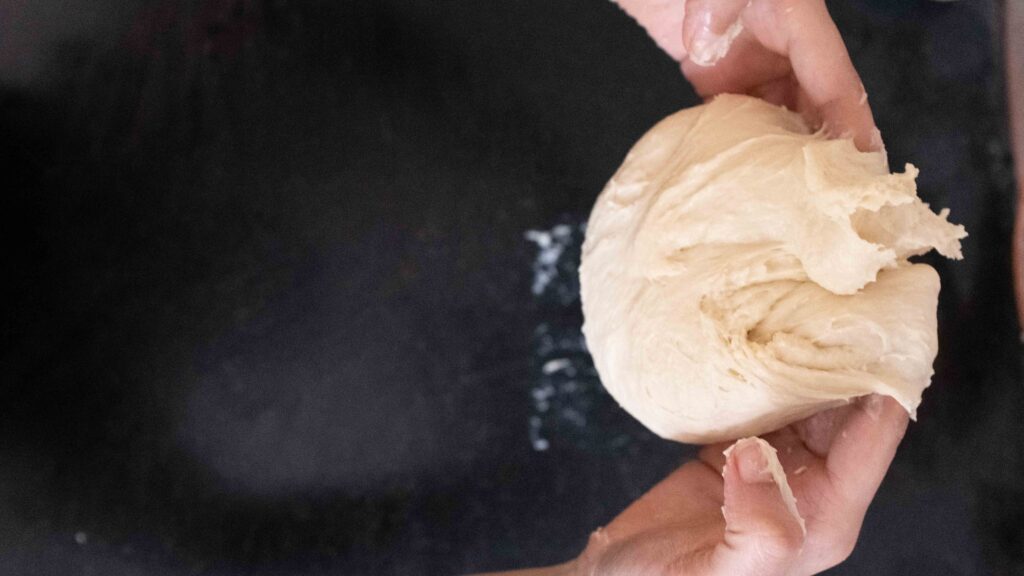
8 – Start slapping and folding the dough; Pick the dough up and slap it down on your counter so that it sticks. Then grab the dough and stretch/pull it towards you, and then fold it over itself and away from you. Now lift up the dough, give it a quarter in the air and slap it down on your counter again. Repeat this sequence until the dough is smooth and very elastic. When it’s ready, it will no longer stick to your hands, and will come clean off the surface. This can take anywhere from 10-30 minutes depending on your brand of flour and how humid it is. Don’t panic if it’s still slightly sticky after 30 minutes and don’t be tempted to add extra flour. Trust yourself and the process. Keep slapping and folding the dough until it is at the correct consistency. The first time I made these, my dough took the entire 30 minutes to come together. The second time, I used a different brand of flour and it was done in 10!
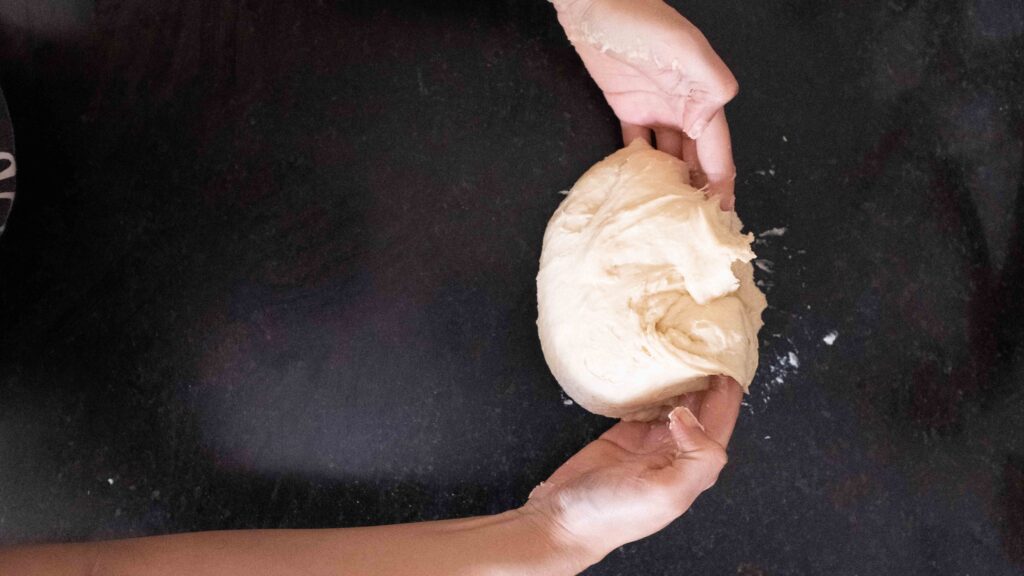
9 – Grease your big mixing bowl with vegetable oil. Form the dough into a ball and place it in the bowl. Lightly coat the dough ball in the oil and then cover the bowl with cling film. Place the bowl in the fridge and allow the dough to ferment for 8-24 hours. If you want to bake the buns on the same day, ferment the dough in a warm place for 60-90 minutes or until the dough doubles in size. I have done both types of fermentation with equal success.
10 – After the dough has had its proof, transfer the chilled dough onto a lightly floured surface. If you didn’t ferment your dough in the fridge, you will need to deflate the dough by pressing out the extra air before transferring it to your floured work surface.
11 – Grease your brownie pan with non-stick spray. Place your DIY New England hot dog mould into the pan and then spray the surface of the aluminium foil.
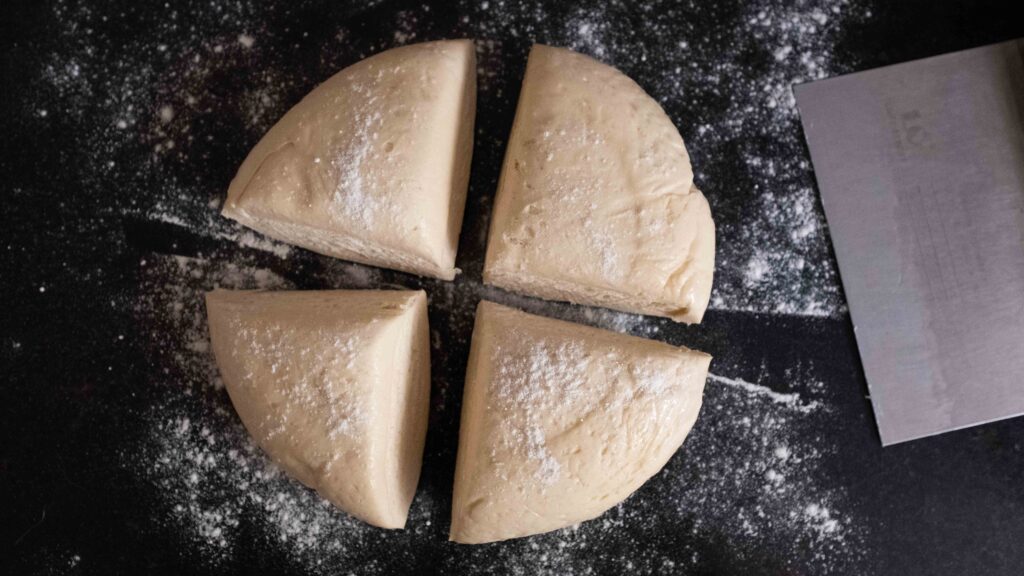
12 – Weigh your dough and then cut it into 4 equal portions. My dough was 640 gm, so I got 4 portions, weighing 160 gm each.
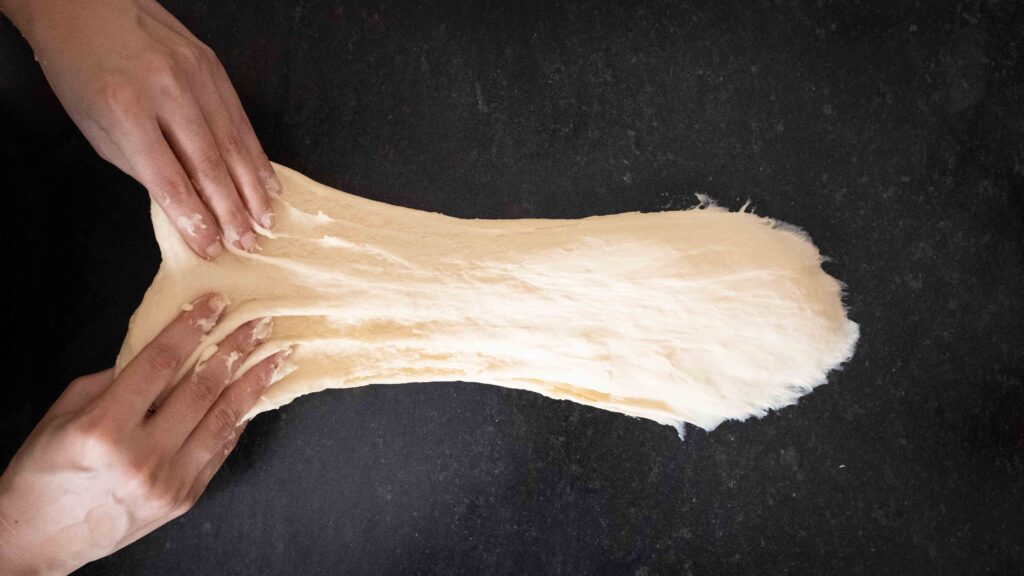
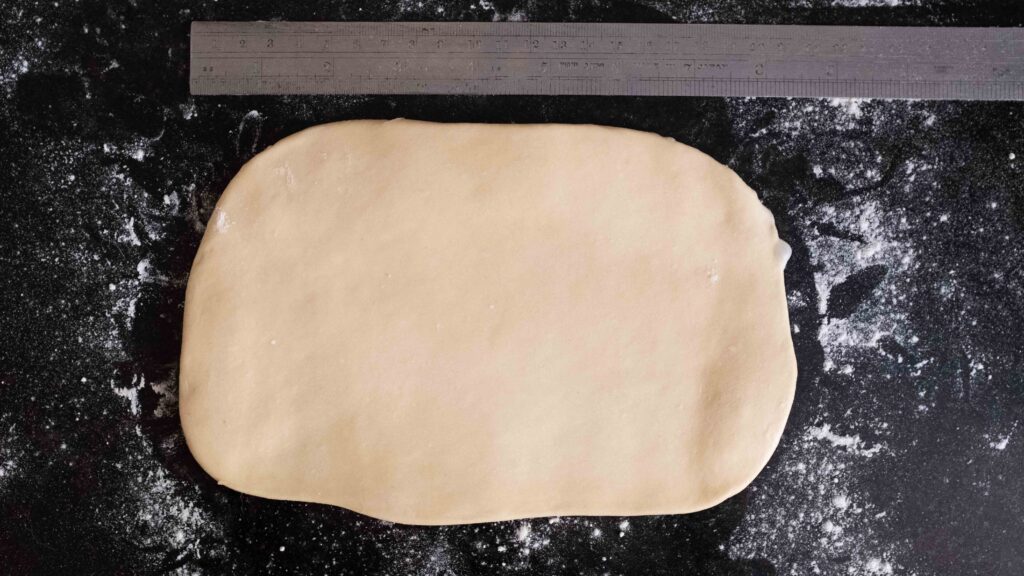
13 – Using a lightly floured rolling pin, roll out each portion into a flattened rectangle, roughly 8 inches long and 5 inches wide.
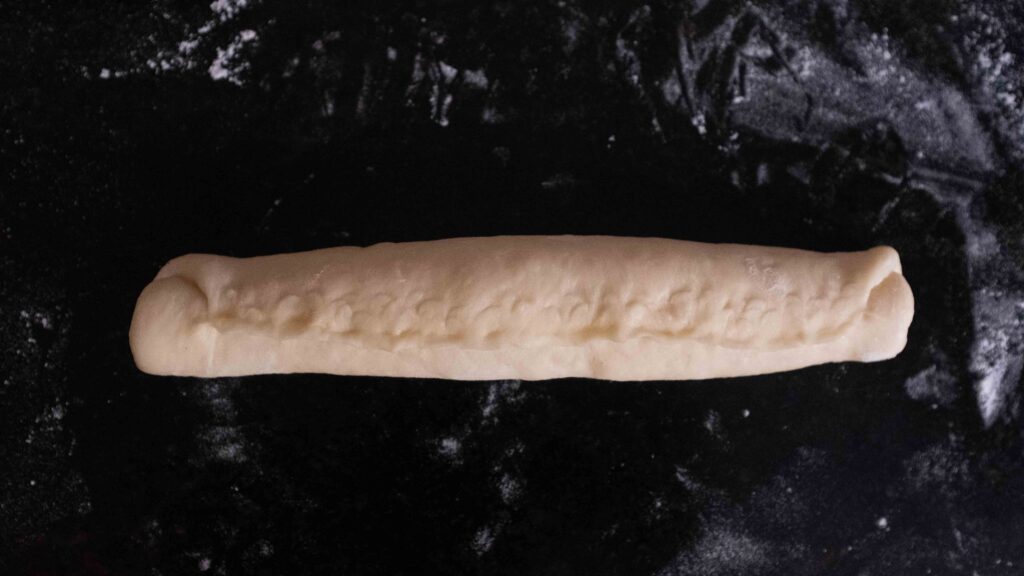
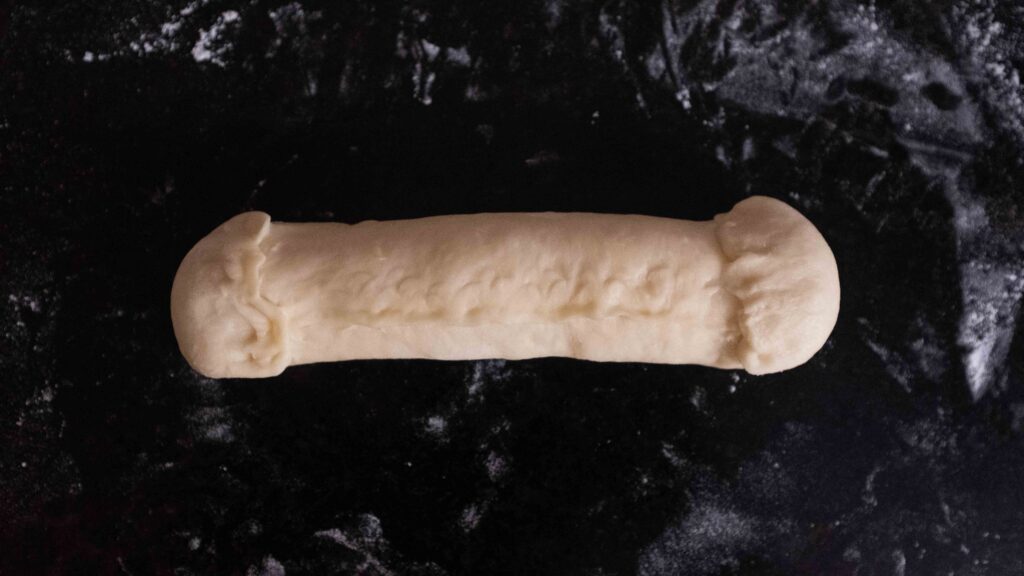
14 – Rolling from the 8-inch side, tightly roll up each rectangle into a log, 8 inches in length. Pinch the seam to seal it. Now fold up the left and right edges of the roll and pinch to seal the seams. The sealed seams should all be on one side. Your log will be about 7 inches long and 1 inch thick at this point.
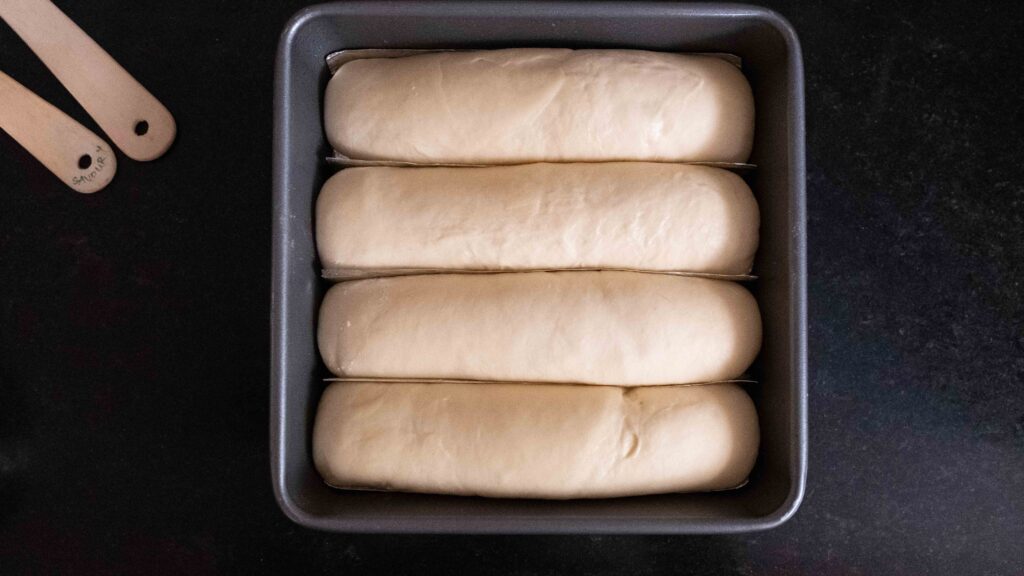
15 – Place the rolled up log, seams-side down into one of the crevices in the prepared pan. Repeat steps 13 & 14 with the other 3 portions of dough.
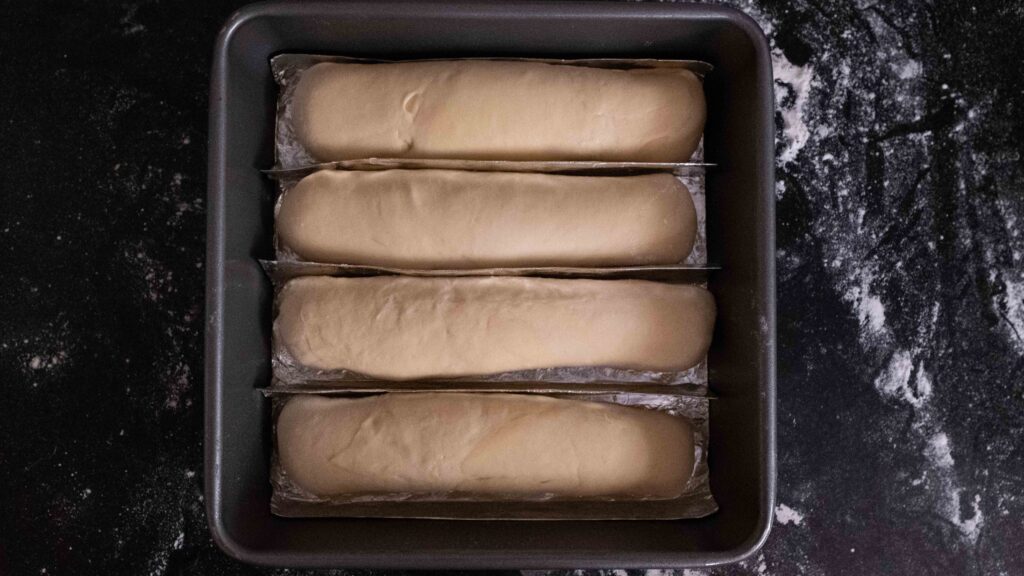
16 – Cover the pan with cling wrap and let the dough proof in a warm place for 60-90 minutes or until the logs are touching each other as well as the edges of the pan. Mine took the full 90 minutes.
17 – When you have 20 minutes remaining on your proofing time, start pre-heating your oven to 180OC.
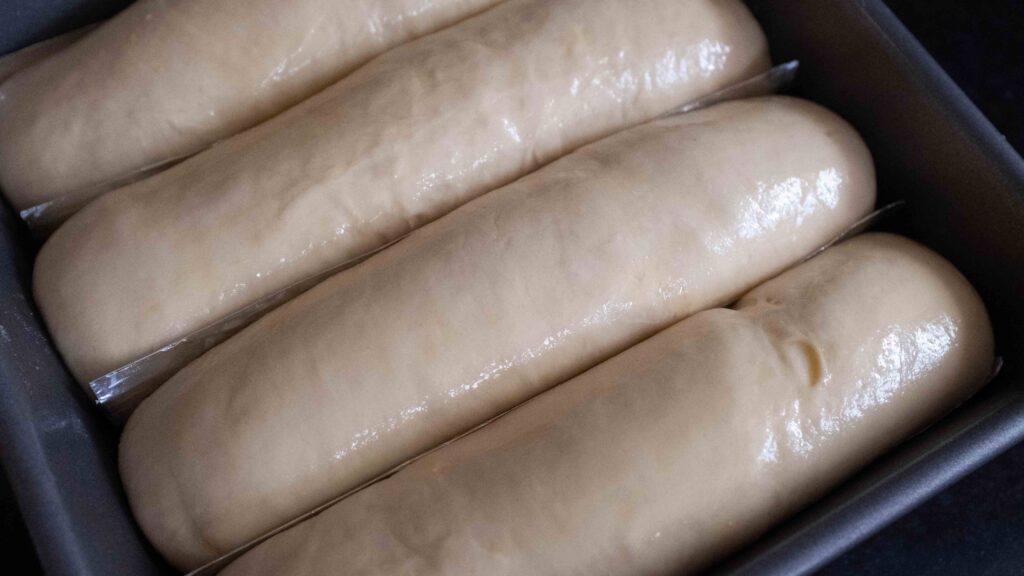
18 – Just prior to baking, make the egg wash. Lightly beat 1 egg with 1 tablespoon of plain water. Using a pastry brush, very gently brush the tops of the buns with the egg wash.
19 – Your oven should have been preheating for 20 minutes now. Place your pan in the middle rack of your oven and bake at 180OC. for 20-22 minutes or until the tops of the buns are glossy, golden brown, and sound hollow when lightly tapped. Mine took exactly 22 minutes. Depending on your oven, you might need to turn your tray at the halfway mark for even heat distribution and browning.
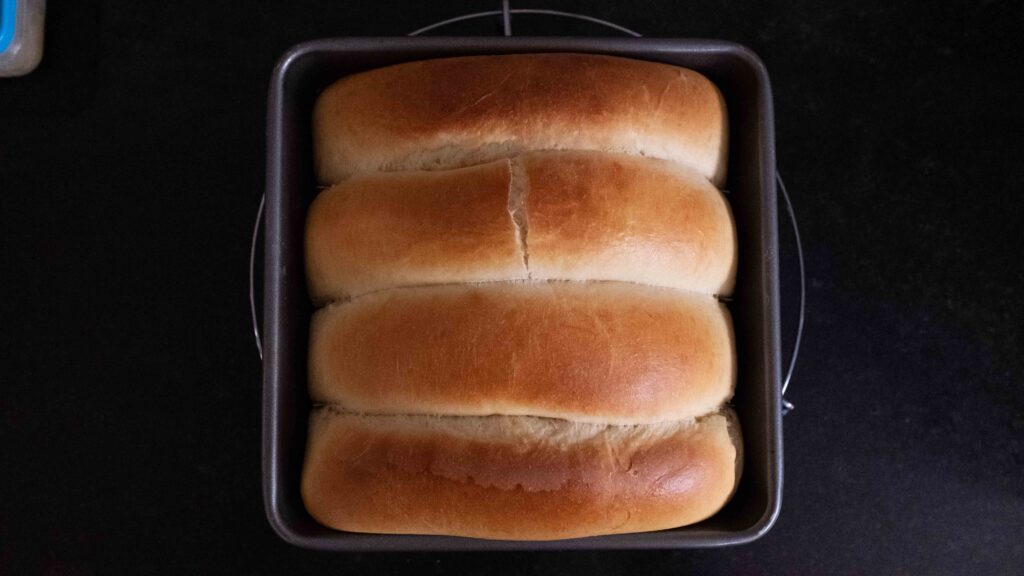
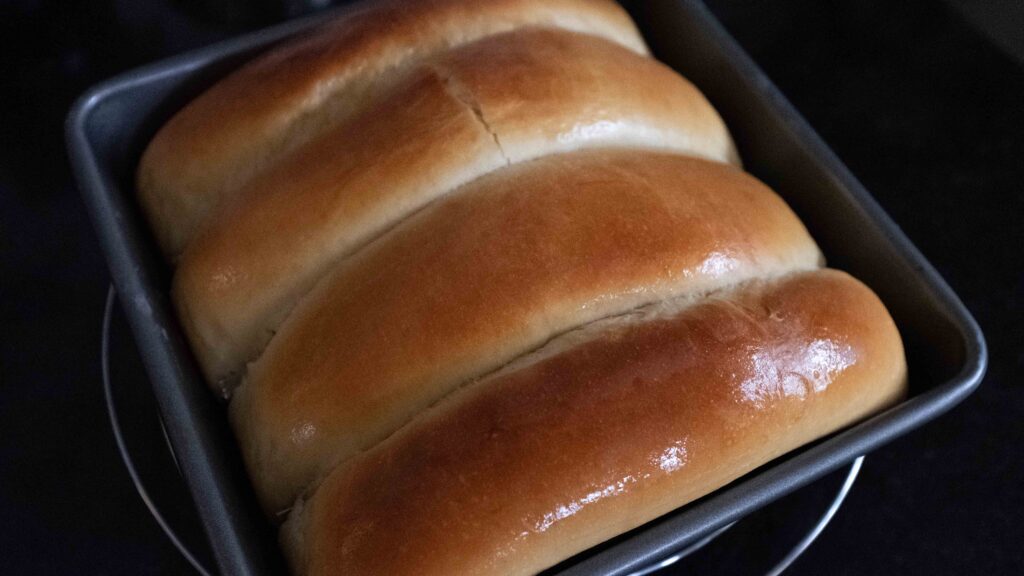
20 – Remove your tray from the oven and place it on a wire rack. While the buns are fresh out of the oven and hot, generously brush the tops with softened butter and leave to cool.
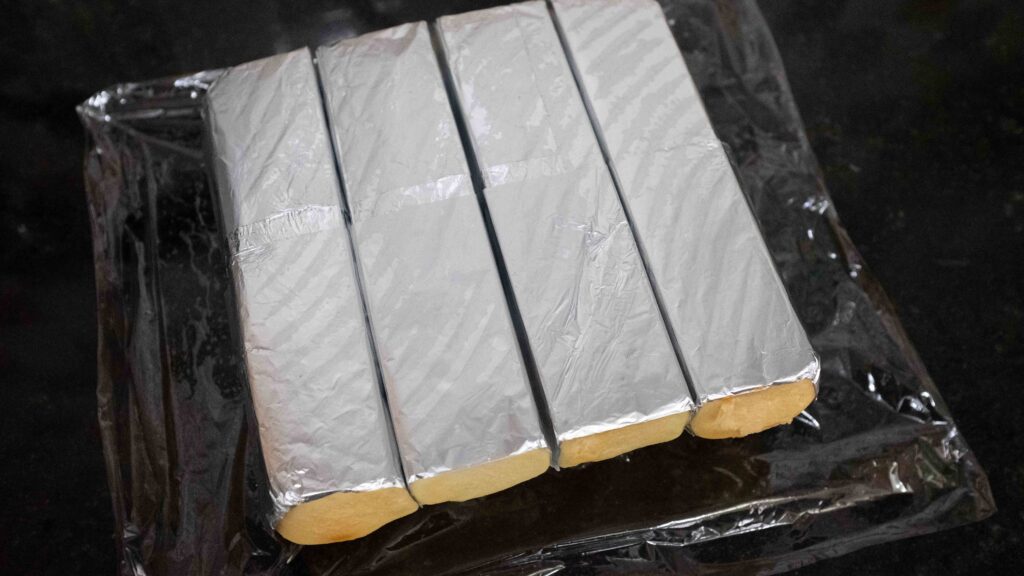
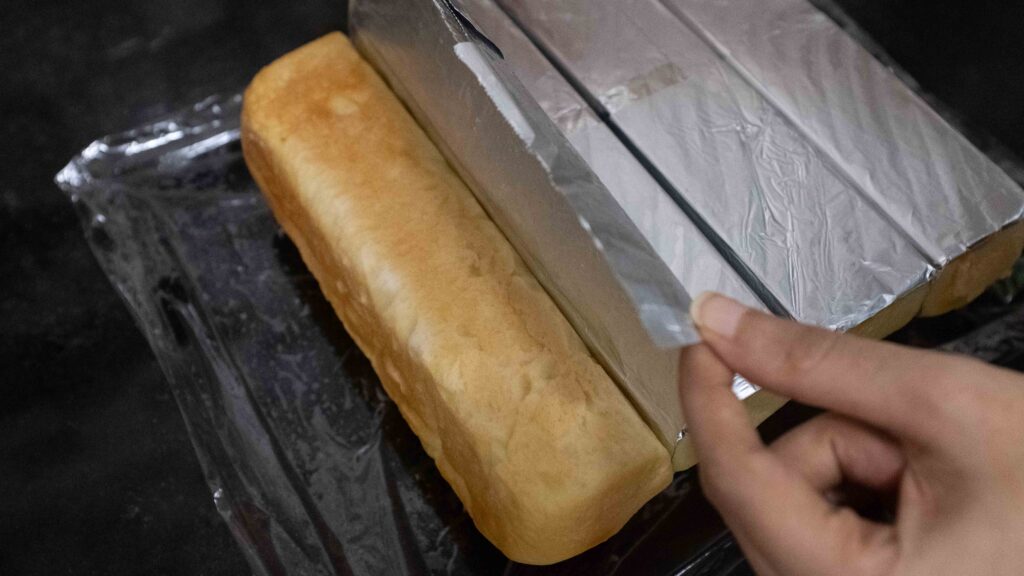
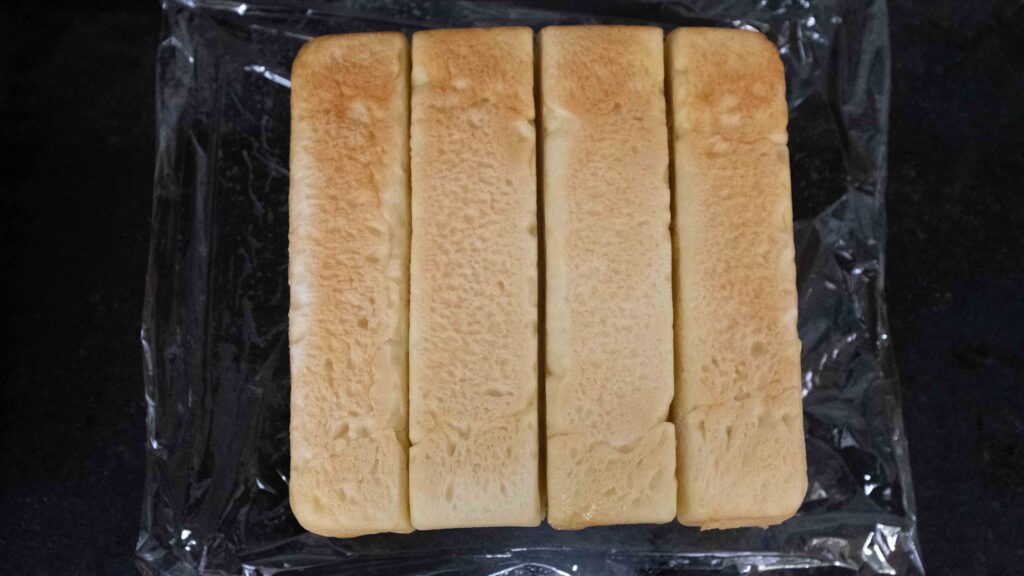
21 – When the rolls have cooled down completely, carefully flip the pan onto your work surface and lift the pan away. Pull the aluminium foil layer off and discard it. The base-side of the buns will be joined together as a single loaf.
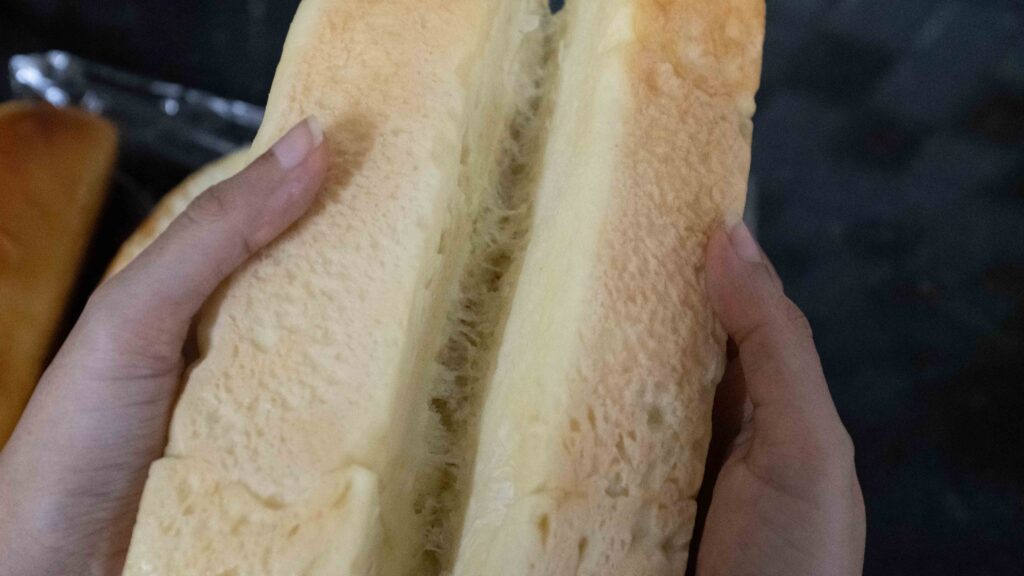
22 – Gently pull each bun apart from the base-side. Store them in an airtight container until ready for use. Use your new England hot dog buns when they’re completely cool for the softest texture and best flavour.


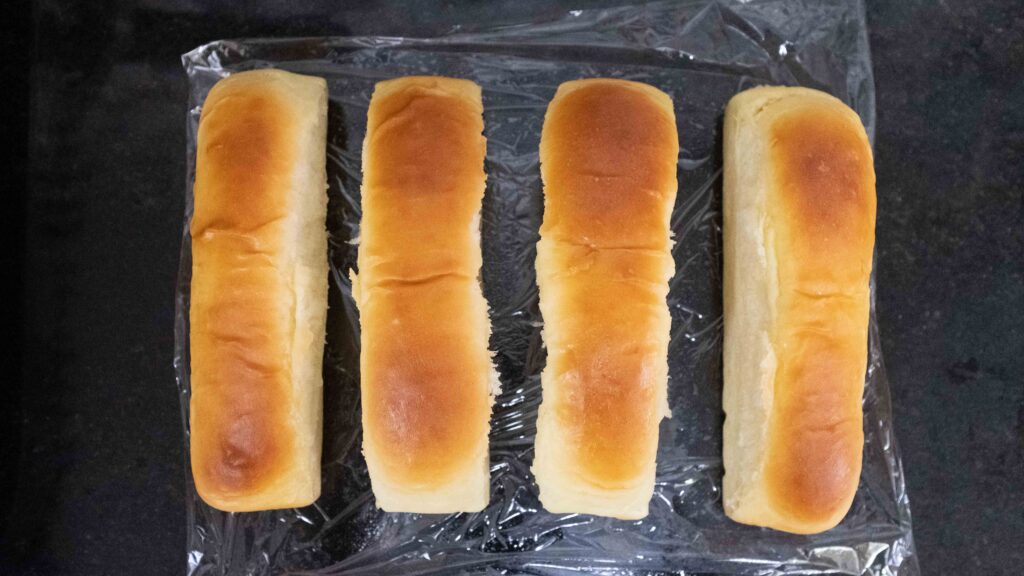
Baking bread from scratch is definitely challenging, and you could simply buy regular hot dog buns. However, you just won’t get the full Maine Lobster Roll experience. Give it a go once, just for the joy of homemade bread! A standard New England hotdog pan like this measures 14 x 6 inches and yields 10 buns, roughly 6 inches long and 1.5 inches wide. My oven can’t fit such a pan, and I wasn’t about to buy yet another baking dish, so I fashioned my own! My recipe has been written for an 8×8 inch pan, which yields 4 buns, roughly 8 inches long and 2 inches wide. This makes them bigger than normal. If you do own a New England pan, I recommend following this recipe instead, for appropriate dough quantities. While these taste amazing fresh out of the oven, I recommend letting them rest overnight to soften a bit. I made the buns a day in advance and stored them at room temperature in an airtight container. You can refrigerate them for a few days as well, and toast them straight out of the fridge right before serving. You needn’t make these only when you’re making this style of sandwich! Feel free to use them instead of regular hot dog buns. They’re also perfect to hold any kind of cold or hot sandwich filling.
Stage 2: Tiger Prawn filling
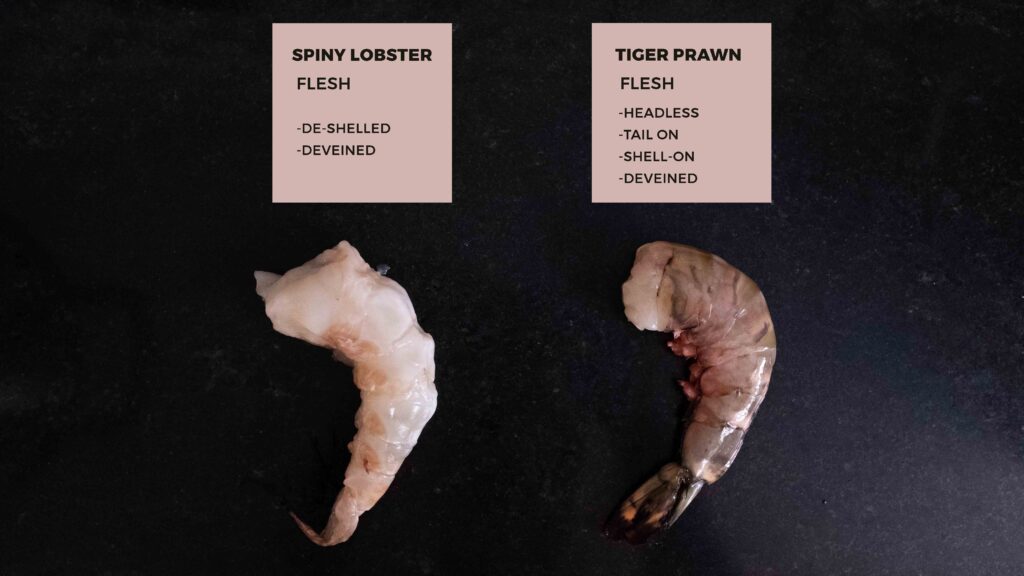
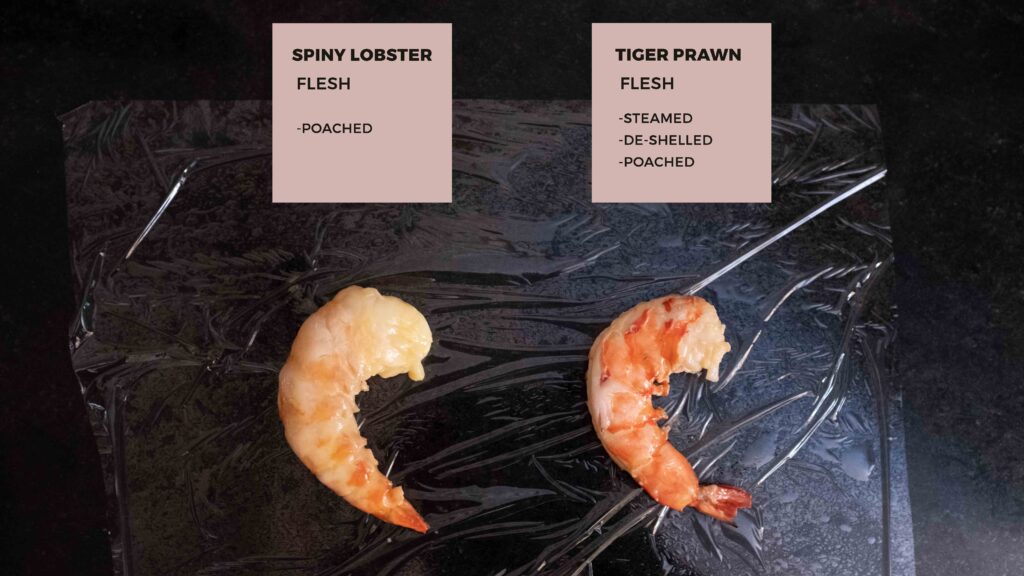
Like lobster, Tiger Prawns (Bengali; Bagda Chingri) live in brackish water and are sea-farmed. I chose to use Tiger Prawns instead of lobster for three reasons. Firstly, the kind of lobster found in a Maine Lobster Roll is True Lobster (French; Homard), which is quite large and has huge claws. In fact, the claw meat is the prized element in a Maine Lobster Roll. This variety of lobster is not readily available in India, and what’s locally sold here as lobster is actually Spiny Lobster or Rock Lobster (French; Langouste), which has no claw meat to speak of. Secondly, the Tiger Prawn—while being pricey—is a more familiar shellfish to cook with in India than Spiny Lobster. And thirdly, even though it’s smaller than the Spiny Lobster overall, a jumbo tiger prawn comes closest to size when deshelled, and therefore offers a similar textural experience. For a prawn meat that’s closest in texture AND flavour to lobster, I highly recommend getting your hands on Giant Freshwater Prawns (Bengali; Golda Chingri). It really is just like lobster, but it comes with its own set of limitations. It’s hard to procure outside of Bengal. Moreover, since this dish only utilizes flesh from the abdomen and tail, you will lose a lot of mass when you remove the large head, which is often as large as the body itself and an integral part of the Giant Freshwater Prawn eating experience.
Ingredients
1. 1.5 kg whole fresh jumbo tiger prawns to give 750 gm meat (get shell-on, tail-on, headless, and deveined tiger prawns) I got 12 prawns in this amount.
For cleaning:
2. Enough plain water to submerge all the prawns
3. 1 heaping tsp baking soda
For the steaming liquid:
4. Enough water to fill a pot by 1-2 inches
5. 1 tbsp. salt
For the butter poaching liquid:
6. 60 ml lemon juice
7. 1 tsp salt
8. 2 large cloves of garlic
9. 10 whole peppercorns
10. 350 gm unsalted butter, very cold, cut into 1 inch cubes
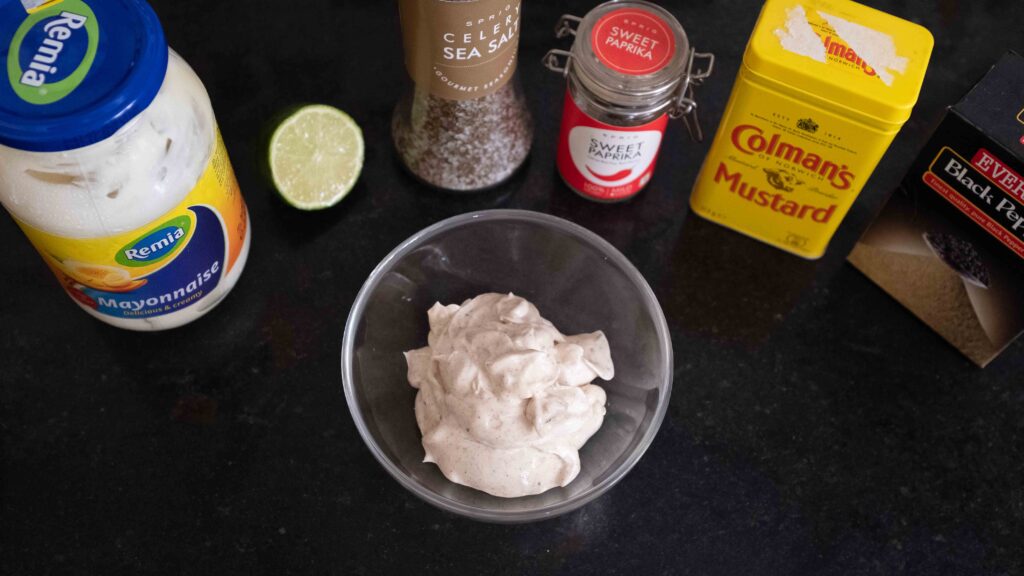
For the dressing:
11. 100 gm mayonnaise
12. 2 tsp freshly squeezed lemon juice
13. ½ tsp celery salt like this
14. ½ tsp sweet paprika
15. ½ tsp mustard powder
16. ¼ tsp freshly cracked black pepper
1.5 kg fresh whole tiger prawns = 975 gm headless, tail-on, shell-on prawns
or 750 gm pure meat. I cannot stress this point enough—because there’s no hiding behind punchy spices—you must use super-fresh tiger prawns in this recipe. By super-fresh, I mean the prawns should not smell fishy or have any sort of unpleasant odour, as this will leech into the dish. If you cannot get shell-on, tail-on, headless, and deveined tiger prawns, buy whole tiger prawns, twist off the heads and devein them yourself. Here’s how to devein prawns with the shell still on. Remember to keep your prawns on ice while you’re prepping them, as they can go bad very quickly in warm weather. After removing the heads, freeze the heads to make stocks or flavoured oils.
Method
1 – To clean your prepared tiger prawns, dissolve 1 heaping teaspoon of baking soda into a large bowl of plain water. Submerge all your prawns in the solution and let it soak for 5 minutes. Thereafter rinse the prawns well in running water and then pat them dry.
2 – Place your prawns inside a steamer basket. Fill a steamer pot with enough plain water to come just below the steamer basket, and bring it to a boil with the lid on.
3 – As soon as the water starts to boil, add the salt to it and wait for the water to come back to a boil.
4 – Once the water’s boiling again, lower your steamer basket with the prawns into the pot. Immediately put the lid on and steam your prawns for exactly 3 minutes. The smaller the prawn, the shorter the cook. If you have about 14-18 prawns in your 1.5 kg batch, that means your prawns are smaller than mine and will steam for a shorter length of time. Steam them for 1-2 minutes only, depending on size.
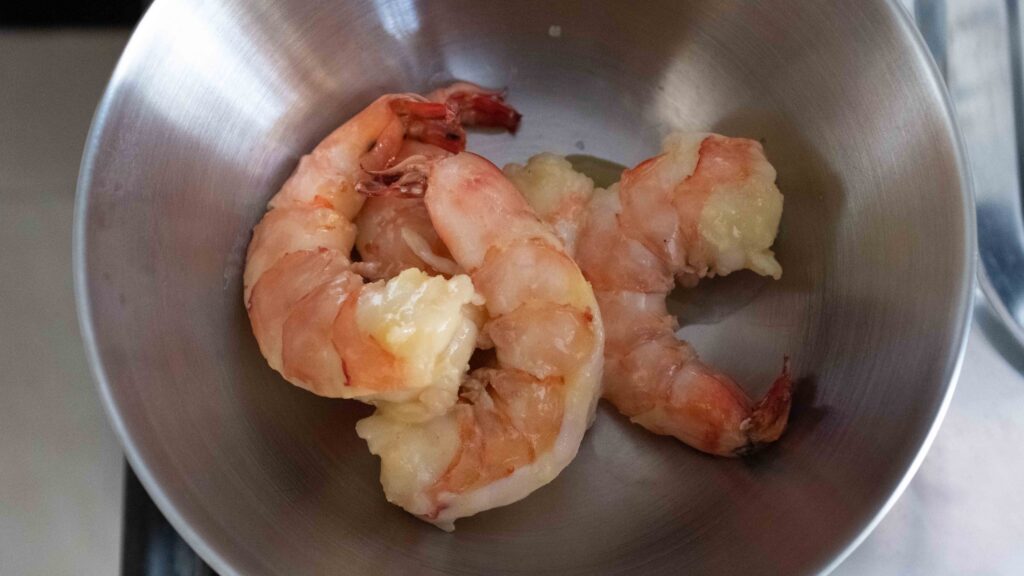
5 – After 3 minutes, remove the steamer basket from the pot and allow the prawns to sit for a few minutes until cool enough to handle.
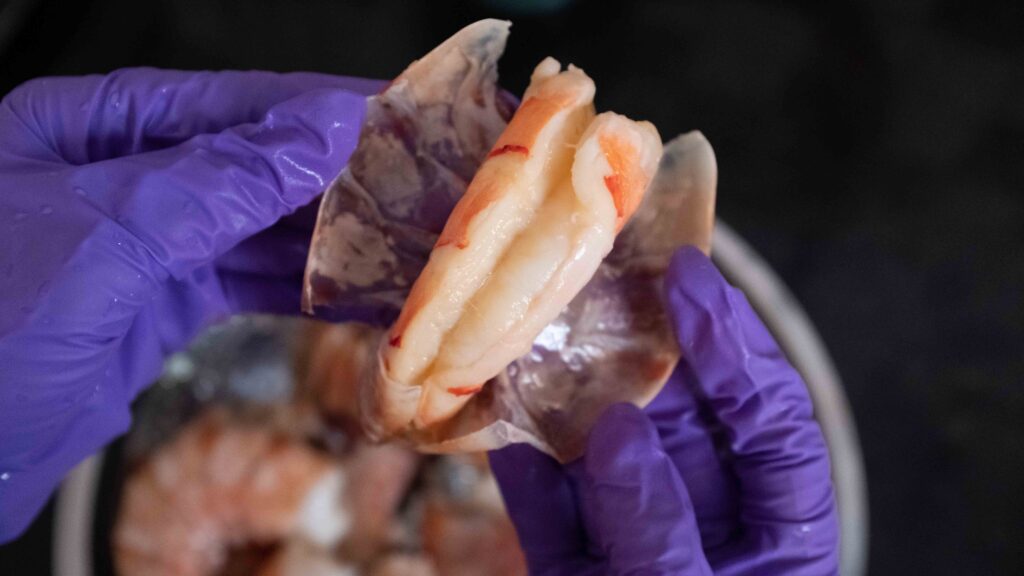
6 – Peel the shells from the body and gently tug off the tail shell. Do it gently to avoid tearing the meat off the tail. Place the fully-deshelled prawns in a bowl. Freeze the shells to make stocks or flavoured oils.
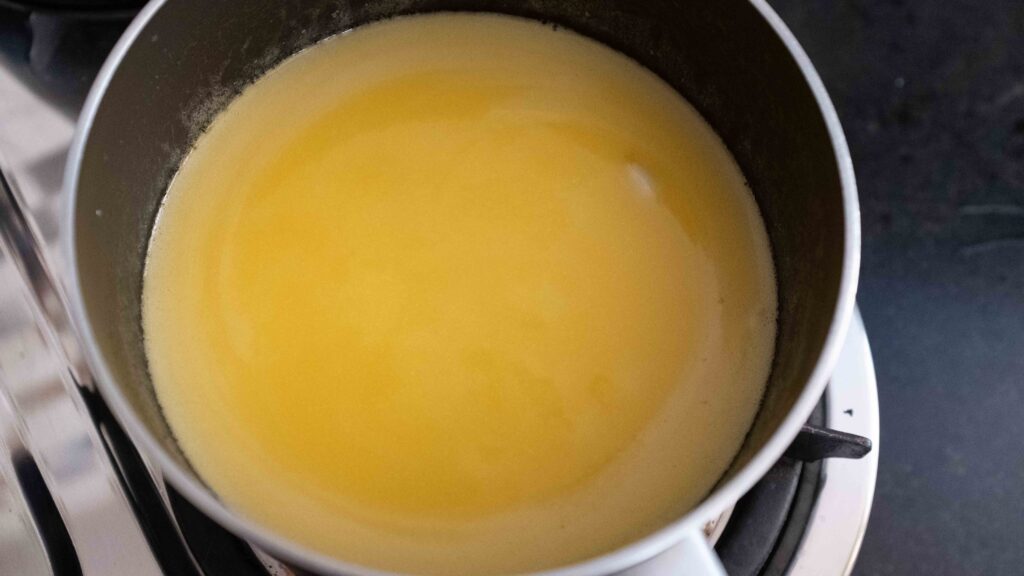
7 – Lightly smash your garlic and then add it to a 6-inch deep, 2 litre saucepan. Now add 60 ml lemon juice, one teaspoon of salt, and all the peppercorns. Bring the mixture to a gentle simmer over low heat.
8 – Add the cold butter to the saucepan, 1 cube at a time, adding the next cube just as the previous cube has almost melted and whisking gently to emulsify each addition of butter. You want to melt the butter, not split it; so make sure the mixture is never boiling/simmering, but only ‘steaming’ (between 75-80OC). This amount of butter poaching liquid is just enough to fully submerge 4 jumbo tiger prawns at a time. If your prawns are smaller, you’ll be able to poach 5-7 at a time.
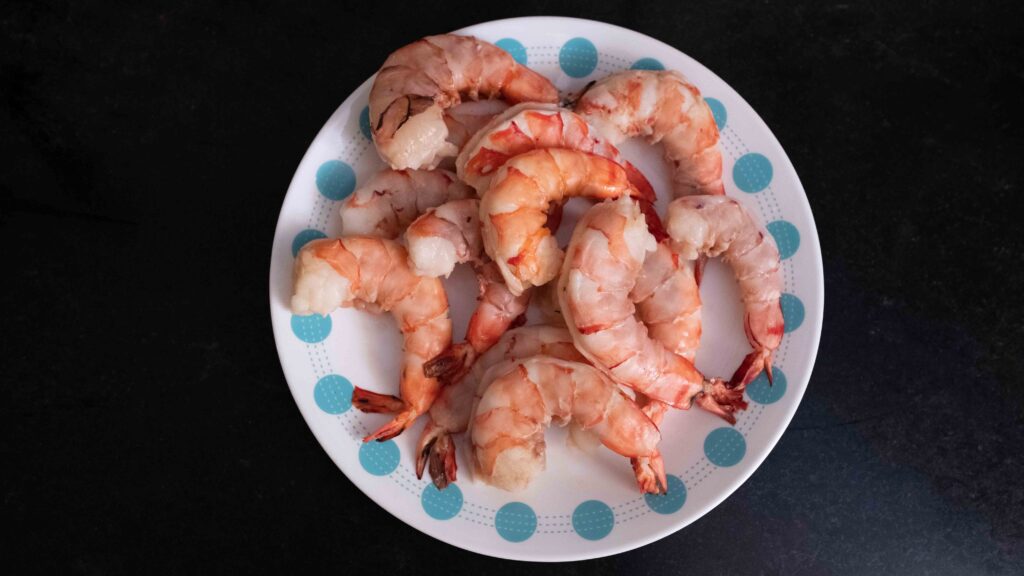
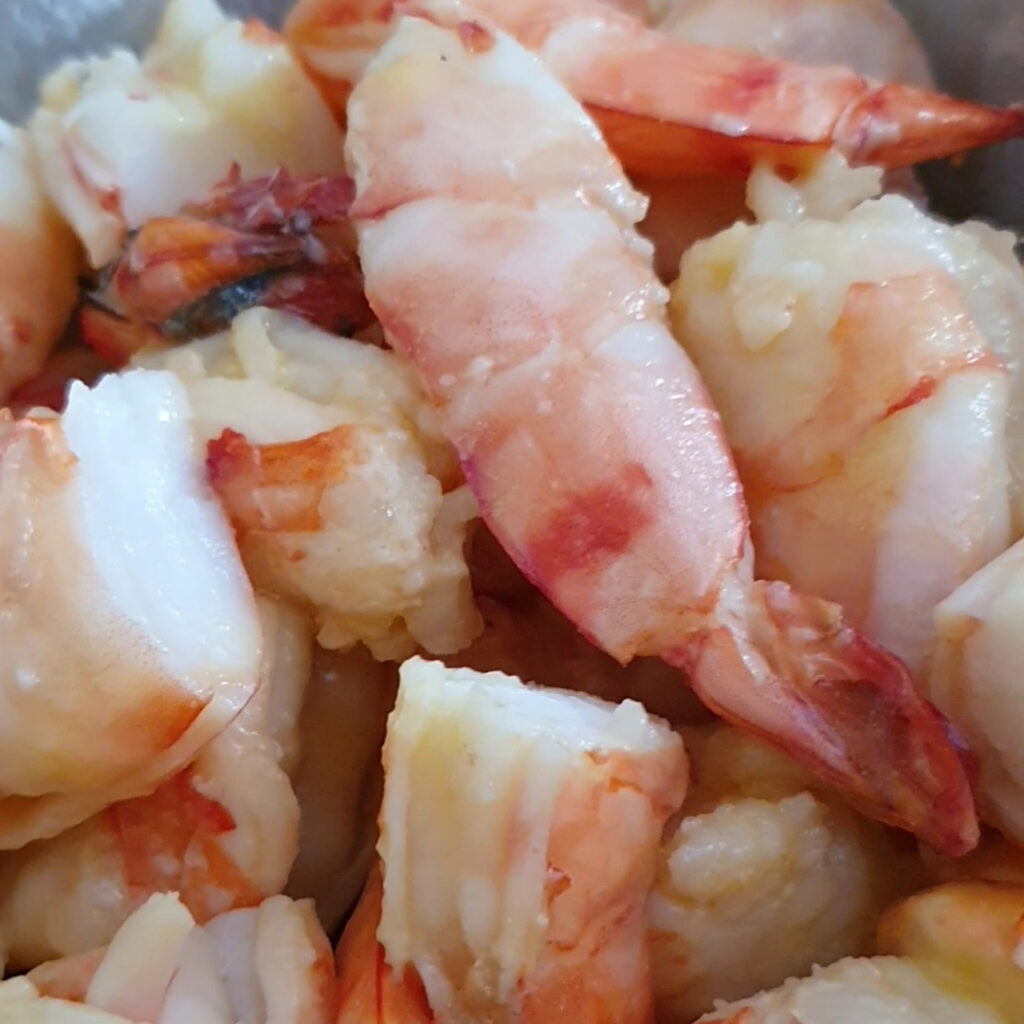
9 – Add the steamed and de-shelled prawns to the butter poaching liquid in batches (I did 3 batches of 4) and cook for 4-5 minutes or until the prawns have curled into a loose “C” shape, their outer flesh is pink with bright red accents, and the inner flesh is white and fully opaque (internal temp 49-50OC). Remember, smaller prawns will cook for a shorter length of time, so look for the tell-tale signs instead of going by the clock. Once cooked, use tongs to immediately transfer the prawns to a bowl to cool down fully.
10 – Once cool enough to handle, cut each prawn into 3 pieces. This is the best time to check if each and every prawn is cooked through. If you see any translucent or grey sections of flesh, chuck them back in the butter poaching liquid and continue cooking until the inner flesh is white and opaque. Take care not to overcook the prawns as this will make them rubbery and unpleasant to eat! After you’re done, transfer the butter emulsion to an airtight bowl and store it in the fridge or freezer. You can add it to seafood dishes for extra flavour or re-use it to poach seafood.
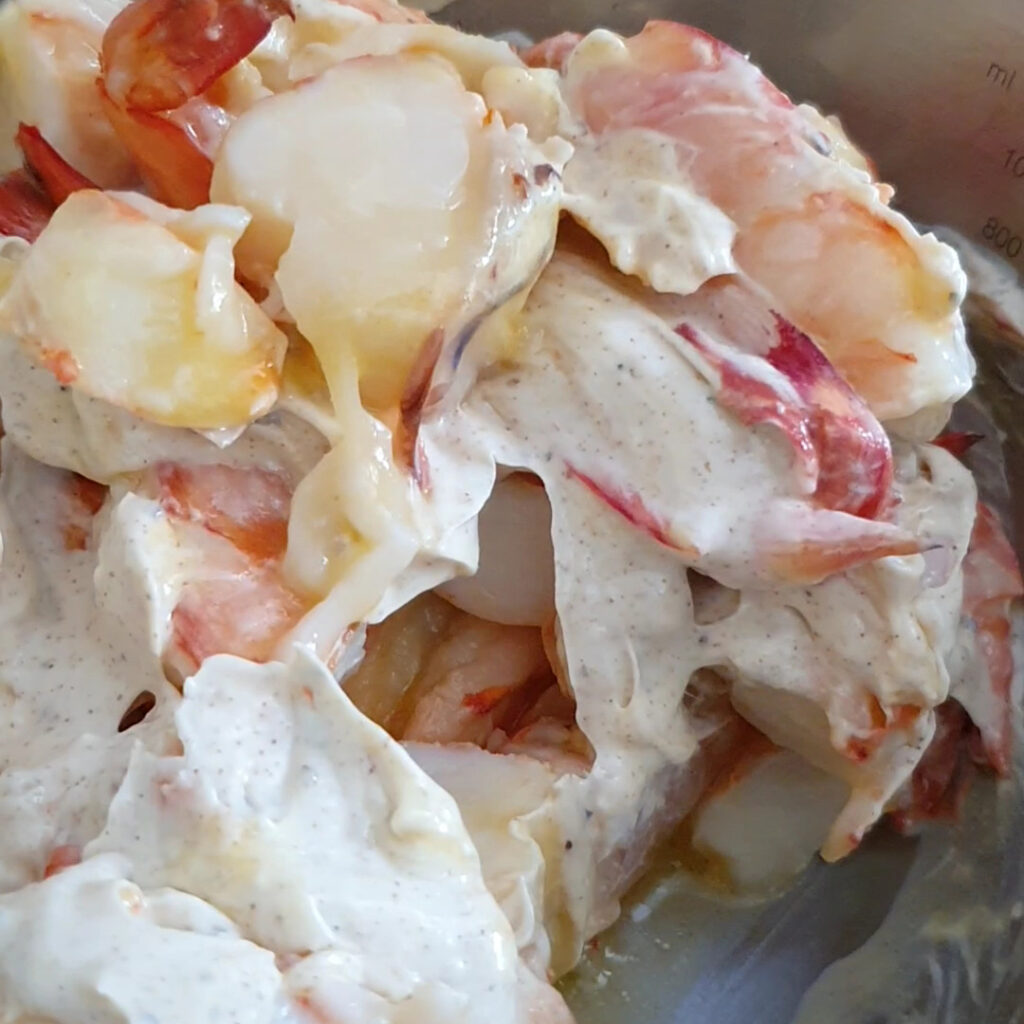
11 – Prep the dressing; mix together all the ingredients listed in ‘for the dressing’. Toss the chopped prawn meat in the dressing and refrigerate the mixture for at least 6-8 hours.


I purchased 1.5 kg whole jumbo tiger prawns which got me 12 very large tiger prawns. After deveining and head removal, the prawns weighed about 975 gm. Then, after steaming and de-shelling, the prawns weighed about 750 gm. That gives roughly 187 gm of cooked meat per sandwich. Always buy prawns with the shell on, as this protects the tender flesh during steaming, as well as retains flavour. Obviously, this recipe totally works with actual lobster. I never (nor will I ever) work with live seafood, so I cannot give any instructions on how to cook with it. If you can get your hands on de-shelled, fresh lobster meat; procure 750 gm and skip the steaming step altogether. Butter-poach the meat until the internal temperature is about 60OC and proceed with the rest of the recipe as normal.
Stage 3: Coleslaw
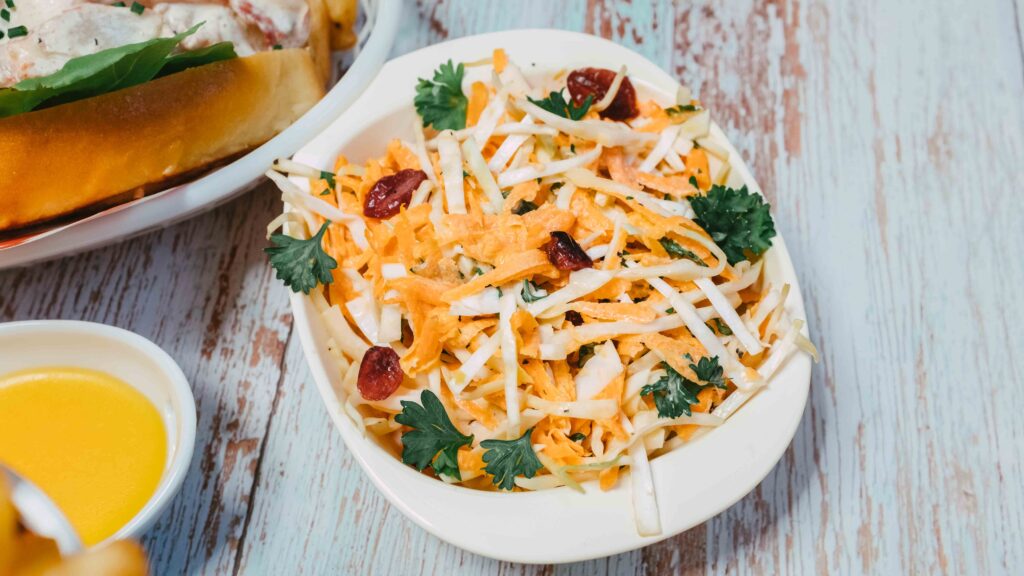
This is a classic accompaniment to a Main Lobster Roll. Crunchy, fresh and palate-cleansing, coleslaw plays a stellar supporting role without stealing the show.
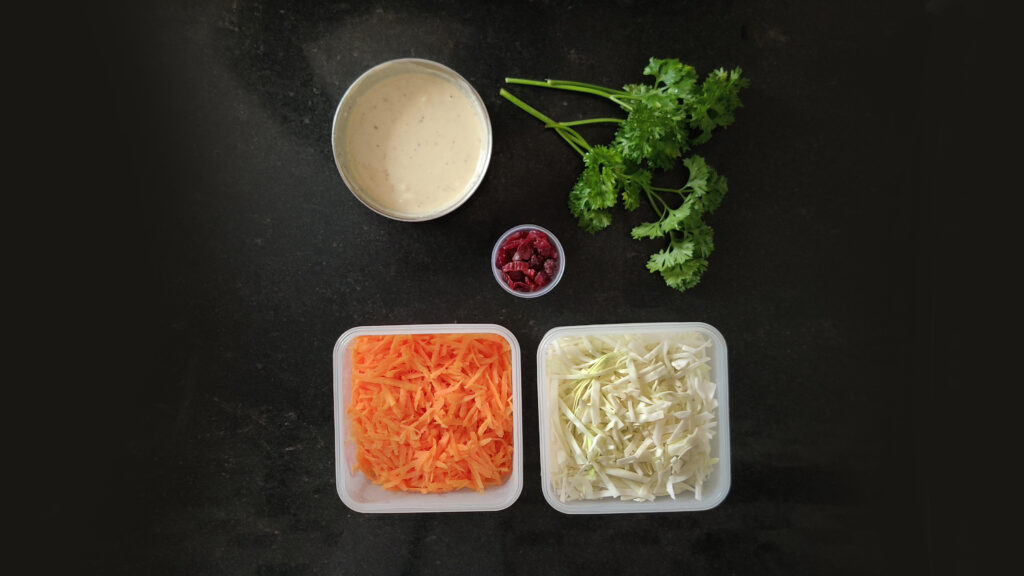
Ingredients
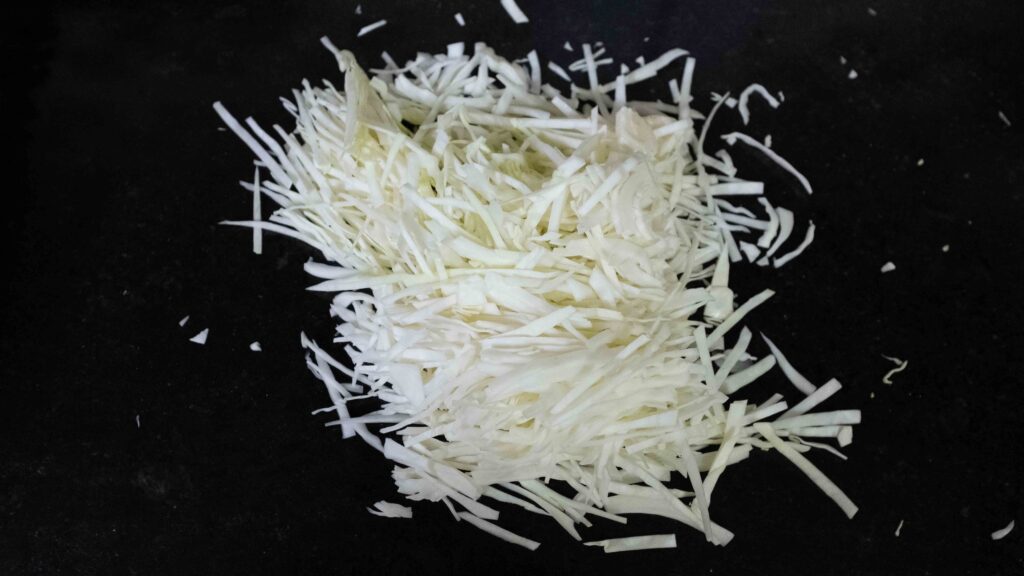
1. 1/2 a medium green cabbage (roughly 250 gm)
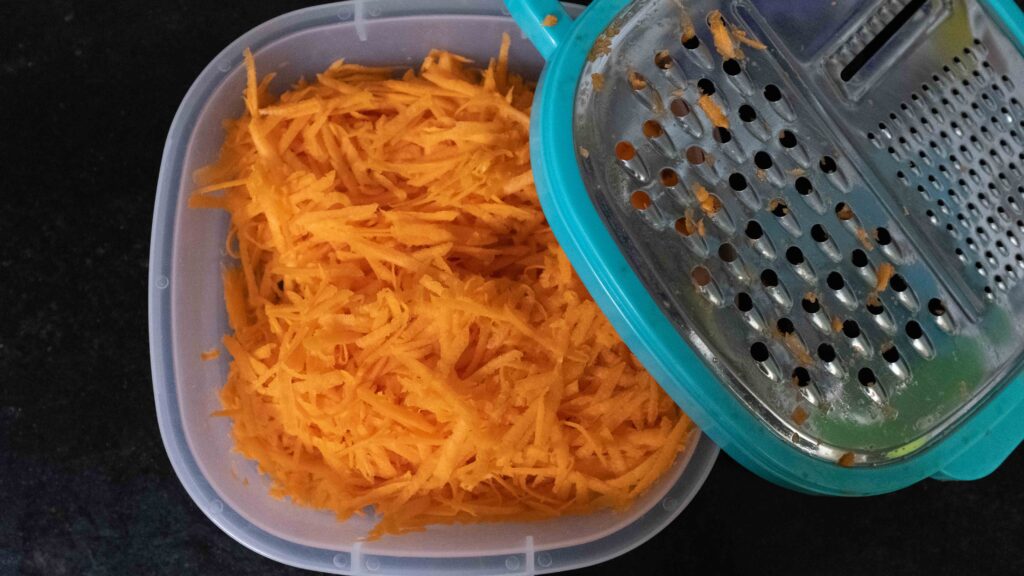
2. 1 large carrot (roughly 250 gm)
3. 4-5 sprigs flat leaf parsley
4. 2 tbsp. dried cranberries
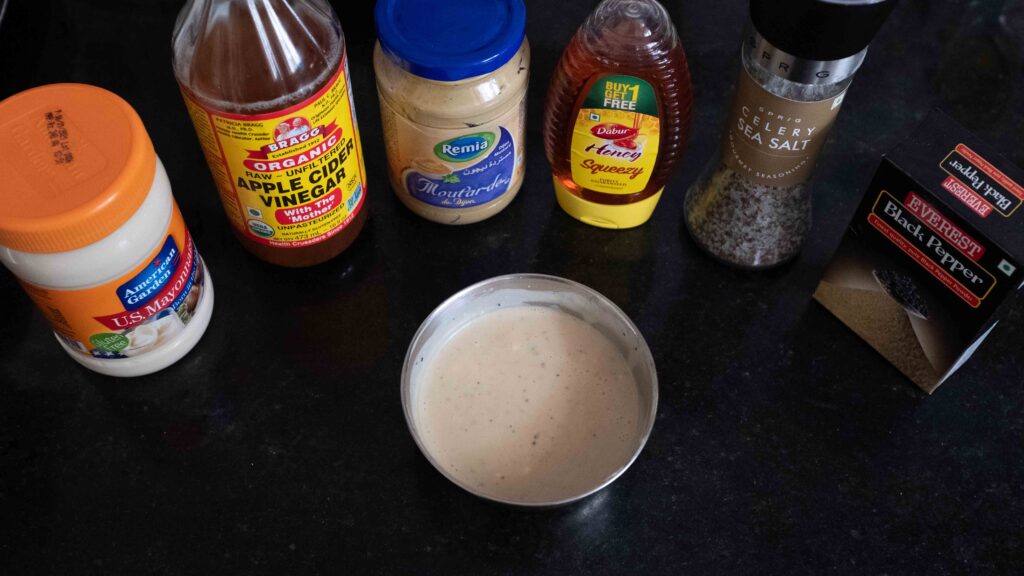
For the dressing:
6. 80 gm mayonnaise
7. 1 tbsp. apple cider vinegar
8. 1 tbsp. Dijon mustard
9. 1 tsp. honey.
10. 1/4 tsp celery salt like this
11. 1/4 tsp freshly cracked black pepper
Method
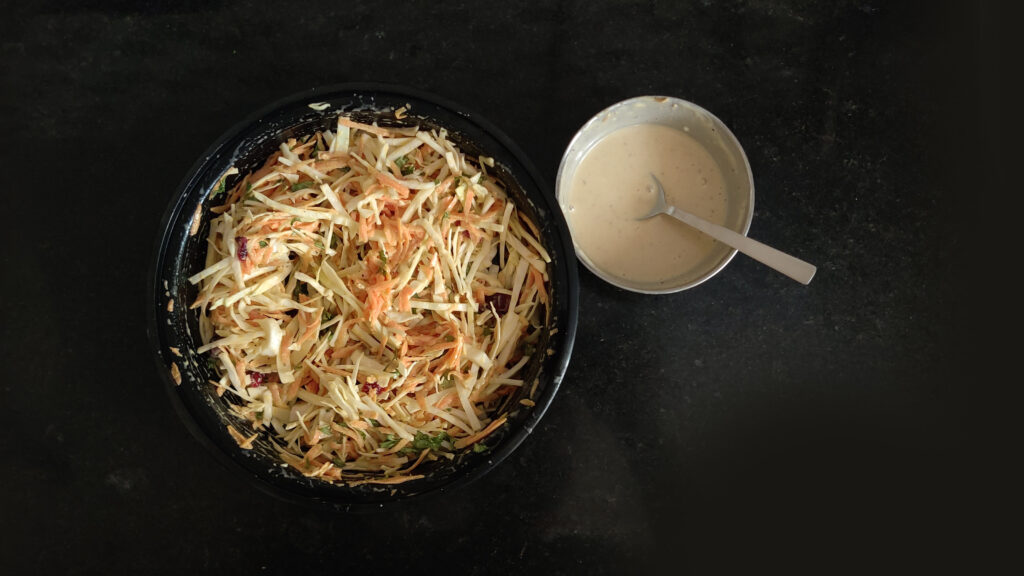
1 – In a medium bowl, add all the ingredients listed in ‘for the dressing’ and whisk well to combine. Taste the dressing and add more acid, sweetness, and seasoning if desired. Place your dressing in the fridge to chill while you prep your veg.
2 – Remove the core from your half-cabbage. Cut your cabbage into quarters and then place each quarter flat-side down and finely shred it with a sharp knife. Transfer the shredded cabbage to a large bowl.
3 – Peel your carrot and then coarsely grate it using a vegetable grater (large holes). Transfer the grated cabbage to the bowl with the shredded cabbage.
4 – Coarsely chop up your parsley leaves and add it to the bowl of veggies.
5 – Add the dried cranberries to the bowl of veggies.
6 – Take your cold dressing out of the fridge and pour it into the bowl of veggies. Toss very well to ensure everything is well-coated.
7 – Serve the coleslaw right away or place it, covered, in the fridge for 10 minutes to 2 hours, depending on how tender you want the cabbage to become or how chilled you like your slaw.
The vegetables can be prepared 1-2 days in advance and stored in an airtight container in the fridge. The dressing can be made well in advance and stored in the fridge for up to 2 weeks! If you prefer the crunch of the cabbage as well as its raw pungent flavour, mix the dressing into the shredded veg just prior to serving. We like to soften and mellow it out a bit, so we mix ours and set it in the fridge for at least 2 hours. Remember, the longer the cabbage sits in the dressing, the softer it will become.
Stage 4: French fries
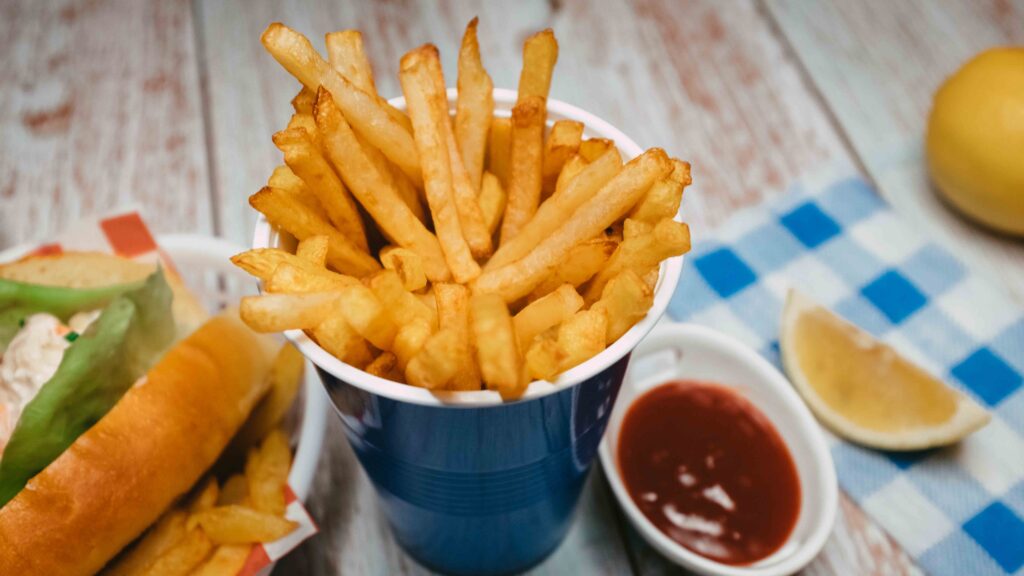
I personally could not leave out this classic accompaniment to the Maine Lobster Roll. Anyone who knows me, knows that I will sell my soul for good potato chips (not to be confused with potato crisps, although I would do the same for those). To me, it doesn’t get better than McDonald’s, so this is my homemade, from-scratch attempt at making those golden pillars of potato perfection. Feel free to order your fries from McDonalds or your favourite French fries outlet, but it’s important to have them on the side!
Ingredients
1. 1 kg starchy potatoes (4 large potatoes weighing 250 gm each)
2. 1 litre canola oil for frying
3. ½ tsp salt for seasoning
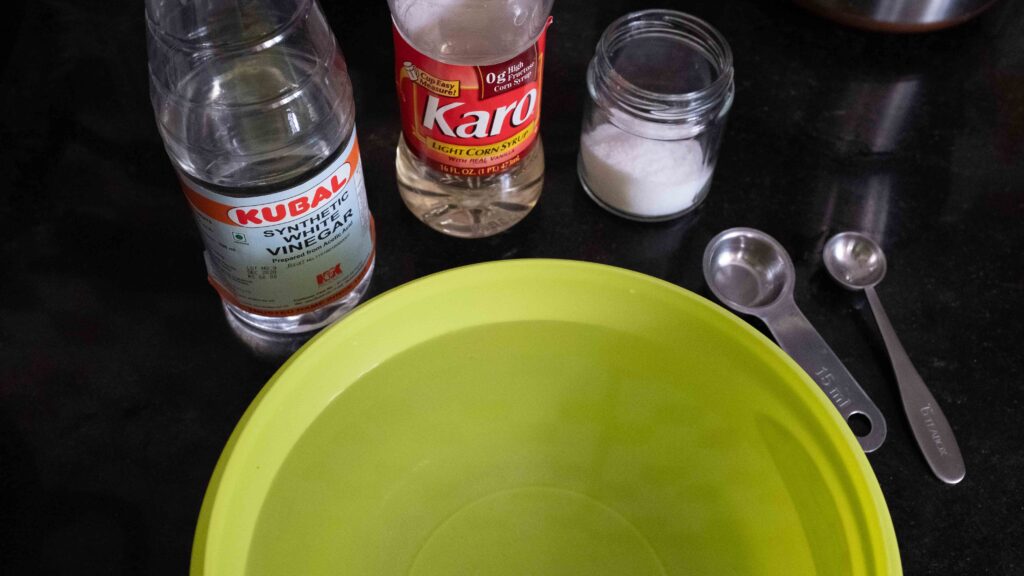
For the brining liquid:
4. 1500 ml chilled water
5. 90 ml corn syrup (or 50 gm sugar)
6. 2 ¼ tbsp. salt
7. 1 tsp white vinegar
Prep
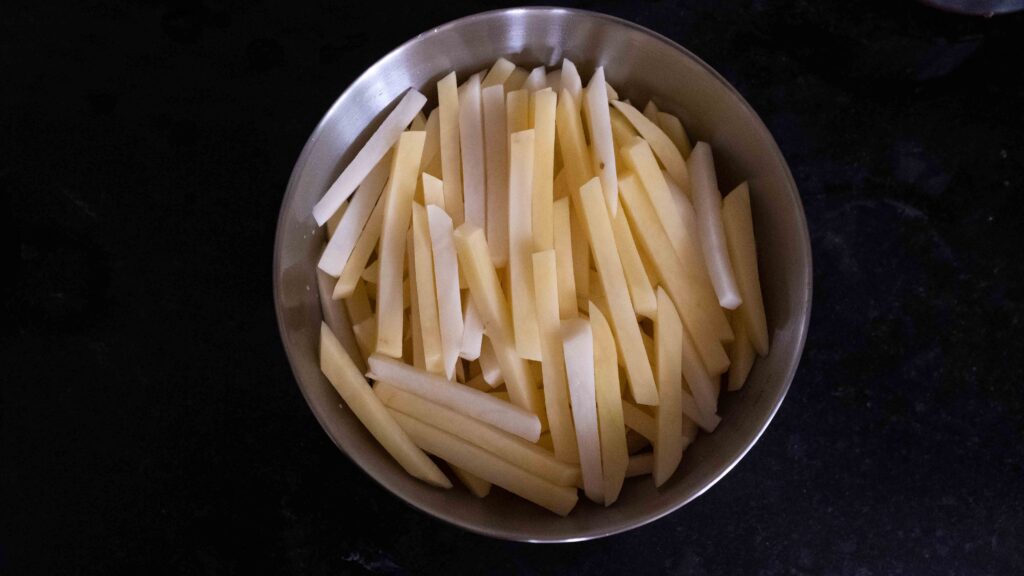
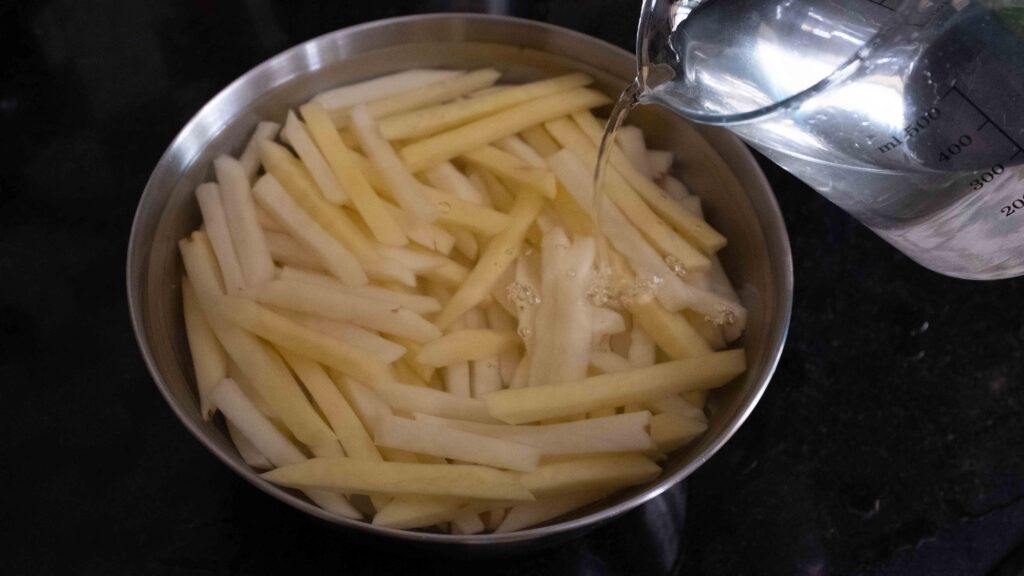
1 – Peel your potatoes and then cut them into slightly wider than ¼ inch thick slices. Now cut the slices into slightly wider than ¼ batons. Then wash the batons very well to rid them of extra starch.
2 – Mix together your brining liquid in a large bowl. Soak the potato batons in the cold brining liquid for a minimum of two hours, or for best results, overnight in the fridge. Prolonged soaking removes the extra starch, which results in crispier fries.
Method
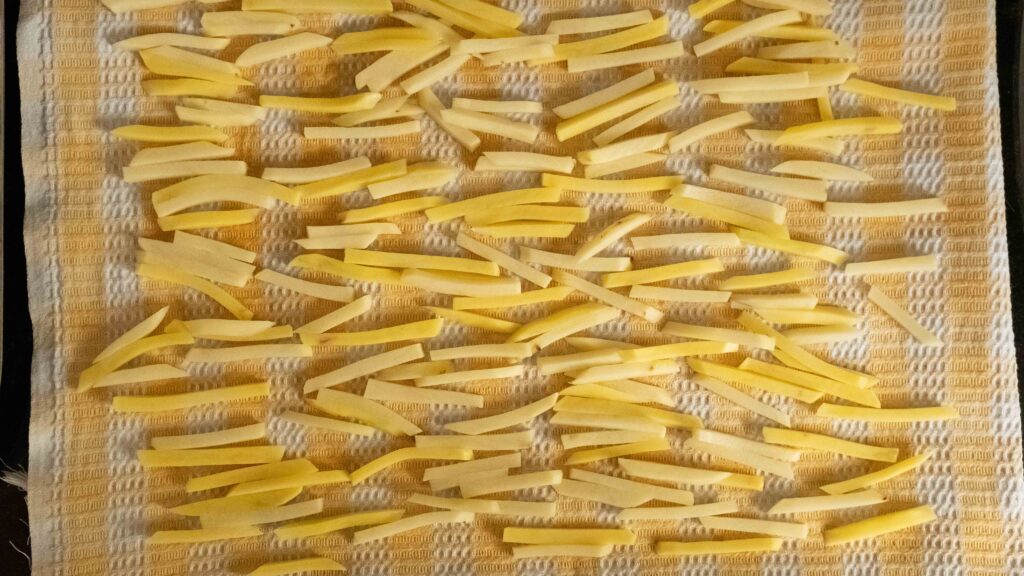
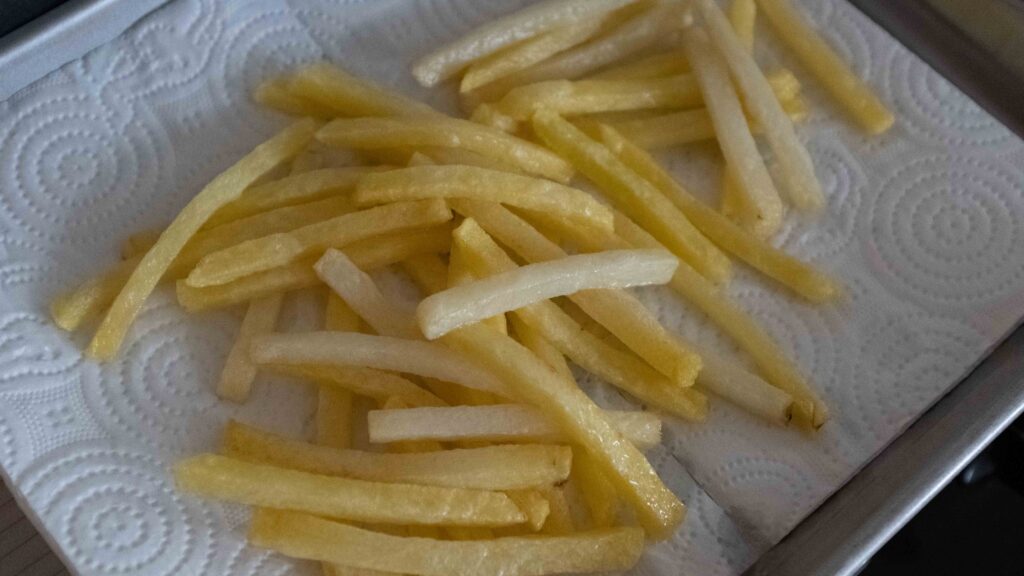
1 – When you’re ready to get frying, drain off the potato-brining liquid and then thoroughly wash the potato batons again to remove any residual starch.
2 – Spread out the batons on some absorbent kitchen towels and pat them dry. I like to lay them out under my kitchen fan for ten minutes.
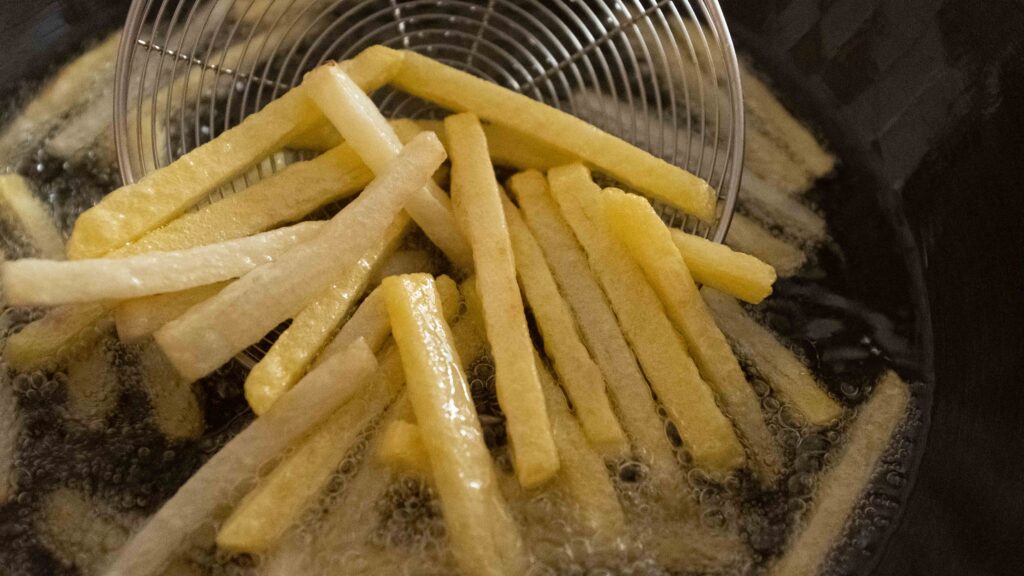
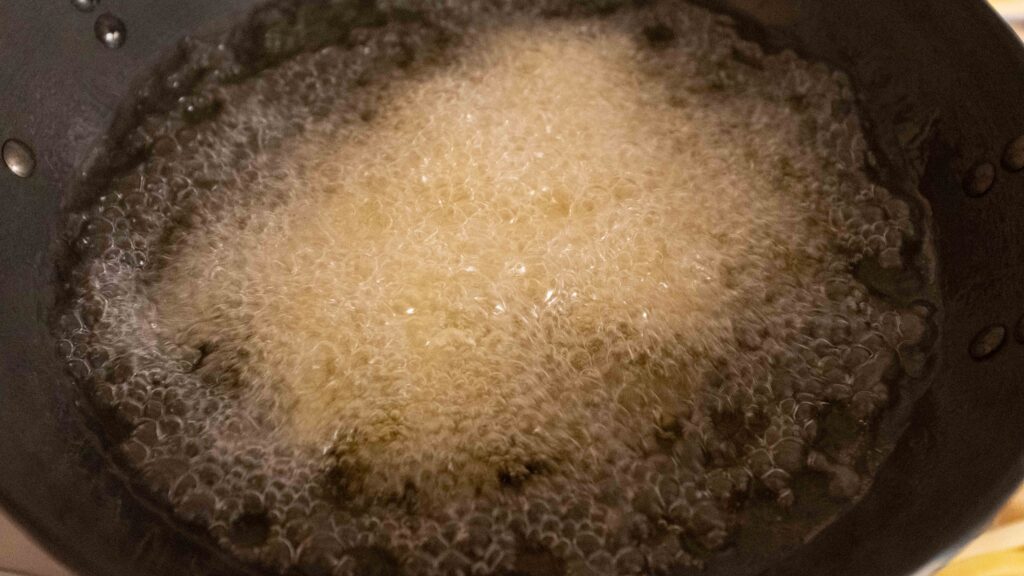
3 – While the potato batons are drying, heat up your frying oil. Fill a 3 litre wok or deep fryer with 1 litre of canola oil. Heat it up on the stove until the oil reaches a temperature of 150OC.
4 – Then add half the potato batons and fry them for 4-5 minutes, flipping occasionally, until they are pale and softened. The fries will tell you when they’re done! They’ll rise to the surface of the oil and float there. Do not be tempted to add them all in, as overcrowding the pan will cause the temperature to drop and result in too much oil absorption. Once the fries come to the surface and have been floating in the oil for about 30 seconds, it’s time to remove them from the fryer.
5 – Using a slotted spoon, transfer the semi-fried batons from the pan to a plate lined with kitchen paper to soak up any extra oil.
6 – Check the temperature of the frying oil and make sure it is 150OC before adding the second batch of batons. Once again, fry them for 4-5 minutes and then place them to drain on the kitchen paper.
7 – Now, increase the setting on the stove and heat the oil to 180OC. Fry the semi-fried potato batons in two batches, for 30-60 seconds per batch, or until they are golden and crispy. Watch the colour of the batons like a hawk, as the oil is very hot and they will cook very rapidly. Drain each batch on fresh paper towels and season with salt as soon as they come out of the hot oil. These fries taste best straight out of the fryer. In case your fries get cold while you’re assembling your Tiger Prawn Rolls in Stage 5, reheat them in the oven at 180OC for 8-10 minutes or until hot and crispy.


I know this seems like a lot of work for plain o’l fries, but the brining, the drying, and double-frying steps are the difference between a limp greasy chip, and one that’s fluffy on the inside and crispy on the outside. To make French fries in advance, complete Steps 1-6 and then let the fries cool completely. At this point, you can freeze the semi-fried fries. To do this, lay them out on a tray in a single layer and flash-freeze them for about an hour. Thereafter, transfer to them to a freezer-safe container and freeze them for up to 3 months. When you’re ready to serve, fry the frozen fries in batches at 180OC until golden brown, roughly 4 minutes.
Stage 5: Finale; the assembly
So apparently, there are rules about what’s acceptable in a Maine Lobster Roll. Purists would want the filling to be served cold, tossed in mayonnaise with just a little salt and lemon, and wedged inside a buttery, lightly toasted bun. Chives and lettuce? Sacrilege! But we already done did heresy with the lobster-tiger prawn switcheroo, aiight? Chives are gentle and pair well with the pure prawn flavour. The lettuce adds freshness and texture and also prevents the filling from making the bun soggy.
Components
1. 40 gm softened salted table butter for toasting
2. New England hot dog buns from Stage 1
3. Cold tiger prawn filling from Stage 2
4. Cold coleslaw from Stage 3
5. Hot French fries from Stage 4
6. 40 gm softened salted butter for buttering
7. 6 butter lettuce leaves
8. 1 tsp finely chopped chives
9. 1 large lemon
10. Ketchup to serve with the fries
Prep
1 – Finely chop up your chives and cut your lemons into 4 wedges, lengthways.
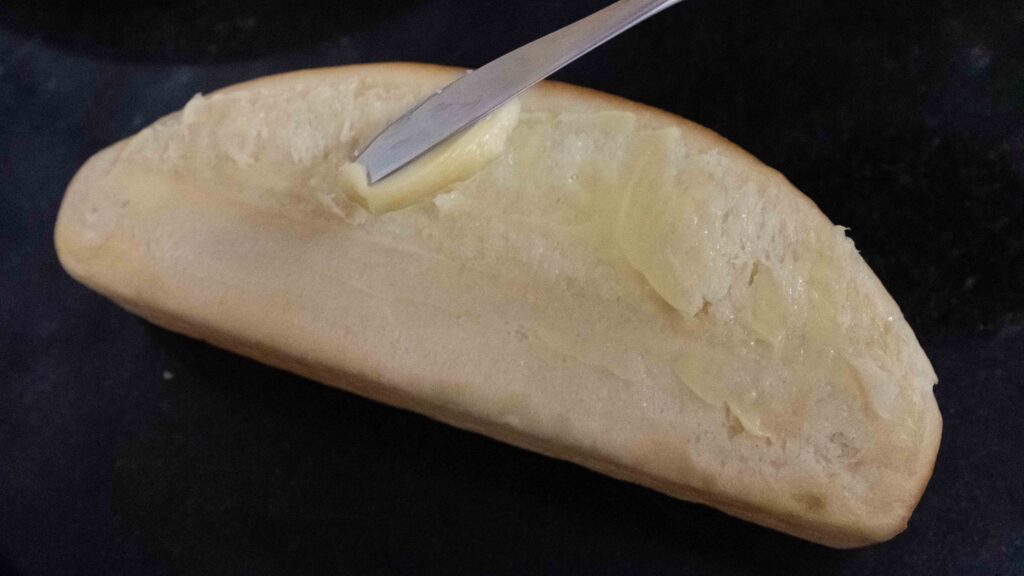
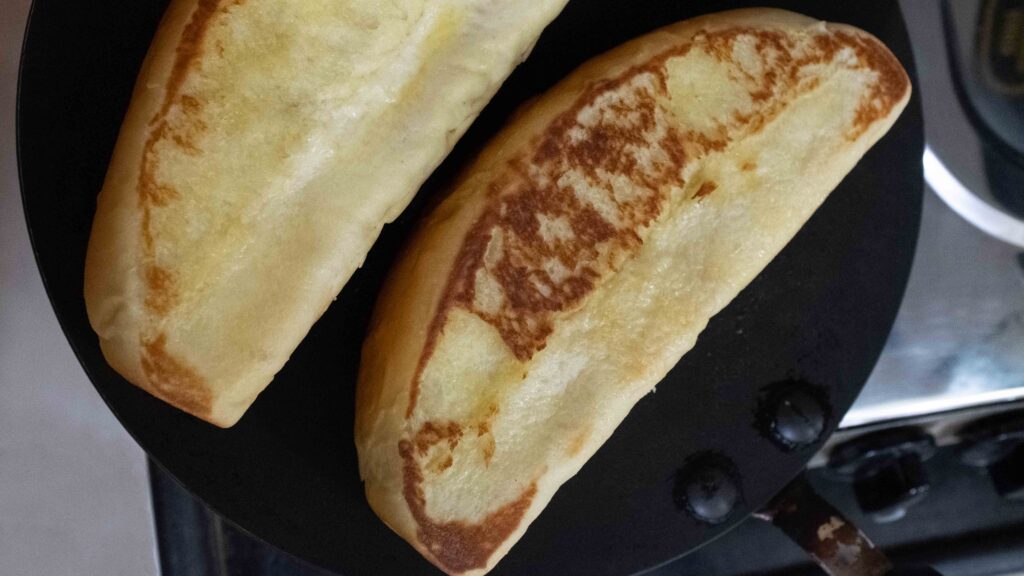
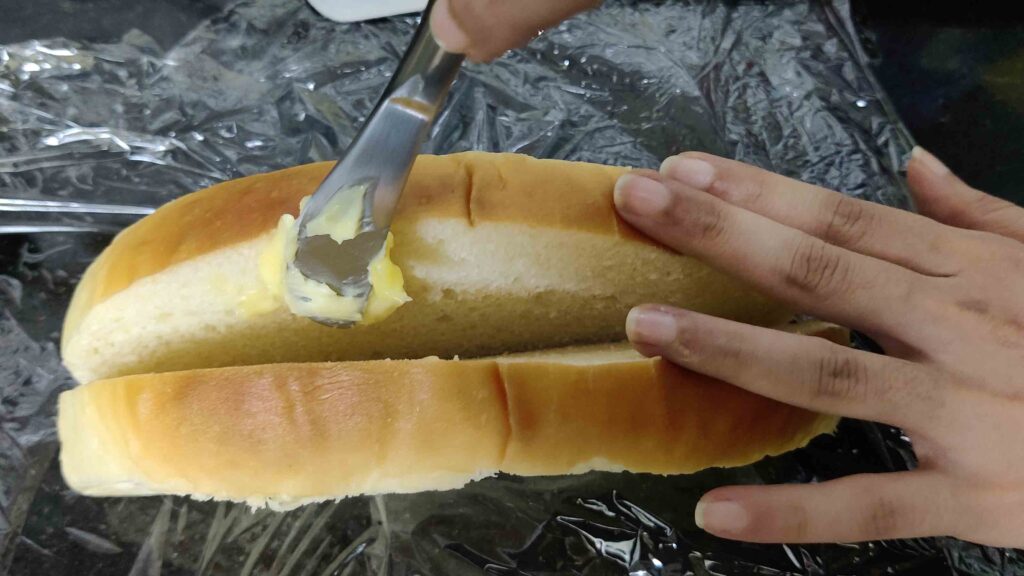
2 – When ready to serve, heat up a large skillet. Butter the soft, pale outer sides of each bun and then toast the buns butter-side down for 1 minute on each side or until golden-brown.
3 – Place each toasted bun on your work surface, top-side facing up. Using a sharp bread knife, carefully cut down the middle of each bun to create a top-split bun. Do not cut all the way down.
4 – Butter the insides of the slit buns.
Method
1 – Lay 4 lettuce leaves inside each toasted bun; 2 on the left half, and 2 on the right half.
2 – Fill each bun with ¼ of the cold tiger prawn filling.
3 – Sprinkle ¼ tsp chives onto the filling of each Tiger Prawn Roll.
4 – Serve your Tiger Prawn Rolls immediately with the hot French fries, cold coleslaw, and some extra wedges of lemon and ketchup. We liked our rolls with loads of lemon squeezed on top of the filling. Now eat!
This is a very seafood-forward dish with very strong flavours of prawn. This can be a bit overpowering for those palates unaccustomed to seafood prepared via this cooking method and/or using minimal ingredients. In India, seafood is typically prepared with robust spice blends that literally temper the ‘fishiness’ and make it more appetizing to our Indian taste buds. In Bengali cuisine particularly, seafood is nearly always shallow-fried before it is added to curries. The frying step further reduces the ‘fishy’ aroma and taste. If you are familiar with poached seafood or enjoy clean seafood flavours, you’ll love this. Here’s the doozy – neither my husband nor I have even eaten a Maine Lobster Roll! This recipe happened because my husband saw a picture and said, “omg, please make this.” We do know what butter-poached lobster tastes like though, so that’s always been our palates’ North Star. And while it has a more ‘prawny’ flavour than lobster (which is subtler and sweeter) these Tiger Prawn Rolls will no doubt delight avid seafood lovers from Maine to Mumbai.
Tips & Tricks
How to knead an enriched dough by hand
How to do the slap and fold technique
How to devein prawns with the shell still on