


Makes 6 servings.
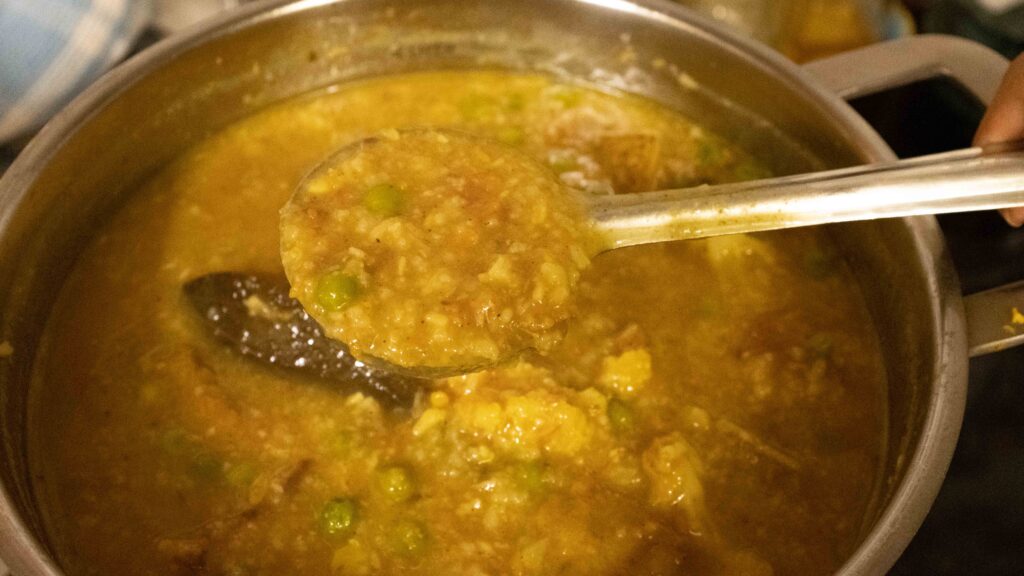
For our 50th recipe, we’re doing something very special to me—khuchuri—the Bong avatar of the ubiquitous desi ‘khichdi’. A savoury porridge of rice and lentils, khichuri can be made as plain or rich as the occasion warrants. Watery and mild for when you’re feeling poorly, moderately-spiced for regular days, and heavily-spiced and ghee-laden to serve as bhog (food offerings) during Durga Puja. Ours belongs to the third variety, fondly called Bhog’er Khichuri. We serve ours with a side of sweet tomato chutney and crunchy bitter gourd chips. Ohmmmm mmmm mmmm.
At a glance
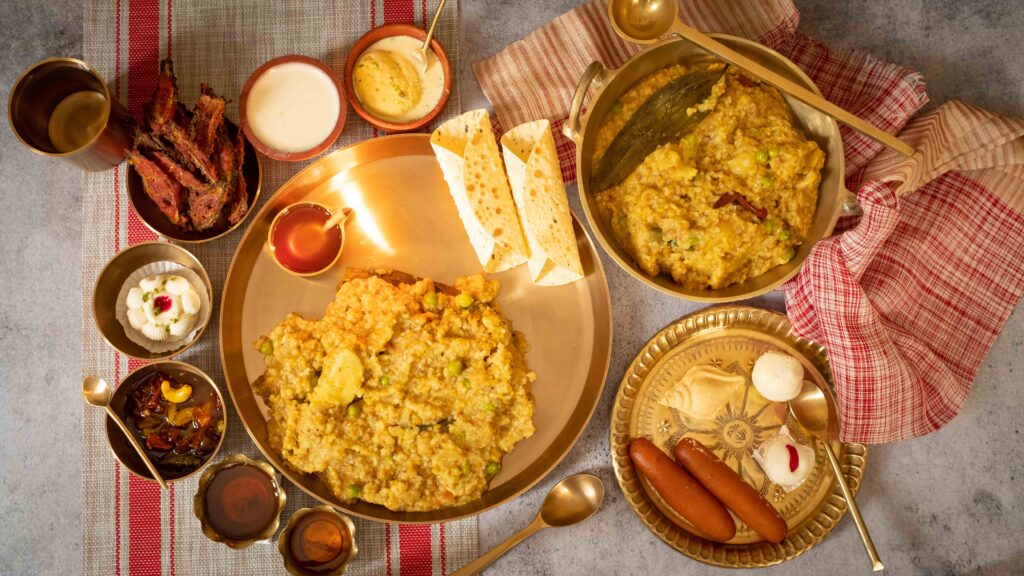
– This recipe comprises bhog’er khichuri + tomato chutney + bitter gourd chips.
– You will need a 5 litre cooking pot, a 3-4 litre non-stick/enamel/stainless steel cooking pot, and a large, deep frying pan.
– This recipe has been broken into 3 stages for ease and comprehension. Please read the entire recipe from start to finish before beginning.
Stage 1: bhog’er khichuri
Made with roasted moong dal and fragrant Gobindobhog rice, this khichuri is a labour of love and requires a fair number of ingredients and time. Don’t be intimidated! The effort is 100% worth it.
Ingredients
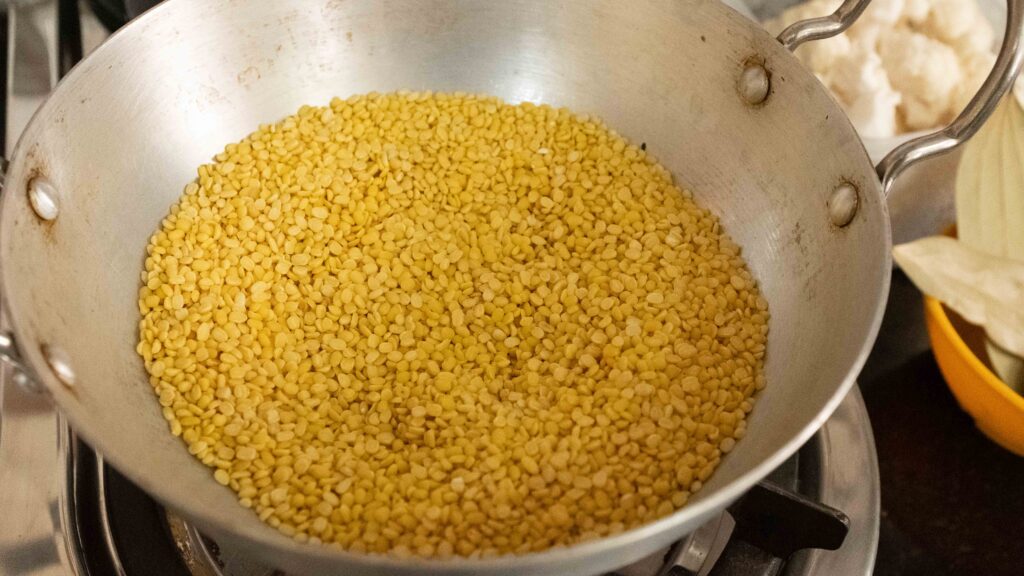
1. 218 gm/1 cup moong daal (yellow split gram)
2. 215 gm /1 cup) Gobindhobhog rice
3. 2.5 litres/10 cups water for cooking + extra for soaking
4. 400 ml hot water for soaking
5. 80 gm/1 medium tomato, roughly chopped
6. 6 fresh green chillies
7. 3 tbsp. sugar
8. 5 tsp salt
9. 150 gm frozen peas
for the fried veg:
10. 3 tbsp. mustard oil like this
11. ½ tsp turmeric powder
12. ½ tsp salt
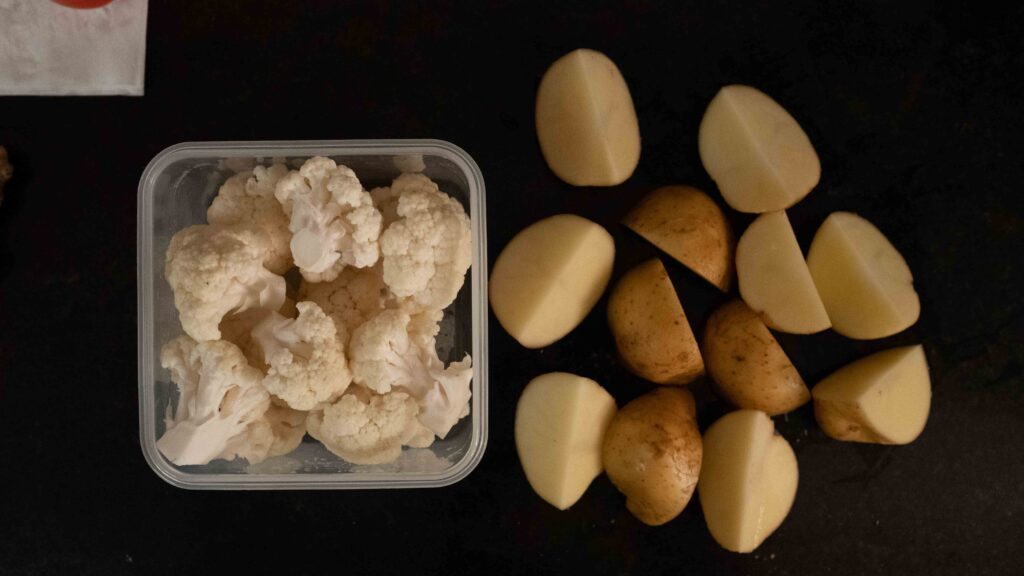
13. 3 medium potatoes (130 gm each) cut in half
14. 1 small cauliflower (250-270 gm) cut into 2-inch florets
for the whole spices:
15. 2 tbsp ghee like this
16. 1 inch cassia bark
17. 3 Indian bay leaves
18. 3 dried red chillies
19. 3 cardamom pods
20. 3 cloves
21. 1 tsp cumin seeds
for the spice paste:
22. 1 tsp turmeric powder
23. 1 tsp Kashmiri red chilli powder
24. 1 tsp cumin powder
25. 1 tsp coriander powder
26. 4 tbsp water
for the coconut tempering:
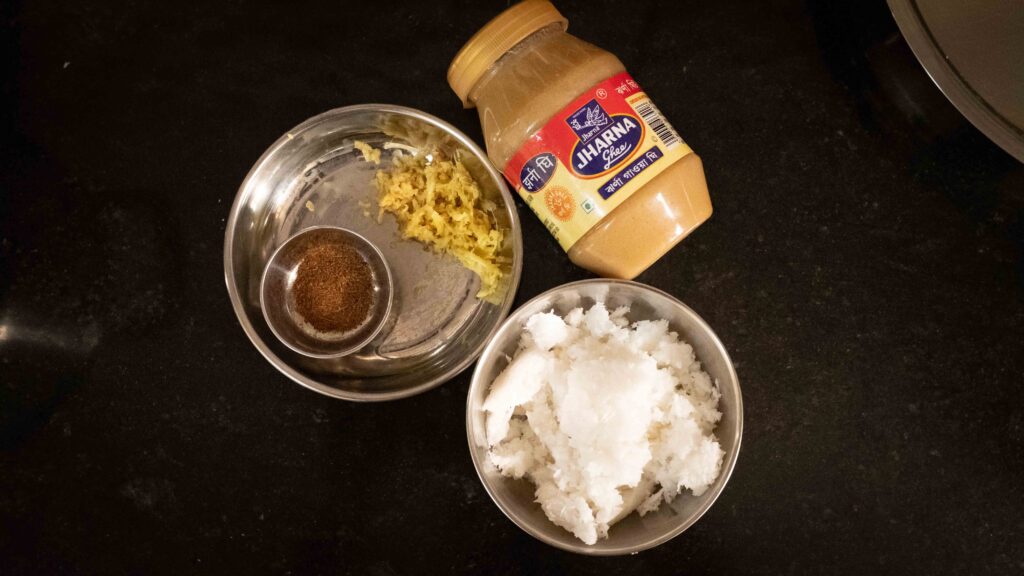
27. 2 tbsp. ghee
28. 2 inch piece ginger
29. 100 gm grated coconut
30. ¾ tsp Bengali garam masala like this
for serving:
31. 1 tsp ghee per serving
Prep
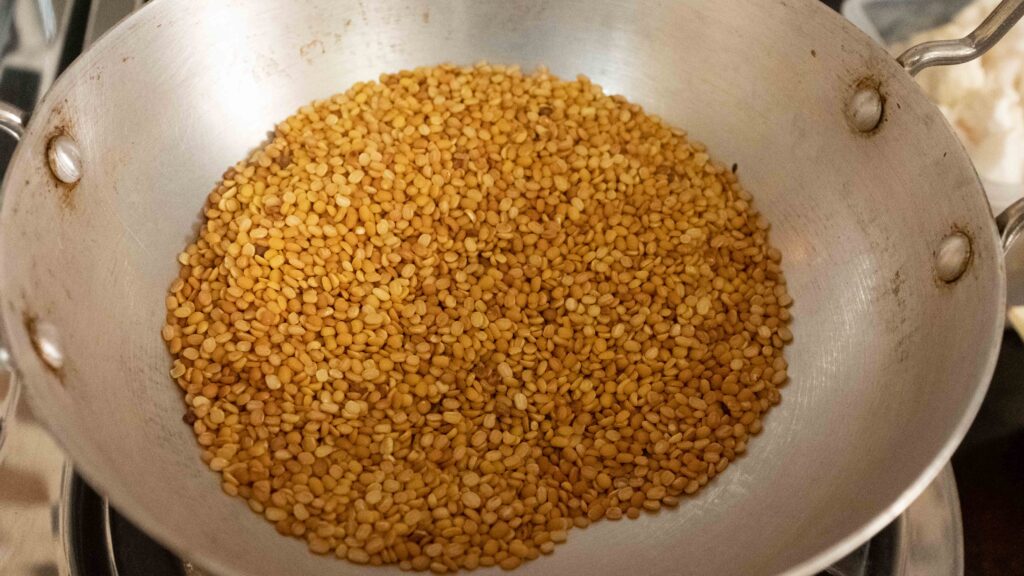
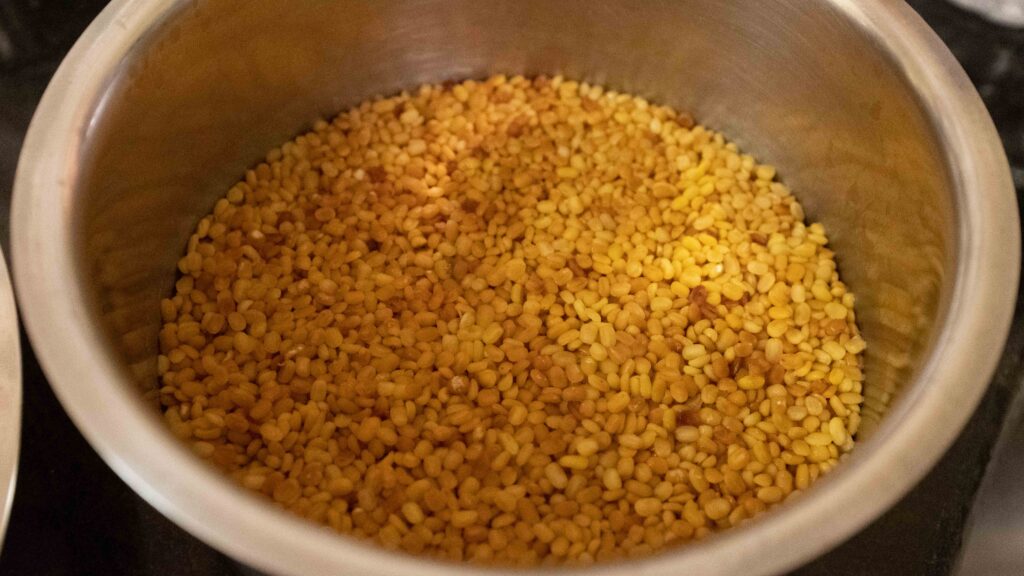
1 – Dry roast the moong daal on low heat until the colour changes from pale yellow to deep orange and it becomes very aromatic (roughly 10-12 minutes). Stir continuously for even colouring.
2 – In the meantime, put the kettle on. As soon as the moong daal is done roasting, transfer it to another bowl and pour hot water onto it until it comes up 2 cm above the daal. Leave it aside to soak for 30 minutes.
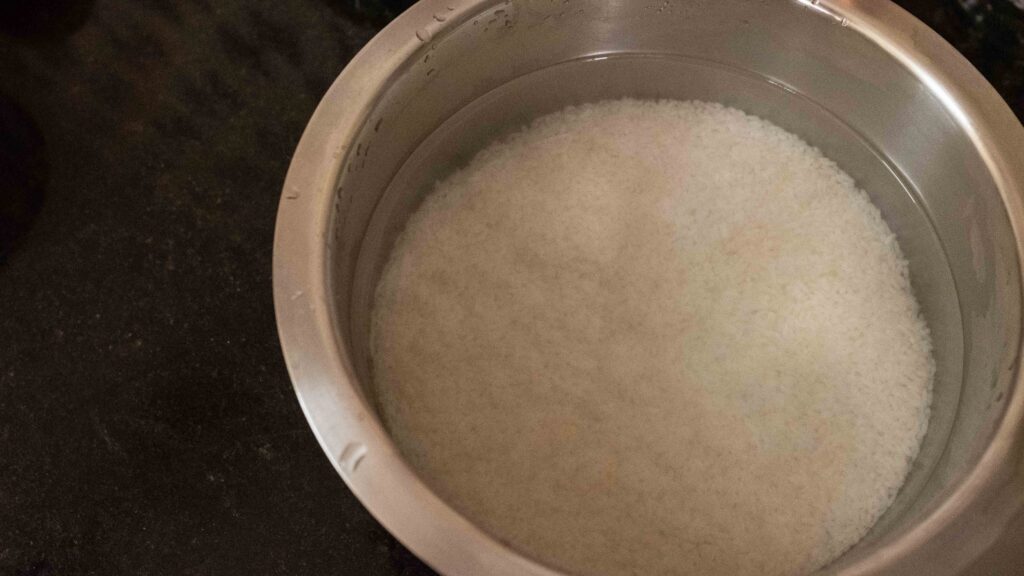
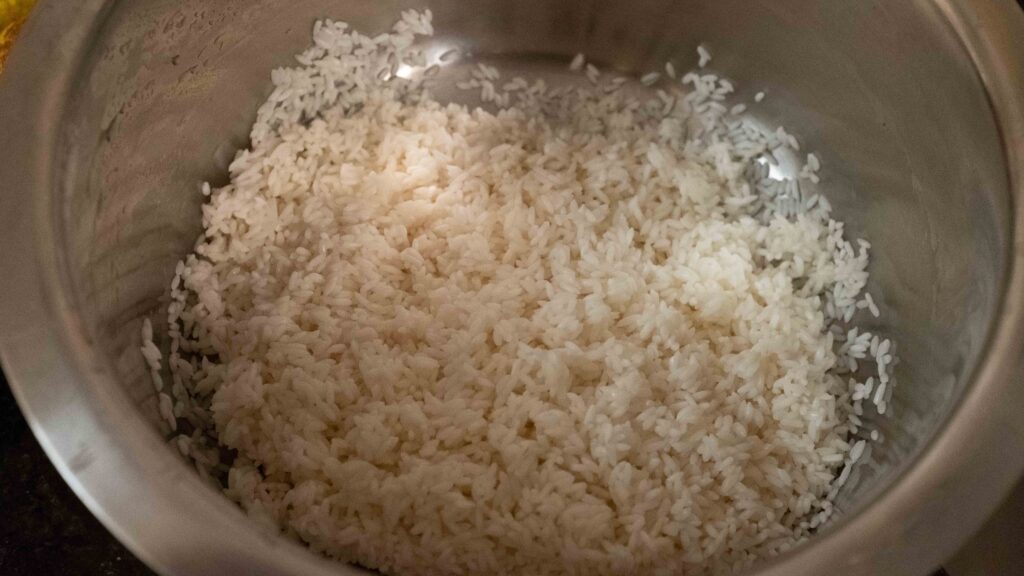
3 – Wash the rice 3-4 times – don’t wash till the water runs clear, as you want some starch. After washing, leave the rice to soak for 30 mins. Thereafter strain it.
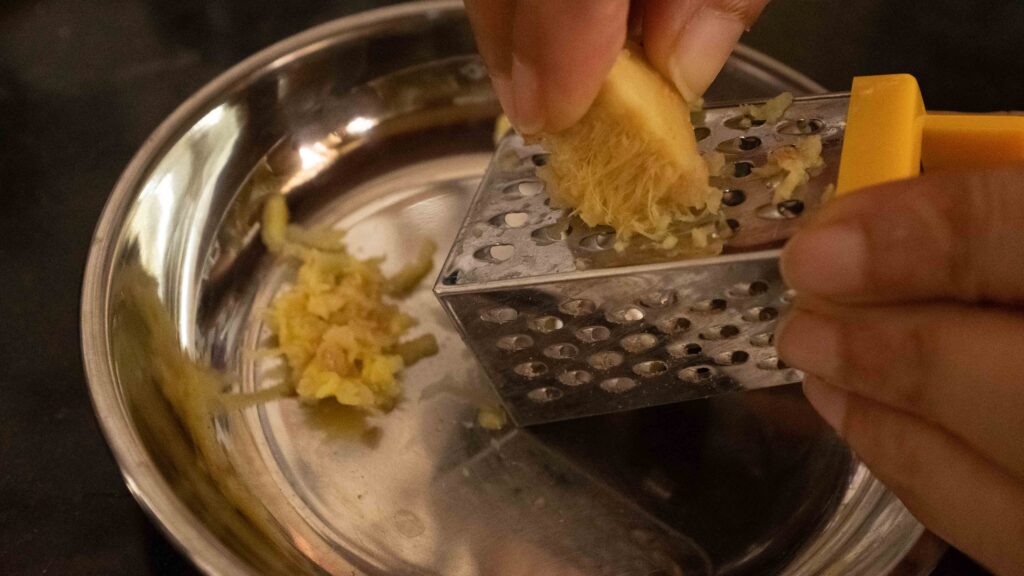
4 – Finely grate your ginger and keep it aside.

Method
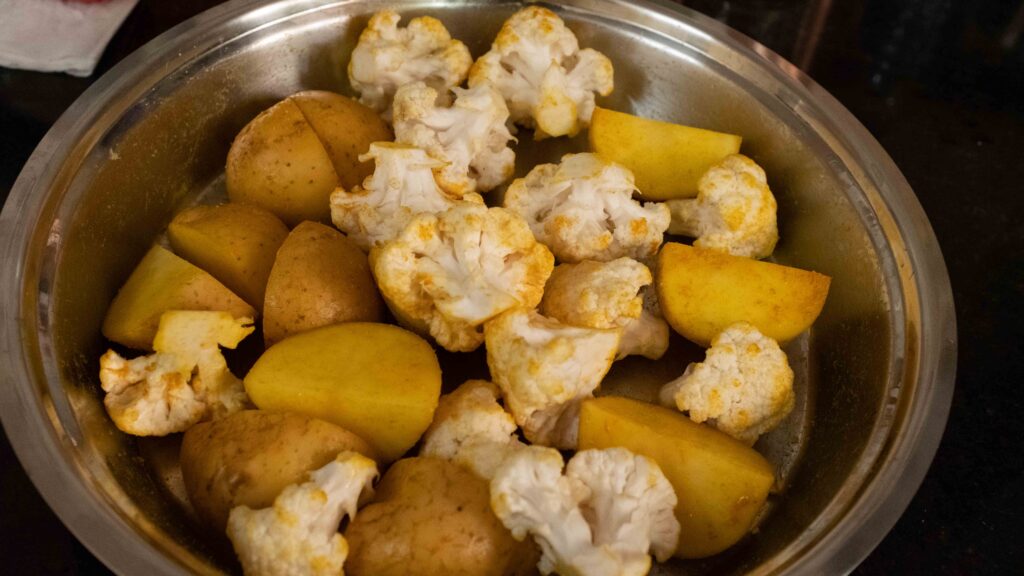
1 – Peel the potatoes (I don’t) and then cut each potato in quarters. Cut the cauliflower into 2-inch florets. Then toss the cauliflower and potatoes in salt and turmeric powder. Set aside.
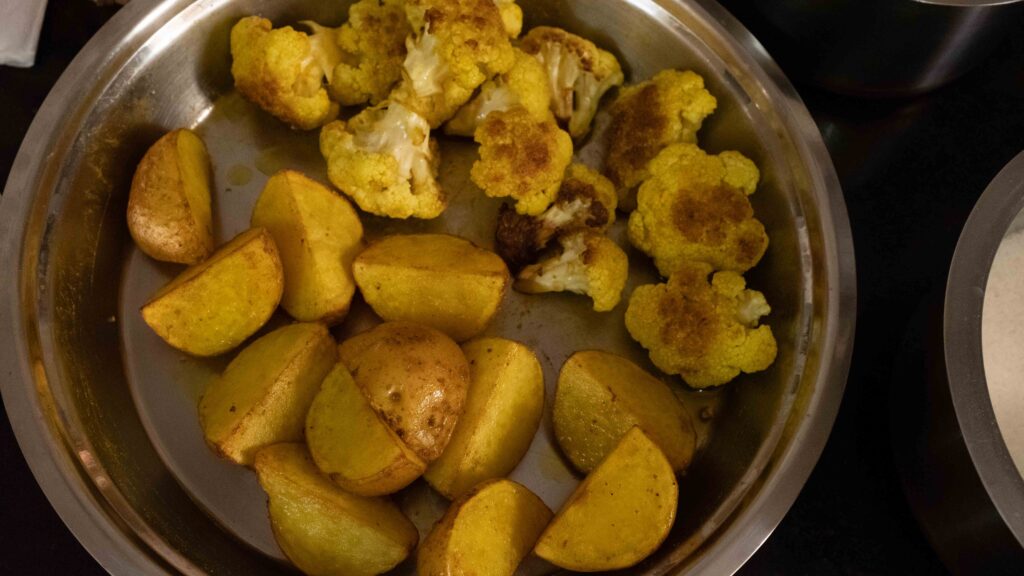
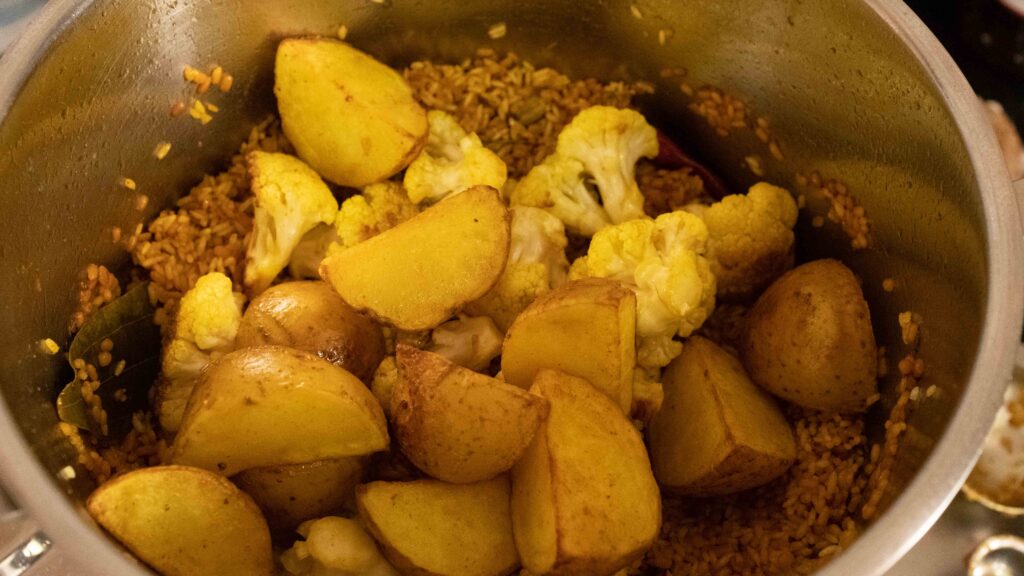
2 – Place a large heavy bottomed pot on the stove. Heat up 3 tablespoons mustard oil until smoking. Then lower the heat to medium. Fry the potato halves in the mustard oil until golden brown on all sides, roughly 3-4 minutes per side. Remove from the pot. Then fry the cauliflower florets in the same oil, until lightly golden brown on all sides, roughly 4-5 minutes per side. and. Remove from the pot and set aside.
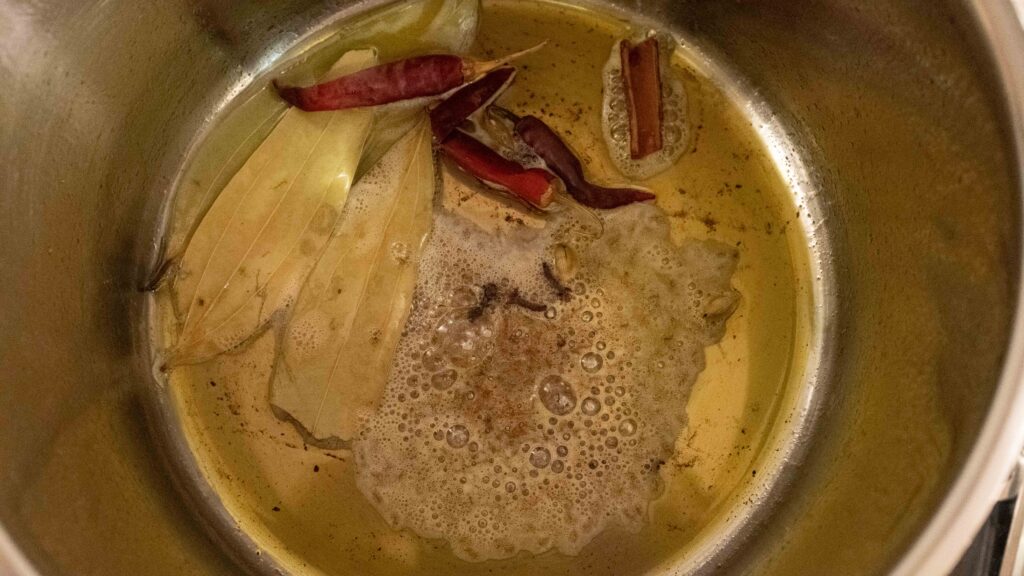
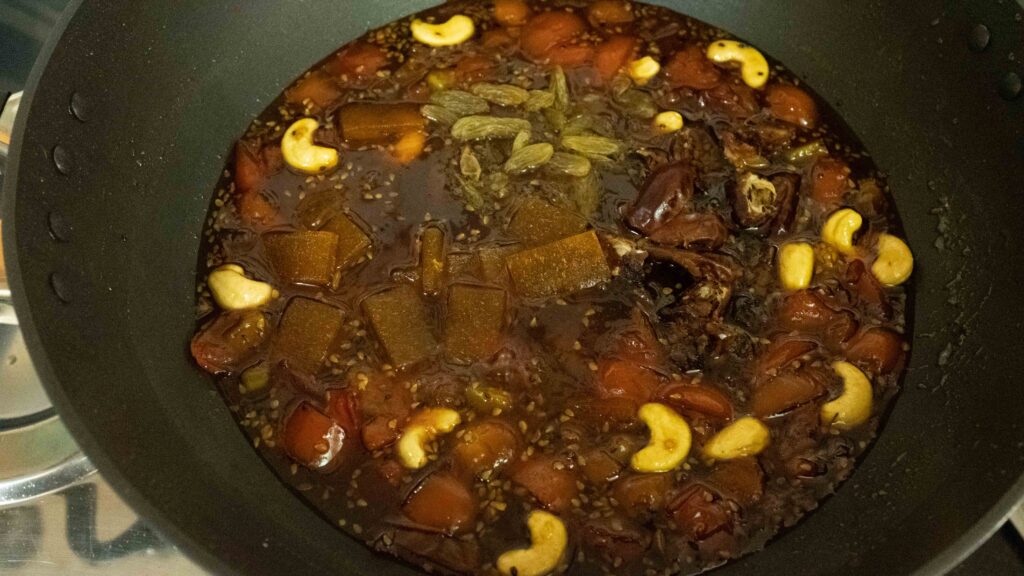
3 – In the same pot, add 2 tablespoons ghee. Once it’s melted and hot, add the whole spices and fry until aromatic, roughly 30 seconds.
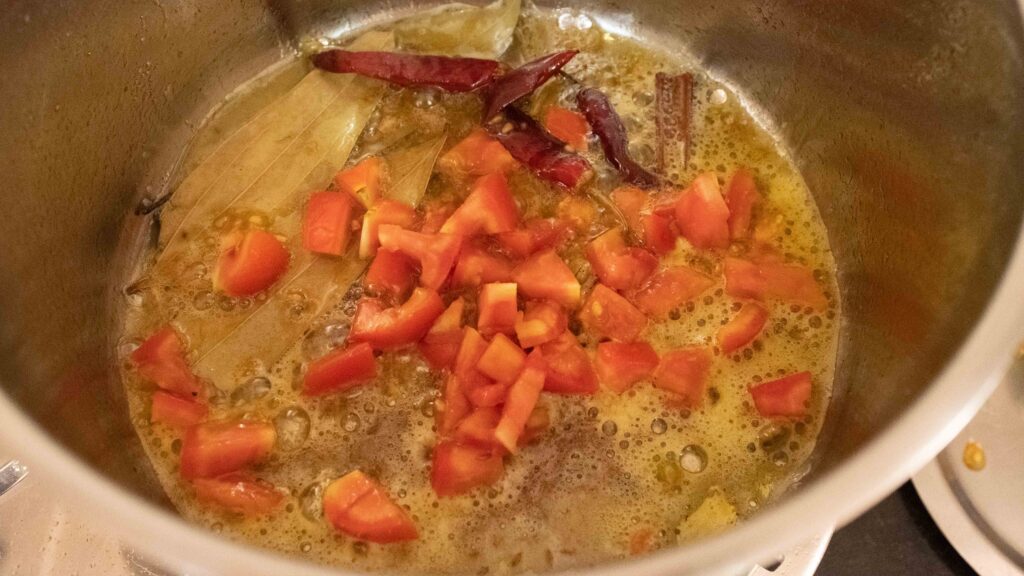
4 – Now add the chopped tomatoes and fry for 1-2 minutes or until lightly softened.
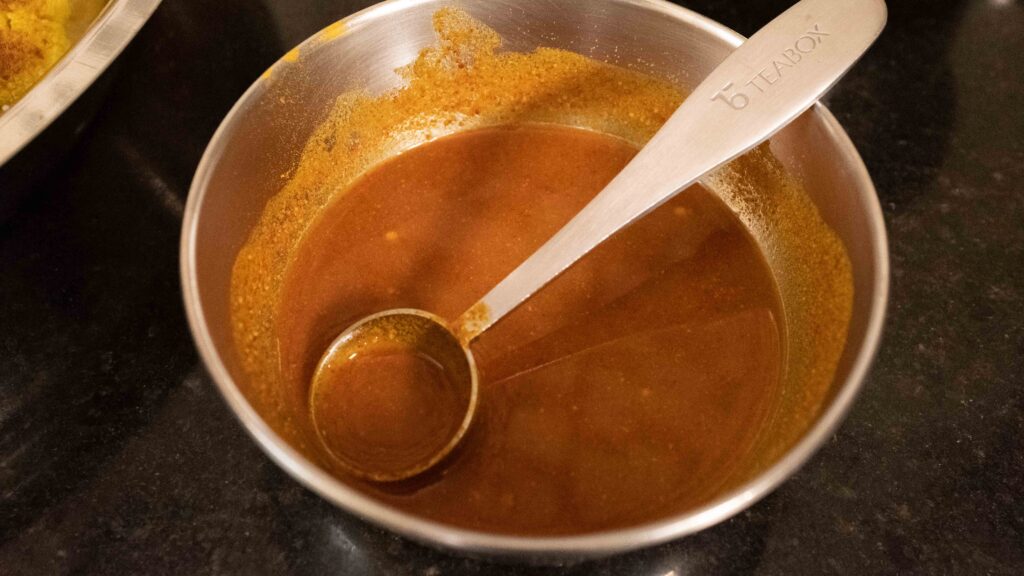
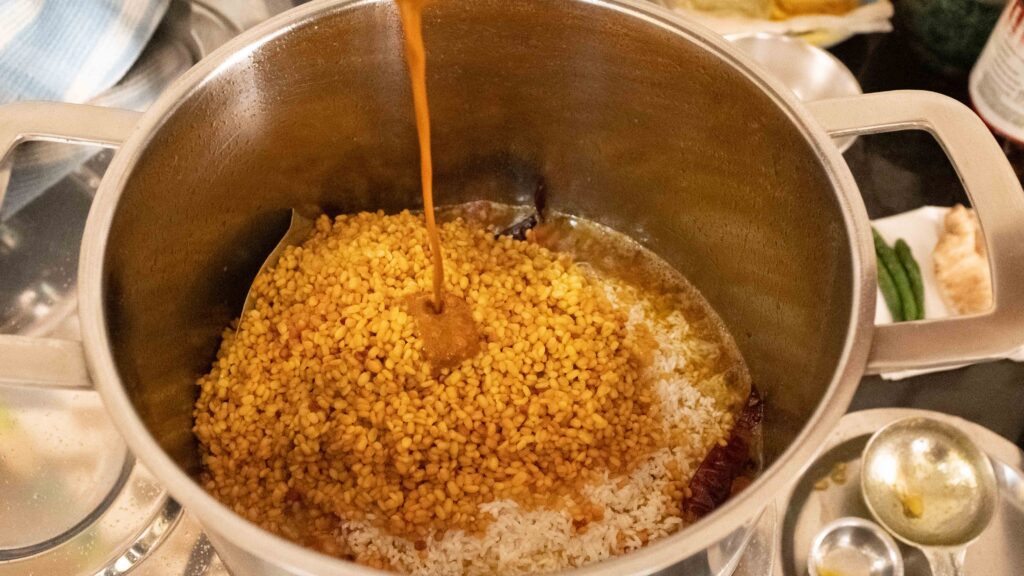
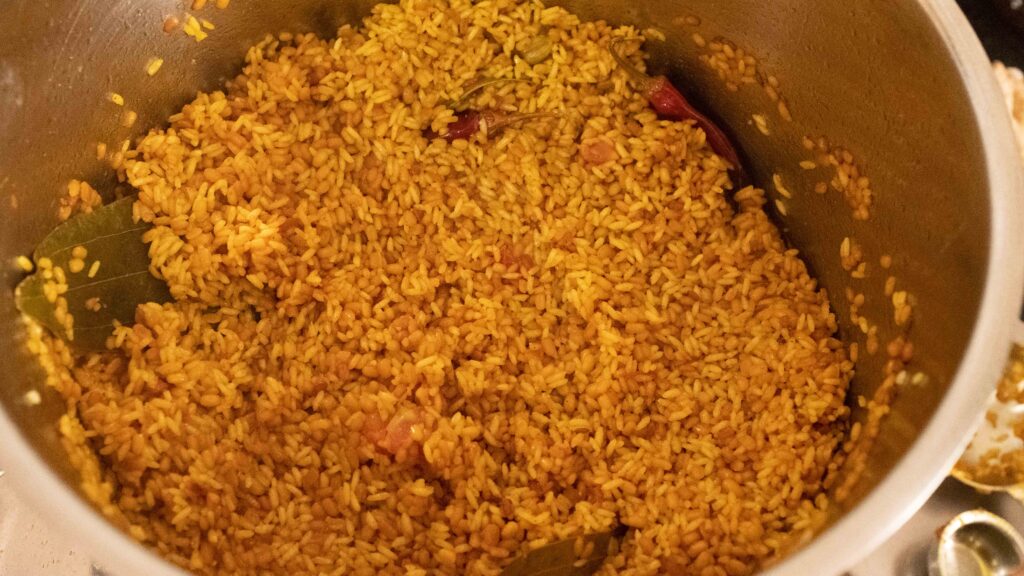
5 – Make the spice paste. Add the strained rice and the soaked daal to the pot and then add the spice paste to the pot. Fry together on medium until the grains absorb all the paste and begin sticking to the bottom and sides of the pot.
6 – Add the fried cauliflower florets and potato halves to the pot.
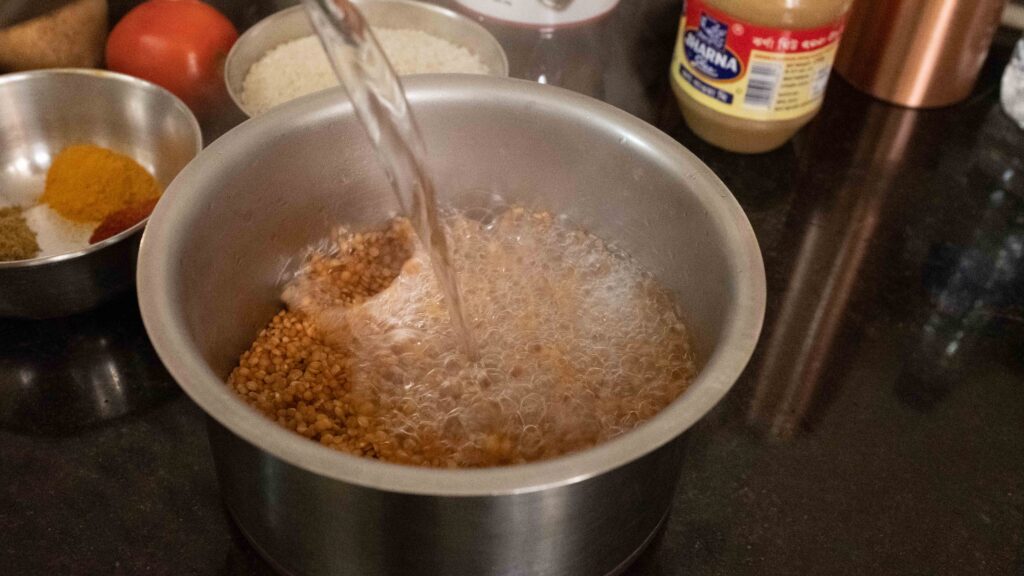
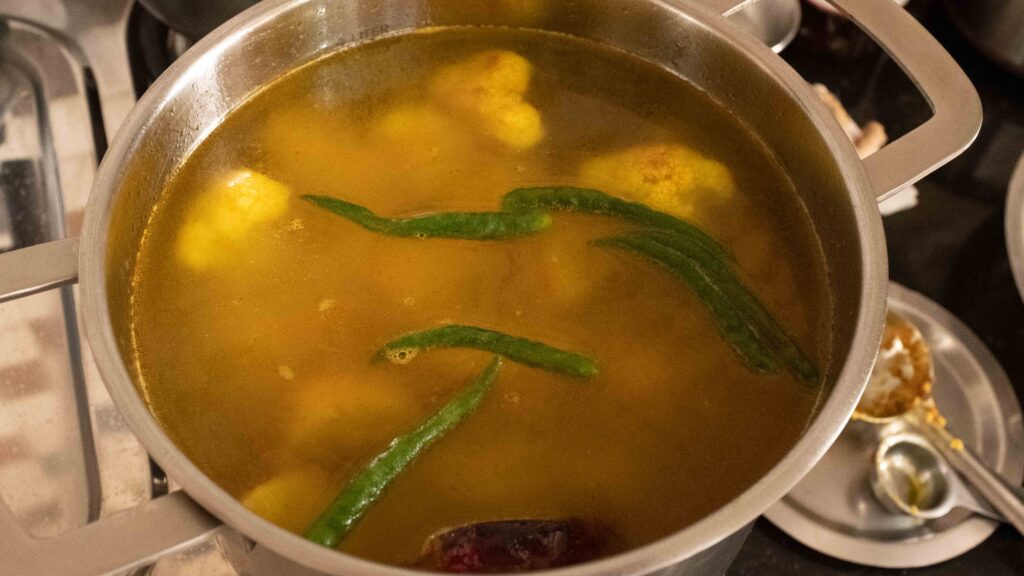
7 – Add all the 2.5 litres of water to the pot, followed by 5 teaspoons salt. Give the pot a good stir and then throw in the 6 green chillies. Wait for the water to come to a simmer.
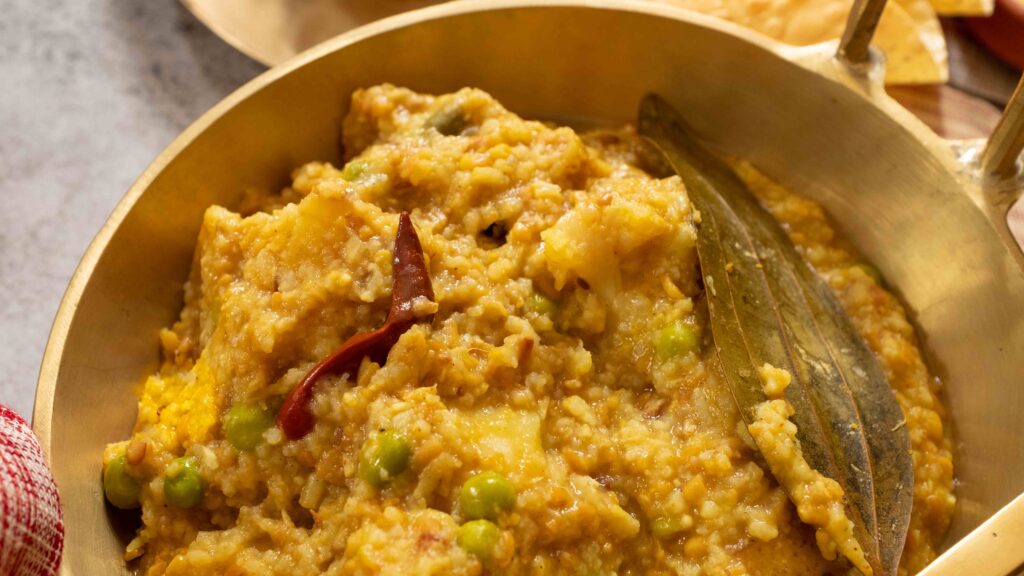
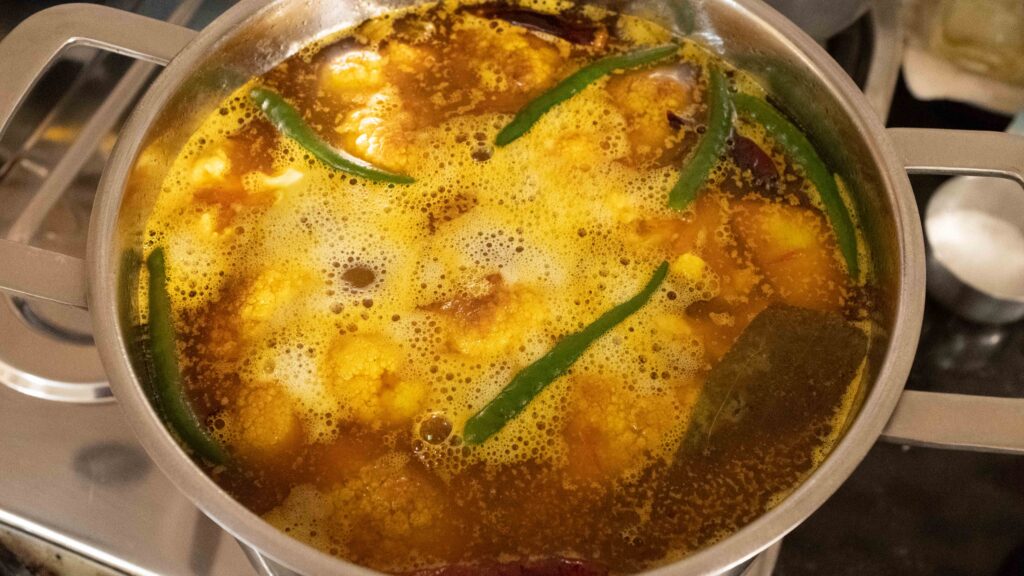
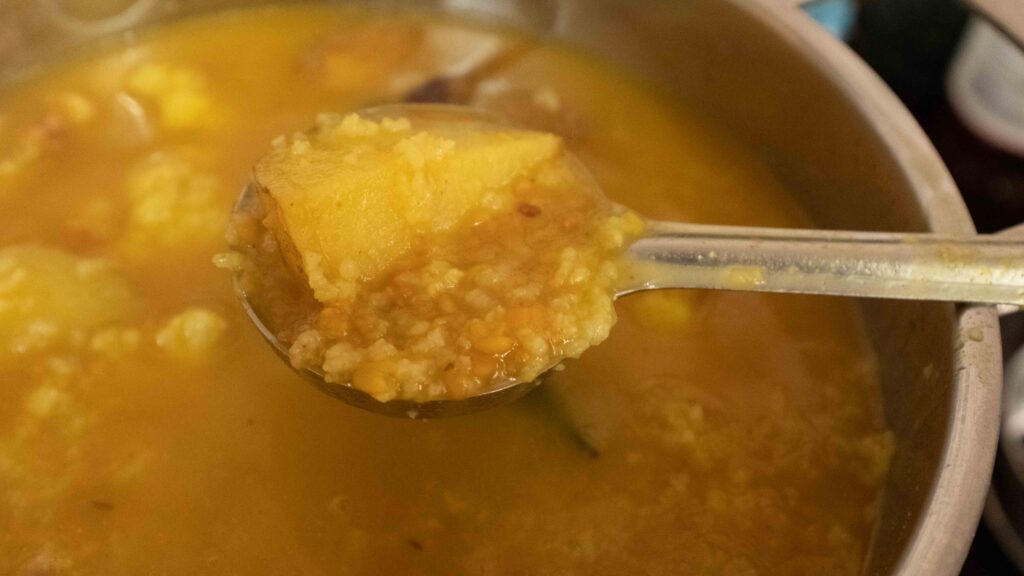
8 – Once at a simmer, lower the heat to minimum and cook the mixture covered for 40 minutes, stirring every 10 minutes or so. Cook until the starches release, the daal liquifies and thickens and the rice grain begin to break apart. The daal and rice will also start to stick to bottom of the pot.
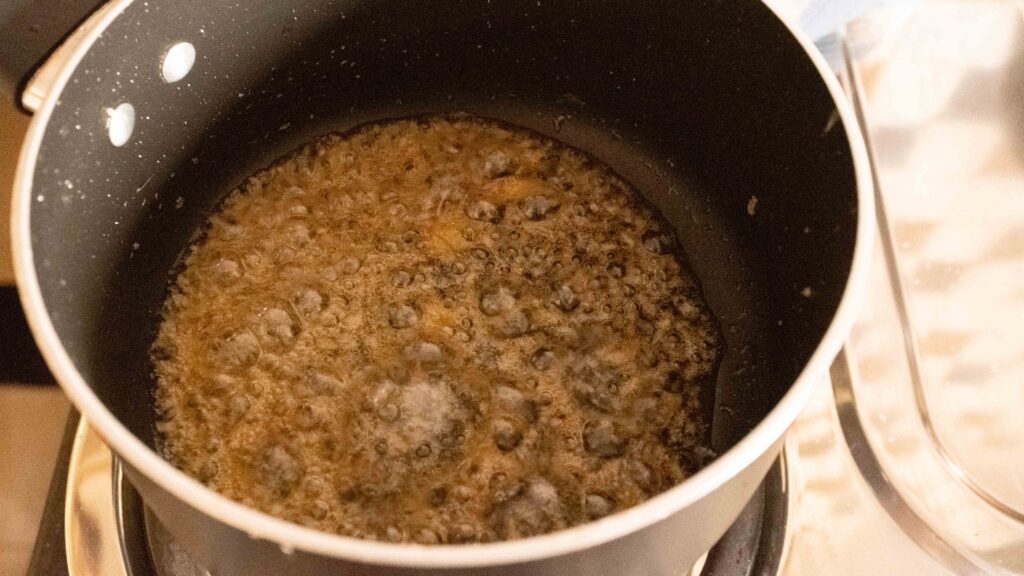
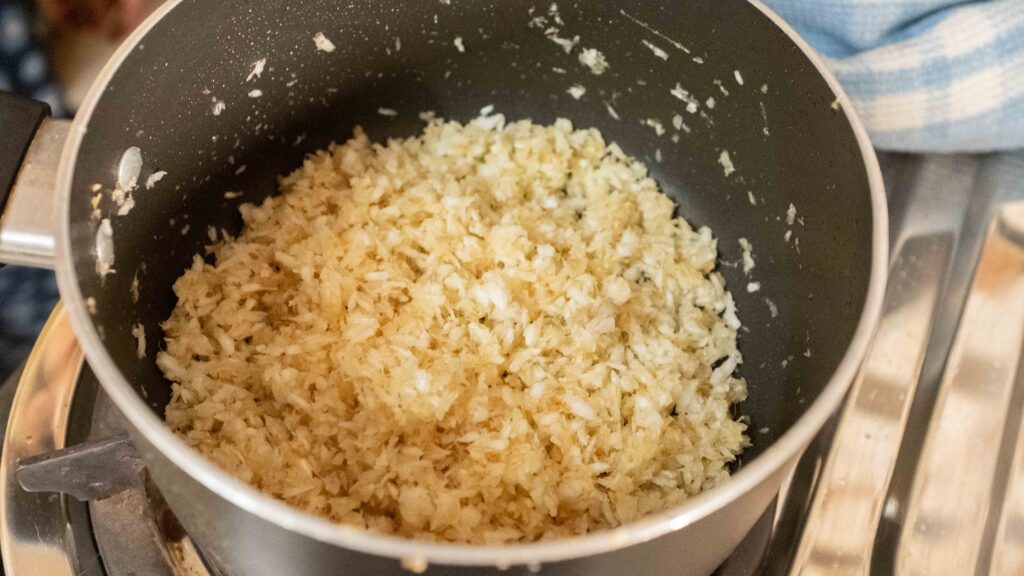
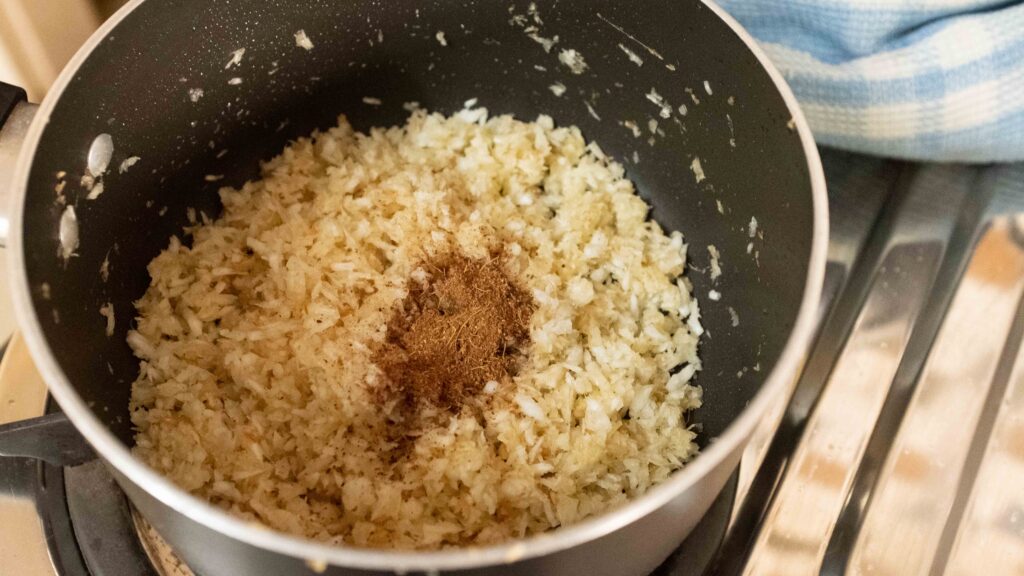
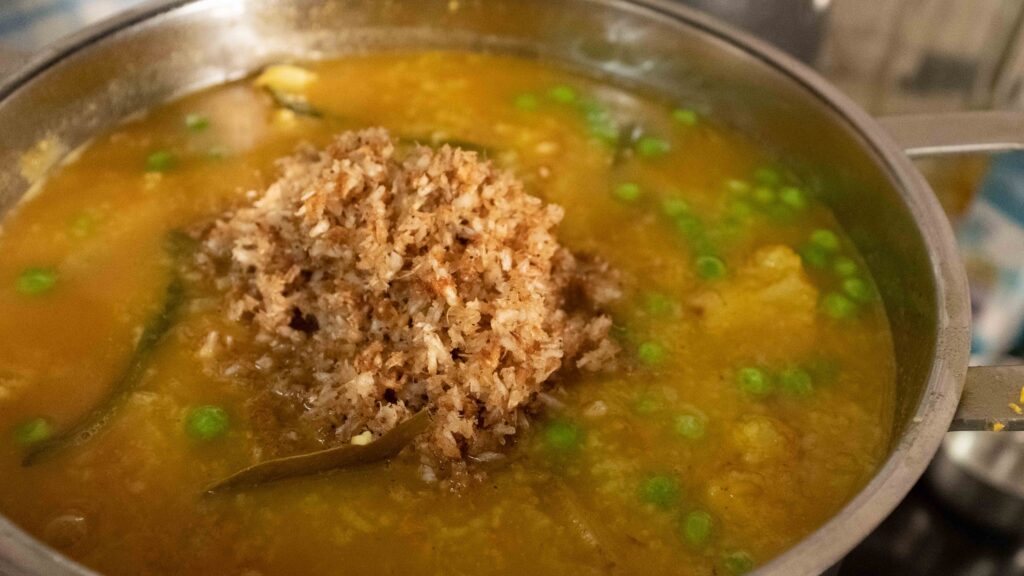
9 – When you have 6-7 minutes remaining on the 40-minute cook, beging making your tempering; in another medium frying pan, add 2 tablespoons ghee and heat until hot. Add the grated ginger and fry for a minute until fragrant. Then add the grated coconut and fry until lightly browned, roughly 6-7 minutes. Finally, add the Bengali garam masala and fry for another 30 seconds. Turn off the heat. This is our tempering.
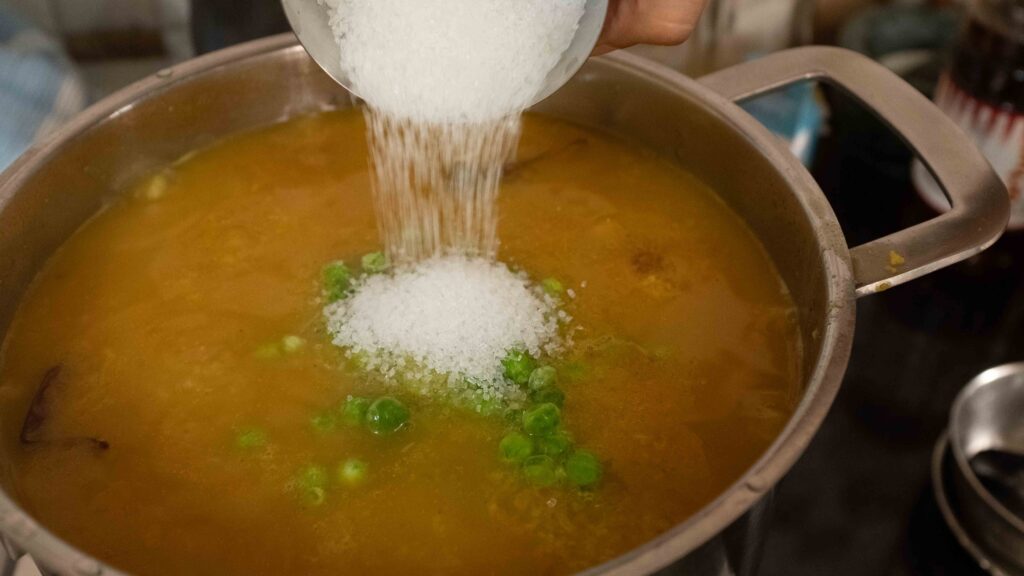
10 – After the khuchuri has had 40 minutes, add the frozen peas and 3 tablespoons sugar, and stir them into the mixture.
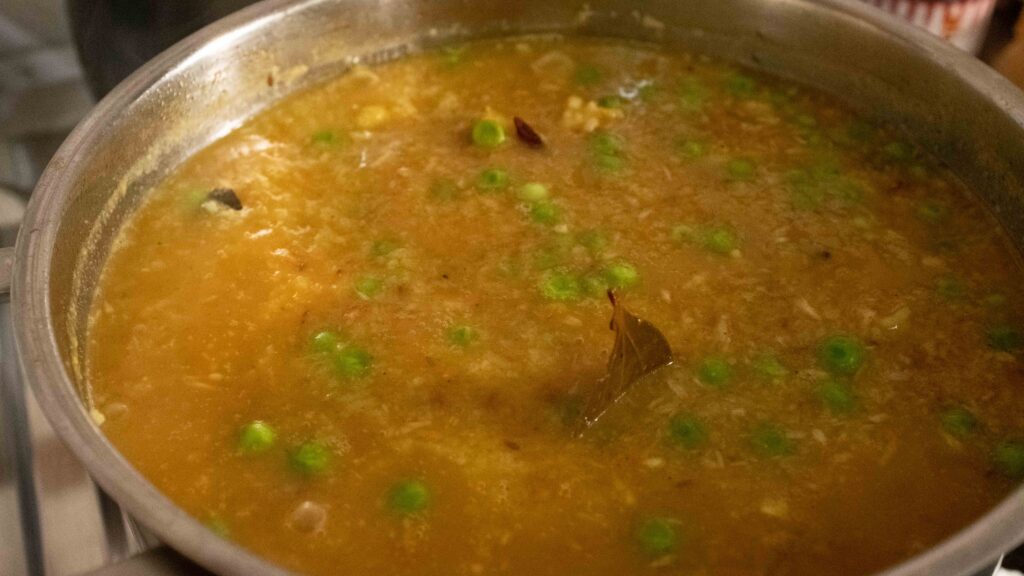
11 – Immediately add the just-made tempering to the pot of simmering khichuri. Simmer for an additional minute and then turn the heat off. Leave the khichuri to rest, covered for at least 30 minutes before serving. It will look a tad watery, but will continue to thicken to the perfect consistency while resting.

This is a BIG batch of khichuri. However, think of it as a meal of rice, daal, and veg, served all in one. That’s 3 dished in one. Plus with 6 people (who will inevitably ask for seconds), it disappears surprisingly quickly. Khichuri tastes even better the day after it’s cooked, once all the flavours have truly settled. Feel free to make it in advance and store it in the fridge for up to 5 days. I do not recommend freezing khichuri as the texture of the potatoes becomes very strange. Gently reheat on the stove or microwave before eating.
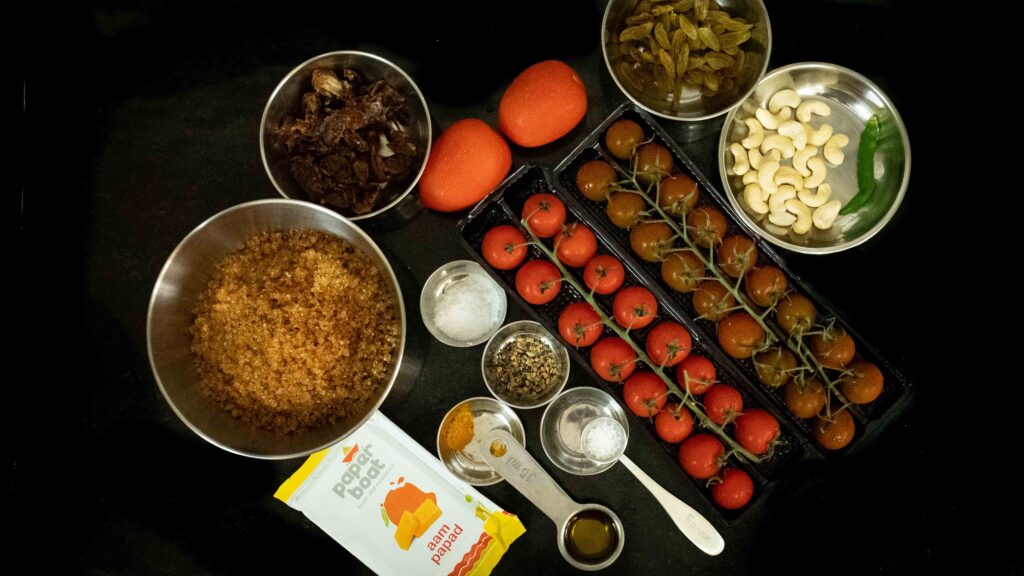
Stage 2: tomato chutney
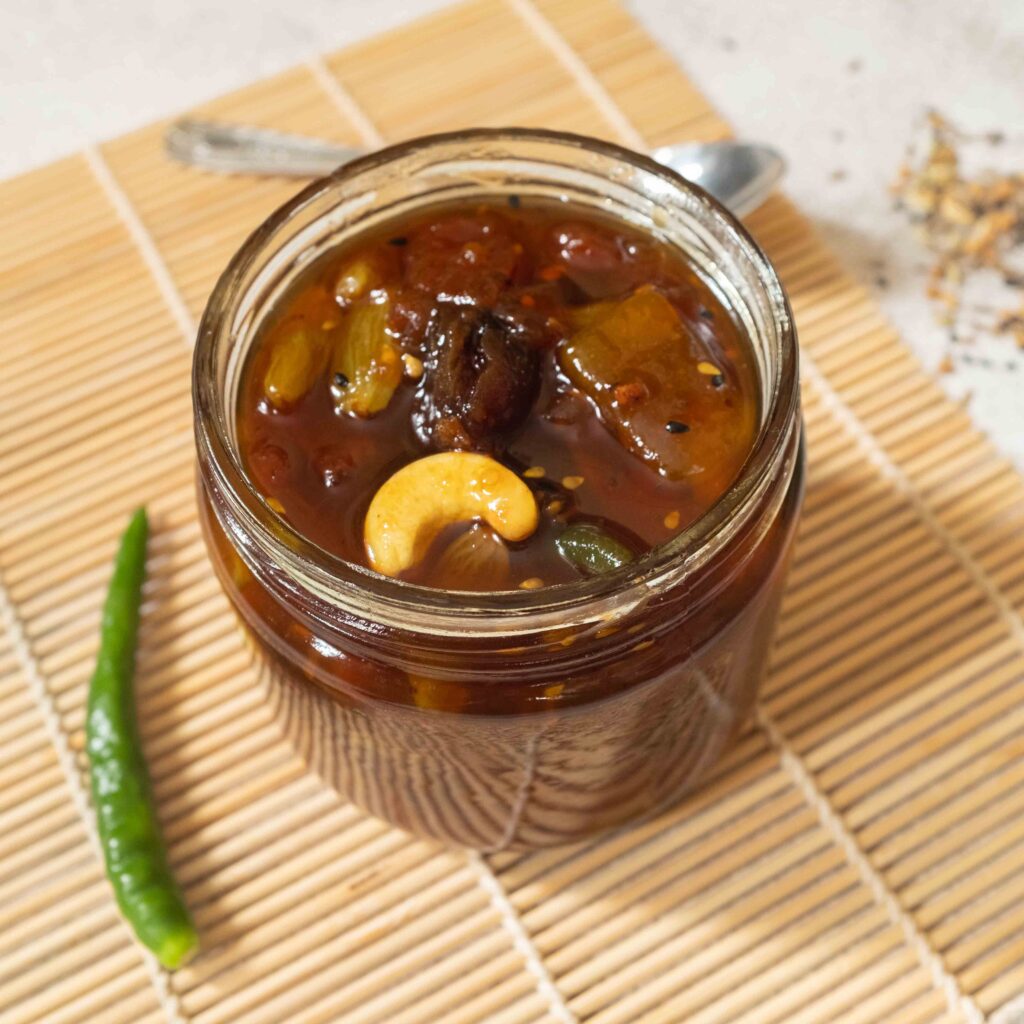
This is a modified version of my husband’s Dadima’s recipe. Of course, she never uses weight measurements while cooking, so I had to work the amounts out after some testing. After making this, my husband declared that it tastes exactly like his grandmother’s! I always make this large a batch and we savour it for months.
Ingredients
1. 1 tbsp. mustard oil like this
2. 1 tsp paanch phoron (equal volumetric measure of the following 5 spices; cumin seeds, brown mustard seeds, fenugreek seeds, nigella seeds, and fennel seeds)
3. 550 gm ripe tomatoes
4. 1 fresh green chilli
5. 1 tsp salt
6. ¼ tsp turmeric powder
7. ½ tsp citric acid
8. 350-400 gm brown sugar (depending on how sweet your tomatoes are)
9. 30 gm whole or halved cashews
10. 40 gm golden raisins
11. 50 gm pitted dates
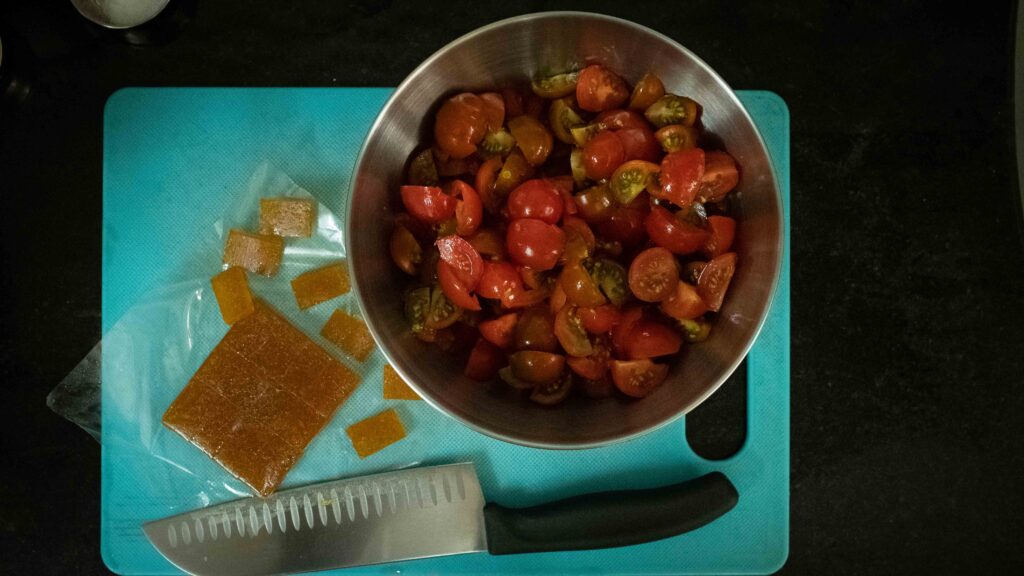
12. 90 gm aamshotto (aam papad/mango fruit leather)
Prep
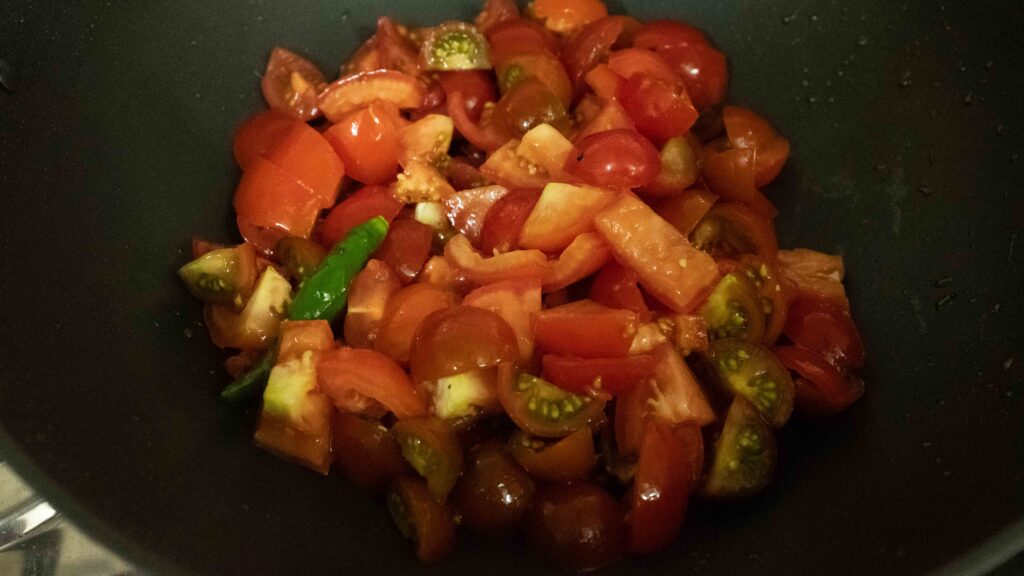
1 – Roughly chop the tomatoes into 2 cm chunks and set aside. I had some wonderfully sweet cherry tomatoes in the fridge so I used those and simply cut them into quarters.
2 – Cut the dates lengthwise into quarters. Set aside.
3 – Chop the aamshotto into 3 x 2 cm squares. Set aside.
Method
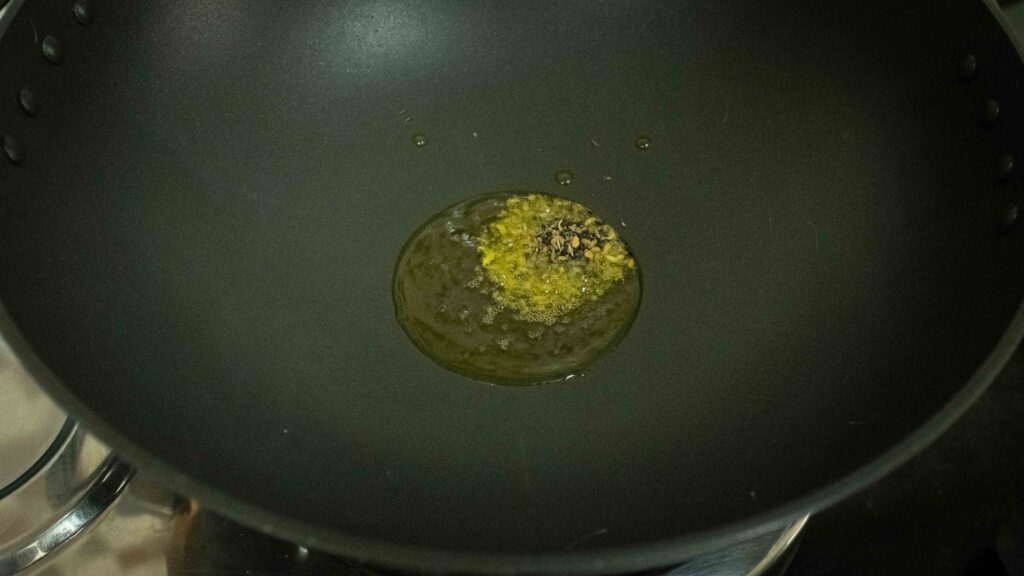
1 – Add the mustard oil to a 3-litre cooking pot and begin heating in on medium.
2 – Once the oil begins to smoke, lower the heat to minimum and add in the paanch phoron. Let it sizzle in the oil for about 30 seconds to release its aromas.
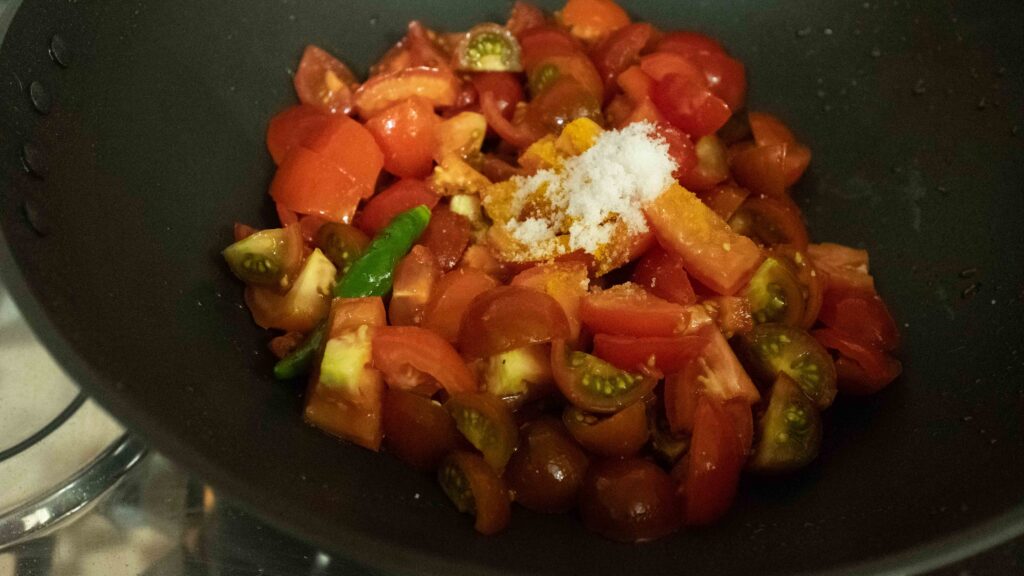
3 – Add the chopped tomatoes and one green chilli to the pot. Then add the salt and turmeric powder. Stir everything together and pop a lid on. Raise the heat to medium and cook covered for 5 minutes or until the tomatoes soften.
4 – After 5 minutes remove the lid and add the citric acid. Stir once again, pop a lid on and cook covered for 2 minutes or until the tomatoes become very mushy.
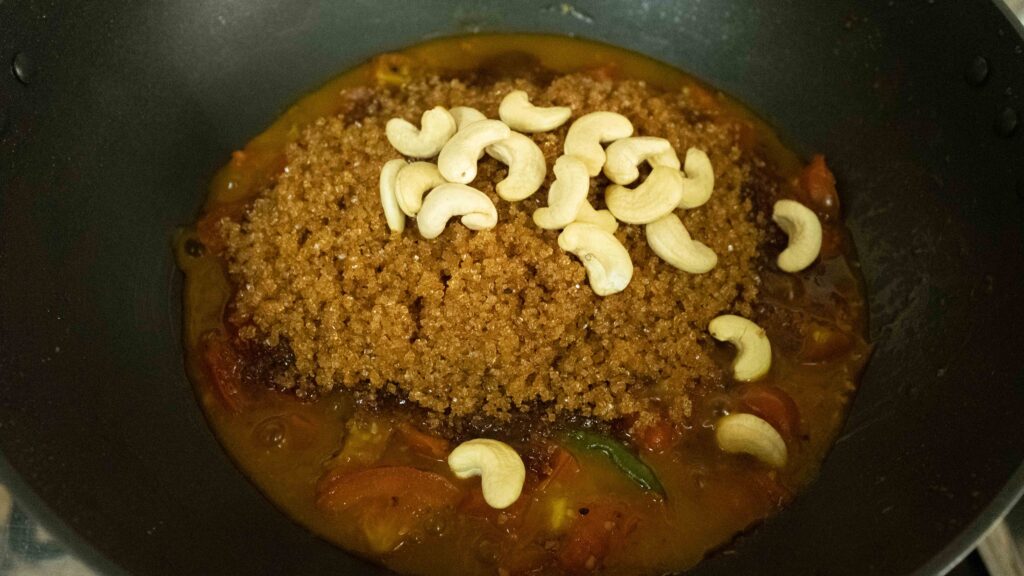
5 – Add the brown sugar and the cashews to the pot. Stir together and wait for the mixture to begin bubbling, roughly 2-3 minutes. The mixture will also become dark and very runny.
6 – Once the mixture is bubbling, add the raisins, the dates, and the aamshotto. Stir and continue bubbling the mixture on medium heat for an additional 2-3 minutes or until you’re happy with the consistency. Do not over-reduce the mixture as it will get more viscous and stickier on cooling.
7 – Turn the heat off and let the mixture cool to room temperature completely. If not using up or serving immediately, store the tomato chutney in sterilised air tight jars in the fridge.


Tomato chutney is normally made in winter, when the tomato crop in India is perfectly ripe and at its sweetest. Pre-December tomatoes tend to be acidic and take ages to break down. Even then, they’re disappointing. The solution? Cherry tomatoes! I actualy discovered this by accident because I wanted to use up 400 gm of cherry tomatoes that were left over from another shoot. They made the sweetest, yummiest chutney I’ve ever made, and I am never waiting for winter to make chutney again! This makes about 3 cups of chutney can be stored in the fridge for up to 4 months. A word of unwarranted advice. Do not add fresh green chillies to hot oil. They will literally burst in the pan, and you will end up with oil burns on your face. True story.
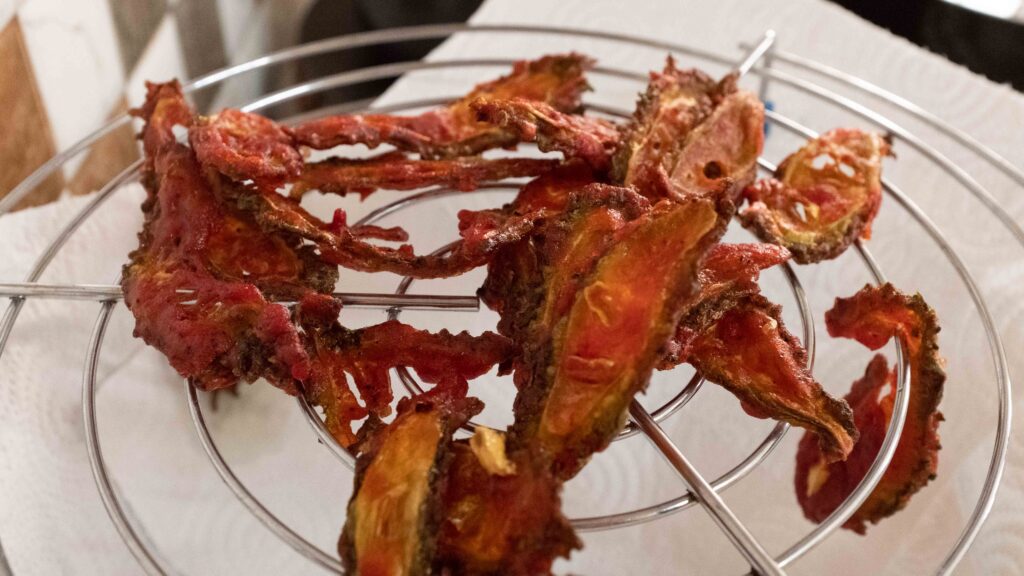
Stage 3: bitter gourd chips
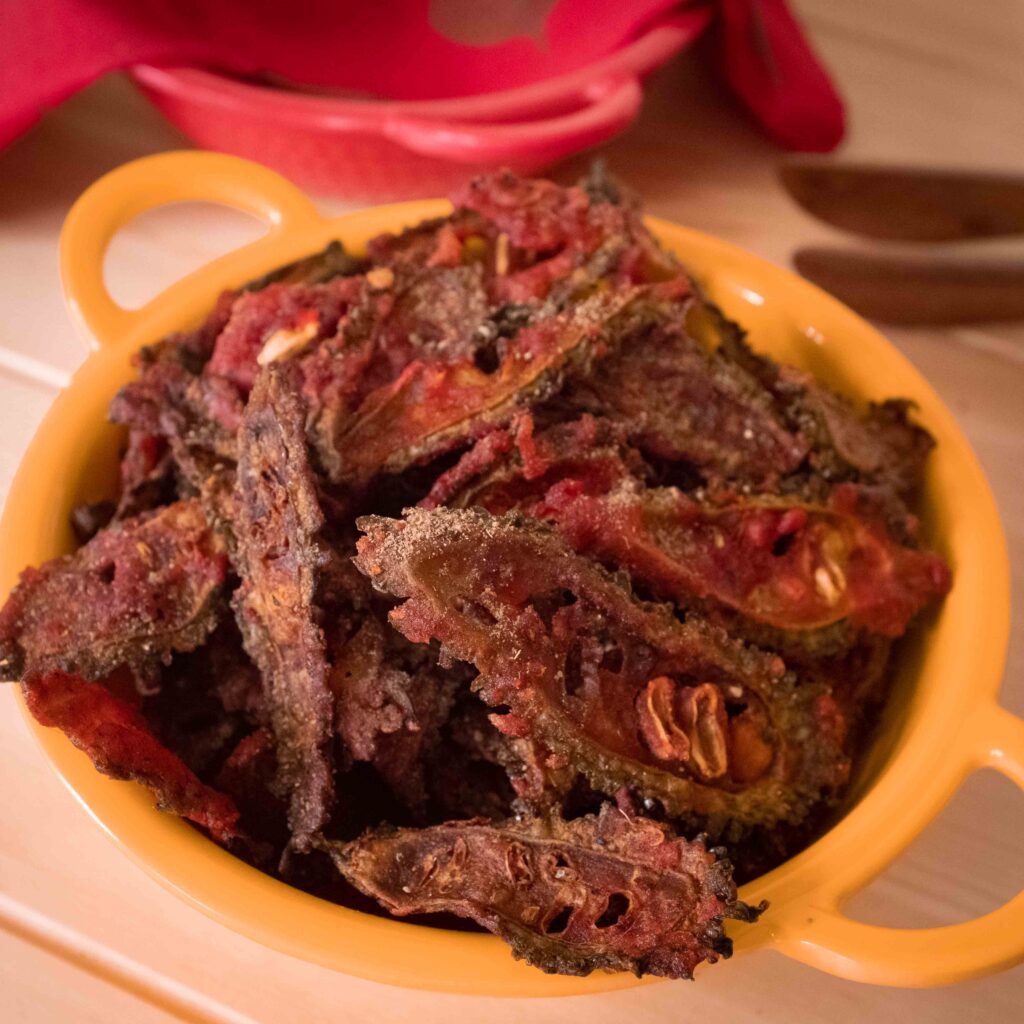
With all the mushy textures, you need an element with some real crunch for a textural disruption. If you’ve ever tried the ‘Karela chips’ from a Hot Chips franchise, this is what the homemade version is. You might think of bitter gourd and jump to health food; but as we’re going to remove some of the bitterness and then deep-fry it, there’s really nothing healthy about this. Does it matter? Nope!
Ingredients
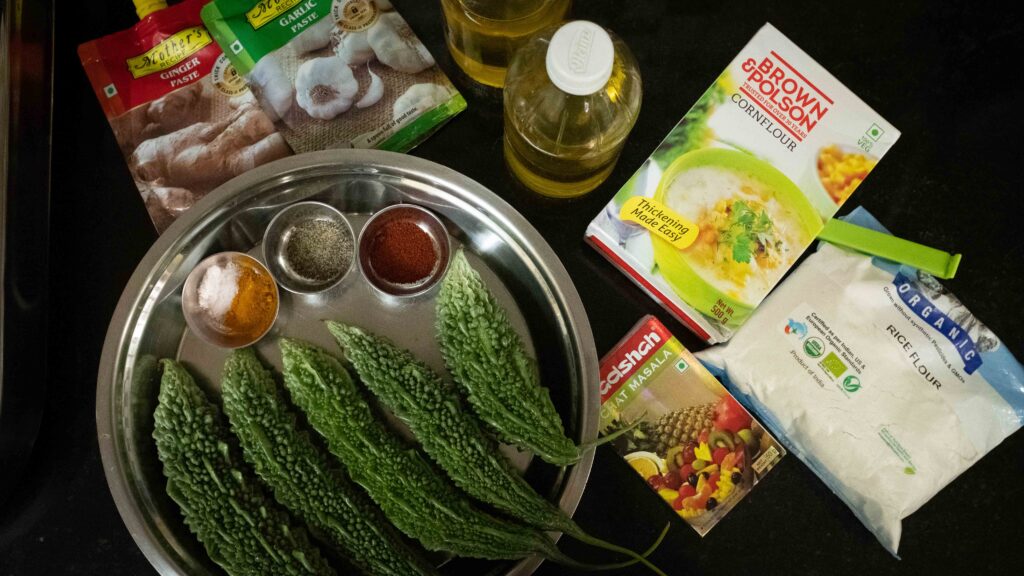
1. 500 gm bitter gourd (4-5 large bitter gourds)
2. 2 tsp salt
3. 2 litres canola oil or unflavoured vegetable oil for frying
for the batter:
4. 60 gm (8 tbsp.) corn flour
5. 80 gm (8 tbsp) rice flour
6. 2 tsp Kashmiri red chilli powder
7. 1 tsp turmeric powder
8. 1 tsp black pepper powder
9. ½ tsp salt
10. 1 tsp ginger paste
11. 1 tsp garlic paste
12. Optional; red food colouring
13. 150 ml (10 tbsp). plain water
for sprinkling:
14. 1 tsp chaat masala like this
15. Extra salt if desired
I find the Hot Chips Karela chips way too spicy, so I have used very little red chilli powder, and that too a very mild variety. Add as much red chilli powder as you like! Chaat masala has no Western equivalent. Available in South Asian stores, it is a tangy spice blend that contains a mixture of dry mango powder, black salt, cumin, coriander, black pepper, ginger, mint, bishop’s weed, and asafoetida (among others). It has a lot of complex flavours going on and there’s really no substitute for it, so do try and get your hands on it.
Prep
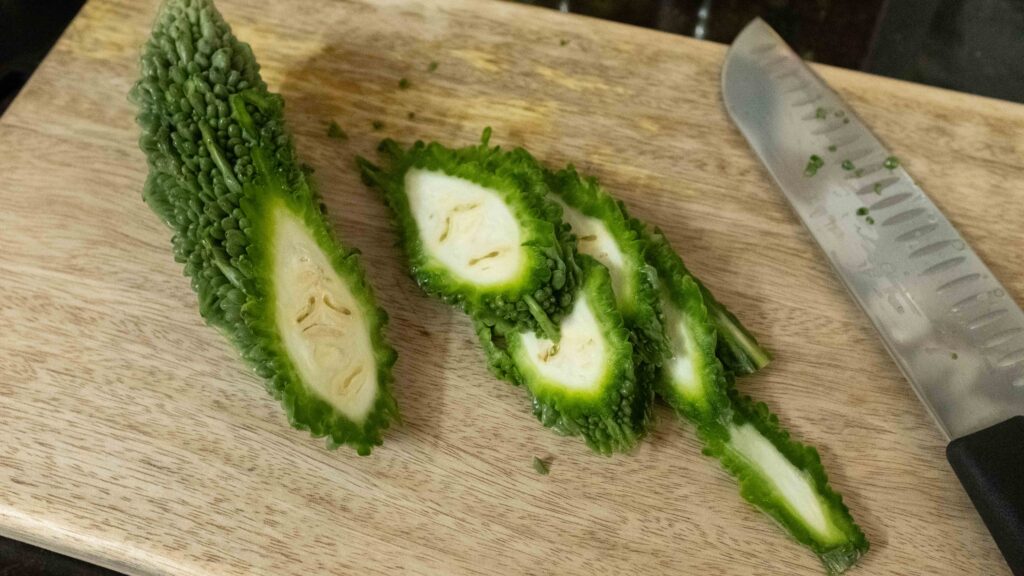
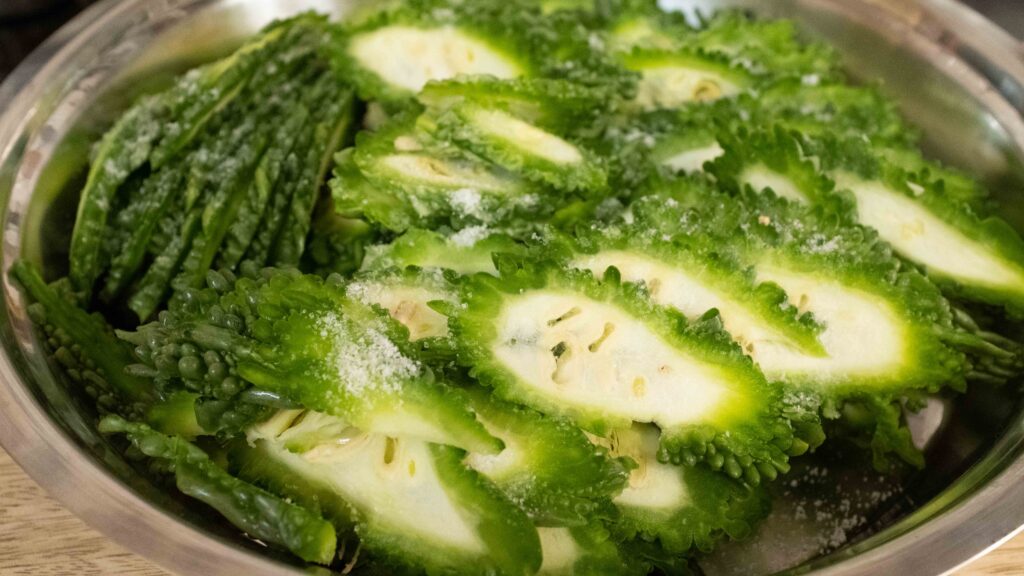
1 – Cut the bitter gourd into 2 mm slices, on the dais. Then sprinkle 2 teaspoons of salt on the slices and toss. Leave to macerate for 30 mins. This will draw out any excess moisture as well as well as some of the bitterness.
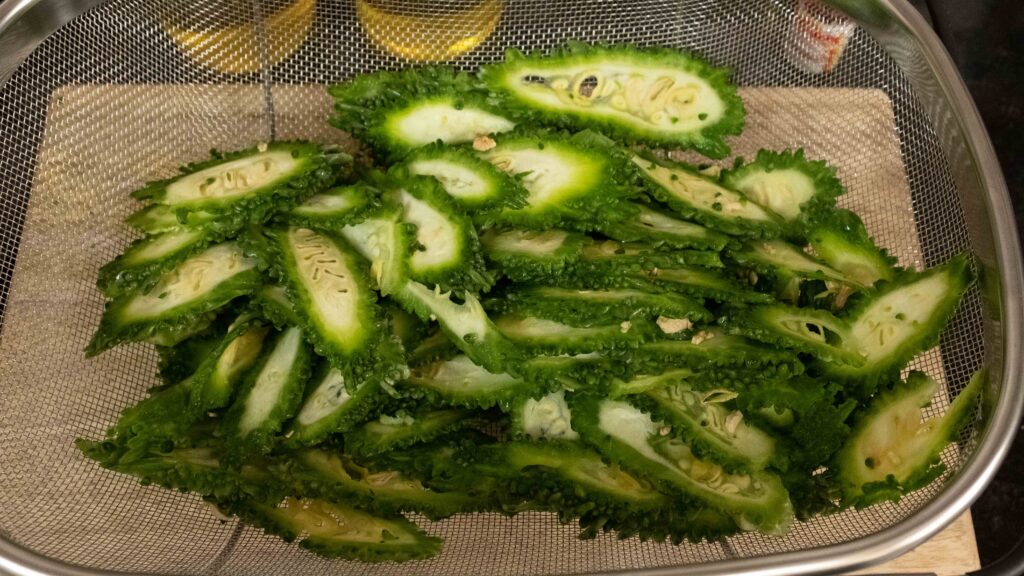
2 – After 30 minutes, place the slices in a colander or strainer and shake off as much moisture as you can. Set aside.
Method
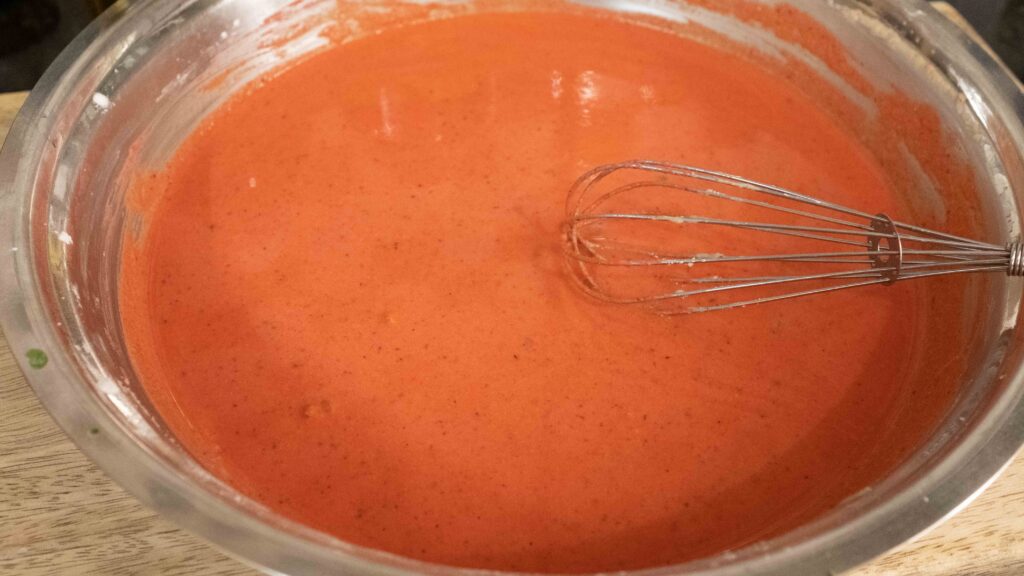
1 – Add the corn flour, rice flour, red chilli powder, turmeric powder, black pepper powder, and ginger-garlic paste to a large bowl. Whisk together with 5 tablespoons of plain water or until you have a thick batter that coats the back of a spoon. Add food colouring if desired. I added 10 drops of tomato red food colouring to make it look like store-bought hot chips.
2 – In the meantime, heat 2 litres of oil in a deep frying pan on medium, until the temperature of the oil is 175OC.
3 – While your oil is heating up, add the bitter gourd slices to the batter in batches and toss. Leave aside for 5 minutes. Don’t add all the slices to the batter at once, as they will sweat in the batter, causing it to become watery.
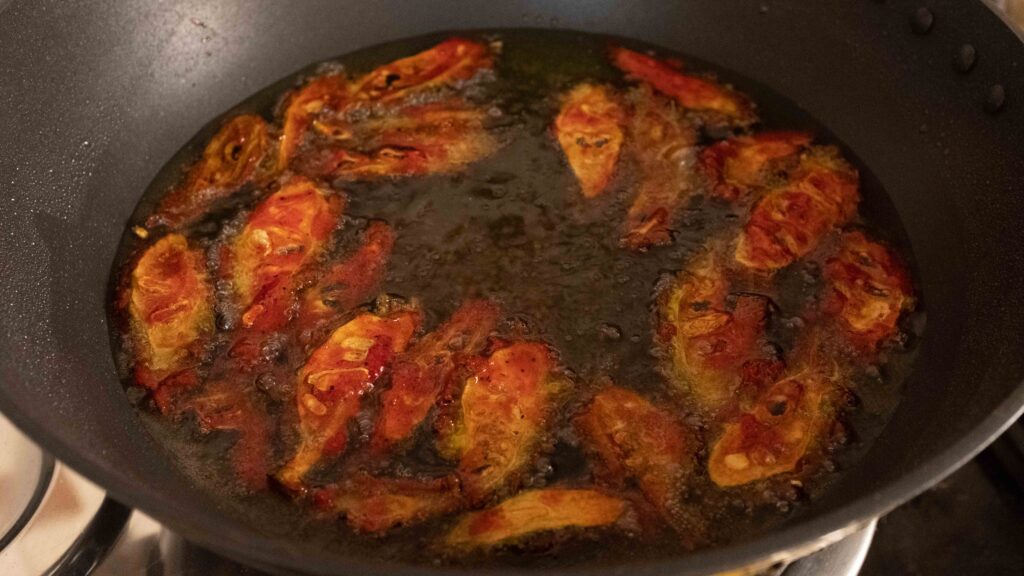
4 – Once the oil is at 175OC, add the first batch of the bitter gourd slices to the hot oil and immediately lower the heat to minimum. Fry on low heat for about 30 minutes. As the chips get crispy, they will rise to the surface of the oil. Continue frying until the chips are crispy and you can hear a knocking sound when you tap on them with a slotted spoon. At this point, raise the heat to medium and fry for an additional 4-5 minutes or until dark reddish-brown and ultra-crispy.
5 – Transfer the chips from the hot oil to a wire rack with some paper towels placed underneath it. While the chips are hot, season with chaat masala and extra salt if desired.
6 – Repeat steps 3-5 until you run out of bitter gourd slices.
7 – Serve the bitter gourd chips along with your hot khichuri and tomato chutney. I also like to serve some papad on the side, followed by mishti doi, bhog’er payesh and ice-cream sondesh for dessert.
8 – When serving, top each plate of khichuri with a teaspoon of melted ghee. If you don’t have tomato chutney, drizzle some honey onto the khichuri. Now eat!
After cooling the bitter gourd chips fully, stored them in an airtight container for up to 15 days (if they last that long). Because these take a while to make, I like to make them well in advance and keep them on hand for meals. If they lose some of their crunch, simply spread them out on a plate and microwave them for 30 seconds at a time until they’re crispy again.