


Makes a three-tiered 6 inch layered cake.
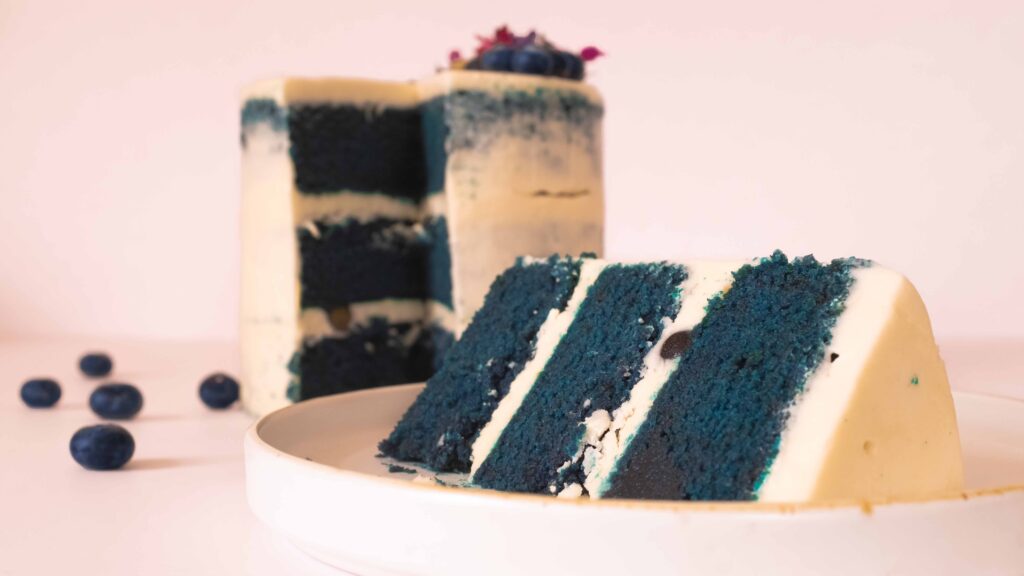
You’ve heard of Red Velvet. She’s passionate and all the rage at parties. This is her introvert cool blue friend from another trend. Just like his more outgoing ruby peer; he too carries a buttermilk moistened crumb and background notes of cocoa. He too is sweet, he too is tender, he too is deep. Because behind his stoic exterior lies an entire spectrum of blue hues. Paired with a buttery cream cheese frosting and freshened with blueberries and lemon zest, nothing about him will give you the blues.
At a glance
– This recipe comprises blue velvet cake + cream cheese frosting
– You will need three 6 inch cake pans, parchment paper, and some large piping bags.
– This recipe has been broken into 3 stages for ease and comprehension. Please read the entire recipe from start to finish before beginning.
Stage 1: blue velvet cake
Ingredients
1. 260 gm cake flour (or 225gm all purpose flour + 35 gm corn flour)
2. 1 tbsp. natural unsweetened cocoa powder
3. 3/4th tsp baking soda
4. Pinch of salt
5. 90 gm unsalted butter at room temperature
6. 300 gm white granulated sugar
7. 180 ml oil
8. 3 large eggs (171gm) at room temperature
9. 2 ½ tsp vanilla extract
10. 3/4th tsp white distilled vinegar
11. 180 ml buttermilk (or 3/4th tbsp. lime juice + 175ml milk) at room temperature
12. Blue gel food paste or colouring
Cake flour has a lower protein content than all-purpose flour. This makes for a more tender cake crumb. However, sometimes it’s hard to procure, which means adapting and making your own cake flour substitute. Whenever you make homemade cake flour – measure out 1 cup of all purpose flour, and then remove 2 tablespoons. Then, add 2 tablespoons of corn flour to the all purpose flour. Sift them together three times. This is your cake flour substitute. It’s not quite the same as store bought cake flour, but it does give a lighter, more tender crumb than if you were to use all-purpose flour only. Cultured buttermilk is another ingredient that’s often hard to procure. Luckily, soured milk can work as a substitute. To make your own “buttermilk” – put 1 tablespoon of fresh lime juice or white vinegar into a liquid measuring cup with volumetric markings. Thereafter, top the cup up with whole milk till you reach the 240 ml mark. Stir gently and set it aside for 5-10 minutes to thicken. It’s then ready to use. In baked goods, this buttermilk substitute adds sourness and moistness like cultured buttermilk, although it lacks the same ‘yoghurt’ like taste.
Prep
1 – In a large bowl, combine the flour, baking soda, cocoa powder, and salt. Sift them together and keep aside. This is your dry mixture.
2 – Separate your egg yolks from your egg whites. Place the egg yolks in a small bowl and the egg whites in a medium bowl. Keep aside.
3 – Grease and line three 6 inch cake pans. Remember to grease the parchment paper as well.
Method
1 – Start preheating your oven at 175OC.
2 – Place the butter and sugar in a large bowl. Using a handheld mixer, cream the butter and sugar together on high speed for roughly one minute.
3 – Add in the egg yolks, the oil, the vanilla extract and the vinegar and beat everything together on high speed for roughly 2 minutes. Remember to periodically scrape down the sides of the bowl to ensure that everything is being mixed properly.
4 – Turn your mixer down to the lowest speed and add the dry ingredients in thirds, alternating with the buttermilk. Beat together until just combined (you should see no floury pockets or liquidy pools). Take care not to over-mix the flour, or you’ll end up with a dense, stodgy crumb.
5 – Add the blue gel food colouring and beat it in until combined. I used 1 teaspoon of Papilon Blue Gel Food Colour + 1/4th teaspoon of Papilon Raspberry Gel Food Colour to achieve the shade that I wanted. Keep this batter aside for a moment.
6 – In a separate bowl, whisk the 3 egg whites on high speed for about 3-5 minutes or until you achieve soft, fluffy peaks.
7 – Using a large metal spoon, gently fold the whipped egg whites into the blue cake batter.
8 – Divide the batter evenly among your three cake pans and place them inside your preheated oven.
9 – Bake your cakes for 25-30 minutes at 175OC. For perfectly even heating, you may need to rotate your pans at the 15 minute mark. Be sure to check for doneness at the 25 minute mark; that is, if a bamboo skewer inserted in the middle of your cakes comes out clean, they’re done.
10 – Remove the pans from the oven and cool them on a wire rack. Don’t remove the cakes from their pans until they are cool enough to handle, else you risk breaking them. Once no longer warm, wrap your cakes with cling wrap to keep them from drying out. Store them in an airtight container while you move on to Stage 2. If you don’t plan on assembling your cake immediately, wrap the cakes individually in cling wrap and store them in an airtight container in the fridge. They can be trimmed, layered, and frosted straight out of the fridge.
Always strive for even heating with cakes. My oven has both top and bottom heating sources, so I always place my cakes on the middle rack, unless a recipe specifies otherwise. If you’re serious about baking, get to know your oven, and all its “hotspots”. This is essential to evenly cooked baked goods. If your cakes tend to rise unevenly, or get cracks, or dome rapidly and then sink, their spot in the oven is too hot. To compensate for these irregularities, you’ll need to lower the temperature and/or move your pan around during the baking process. Keep in mind, if your oven has a convection mode, avoid using it for cakes if you can. Although it may speed up your overall bake-time, it will also dry out your sponge, and you definitely don’t want that.
Stage 2: Cream cheese frosting
Ingredients
1. 227 gm full fat cream cheese (not cream cheese spread or the whipped stuff) at room temperature
2. 100 gm unsalted butter at room temperature
3. 60 gm vegetable shortening
4. 900 gm icing sugar + 50 gm extra if needed
5. 2 tsp pure vanilla extract
6. 1 tsp freshly squeezed lemon juice
7. 1/4th tsp salt
The quantities mentioned here will generously fill, crumb-coat, and fully cover this cake. For the semi-naked frosting look that I executed for this cake, you will need to reduce all quantities by one-fourth. Else, you could make the entire amount and freeze the leftover frosting.
Prep
1 – Cut your cream cheese into 1 inch cubes. Set it aside until it has softened to room temperature.
2 – Bring your butter to room temperature. It should be firm but soft to the touch (and not melted).
3 – Sift your icing sugar. Set it aside.
Method
1 – Place the butter and vegetable shortening in a large bowl. Using a hand held mixer, beat them together for 2-3 minutes on medium speed until very smooth and creamy.
2 – Add in the cut up cream cheese. Beat the mixture once again, until you achieve a fluffy consistency, approximately 1-2 minutes.
3 – Add in the icing sugar, 1/4th cup at a time, beating on low speed for 30 seconds with each addition. Repeat until all the icing sugar has been incorporated and is combined.
4 – Add in the vanilla, lime juice, and salt. Once again, beat everything on low speed for 30 seconds.
5 – Thereafter, raise your mixer to the highest speed and beat the mixture for 10-15 whole minutes. If you have incorporated too much air into your frosting, use a rubber spatula or a wooden spoon to ‘mash’ the frosting against the sides of the bowl for a couple of minutes. This will push out any air bubbles.
6 – Cover your bowl with cling wrap and refrigerate your frosting for 1-2 hours before you move on to Stage 3.
Fair warning, owing to the amount of sugar as well as the addition of butter+shortening, this is a fairly sweet frosting with only a mild cream cheese taste. Feel free to use any other frosting you like. Any sort of chocolate ganache would be amazing, but cream cheese is traditionally paired with red/blue velvet. I chose to go with a crusting cream cheese frosting, rather than an all cream cheese frosting so that it would hold up well, even in fairly warm weather. In cold weather, you can replace all of the shortening with butter. However, in warm weather, your frosting will require shortening for added stability. Yes, there’s a tonne of sugar, but cream cheese is notoriously hard to stabilise (especially in India), so this amount or more is necessary to prevent your cakes from destabilising due to a runny filling. The good thing is, we’re not going to be adding a tonne of frosting, as this is a semi-naked cake! If your frosting is too loose, keep adding icing sugar, a little at a time until you achieve the desired consistency. If it becomes too thick, add a small splash of room temperature milk or cream. This frosting can be made up to 3 months in advance and stored in the freezer, or up to 5 days in advance and stored in an airtight container in the fridge. Before using chilled frosting, take it out of the fridge and rest it on your counter for 10-15 minutes. If you’re using frozen frosting, thaw it in the fridge first. If it looks a little seized up, re-beat the frosting for a few seconds so that it’s light, airy, and creamy again.
Stage 3: Finale; cake construction & assembly
Components
1. Three 6 inch blue velvet cakes
2. Chilled cream cheese frosting
3. Fresh blueberries
4. Edible flowers
5. ½ tsp fresh lemon zest
Prep
1 – Trim the sides and tops of your cake as necessary.
2 – Ready your decorating surface. A cake turntable with a cake board is ideal for this. Place the board in the centre of your turntable.
3 – Fill 2-3 piping bags with frosting for quick application. Snip the tips about 1 cm wide.
4 – Keep these handy: a large serrated knife, a straight palette knife, an off-set spatula, a cake scraper, and a medium bowl.
Method
1– Spread a small dollop of frosting on the centre of your cake board. This will be the glue that holds the first cake layer in place.
2 – Place your first cake on the frosting, base side down.
3 – Going in a circle from the inside out, pipe a thick layer of frosting onto the first cake’s top surface. Sprinkle half the lemon zest onto the frosting and nestle 5-6 fresh blueberries on top.
4 – Place your second cake atop the frosting, base side down. Lightly press down to secure.
5 – Once again, going in a circle from the inside out, pipe a thick layer of frosting onto the second cake’s top surface. Sprinkle the rest of the lemon zest onto the frosting and nestle 5-6 fresh blueberries on top.
6 – Place the third and final cake atop the frosting, top side down. Lightly press down to secure. Then, going in a circle from the inside out, pipe a thick layer of frosting, right on top of the cake.
7 – Rotate your cake turntable to check that all three layers are aligned around the entire circumference of the cake. If they’re not, carefully trim off any bits that are sticking out.
8 – It’s time to frost the sides of the cake. While rotating your turntable, pipe frosting all around the cake, starting at the base, and moving upwards.
9 – Use a bench scraper to remove the extra frosting from the sides of the cake. Place this extra frosting in a fresh bowl. Since this is a semi-naked cake, we’re aiming for a thin coat. You should scrape enough off to be able to just see the cake’s sides through the frosting, creating an almost translucent coating. The scraped-off icing can be saved and used for another project (like cake pops) as it’s likely to be mottled with blue crumbs.
10 – Use the offset spatula to flatten and neaten the frosting on the cake’s top. Need help? See how to achieve the semi-naked cake look here.
11 – Place your cake in the fridge for 60-90 minutes to set the frosting.
12 – After it has chilled and set, take it out of the fridge. Top your cake with fresh blueberries and edible flowers, or whatever decorations you fancy. Marvel at your glorious creation!
13 – Slice and serve with a handful of fresh blueberries. Now eat!
If you don’t have a turntable you can use a regular platter, but it will take a lot more manoeuvring to decorate your cake. Fully constructed, this cake will hold up relatively well at room temperature, although any sort of cream cheese or buttercream frosting is always a gamble on a hot and humid day. For best results, cut yourself a slice whenever you get a craving and store the rest of the cake, covered, in the fridge. This is a tall cake, so cutting a clean slice can be a bit challenging. I find that a sharp chef’s knife is the best tool for the job and cutting a slice is easiest when the cake is a bit cold.
Tips & Tricks
How to line a round cake pan
How to trim cakes for even layers