


Makes 12 standard-sized cupcakes.
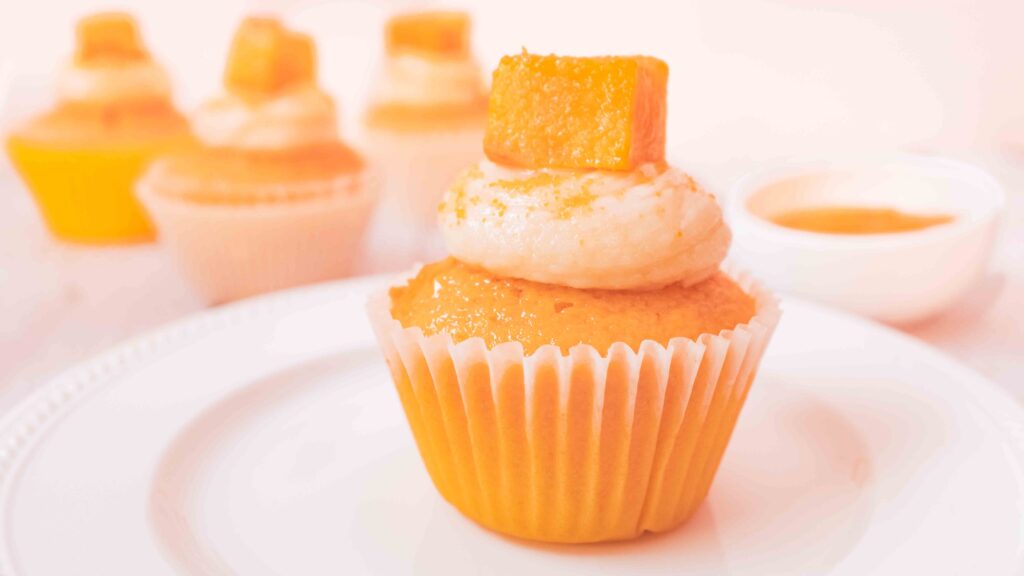
If you grew up in India, you may have squandered all your lunch money on Mango Duet or Mango Zap creamsicles. Vanilla ice cream coated with frozen mango pulp? Yes please! That’s what this dessert tastes like, only better! We baked 48 cupcakes before we were finally happy with the recipe! The results of our manic testing is a moist-for-days mango flavoured sponge, filled with fruity-fresh mango coulis, and topped with a melt in your mouth vanilla mascarpone frosting. All of it comes together, in a cool mouthful of what can only be described as mmmm mmmm mmmm!
At a glance
– This recipe comprises vanilla & mango cupcakes + mango coulis + mascarpone frosting + fresh mangoes.
– You will need standard cupcake liners, a standard 12-cup cupcake pan, (or individual moulds) and some piping bags.
– This recipe has been broken into 4 stages for ease and comprehension. Please read the entire recipe from start to finish before beginning.
Stage 1: vanilla & mango cupcakes
Ingredients
For the dry mixture:
1. 200 gm cake flour (or 165 gm all purpose flour + 35 gm corn flour)
2. 1 tsp baking powder
3. 1/4 tsp baking soda
4. 1/8 tsp salt
For the wet mixture:
5. 180 ml milk at room temperature
6. 80 gm sour cream or unflavoured yoghurt
7. 3/4 tbsp. pure vanilla extract
8. 1/2 tsp mango flavour like this
9. 4-5 drops orange-yellow gel food paste or colour like this
For creaming:
10. 50 gm unsalted butter, melted and cooled
11. 60 ml neutral flavoured oil
12. 200 gm white castor sugar
13. 2 large eggs (57 gm per egg, in-shell weight) at room temperature
Cake flour has a lower protein content than all-purpose flour. This makes for a more tender cake crumb. However, sometimes it’s hard to procure, which means adapting and making your own cake flour substitute. Whenever you make homemade cake flour – measure out 1 cup of all purpose flour, and then remove 2 tablespoons. Then, add 2 tablespoons of corn flour to the all purpose flour. Sift them together three times. This is your cake flour substitute. It’s not quite the same as store bought cake flour, but it does give a lighter, more tender crumb than if you were to use all-purpose flour only.
Prep
1 – In a medium bowl, sift in all the dry ingredients and give them a very good whisk to aerate. Set aside.
2 – Add all your wet ingredients to a jug. Give them a thorough stir to combine. Set aside.
3 – Melt your butter over low heat and then bring it to room temperature.
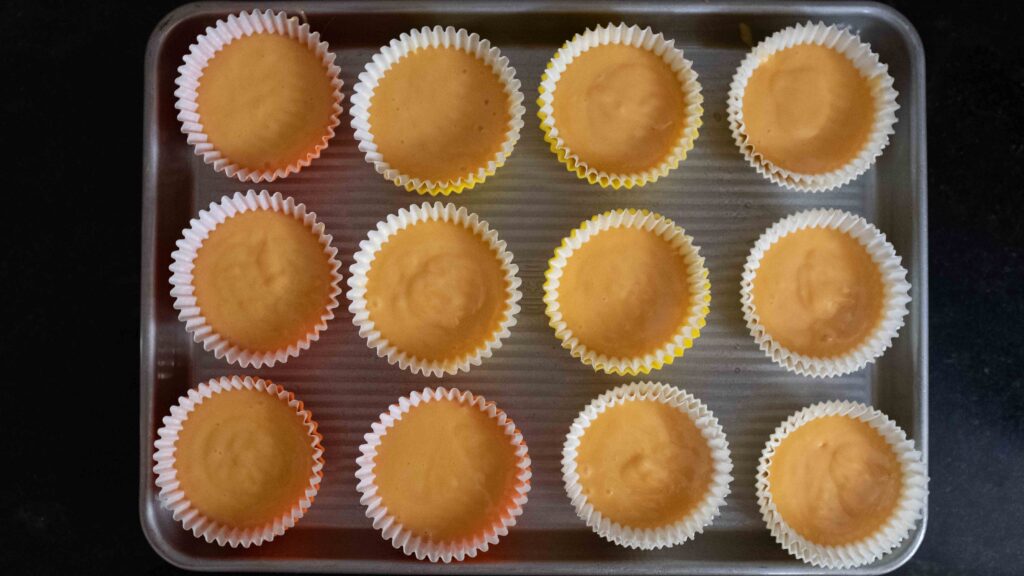
4 – Line your cupcake pan or individual moulds with cupcake liners.
Method
1 – Start preheating your oven at 175OC.
2 – Place the melted butter, the oil, and the sugar in a large bowl. Using a handheld mixer, cream the fats and sugar together on high speed for 1-2 minutes or until pale and creamy.
3 – Add the eggs and beat everything together on high speed for roughly 1-2 minutes or until fluffy. Remember to periodically scrape down the sides of the bowl to ensure that everything is being mixed properly.
4 – Turn your mixer down to the lowest speed and add the dry mixture in thirds, alternating with the wet mixture. Beat together until just combined (you should see no floury pockets or liquidy pools). Take care not to over-mix the batter, or you’ll end up with dense, stodgy cupcakes.
5 – Spoon the batter evenly into your 12 cupcake liners. Fill each only two-thirds full (roughly 3 tablespoons of batter per cupcake liner).
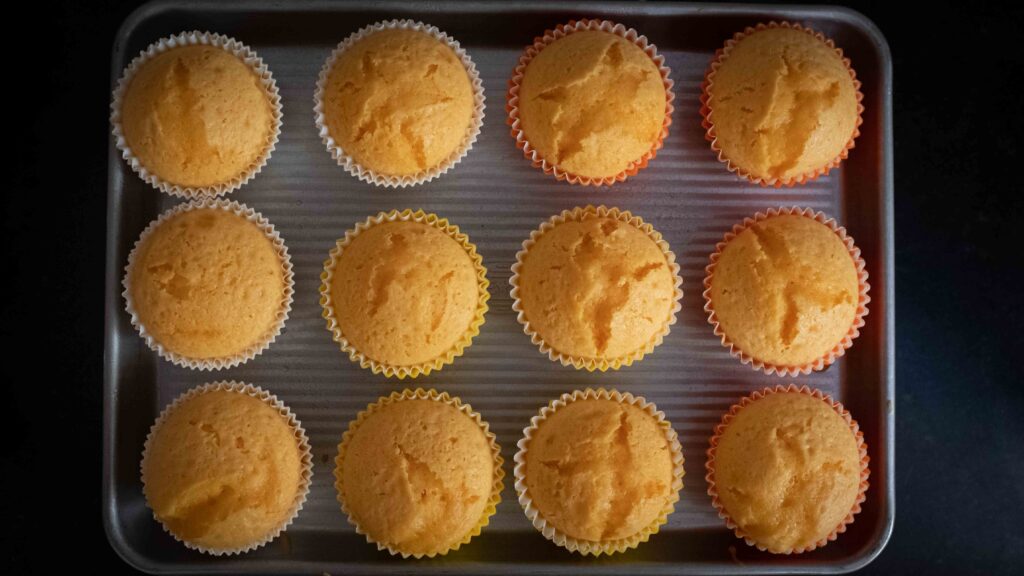
6 – Bake for 18-22 minutes at 175 OC. For perfectly even heating, rotate your pan at the 10 minute mark. Be sure to check for doneness at the 18 minute mark; that is, if a bamboo skewer inserted in the middle of a cupcake comes out clean, they’re done. Mine took exactly 22 minutes.
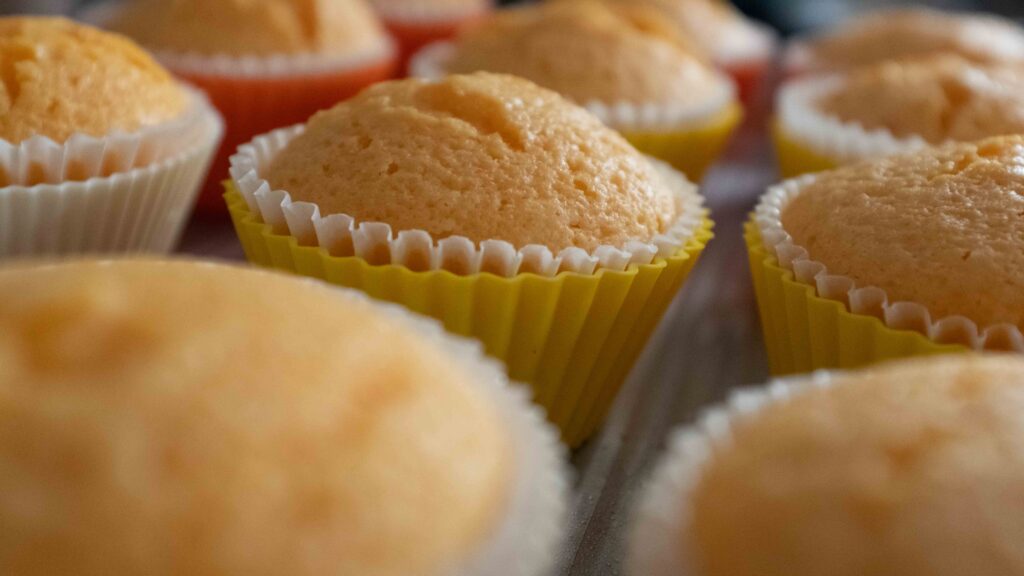
7 – Remove the pan from the oven and cool it on a wire rack. Don’t remove the cupcakes from the pan till they come to room temperature. Thereafter, your cupcakes are ready for the next stage. Store them in an airtight container while you move on to Stage 2.

These cupcakes are so moist and tender, it’s kind of ridiculous. You’ll want to eat them immediately, straight out of the oven, but please resist! If you don’t plan on filling and frosting your cupcakes immediately, keep them in an airtight container in the fridge. They will stay fresh(ish) for 3 days, although you will lose some moistness. Bring them back to room temperature before proceeding with any of the other stages. Always strive for even heating with cakes. My oven has both top and bottom heating sources, so I always place my cakes on the middle rack, unless a recipe specifies otherwise. If you’re serious about baking, get to know your oven, and all its “hotspots”. This is essential to evenly cooked baked goods. If just a few of your cupcakes tend to rise unevenly, or get cracks, or dome rapidly and then sink, their spot in the oven is too hot. To compensate for these irregularities, you’ll need to lower the temperature and/or move your pan around during the baking process. Keep in mind, if your oven has a convection mode, avoid using it for cakes if you can. Although it may speed up your overall bake-time, it will also dry out your sponge, and you definitely don’t want that.
Stage 2: mango coulis
Ingredients
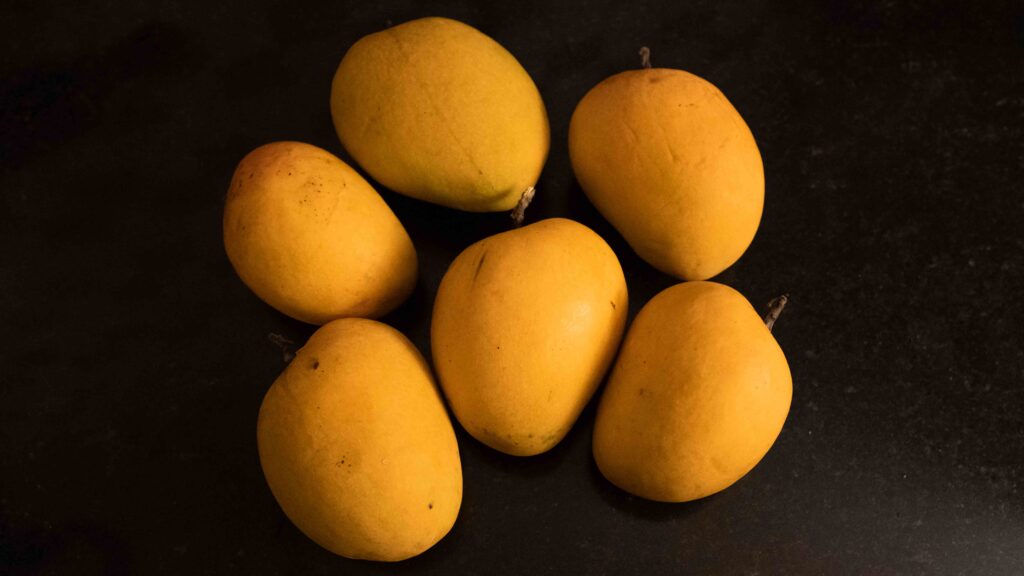
1. Enough ripe Ratnagiri/Devgad Alphonso mangoes to yield 120 gm mango pulp (I used 1 medium mango, weighing roughly 260 gm)
2. 1 ½ tsp. castor sugar
3. 1/4 tsp lemon juice (from 1/4 of a small lemon)
4. 1/8 tsp citric acid
5. 1/16 tsp salt
If the mango is the king of fruits, the Aphonso (aka Hapus) mango is arguably the king of mangoes. Further, the Ratnagiri Alphonso and Devgad Alphonso variants are the Kings of Alphonso! Grown on the West Coast of India, just north of Goa—these two varieties are available only from mid-April to late May. If you have the privilege, please try to source Alphonso mangoes only for this dessert. Why? Thin skin, small seed, non-fibrous, orange coloured flesh, firm but buttery texture, silky mouthfeel, sweet and juicy pulp, heady aroma, unmatched flavour. Phew! And while Himsagar and Langra mangoes can vie with the Alphonso for best-tasting mango, they’re not as suitable for desserts as the Alphonso. For best results, use ripe and fresh Alphonso mangoes. If you cannot source this variety locally, or they’re simply not in season when you’re making this cheesecake, I recommend using canned Alphonso like this over using any other variety. For the mango puree, wait till your mangoes are super ripe, as this will ensure maximum flavour and sweetness. When you press the fruit, it should be firm but have a little give (but not be squishy). It will also be super fragrant near the stem. Additionally, if you’re using Ratnagiri Alphonso mangoes, the skin will be juuuust a tad wrinkled. Once cut open, the flesh will be sunset yellow-orange and not pale yellow. I sourced 2 dozen fully ripe Ratnagiri Alphonso mangoes in mid-May and immediately made and froze a batch of puree to use for desserts. To freeze mango puree, mix 2 tablespoons of sugar per 250 gm puree and then freeze it. Frozen puree will keep for at least 6-9 months if stored correctly! Thaw the frozen puree inside its container and then bring it to room temperature before using it in the recipe. Once thawed, it should not be re-frozen. Store thawed puree in the fridge for up to a day. If using frozen puree, thaw it before making the coulis. Don’t leave out the citric acid. It really boosts the mango flavour as well as prevents the sugar from crystallising later.
Method
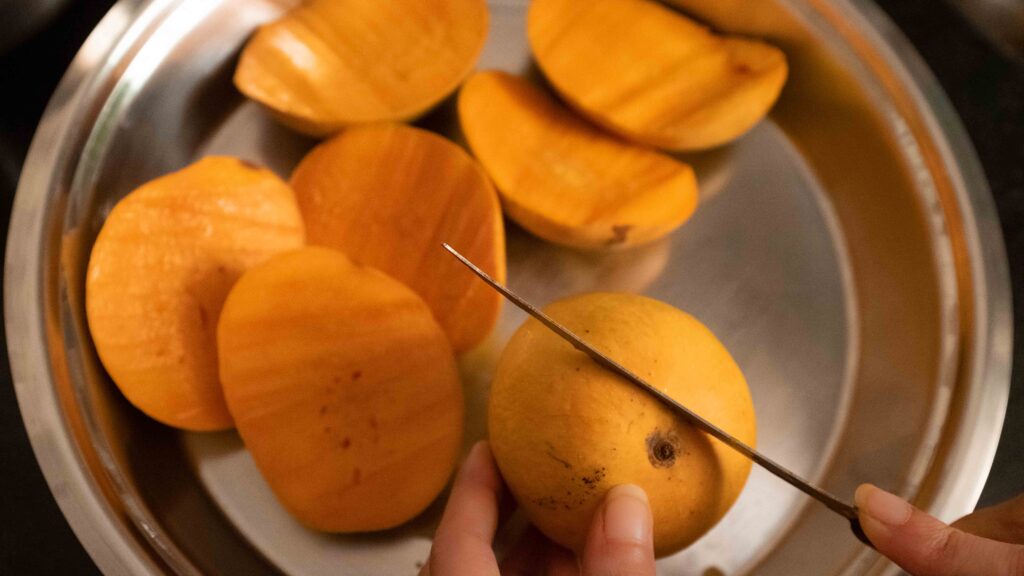
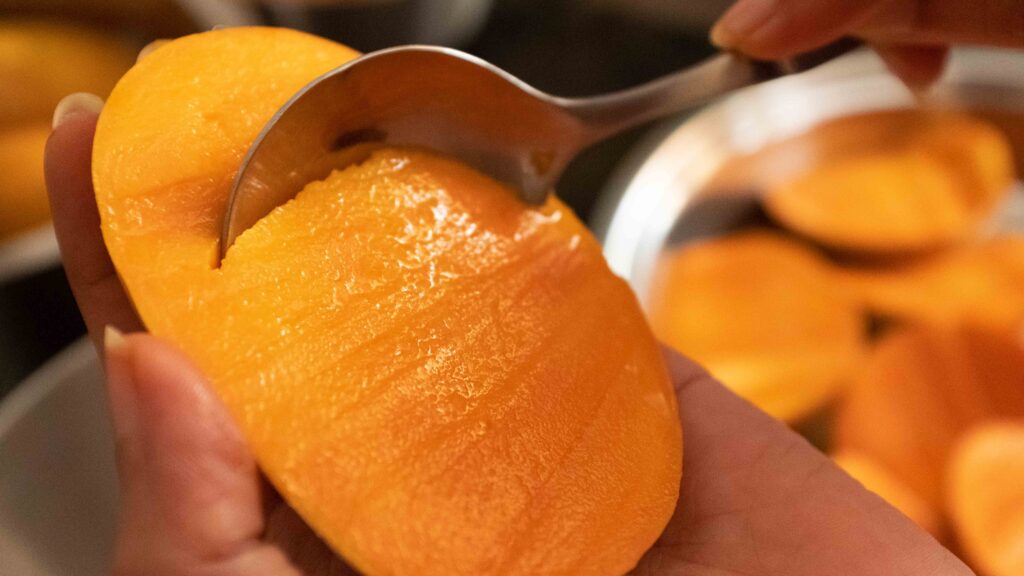
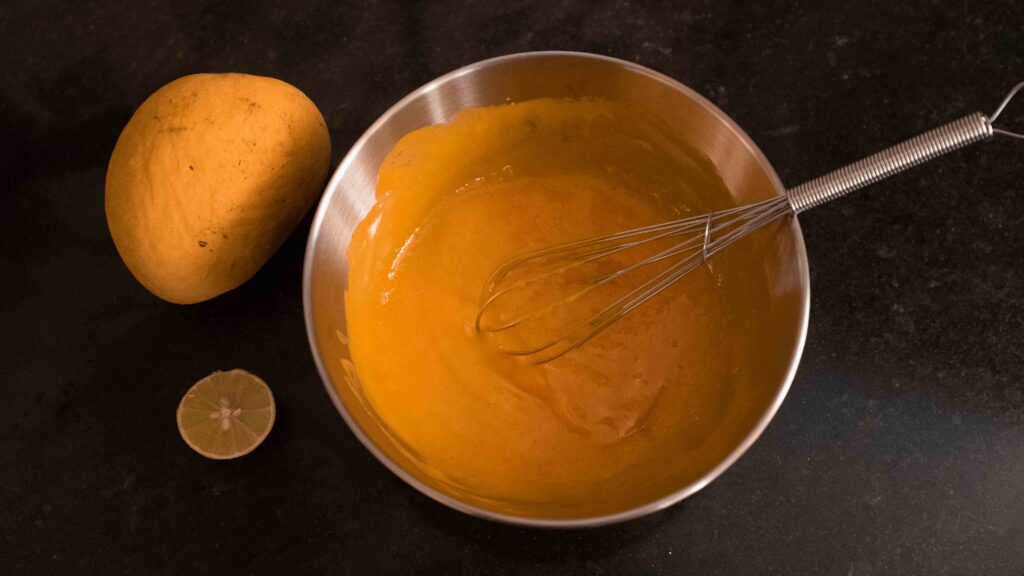
1 – Weigh out 120 gm thawed/canned mango puree or extract 120 gm mango pulp from your mangoes. I like to cut off the cheeks and then scoop out the flesh with a spoon. To remove the flesh from around the seed; peel off the skin, cut off the flesh around the seed, and then squish the seed along the grain. This method lets you extract all the pulp without pulling off the fibres attached to the seed.
2 – Place the mango pulp into the jar of a blender and puree until completely smooth.
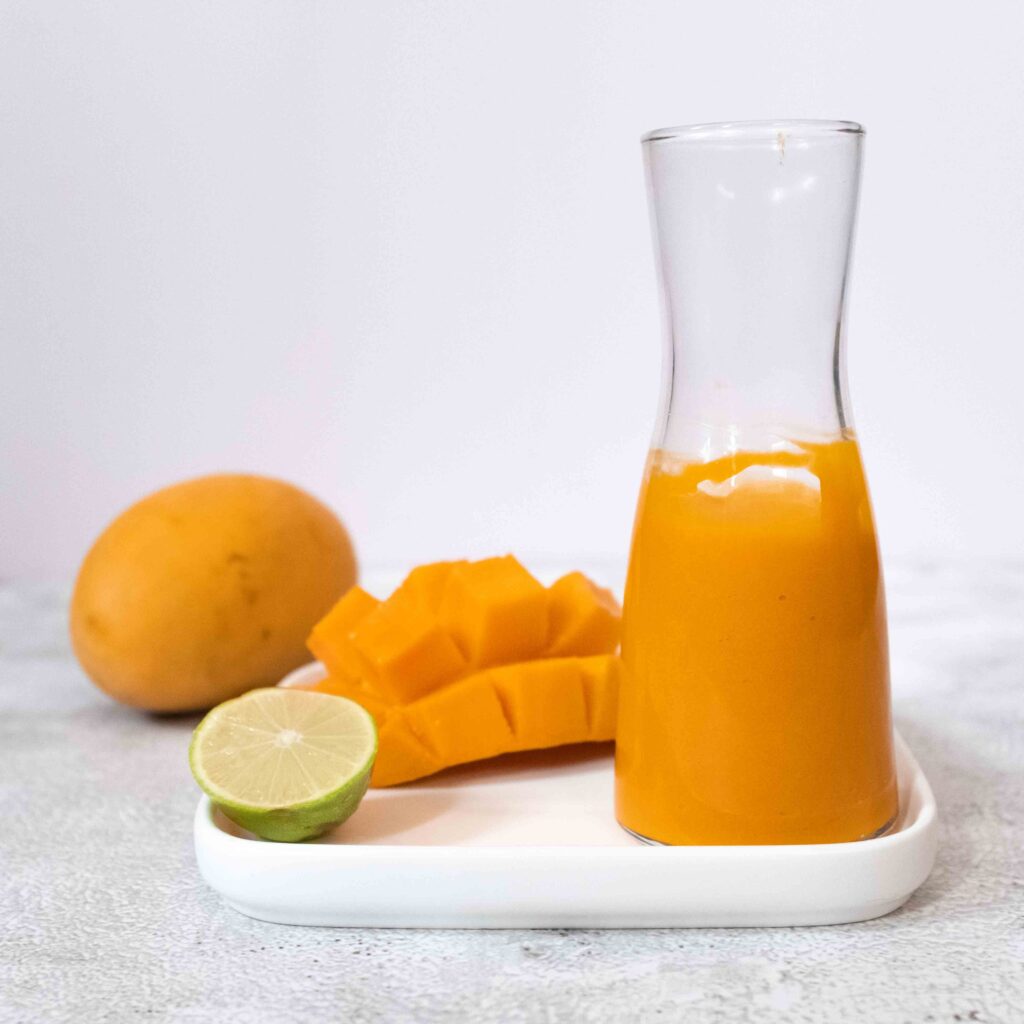
3 – Now place the mango puree in a medium bowl, add the rest of the ingredients listed, and whisk together until smooth and homogenous. That’s it! Taste and add more sugar and lemon juice if desired. You’re looking for a bright, fresh mango taste.
4 – Transfer the coulis to a sterilised airtight container and store it in the fridge until ready to use.
This super simple coulis is fresh and intensely mango-ey and amazing as a dessert topping. I make a batch when I want instant mango flavour in ice creams, yoghurts, and the like. The amounts mentioned here are just enough to fill 12-14 cupcakes. If you want leftovers or more to drizzle over your cupcakes, you can easily double or triple the recipe as needed. If you use fresh mango puree to make your coulis, you can store the coulis in the freezer for 6-9 months. If you use frozen mango puree for your coulis, it must be made and used up within a day or two and stored in the fridge (refreezing thawed products results in spoilage).
Stage 3: mascarpone frosting
Ingredients
1. 400 gm full fat mascarpone cheese, softened but still cool (16-18OC)
2. 80 gm confectioner’s sugar
3. 1/4 tsp salt
4. 1/4 tsp fresh lemon juice
5. 1/4 tsp clear mango flavour like this
6. 1 tsp pure vanilla extract
7. 2 tsp powdered freeze dried mango like this
Prep
1 – Bring your mascarpone cheese to temperature so that it creams to the correct consistency. Too cold and it will lead to a chunky frosting. Too warm and it will make for a soupy frosting! Mascarpone softens very quickly in warm weather. I take my mascarpone out of the fridge 10-15 minutes before using it so that it softens just a bit, but is still cool.
2 – Sift your confectioner’s sugar. Set it aside.
Method
1 – Place your softened mascarpone in a mixing bowl. Using a spatula or a wooden spoon, cream the mascarpone until it is smooth and homogenous.
2 – Add the confectioner’s sugar in ¼ increments and cream by hand with each addition, until fully incorporated and smooth.
3 – Now add the salt, the lemon juice, the mango flavour, and the vanilla extract, and continue creaming by hand until fully combined.
4 – Sprinkle the freeze dried mango powder onto the mascarpone and fold it into the mixture until you can see little yellow streaks in the frosting. Do not over mix or the whole frosting will be tinted yellow.
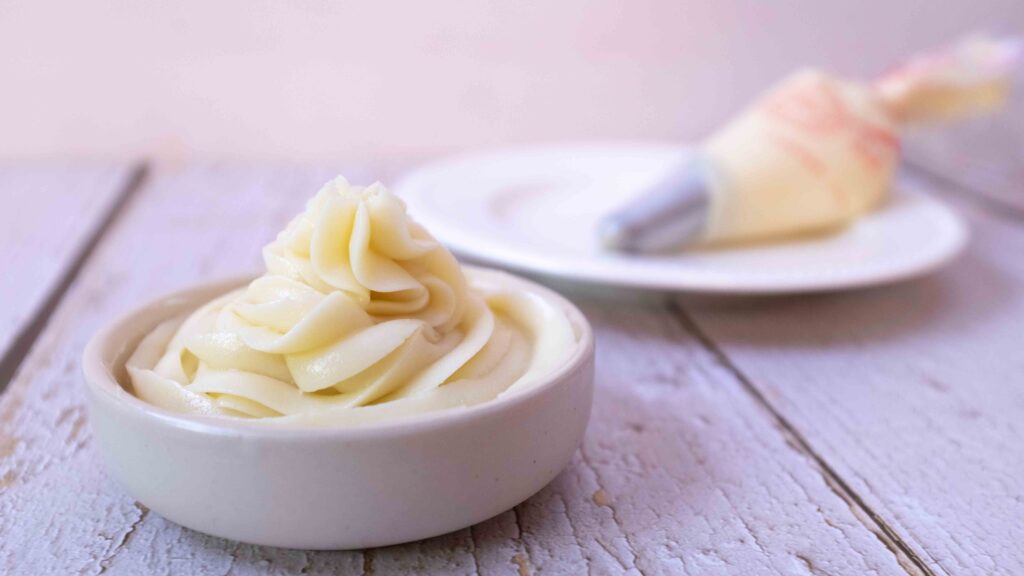
5 – Transfer the frosting to a piping bag and place it in the fridge for at least 15 minutes before using. Get ready to assemble your cupcakes in Stage 4.
This frosting tastes like a delicious, custardy vanilla ice cream! The quantities mentioned here yield 1 ½ cups of frosting which is more than enough to decorate 12-14 cupcakes. After it is piped or spread onto your cupcakes, it will hold its shape, but will soften significantly in warm weather. Keep frosted cupcakes in the fridge or somewhere cool for best results.
Stage 4: Finale; cupcake construction & assembly
Components
1. Vanilla & mango cupcakes
2. Mango coulis (chilled)
3. Mascarpone frosting (slightly chilled)
4. 1 medium ripe Alphonso mango
5. 1 tsp. powdered freeze dried mango like this
Special equipment
1. Apple corer/cupcake corer
Prep
1 – Cut the mango into 1 ½-2 cm cubes. Watch this video to see how. Set aside.
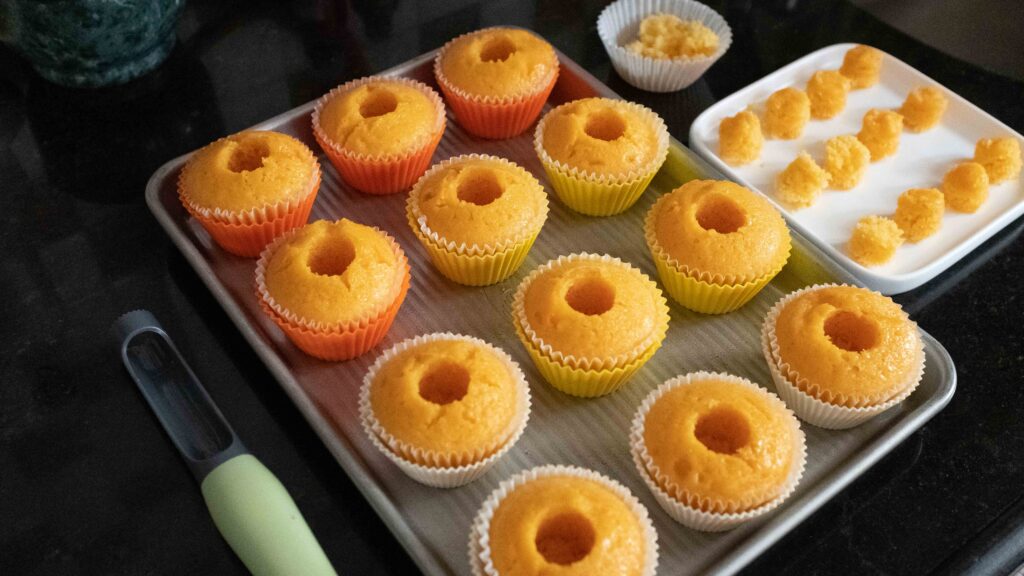
2 – Transfer your mango coulis to a small piping bag.
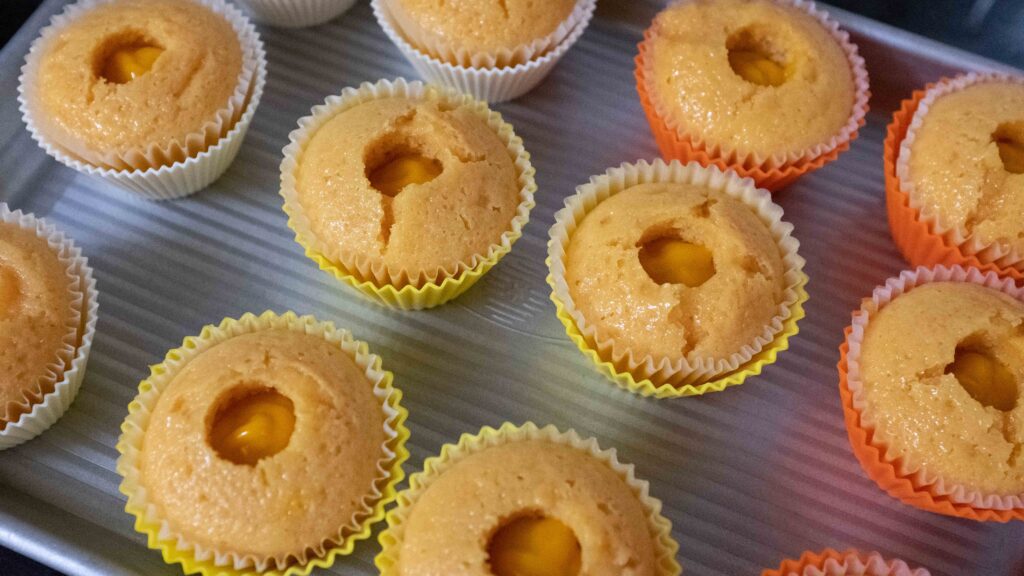
3 – Using an apple corer, go 2 ½ cm downwards into the cupcake and remove its core. Take care not to go in too deep. Repeat for all 12 cupcakes. Don’t discard the cored-out cylinders! They’ll come in handy in a bit.
Method
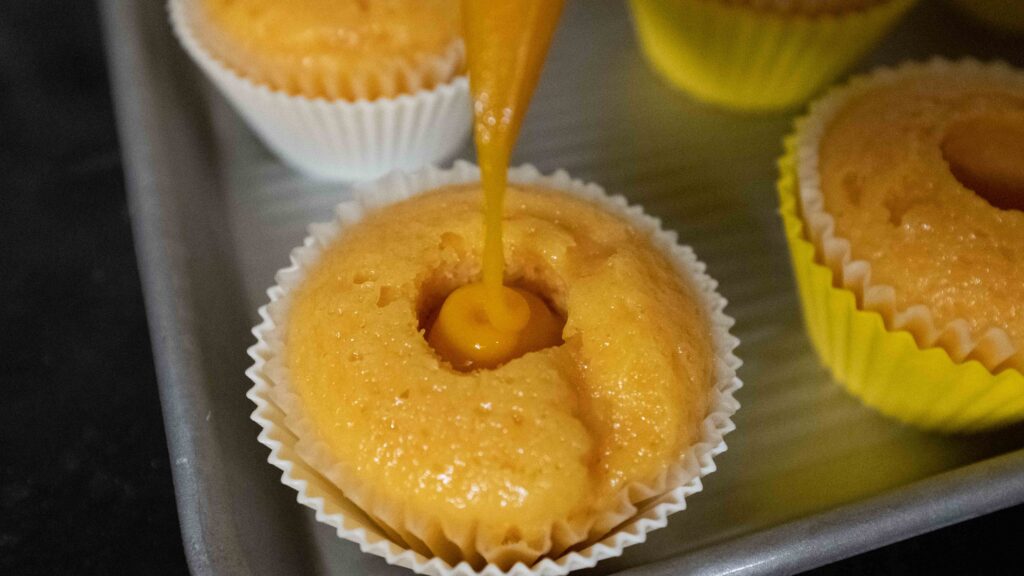
1 – Snip the tip of your mango coulis piping bag about ¼ cm wide. Squeeze about 1 teaspoon of mango coulis into each cupcake cavity, or until the filling comes up ¾ of the way to the top.
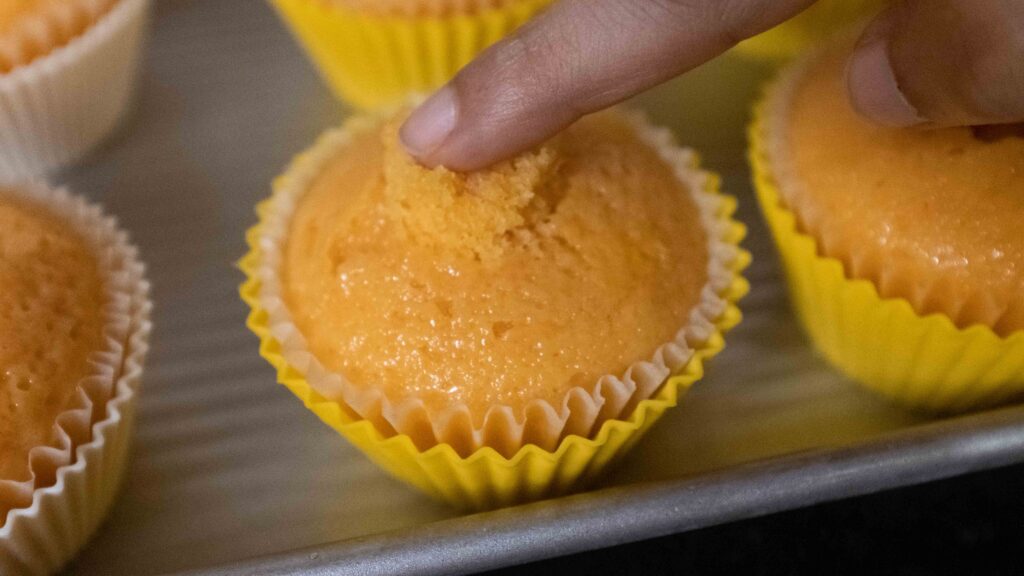
2 – Plug the cupcakes with the cored-out cylinders.
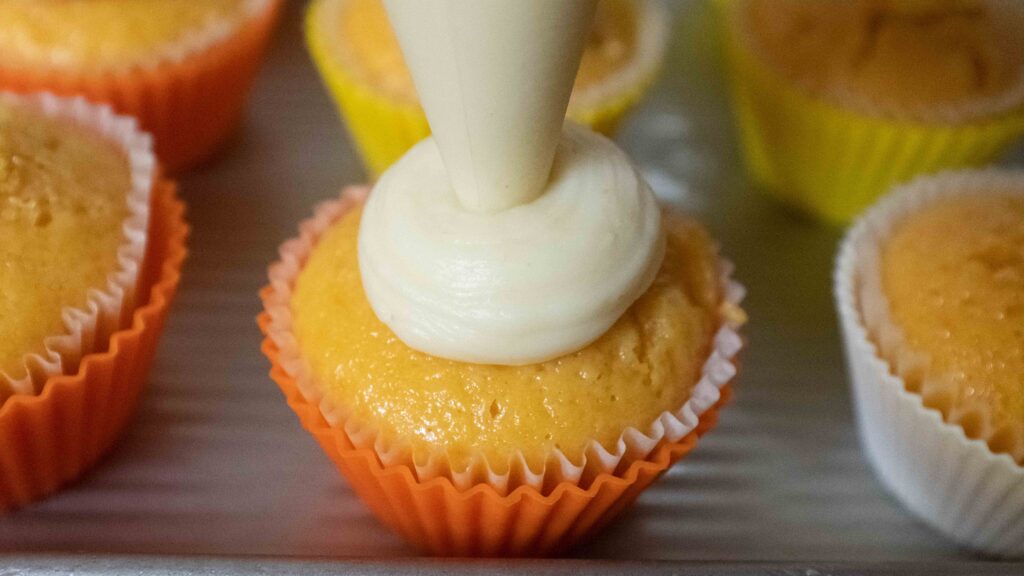
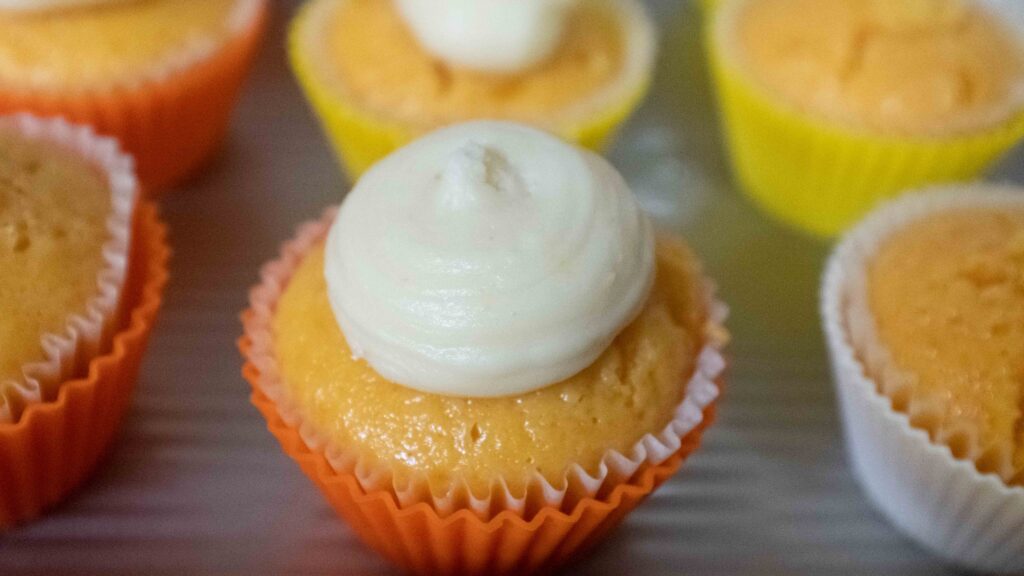
3 – Take your piping bag of mascarpone frosting out of the fridge and snip the tip about 1 ½ cm wide. Hold your piping bag perpendicular to the top of the cupcake with the tip suspended 1 cm above the cupcake. Keep the tip steady and squeeze frosting onto the cupcake. As the frosting spreads outwards and upwards, it will submerge a bit of the tip. Let this happen, don’t be tempted to lift the bag. Once you’re happy with the diameter of the frosting, slowly lift the piping bag to let the frosting dome get a little taller, then stop squeezing and lift up. Repeat for all 12 cupcakes.
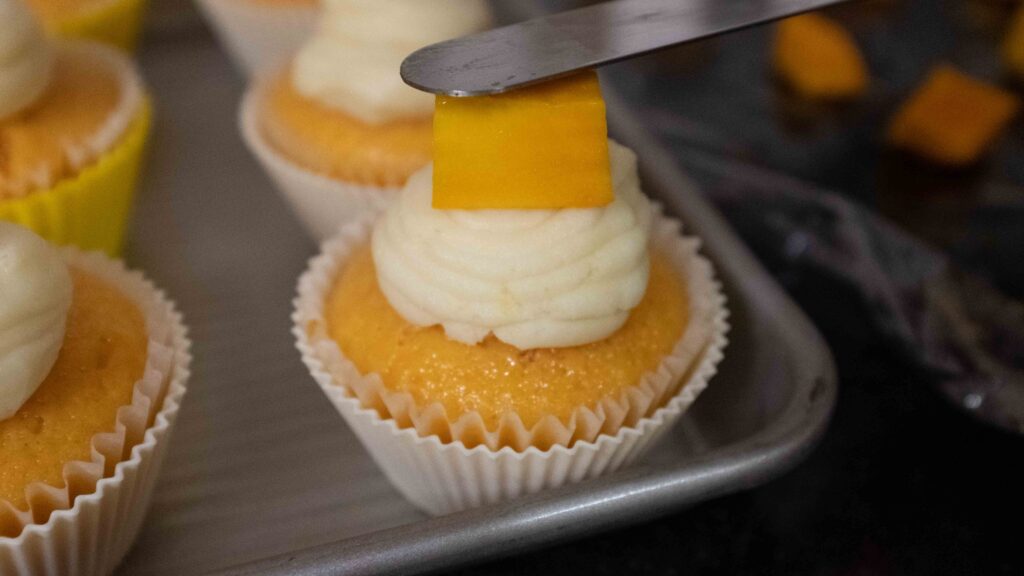
4 – Place a single cube of fresh mango on top of each frosted cupcake.
5 – Finally, sprinkle each cupcake with 2-3 pinches of freeze dried mango powder.
6 – Place your cupcakes in an airtight container and refrigerate for at least two hours before serving. This will allow the mascarpone to fully set (plus, it tastes better cold).
7 – Serve your chilled cupcakes with extra mango coulis and fresh mangoes on the side. Now eat!

Fully constructed, these don’t do well, sitting around for hours, either on your counter or inside the fridge. You don’t want the water content from the mango coulis and the mascarpone frosting to leech into the sponge and make it gloopy. Plus, fresh mango begins to oxidize and blacken when exposed to air. Be sure to core, fill, frost, and decorate only the cupcakes you’re going to eat immediately.
Tips & Tricks
How to core and fill a cupcake
How to pipe a simple dome of frosting
https://vib.by/v/7JORNuqri