


Makes a three-tiered 6 inch layered cake.
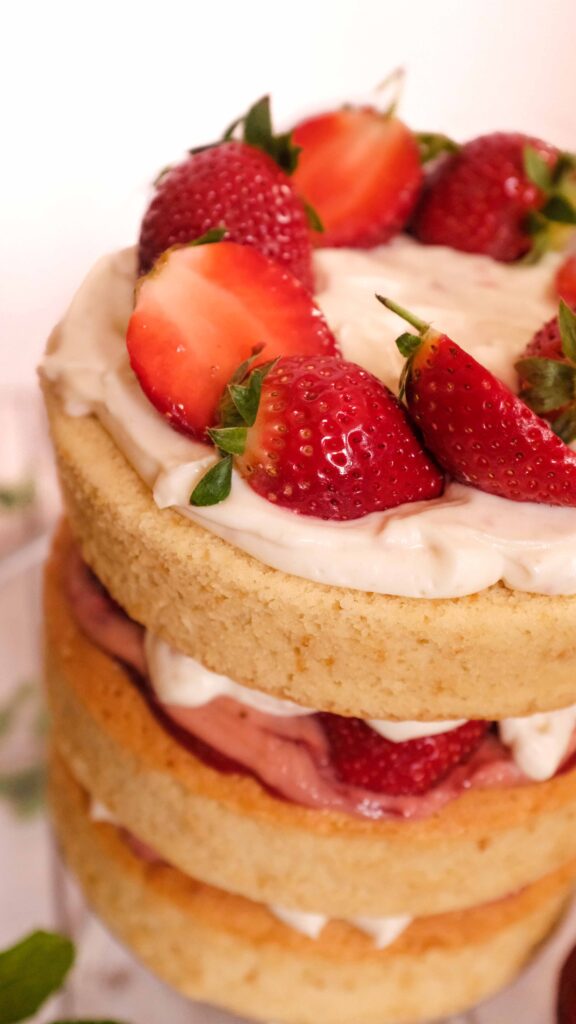
In India, winter is peak strawberry season (read, strawberry cake season). Unfortunately, strawberry cake tends to diminish the vibrancy of fresh strawberries. Rather than subduing their voices by cooking them into the cake batter, I’ve baked a vanilla stage for my strawberry sisters to belt out, “I’m so excited, and I just can’t hide it!” Imagine strawberry shortcake, only way lighter and floofier thanks to the chiffon sponge. Where are the strawberries? In the tangy curd, in the silky frosting, in the sweet filling, and right on top—basically in every mouthful.
At a glance
– This recipe comprises vanilla chiffon sponge + master strawberry puree + strawberry curd + strawberry filling + whipped cream and mascarpone frosting + fresh strawberries.
– You will need three 6 inch cake pans, parchment paper, and some piping bags.
– This recipe has been broken into 6 stages for ease and comprehension. Please read the entire recipe from start to finish before beginning.
Stage 1: vanilla chiffon sponge
Ingredients
For the dry mixture:
1. 190 gm cake flour (or 160 gm all purpose flour + 30 gm corn flour)
2. 150 gm white castor sugar
3. 3/4 tsp baking powder
4. 1/4 tsp baking soda
5. 1/8 tsp salt
For the wet mixture:
6. 50 gm unsalted butter, melted and cooled
7. 90 ml neutral flavoured oil
8. 170 ml buttermilk (or 2 tsp. lemon juice + 160 ml milk) at room temperature
9. 4 egg yolks from 4 large eggs (60 gm/egg with shell) at room temperature
10. 1 ½ tbsp. vanilla extract
11. ½ tsp almond extract (or 3-4 drops almond flavouring)
For the meringue:
12. 4 egg whites from 4 large eggs (60 gm/egg with shell) at room temperature
13. ½ tsp cream of tartar
14. 100 gm white castor sugar
Cake flour has a lower protein content than all-purpose flour. This makes for a more tender cake crumb. However, sometimes it’s hard to procure, which means adapting and making your own cake flour substitute. Whenever you make homemade cake flour – measure out 1 cup of all purpose flour, and then remove 2 tablespoons. Then, add 2 tablespoons of corn flour to the all purpose flour. Sift them together three times. This is your cake flour substitute. It’s not quite the same as store bought cake flour, but it does give a lighter, more tender crumb than if you were to use all-purpose flour only. Cultured buttermilk is another ingredient that’s often hard to procure. Luckily, soured milk can work as a substitute. To make your own “buttermilk” – put 1 tablespoon of fresh lemon juice or white vinegar into a liquid measuring cup with volumetric markings. Thereafter, top the cup up with whole milk till you reach the 240 ml mark. Stir gently and set it aside for 5-10 minutes to thicken. It’s then ready to use. In baked goods, this buttermilk substitute adds sourness and moistness like cultured buttermilk, although it lacks the same ‘yoghurt’ like taste.
Prep
1 – In a large bowl, sift in all the dry ingredients and give it a very good whisk to aerate. This is your dry mixture. Set aside.
2 – Very carefully, separate your egg yolks from your egg whites. Place the egg yolks in a small bowl and the egg whites in a medium bowl. Keep aside.
3 – Melt your butter over low heat and then bring it to room temperature.
4 – Line the bottom of three 6 inch cake pans with parchment. Do not grease or line the sides of the pans as you want the batter to cling to the pan’s walls as it rises.
Method
1 – Start preheating your oven at 175OC.
2 – In a medium bowl, whisk together the melted butter, oil, buttermilk, vanilla extract, almond extract, and egg yolks. You can use a manual hand whisk for this. This is your wet mixture. Set aside.
3 – Grab the bowl with the egg whites and add in the cream of tartar. Using a handheld mixer, beat the egg whites on medium speed until they start forming soft peaks. With the mixer still running, slowly and steadily stream in the castor sugar. Once all the sugar has been added, raise the speed of the mixer to high and beat until you reach stiff peaks. This is your meringue.
4 – Add the wet mixture to the large bowl containing the dry mixture and gently fold together with a whisk until the batter is smooth.
5 – Once the dry and wet mixture is homogenous, add 1/3rd of the meringue to the mixture. Using your whisk, fold it into the batter to lighten it. You will see ‘streaks’ of meringue in the batter.
6 – Add another 1/3rd of the meringue and fold again to combine it with the batter.
7 – Finally, add the last 1/3rd of the meringue and gently fold until it is fully incorporated into the batter. To ensure you haven’t left any floury or clumpy pockets, fold the batter one final time with a rubber spatula. Take care not to deflate the meringue. The batter should be light, fluffy and homogenous.
8 – Divide the batter evenly among your three cake pans and gently tap them on your counter to pop any air bubbles.
9 – Place your cake pans inside your preheated oven. Bake your cakes for 20-25 minutes at 175OC. Do not open the oven for a full 20 minutes, as chiffon cake may deflate from a sudden drop in temperature. Be sure to check for doneness at the 20 minute mark; that is, if a toothpick inserted in the centre of the cakes comes out clean, they’re done. Mine took the full 25 minutes.
10 – Remove the cakes from the oven and immediately invert the pans onto a parchment sheet. This is a crucial step – as chiffon cake is so delicate that it can collapse back down in the pan as it cools. Leave the cakes to cool like this, without lifting off the pans.
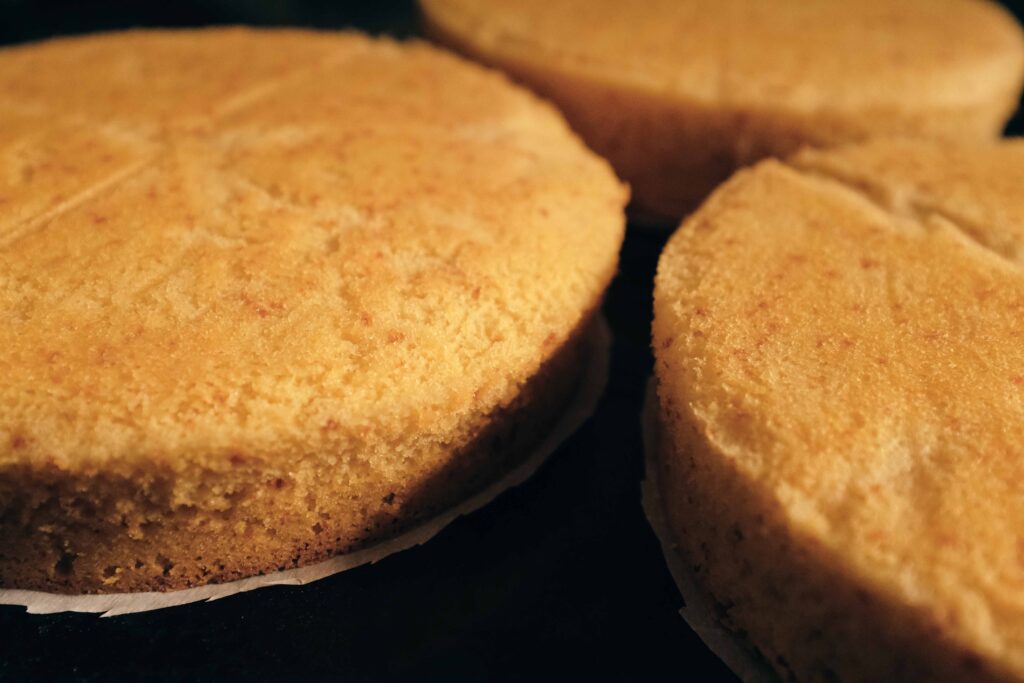
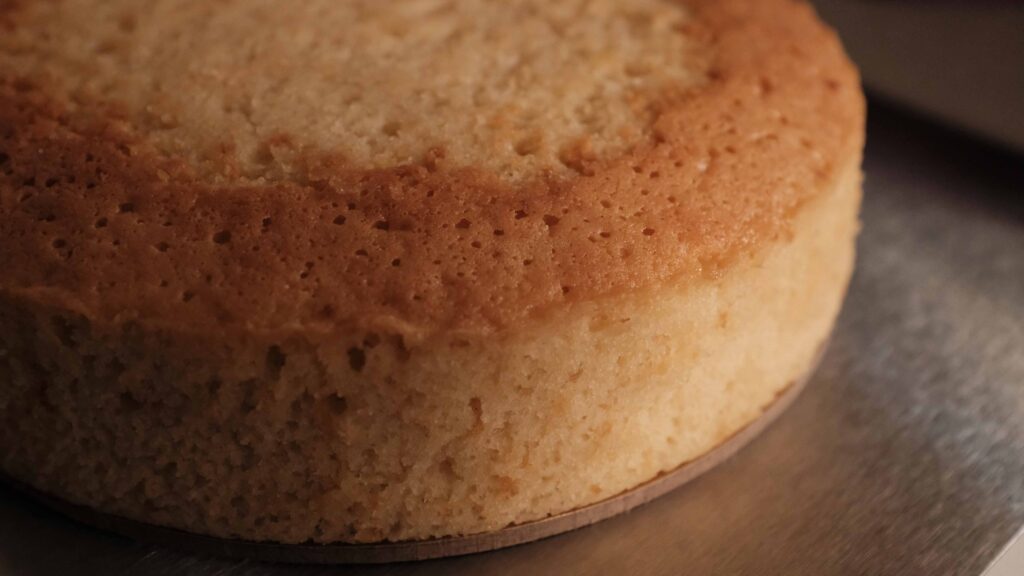
11 – Once the cakes have cooled completely, remove the pans. The cakes will have released by themselves and the pans should lift right off. If they don’t, run a very sharp knife around each cake and then unmould them. Each cake should be about 4 cm (1.5 inches) tall if they’ve been mixed, baked, and unmoulded correctly.
12 – As this is a naked cake, you want the sides to look pale and pristine. If you have any crusty crumbs on the sides of your cakes, gently rub them off with your fingers, so that the sides are an even yellow sponge (I didn’t need to do this).
13 – Wrap your cakes with cling wrap to keep them from drying out. Store them in an airtight container in the fridge while you move on to Stage 2. They can be trimmed, layered, and frosted straight out of the fridge.
Chiffon cake is an oil-moistened cake that is very different from regular butter cake. Possessing a super light, airy, and sponge-like crumb, chiffon cake is the perfect flavour vehicle for toppings, curds, and fresh creams because it soaks up flavours without getting soggy or falling apart. Strictly speaking, this is not a traditional chiffon, as this cake also contains butter for some flavour. However, unlike an all-butter cake, it doesn’t impose its own flavour, allowing for clean fresh, fruity flavours to shine through. Always strive for even heating with cakes. My oven has both top and bottom heating sources, so I always place my cakes on the middle rack, unless a recipe specifies otherwise. If you’re serious about baking, get to know your oven, and all its “hotspots”. This is essential to evenly cooked baked goods. If your cakes tend to rise unevenly, or get cracks, or dome rapidly and then sink, their spot in the oven is too hot. To compensate for these irregularities, you’ll need to lower the temperature and/or move your pan around during the baking process. Keep in mind, if your oven has a convection mode, avoid using it for cakes if you can. Although it may speed up your overall bake-time, it will also dry out your sponge, and you definitely don’t want that.
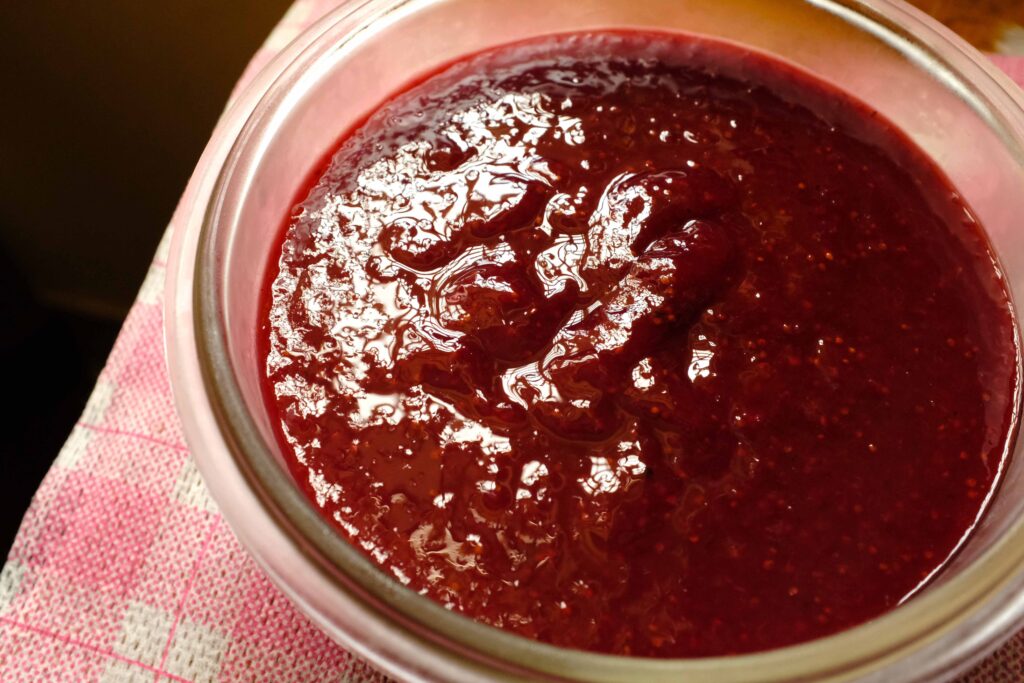
Stage 2: master strawberry puree
Ingredients
1. 1 kg fresh strawberries (post-hulled weight)
2. 50 gm white castor sugar
3. 1 tsp freshly grated lemon zest
4. 1 tbsp. (15 ml) freshly squeezed lemon juice
5. 1/4th tsp salt
6. 1/8th tsp freshly cracked black pepper
If strawberries are not in season where you live, feel free to use frozen berries of the same weight. Remember to thaw them before using.
Method
1 – Wash and then cut the stalks off your strawberries.
2 – Add the strawberries to the jar of a blender and blitz them into a fine puree. You can also use a stick blender for this.
3 – Add the sugar, salt, pepper, lemon zest and lemon juice to the puree. Give it a final blend. Done! Set it aside for Stage 2.
This amount of strawberries yields 4 cups of master strawberry puree. Here’s the deal. Every single strawberry I tasted this year was lacklustre. Unless you are in possession of amazingly sweet berries, this puree simply tastes like sour, mildly strawberry-flavoured water and must be cooked down for a more concentrated, sweet flavour. Thereafter, it can be used to make a variety of different condiments. In this recipe, we’re going to use this master puree to make a strawberry curd and a strawberry filling. As this puree is made with real fruit and contains no artificial preservatives, you will need to store it in the fridge and use it up within a week or freeze it for up to 6 months.
Stage 3: strawberry curd
Ingredients
1. 300 gm master strawberry puree to give 250 gm strained puree
2. 150 gm white castor sugar
3. 1 tsp. finely grated lemon zest
4. 3 tbsp. (45 ml) freshly squeezed lemon juice
5. 1 tsp strawberry emulsion like this
6. 4 large eggs + 1 egg yolk
7. 100 gm butter
8. 1/4 tsp salt
Prep
1 – Cut your butter into ½ inch cubes. Keep it chilled in the fridge until ready for use.
2 – Weigh out roughly 300 grams of the master strawberry puree you made in Stage 1. Pass it through a fine-meshed strainer to collect 250 grams of strained puree. Transfer the pulp caught in the mesh back to the master strawberry puree.
Method
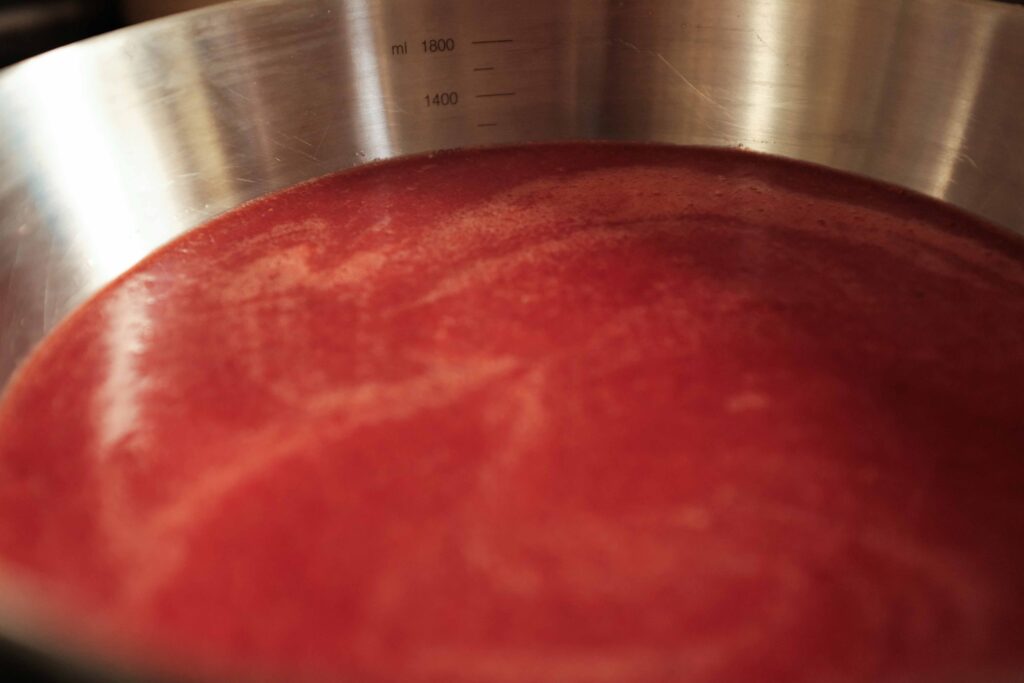
1 – Add the strained strawberry puree to a large, heavy-bottomed steel saucepan. Place the saucepan on your hob and cook the mixture over low heat for about 15 minutes, stirring continuously to prevent burning.
2 – After 15 minutes, a lot of the excess water will have evaporated, the colour of the mixture will have darkened, and the consistency will be akin to a glaze. Take it off the heat and let it come to room temperature.
3 – Once it has cooled, add in the eggs, egg yolk, sugar, salt, lemon zest, lemon juice, and the strawberry emulsion, and whisk everything well to combine.
4 – Place the saucepan back on the hob and cook the mixture over low heat, stirring continuously, until the sugar has dissolved completely.
5 – Take the cubes of butter out of the fridge. Add 3-4 cubes of cold butter in batches, stirring continuously. Wait until one batch of cubes has melted and emulsified into the mixture; only then add in the next batch. Do this until you run out of butter.
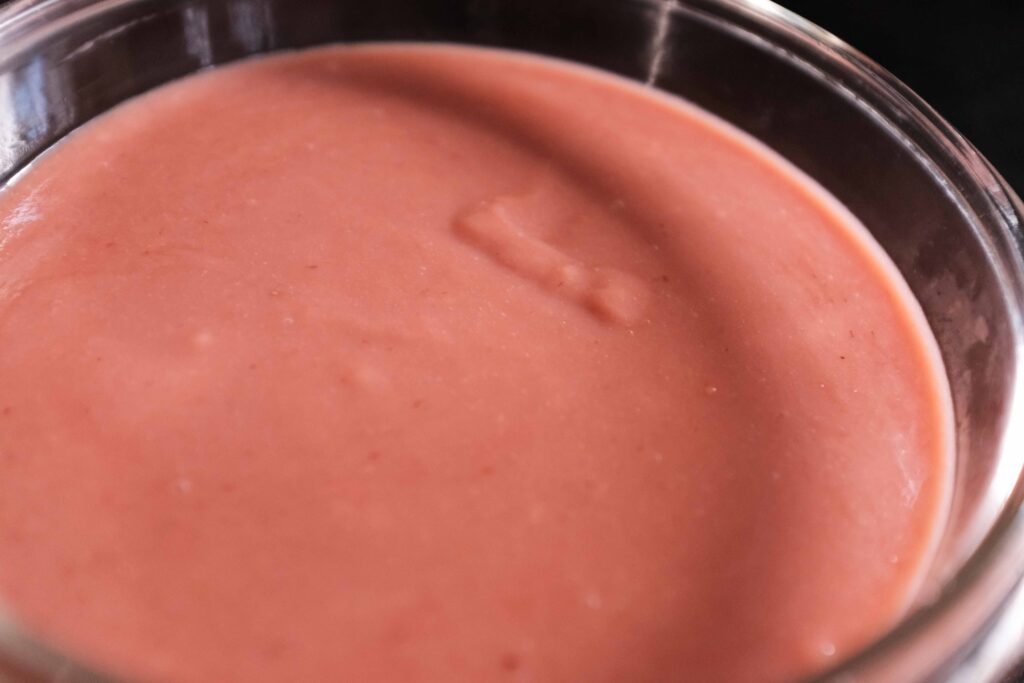
6 – Continue to cook the mixture on low heat, stirring continuously until the mixture is viscous and coats the back of a spoon. This can take anywhere from 5-10 minutes.
7 – Strain the mixture immediately into a bowl and cover it with cling wrap, making sure to press the plastic down onto the surface of the curd. Refrigerate the curd for at least one hour. Once it’s cold, it’s ready to use.
An emulsion does the same work as an extract and can be substituted for an extract in 1:1 ratio. While extracts are alcohol based, emulsions are water based. This means that when they are subjected to high heat either in the oven or on the stove, their flavour will not cook out—making emulsions preferable to extracts. Please do not use essence anywhere, as your fnal product will taste artificial! This quantity of ingredients yields roughly 2 cups of strawberry curd. Use as much as you like to fill your cake layers and then keep the rest refrigerated in an airtight jar, ready for use, anytime. Leftovers make for a great spread on toast. Use up any leftovers within a week.
Stage 4: strawberry filling
Ingredients
1. 750 gm master strawberry puree
2. 1/16 tsp citric acid (optional)
3. 100 gm white castor sugar
4. 1 tsp strawberry emulsion
5. 3/4th tbsp. corn starch
6. 1 ½ tbsp. (20 ml) plain water
7. 1/4th tsp freshly cracked black pepper
Even though strawberries were in season when I made this, I had to add this amount of sugar because they were quite watery and lacking in natural sweetness. Taste your master strawberry puree and adjust the amount of sugar according to how sweet your strawberries are.
Method
1 – Add the strawberry puree, the sugar, the strawberry emulsion, and the citric acid to a large, heavy-bottomed steel saucepan.
2 – Place the saucepan on your hob and cook the mixture over low heat for about 60 minutes, stirring continuously to prevent burning. You’re looking to reduce the puree by half.
3 – When the puree has sufficiently reduced, mix the corn starch with the plain water and whisk together to form a slurry.
4 – Add the slurry to the hot strawberry reduction, stir it in, and raise the heat to medium.
5 – Continue to cook the mixture on medium heat for about a minute or until the reduction thickens and can coat the back of a spoon.
6 – Remove from the heat and stir in the black pepper.
7 – Cool the mixture fully before covering and storing it in the fridge. It will continue to thicken as it cools. Strawberry filling ready. Set aside.
When the fresh strawberry puree is cooked down, it packs a real concentrated flavour punch that’s halfway between a crush and a jam. The citric acid really helps to boost the natural flavour of the berries, so I highly recommend adding it. This amount yields about 1 ½ cups of strawberry filling. You will need roughly 4-6 tablespoons to fill your cake layers. Leftovers should be stored in the fridge for up to a week and can be used like a jam or mixed into buttercreams and cake batters for a completely natural strawberry taste.
Stage 5: whipped cream and mascarpone frosting
Ingredients
For the stabilised whipped cream:
1. ½ tsp gelatine powder
2. 1 tbsp. cold water
3. ½ tsp heavy whipping cream (30-35% fat); at room temperature
4. 100 ml heavy whipping cream (30-35% fat); very cold
5. 20 gm confectioner’s sugar
6. 1/8 tsp vanilla bean powder
For the mascarpone cream:
7. 100 gm full fat mascarpone cheese, softened but still cool (16-18OC)
8. 20 gm confectioner’s sugar
9. 1/8 tsp salt
10. 1/8 tsp fresh lemon juice
11. 1 tsp powdered freeze dried strawberries
Prep
1 – Keep your heavy whipping cream in a medium mixing bowl in the fridge. Make sure it’s ultra-chilled (not frozen) before you start.
2 – Bring your mascarpone cheese to temperature so that it whips up to the correct consistency. Too cold and it will lead to a chunky frosting. Too warm and it will make for a soupy frosting! I take my mascarpone out of the fridge 10-15 minutes before using it so that it softens just a bit, but is still cool.
3 – Sift your confectioner’s sugar and divide it into two. Set it aside.
Method
1 – Bloom your gelatine; place the cold water in a small microwave safe bowl. Sprinkle your gelatine over the water and let it steep for 5 minutes.
2 – Melt the gelatine for 5 seconds in the microwave. You can tell it has fully melted when there are no granules of gelatine visible. If still grainy, microwave for another 3-5 seconds.
3 – After melting your gelatine, mix in ½ teaspoon of room temperature heavy cream and combine. If your gelatine feels cold to the touch, re-heat it in the microwave for 3-5 seconds until it is warm again
4 – Take out your cold mixing bowl with the chilled heavy whipping cream. Using a hand held mixer, whisk the cream for about 15 seconds on medium speed until it is foamy.
5 – Add 20 gm sifted confectioner’s sugar and the vanilla bean powder and continue whisking on medium speed until you reach the soft peak stage. When the whisk is pulled out and held upright, the mixture on the tip of the whisk should gently curl back on itself like a wave.
6 – Turn your mixer down to the lowest speed and drizzle in your warm gelatine. Now, raise the speed to medium and whisk until you reach the firm peak stage. When you lift the whisk up, the stuff on the whisk will stand up and hold its shape. I like to stop the mixer every 15 seconds or so to check, as over-whipping cream will turn it into butter!
7 – Immediately start on your mascarpone cream, as the stabilised whipped cream needs to be mixed in right away, before the gelatine sets. In a separate bowl, cream the softened mascarpone cheese until smooth. Since this is such a small amount of mascarpone, I highly recommend creaming it by hand, else it can get over-whipped, split, and turn grainy in an instant (yup, has happened to me).
8 – Add in 20 gm confectioner’s sugar, the salt, and the lemon juice, and continue creaming by hand until just combined.
9 – Sprinkle 1 tsp of freeze dried strawberry powder onto the mascarpone, do not mix.
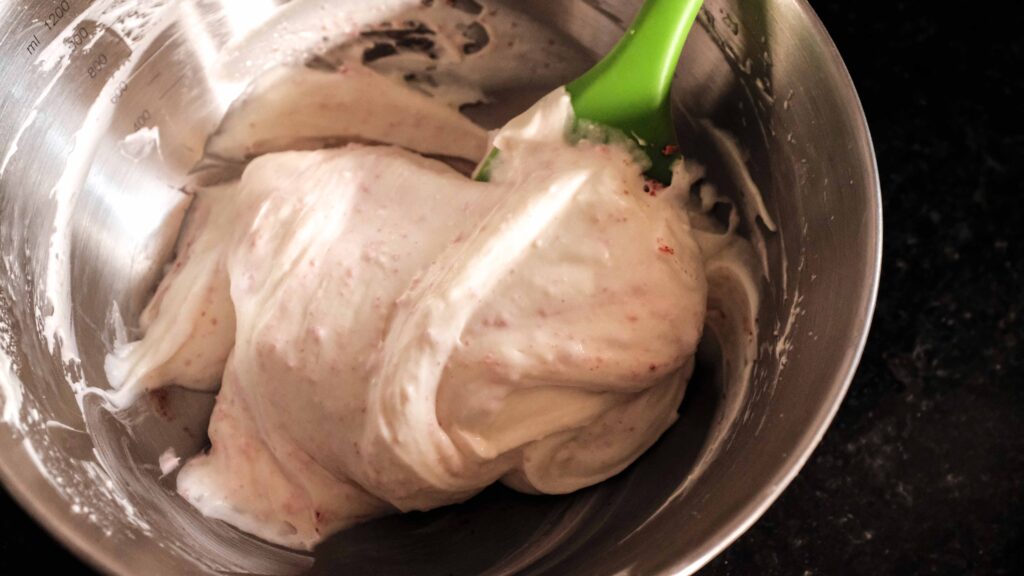
10 – Gently fold your stabilised whipped cream mixture into the mascarpone cream mixture until just combined. Fold just until you can see little pink streaks in the white frosting. Do not over mix or the whole frosting will be tinted pink.
11 – Immediately transfer the frosting to a piping bag and place it in the fridge for about 10 minutes. Get ready to assemble your cake in Stage 6.
Since this is a delicately flavoured cake, the frosting needs to taste uh-mazing. Clear vanilla flavourings, while keeping your frosting white, are all aroma, no flavour, and taste artificial. Using vanilla bean powder is a great way to incorporate real vanilla without staining your frosting or cutting into a vanilla bean. You could just as easily use an extract or an emulsion to flavour your frosting, but it will turn a bit yellowish. The quantities mentioned here yield 1 cup of frosting which is just the right amount to fill and top 3 x 6-inch cake layers. If you want more to serve on the side, you can easily double or triple the amounts. Please note, you cannot make stabilised whipped cream ahead of time, and once it’s combined with the mascarpone mixture, it must be used straight away or else the gelatine will set and the entire texture will change. After it is piped or spread onto your cake layers, it will hold its shape and remain nice and fluffy, as long as it’s kept refrigerated or in a cool environment.
Stage 6: Finale; cake construction & assembly
This is what is known as a ‘naked cake’, where the all the individual cake layers are clearly visible. This way all your hard work is on display as every component shines through.
Components
1. Three 6 inch vanilla chiffon cakes
2. Strawberry filling
3. Strawberry curd
4. Whipped cream and mascarpone frosting
5. To stack; 5-6 fresh medium strawberries of the same size, halved
6. To top; 5-6 fresh assorted strawberries, 4 left whole, 2 halved
7. Strawberry glaze (made by diluting ½ tsp strawberry filling with ½ tsp hot water)
Prep
1 – Make sure your strawberry filling is at room temperature for easy spreading.
2 – Evenly trim the tops of your cakes if they’re not flat.
3 – Ready your decorating surface. A cake turntable with a cake board is ideal for this. Place the board in the centre of your turntable.
4 – Take your piping bag of frosting. Snip the tip about 1 cm wide.
5 – Fill your strawberry curd into a piping bag for smooth application. Snip the tip to about ½ cm wide.
6 – Make your strawberry glaze.
7 – Cut the 5-6 medium strawberries in half and set aside.
8 – Keep these handy; a straight palette knife, an off-set spatula, and a small pastry brush.
Method
1– Spread a small dollop of frosting on the centre of your cake board. This will be the glue that holds the first cake layer in place.
2 – Place your first cake on the frosting, top-side up.
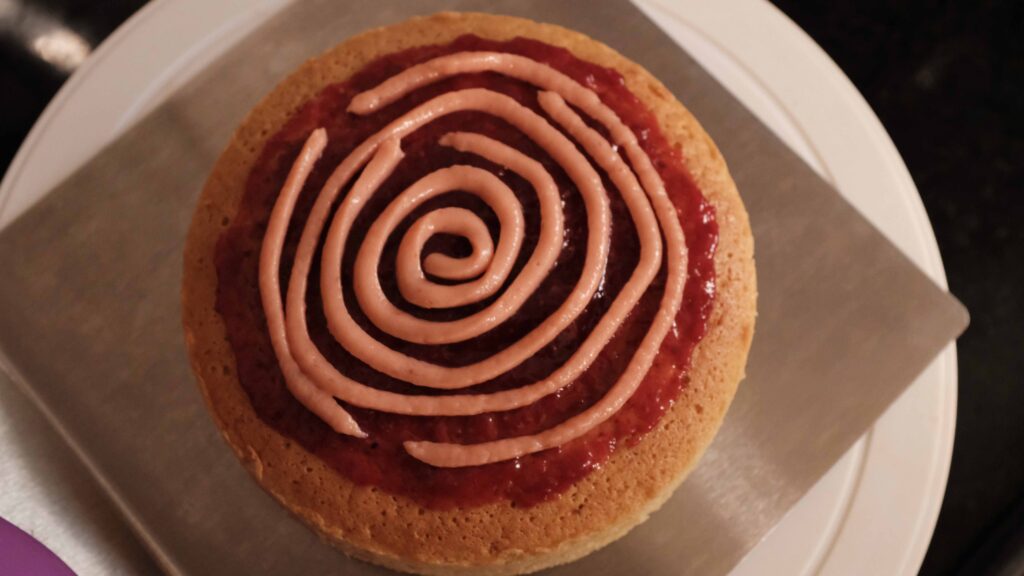
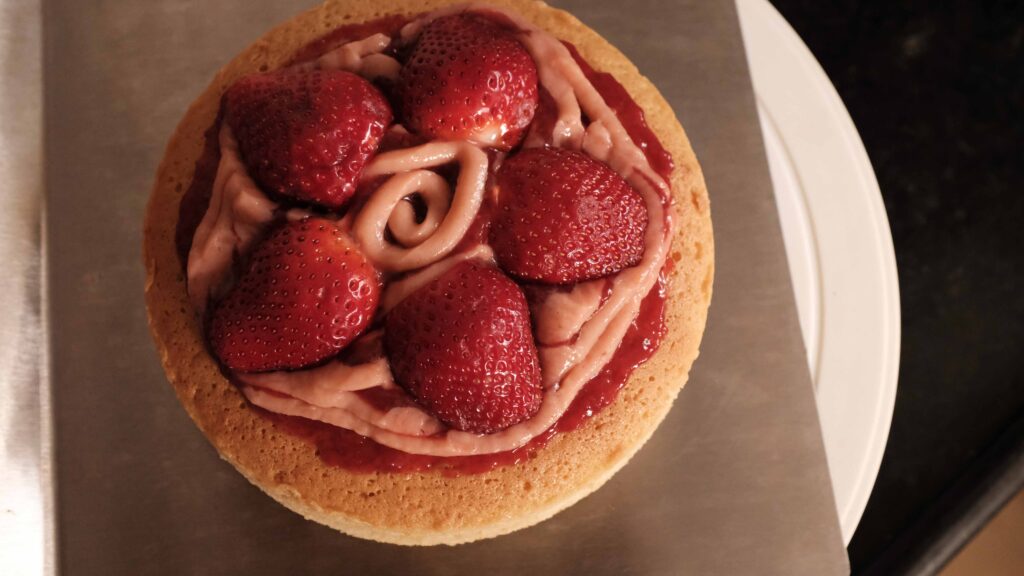
3 – Place 2 tablespoons of strawberry filling onto the cake’s centre, spreading it to within 1 cm of the cake’s edges.
4 – Going in a circle from the centre and moving outwards, pipe a skinny spiral of curd onto the strawberry filling layer, keeping it within 2 cm of the cake’s edges.
5 – Place 5-6 fresh strawberry halves, cut-side down on top of the curd, and arranged them in a radial pattern, with the pointy edges poking outwards. Each berry should be positioned about 1 cm shy of the cake’s edges, and lodged down well. These strawberry ‘dams’ will prevent spillage from occurring when you stack your next layer of cake Do not keep them too close to the edge as they will slide out further when pressure is applied.
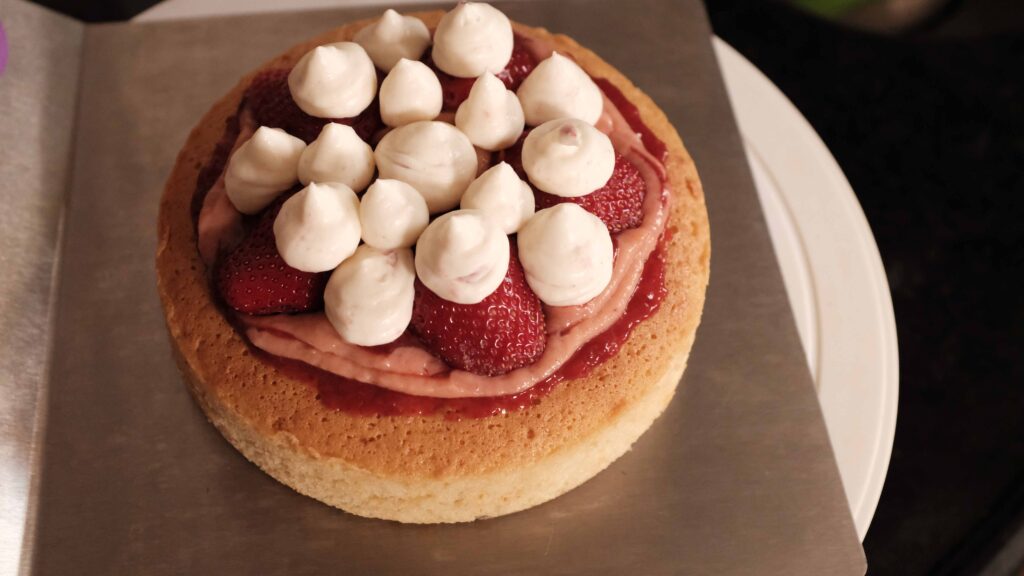
6 – Pipe blobs of frosting onto and between the strawberries, staying within 3 cm of the cake’s edges. Remember, if you put too much frosting on, you’re in for a strawberry and frosting landslide!
7 – Place the next cake atop the frosting, top-side up. Lightly press down to secure.
8 – Repeat steps 3-6 for your second cake tier.
9 – Place the third and final cake atop the frosting, bottom-side up. Lightly press down to secure. Then, going in a circle from the inside out, pipe the remaining frosting, right on top of the cake. Use a palette knife to create rustic swirls and waves.
10 – Top your cake with whole and halved fresh strawberries, arranged in a wreath pattern.
11 – Glaze the cut-side of the halved strawberries. This will stop them from drying out. Stand back and take a bow!
12 – Cover and refrigerate your cake for at least two hours before serving. This will allow the gelatine in the frosting to set and prevent it from “weeping”.
13 – Slice and serve with some more strawberry curd and strawberry filling, and a few fresh strawberries on the side. Now eat!
Why the excruciatingly precise instructions? Because the first time I made this cake, I added way too much filling, curd, and frosting between each layer and made a royal mess! There were waterfalls of everything pouring down the sides of the cake (my tears probably added to the deluge as well). If you don’t mind all the mess and spillage, go ahead and dollop at will, but I did warn you! Fully constructed, this cake will not hold up well at room temperature, despite the stabilisation of the whipped cream. Unless it’s cold where you live, do not leave it sitting outside the fridge for more than an hour. For best results, cut yourself a slice whenever you get a craving and store the rest of the cake, covered, in the fridge. This is a tall cake, so cutting a clean slice can be a bit challenging. I find that a serrated bread knife is the best tool for the job and cutting a slice is easiest when the cake is a bit cold. Since this cake contains fresh fruit and cream, it must be finished within a week. The pair of us polished it off in two days flat!
Tips & Tricks
How to invert & cool a chiffon cake
How to trim cakes for even layers