


Makes 12 standard sized cupcakes.
Red velvet has one of those je ne sais quois flavours that has justly acquired diva status in the cake world. Can’t peg her as vanilla, or classify her as chocolate—she is curious combination of the two. If red velvet were a fictional character, I imagine she’d be Scarlett O’Hara or some other fierce belle from the annals of fem lit. Leavened by buttermilk, given depth by cocoa, and topped with a silky cream cheese frosting that echoes the tang in the crumb – she’s paradoxically light and rich on the palate, charming you to eat more and more. Portion control? One bite of these sweetheart cupcakes, and frankly my dear, you won’t give a damn.
At a glance
– This recipe comprises red velvet cupcakes + cream cheese frosting + fondant decorations (optional).
– You will need standard cupcake liners, a standard 12-cup cupcake pan, (or individual moulds), a piping bag, a medium-large round piping tip, a heart-shaped cookie cutter, and a fondant mould.
– This recipe has been broken into 4 stages for ease and comprehension. Please read the entire recipe from start to finish before beginning.
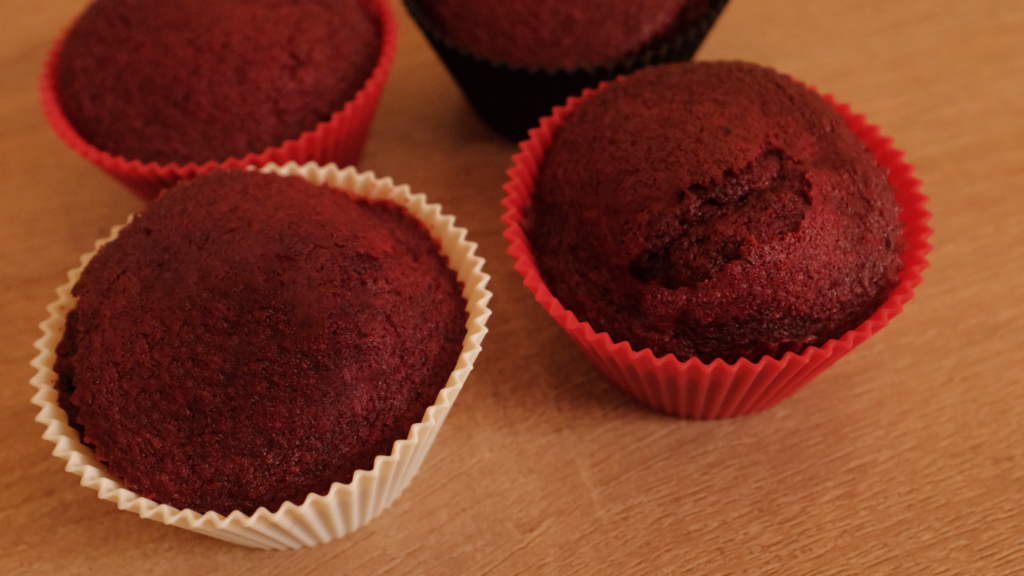
Stage 1: red velvet cupcakes
Ingredients
1. 160 gm cake flour or (or 135 gm all purpose flour + 25 gm corn flour)
2. 3 ½ tsp natural unsweetened cocoa powder
3. ½ tsp baking soda
4. 1/4 tsp salt
5. 50 gm unsalted butter, at room temperature
6. 170 gm white granulated sugar
7. 100 ml neutral flavoured oil
8. 2 medium eggs (100 gm), at room temperature
9. 2 tsp. pure vanilla extract
10. 3/4th tsp apple cider vinegar
11. 100 ml buttermilk (or 1 ½ tsp. white vinegar + 95 ml milk) at room temperature)
12. Red gel food paste or colouring (1-2 tbsp.)
Cake flour has a lower protein content than all-purpose flour. This makes for a more tender cake crumb. However, sometimes it’s hard to procure, which means adapting and making your own cake flour substitute. Whenever you make homemade cake flour – measure out 1 cup of all purpose flour, and then remove 2 tablespoons. Then, add 2 tablespoons of corn flour to the all purpose flour. Sift them together three times. This is your cake flour substitute. It’s not quite the same as store bought cake flour, but it does give a lighter, more tender crumb than if you were to use all-purpose flour only. Cultured buttermilk is another ingredient that’s often hard to procure. Luckily, soured milk can work as a substitute. To make your own “buttermilk” – put 1 tablespoon of white vinegar into a liquid measuring cup with volumetric markings. Thereafter, top the cup up with whole milk till you reach the 240 ml mark. Stir gently and set it aside for 5-10 minutes to thicken. It’s then ready to use. In baked goods, this buttermilk substitute adds sourness and moistness like cultured buttermilk, although it lacks the same ‘yoghurt’ like taste.
Prep
1 – In a large bowl, combine the flour, baking soda, cocoa powder, and salt. Sift them together and keep aside. This is your dry mixture.
2 – Separate your egg yolks from your egg whites. Place the egg yolks in a small bowl and the egg whites in a medium bowl. Keep aside.
3 – Line your cupcake pan or individual moulds with cupcake liners. Keep aside.
Method
1 – Start preheating your oven at 175OC.
2 – Place the eggs whites in a medium bowl. Using a handheld mixer, whisk the 2 egg whites on high speed for about 3-5 minutes or until you achieve soft, fluffy peaks.
3 – Place the butter and sugar in a large bowl. Using a handheld mixer, cream the butter and sugar together on high speed for roughly one minute.
4 – Add in the egg yolks, the oil, the vanilla extract and the apple cider vinegar and beat everything together on high speed for roughly 2 minutes. Remember to periodically scrape down the sides of the bowl to ensure that everything is being mixed properly.
5 – Turn your mixer down to the lowest speed and add the dry ingredients in thirds, alternating with the buttermilk. Beat together until just combined (you should see no floury pockets or liquidy pools). Take care not to over-mix the flour, or you’ll end up with dense, stodgy cupcakes.
6 – Add the red gel food colouring and beat it in until combined. I used 1 ½ tablespoons of Papilon Super Red Gel Food Colour to achieve the shade that I wanted.
7 – Using a large metal spoon, gently fold the whipped egg whites into the red cake batter.
8 – Spoon the batter evenly into your 12 cupcake liners. Fill each only two-thirds full (roughly 3 tablespoons of batter per cupcake liner).
9 – Bake for 18-22 minutes at 175 OC. For perfectly even heating, rotate your pan at the 10 minute mark. Be sure to check for doneness at the 18 minute mark; that is, if a bamboo skewer inserted in the middle of a cupcake comes out clean, they’re done.
10 – Remove the pan from the oven and cool it on a wire rack. Don’t remove the cupcakes from the pan till they come to room temperature. Once no longer warm, your cupcakes are ready for the next stage. Store them in an airtight container while you move on to Stage 2. If you don’t plan on filling and frosting your cupcakes immediately, keep them in an airtight container in the fridge. They will stay fresh(ish) for 3 days, although you will lose some moistness. Bring them back to room temperature before proceeding with any of the other stages.
Always strive for even heating with cakes. My oven has both top and bottom heating sources, so I always place my cakes on the middle rack, unless a recipe specifies otherwise. If you’re serious about baking, get to know your oven, and all its “hotspots”. This is essential to evenly cooked baked goods. If just a few of your cupcakes tend to rise unevenly, or get cracks, or dome rapidly and then sink, their spot in the oven is too hot. To compensate for these irregularities, you’ll need to lower the temperature and/or move your pan around during the baking process. Keep in mind, if your oven has a convection mode, avoid using it for cakes if you can. Although it may speed up your overall bake-time, it will also dry out your sponge, and you definitely don’t want that.
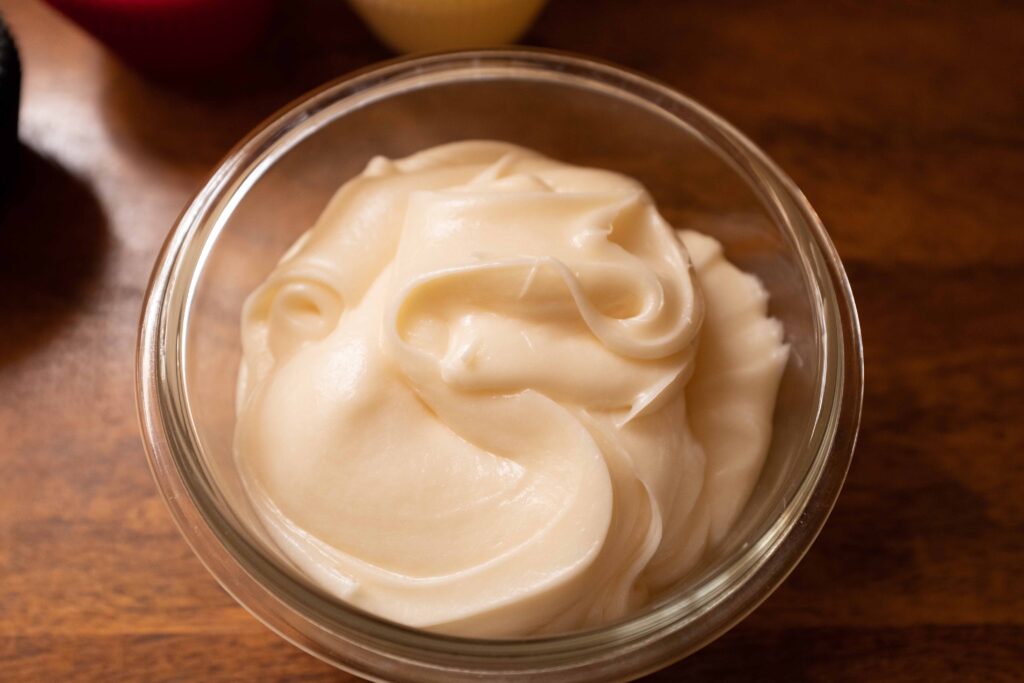
Stage 2: Cream cheese frosting
Ingredients
1. 200 gm full fat cream cheese (not cream cheese spread or the whipped stuff) at room temperature
2. 100 gm unsalted butter at room temperature
3. 300 gm icing sugar + 30 gm extra if needed
4. 1 tsp pure vanilla extract
5. 1/8th tsp salt
Prep
1 – Cut your cream cheese into 1 inch cubes. Set it aside until it has softened to room temperature.
2 – Bring your butter to room temperature. It should be firm but soft to the touch (and not melted).
3 – Sift your icing sugar. Set it aside.
Method
1 – Place the butter in a large bowl. Using a hand held mixer, beat it for 2-3 minutes on medium speed until very smooth and creamy.
2 – Add in the cream cheese. Beat the mixture on medium once again, until you achieve a fluffy consistency, approximately 1-2 minutes.
3 – Add in the icing sugar, 1/4th cup at a time, beating on low speed for 30 seconds with each addition. Repeat until all the icing sugar has been incorporated and is combined.
4 – Add in the vanilla and salt. Once again, beat everything on low speed for 30 seconds until combined.
5 – Thereafter, raise your mixer to the highest speed and beat the mixture for 5 whole minutes. If you have incorporated too much air into your frosting, use a rubber spatula or a wooden spoon to ‘mash’ the frosting against the sides of the bowl for a couple of minutes. This will push out any air bubbles.
6 – If you’re not planning to frost your cupcakes anytime soon, cover your bowl with cling wrap and keep it refrigerated for up to 5 days while you move on to Stage 3. When you’re ready to use it, beat the frosting for a few seconds so that it’s creamy again. If you are you going to skip Stage 3, transfer your cream choose frosting to a piping bag fitted with a medium-large round tip. Refrigerate the frosting inside the bag for 30 minutes prior to frosting your cupcakes. This will help the piped frosting to hold its shape.
The quantities mentioned here will generously frost 12-15 medium cupcakes. Unlike a sturdy crusting cream cheese frosting, such as the one used in my Blue Velvet Cake recipe, or a loose spreadable cream cheese frosting like the one used in my Banana Bread, this one’s somewhere in between. The amount of sugar and butter gives it just enough structure to hold its decorative shape for perhaps 15 minutes after frosting (that’s how hot it is in Mumbai, even in February). Reserve the star nozzles for sturdy buttercreams or whipped ganache, this frosting is best piped with a medium-large plain round tip. Smooth, creamy, tangy, and with just the right amount of sweetness, this cream cheese frosting—although traditionally paired with red velvet cake—is perfect to pipe on anything from carrot cake to brownies. Make it up to 3 months in advance and store it in the freezer, or up to 5 days in advance and store it in an airtight container in the fridge. Before using chilled frosting, take it out of the fridge and rest it on your counter for 5 minutes. If you’re using frozen frosting, thaw it in the fridge first. If it looks a little seized up, re-beat the frosting for a few seconds so that it’s light, airy, and creamy again.
Stage 3: fondant decorations (optional)
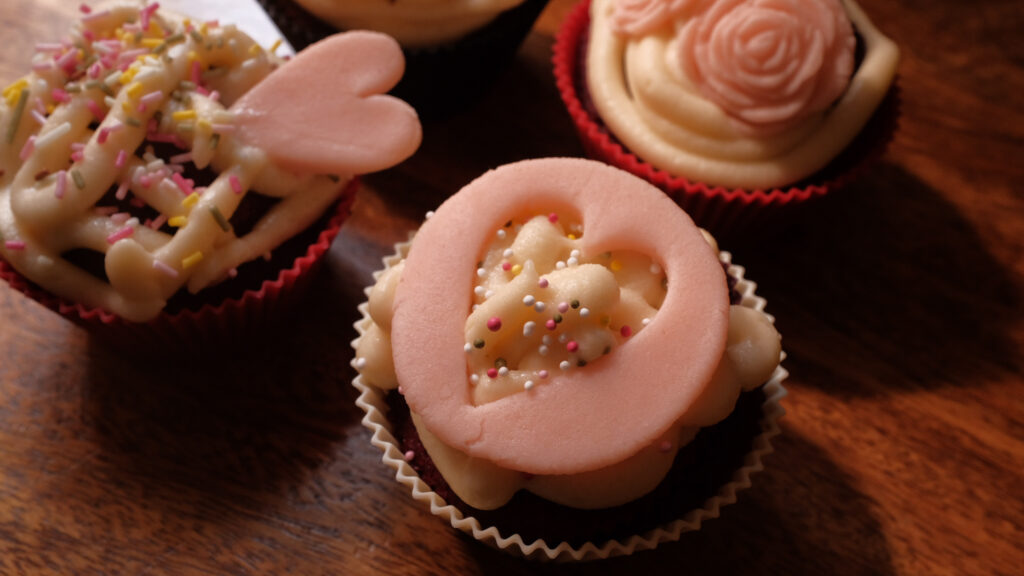
Top your cupcakes with anything you like. Since I made these for Valentine’s Day, I went ultra-corny and made some good ol’ hearts and roses out of readymade fondant or sugar paste.
Ingredients
1. 200 gm white readymade fondant like this
2. ½ a drop of red gel food colour
3. 2 tbsp. confectioner’s sugar
4. 2 tbsp. corn flour
Materials
1. Fondant rolling pin
2. Fondant dusting bag/cake decorating pouch
3. 4 cm heart-shaped cookie cutter
4. 5 cm round cookie cutter
5. Silicon mould for fondant roses like this to make small fondant roses
6. A couple of toothpicks
7. Disposable gloves
8. Parchment sheet
9. Cookie sheet/tray
Prep
1 – Sift together the confectioner’s sugar and corn flour and transfer the mixture to your fondant dusting bag. If you don’t have one, here’s how to make one at home.
2 – Line a cookie sheet with some parchment and set aside.
3 – Place one drop of red gel food colour in a bowl. Using a toothpick, add tiny glops of red gel food paste to your fondant. I added about 1/4 drop of Papilon Super Red Gel Food Colour to achieve the blushing pink shade that I wanted. Using gloves, knead the colour into the fondant until it is evenly distributed throughout, and the texture of the fondant is very soft and pliable.
Method
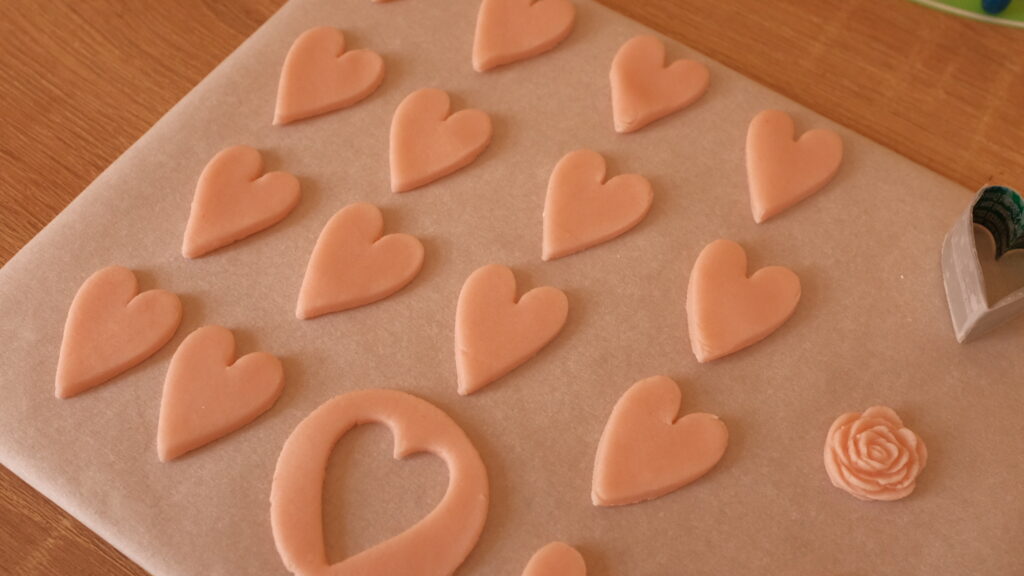
to make the hearts:
1 – Using the fondant dusting bag, dab the surface on which you will roll your fondant. A perfectly flat, smooth surface is ideal for this. Dab your rolling pin and hands as well.
2 – Grab half the fondant and roll it out until it’s about 3 mm thick (keep the other half covered in plastic wrap). If the fondant gets sticky while rolling, dab the surface of the fondant with the dusting bag.
3 – Cut 4 hearts out, keeping about 4 cm between each heart. Make extra if you like. Place the hearts on the parchment lined cookie sheet.
4 – Use the round cookie cutter to cut a circle around the negative space left by the hearts. You will have as many of these negative-space hearts as you will have heart-shaped fondant pieces. Transfer these circles to the parchment lined cookie sheet.
to make the roses:
5 – Using the fondant dusting bag, dust the hollow-side of the silicon mould. This will allow for easy release of the fondant roses.
6 – Get the other half of the blush pink fondant (or use up leftover rolled fondant). Pinch small chunks of fondant and flatten them into the hollow crevices. Remove any extra fondant that doesn’t fit flush with the edges of the crevices.
7 – Gently pushing on the raised side of the mould, release the fondant roses from their crevices and then transfer them to the parchment lined cookie sheet. Make as many as you like. I made about 12 roses to top 4 cupcakes.
8 – Air dry your fondant decorations for 24-48 hours, depending on your environmental humidity. Thereafter, they’re ready to use! Ready decorations can be stored in an airtight container until you’re ready to assemble your cupcakes.
Fondant dries out quickly. When not in use, keep it covered or encased in plastic wrap and stored in a resealable bag. Leftover fondant and dried decorations can be stored for about 2 months in an airtight container. Do not refrigerate or freeze.
Stage 4: Finale; cupcake construction & assembly
Components
1. Red velvet cupcakes
2. Cream cheese frosting; filled into a piping bag, with a medium-large round piping tip attached
3. Fondant decorations (optional)
4. Colourful sprinkles (optional)
Prep
1 – Take your piping bag of frosting out of the fridge and rest it on your counter for 5 minutes or until it is pipeable.
Method
1 – Pipe a generous serving of frosting onto your cupcakes. Pipe it however you like! I did some regular swirls and a whole bunch of random squiggles of frosting on mine.
2 – Top each cupcake with one or more fondant decorations. Make sure to anchor them securely into the frosting.
3 – Finally add a teeny dash of sprinkles to the tops of the cupcakes if you like. Mix, match, keep it random, there are no rules. Happy Valentine’s Day! Now eat!
No matter how much sugar is added to stabilise cream cheese frosting, it doesn’t do well in warm weather. I recommend frosting and decorating only those cupcakes that you plan to serve and eat immediately, else the frosting will eventually get gloopy and flatten out (and flatten out your decorations along with it).