


Makes 4-6 servings.
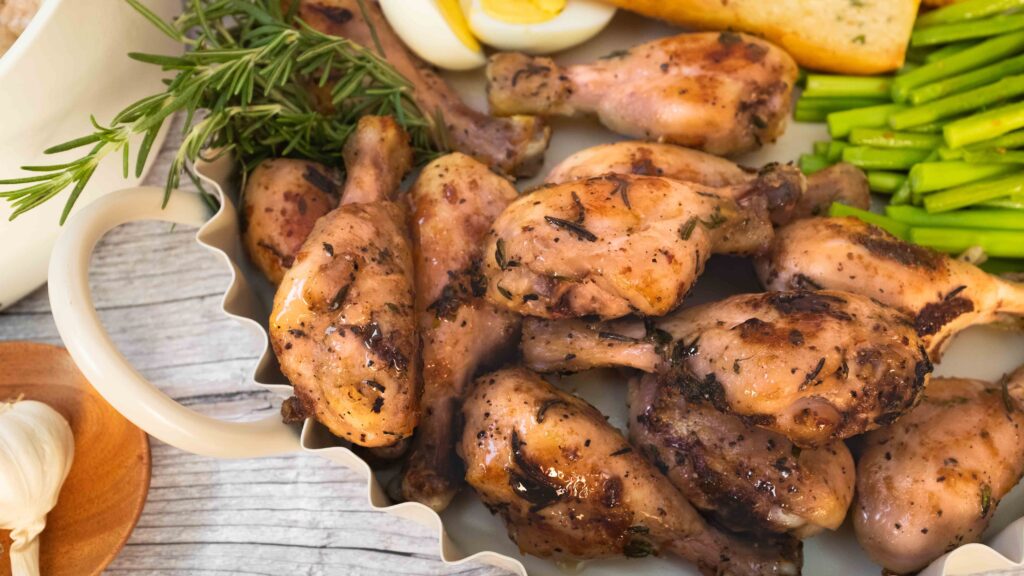
Roast chicken needn’t mean hours in the kitchen, especially during Summer. By opting for drumsticks, you can cut down on cook-time and still cook up heaps of flavour. Marinated simply with fresh herbs, common pantry spices, and good quality EVOO, this chicken is quick to make and delicious to eat. Now, everyone has their go-to potato salad recipe—tangy, smoky, creamy and topped with a crunchy bacon crumb—ours might just become yours! Here it is. Our ugly-delicious (and dare I say, no-fuss) way to enjoy these two picnic-friendly classics, featuring crusty garlic bread on the side.
At a glance
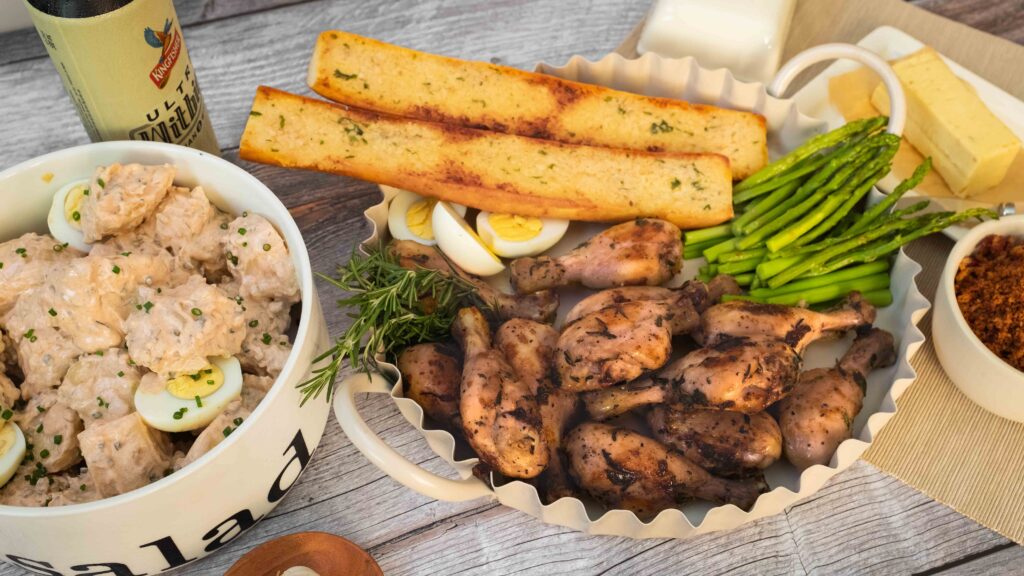
– This dish comprises potato salad + roast chicken drumsticks + garlic bread.
– You will need a steamer, a 5-litre cooking pot, some medium cooking pots, some roasting trays, aluminium foil, and a large skillet.
– This recipe has been broken into 4 stages for ease and comprehension. Please read the entire recipe from start to finish before beginning.
Stage 1: potato salad
Ingredients
1. 1 kg waxy potatoes (new potatoes work well)
2. 1 ½ tsp table salt
3. 100 gm asparagus spears
4. 6 medium eggs
For the cook
5. 1 litre water for steaming
6. 3 litre water for boiling
7. 1 litre water + ice cubes for an ice bath
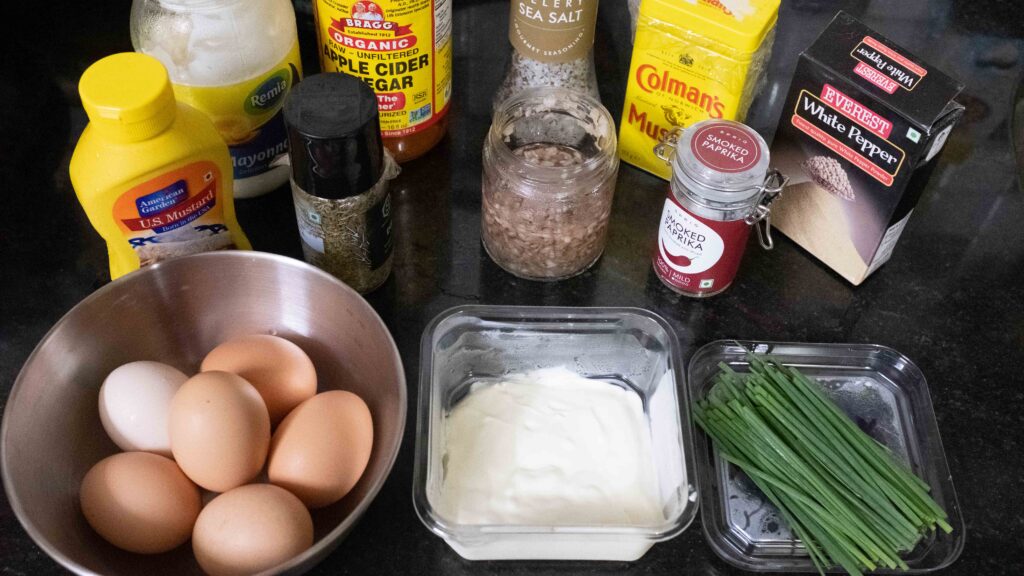
For the dressing
8. 100 gm mayonnaise
9. 100 gm sour cream
10. 50 gm relish
11. 1 ½ tsp apple cider vinegar
12. 1 tbsp. American mustard like this
13. ½ tsp yellow mustard powder like this
14. ¼ tsp white pepper powder
15. 1 tsp smoked paprika like this
16. ½ tsp celery salt like this
17. 1 tsp dried dill
18. 5 gm fresh chives
For the bacon breadcrumbs topping
19. 75 gm streaky bacon
20. 50 gm brown bread, roughly 2 large slices (stale is best)
21. 1/8 tsp salt
I don’t like the taste and texture of readymade relish, so I always make my own. To make 1 ½ cups of relish, finely chop up some bottled gherkins/cornichons, until you have 1 cup’s worth. Then finely chop some red onion until you have 1/4th cup’s worth. Place the chopped gherkins and onions in sterilised heat-proof jar and shake it about until they’re evenly mixed. Next, bring 60 ml white vinegar, 2 tablespoons of sugar, and 1/8 teaspoon salt to a boil in a saucepan, stirring until the sugar has dissolved. Then boil for an additional 2 minutes until slightly reduced. Pour the hot pickling solution into the jar of chopped gherkins and onions and then put the lid on. Once the jar comes to room temperature, transfer it to the fridge and leave it to pickle for at least 5 days for best results. After it’s ready, you can use it with hot dogs or mix it into chicken/egg salads for some tangy, crunchy pops of texture.
Prep
1 – Peel and cut your potatoes into 5 cm wide chunks. Keep the chunks submerged in cold water to prevent oxidation. Set aside.
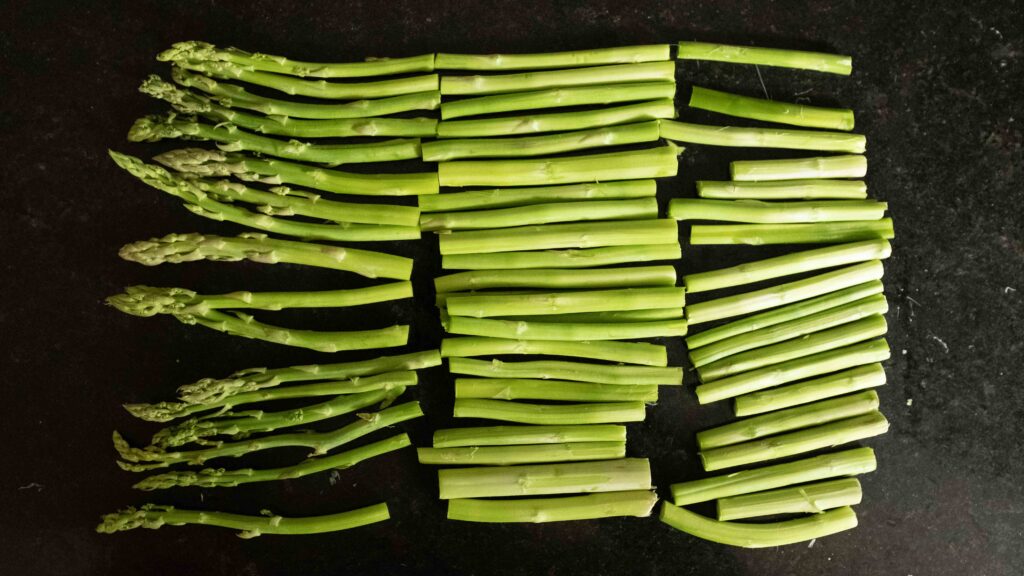
2 – Clean your asparagus spears. Then, using a peeler or a sharp knife, trim away the tough, fibrous layer of each asparagus spear and then cut off the hard woody bottom ends. Now cut the asparagus spears into 8 cm batons. Set aside.
3 – Combine all the ingredients listed in ‘for the dressing’ and stir them together until well-mixed. This is your dressing. Place it in the fridge until ready to use.
Method
1 – Pour about 1 litre of water into your steamer pot and set it to boil. Once the water comes to a boil, place the peeled and cut potatoes on the steamer rack. Pop the lid on and steam your potato chunks on medium heat for 20-22 minutes, or until you can easily pierce through the potatoes with a fork.
2 – When the potatoes are cooked (fork-tender), transfer them from the steamer rack to a large bowl. Discard all the water.
3 – While the potatoes are hot and steaming, sprinkle in ½ teaspoon of table salt and toss the potato chunks to season them evenly.
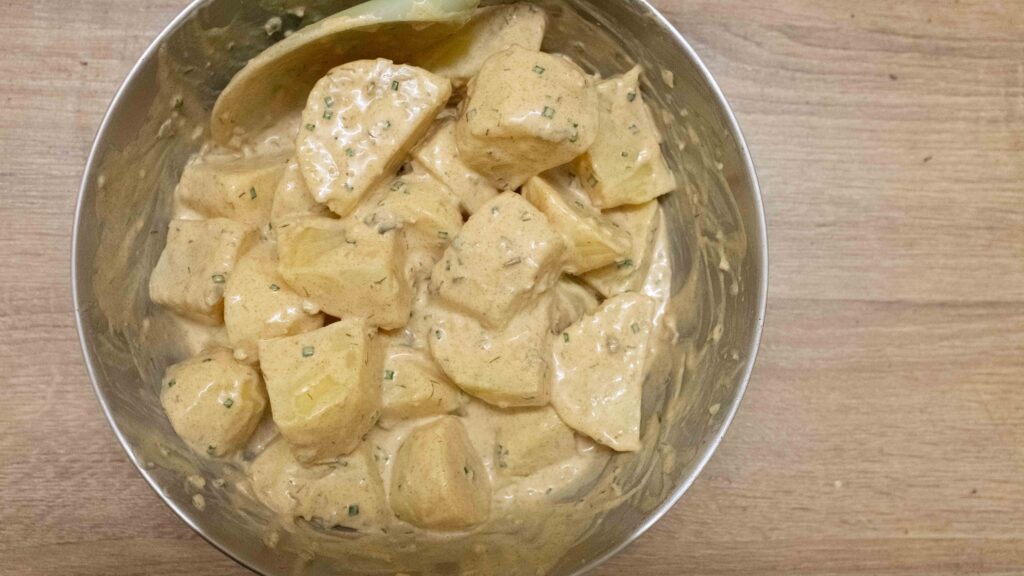
4 – Now, grab the cold dressing from the fridge, drizzle it onto the hot potato chunks. Toss everything together once again to dress evenly. Set the bowl aside while you quickly boil your asparagus spears and eggs.
5 – Fill 2 medium pots with 1 ½ litres of water each. Bring both pots to a boil.
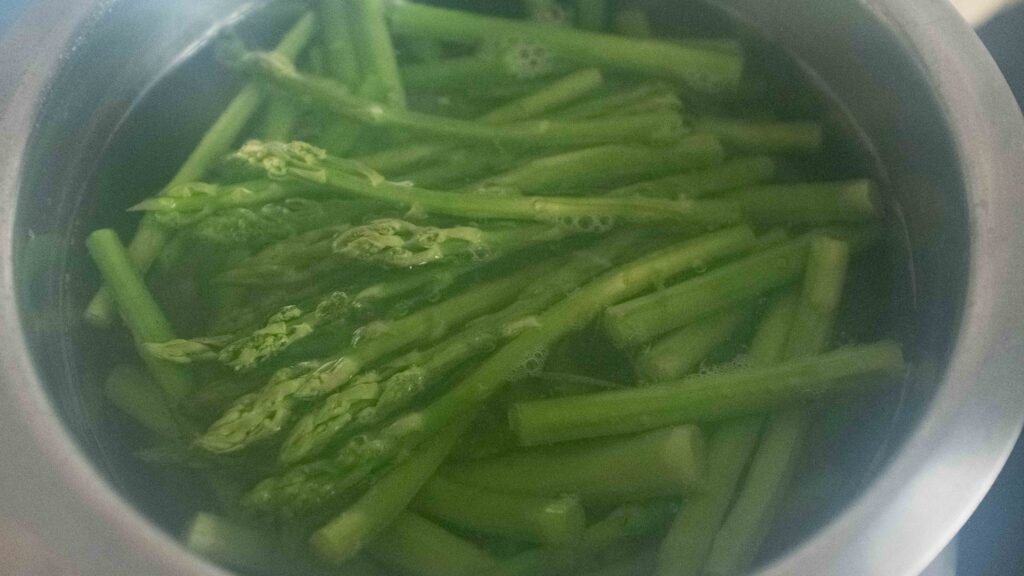
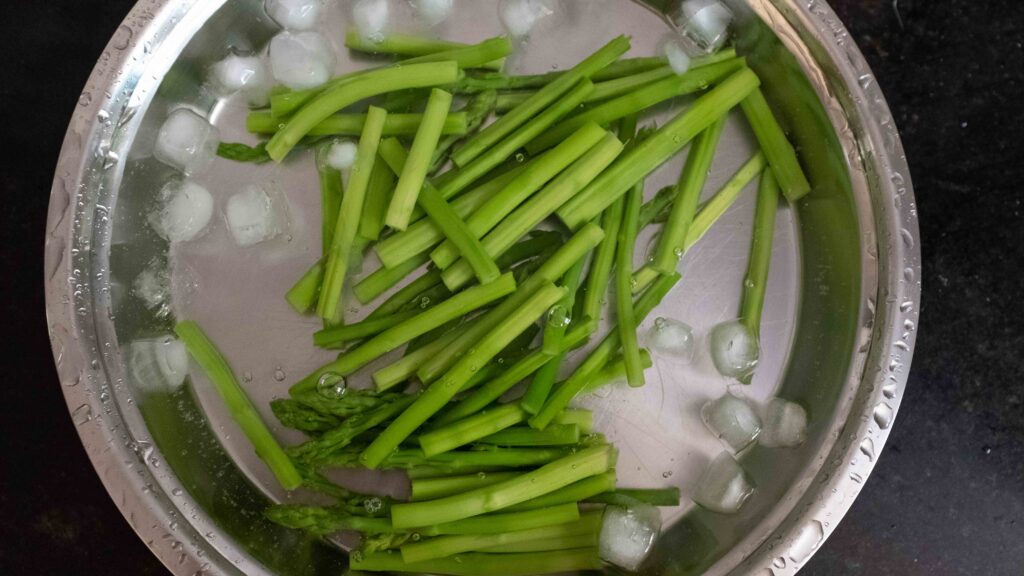
6 – As soon as the water’s boiling, throw 1 teaspoon of salt into a pot and place your asparagus batons in it. Also fill a bowl with 1 litre of cold water and add some ice cubes to it. Boil the asparagus batons for 2 minutes and then immediately transfer them to the ice water bath. This will stop the cooking process and lock in the lovely green colour.
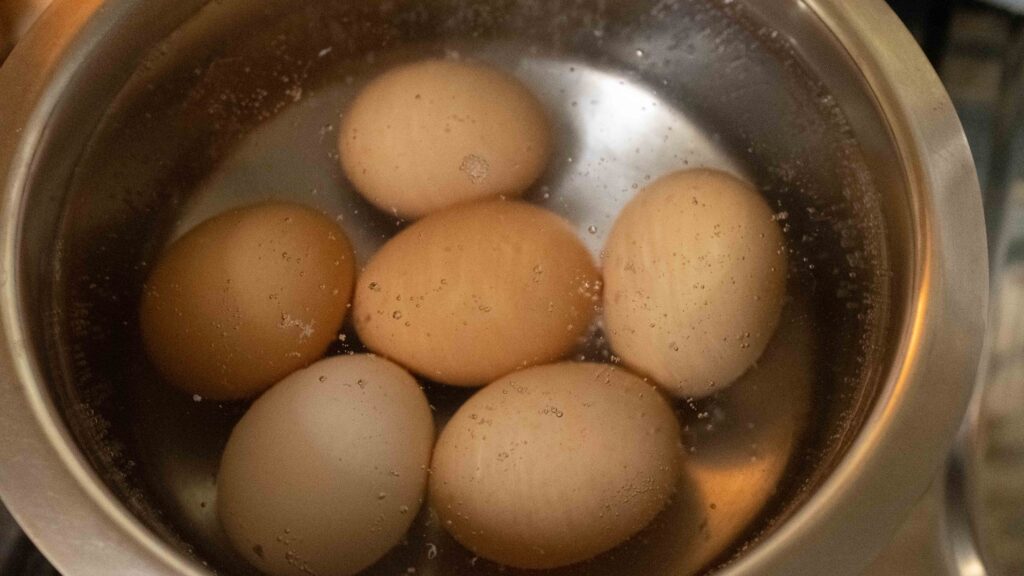
7 – Gently lower your eggs into the other pot of boiling water. Boil them for 8 minutes and then turn the stove off. Let them sit in the hot water for another 2 minutes, before removing them from the pot to cool.
8 – Using tongs, lift the asparagus batons out of the ice water and drain them on some kitchen paper.
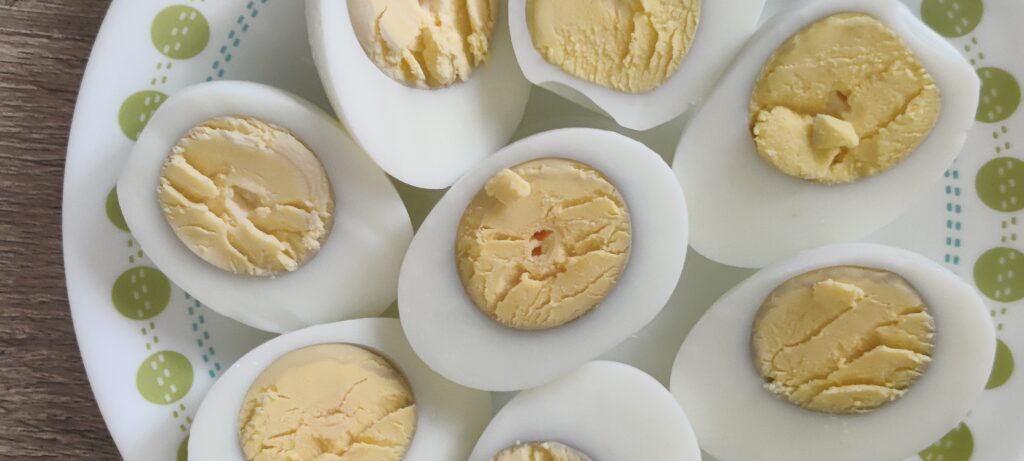
9 – Peel the cooled eggs and then cut each one in half down the centre.
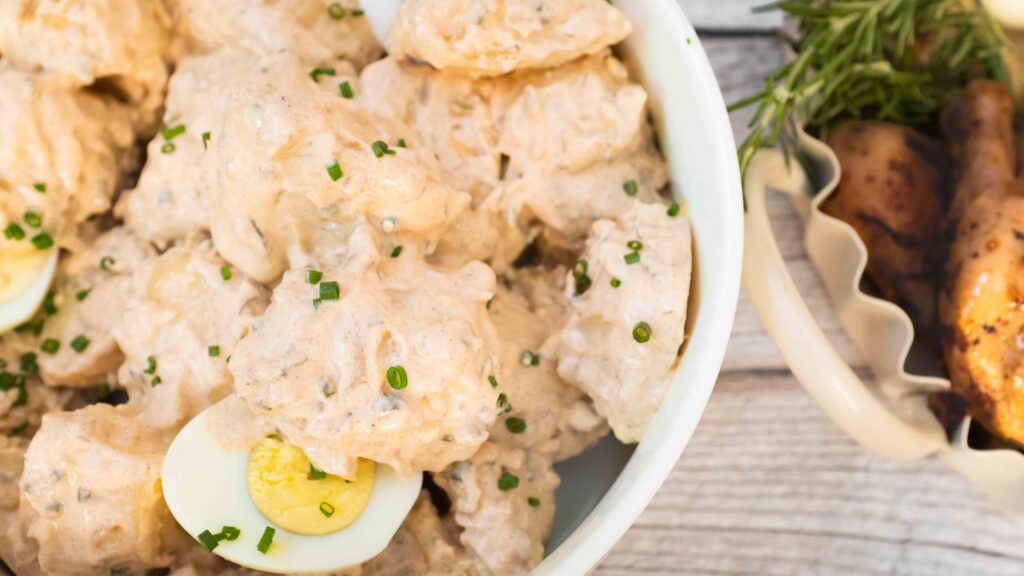
10 – Add the blanched asparagus batons and halved, boiled eggs to the potato salad. Gently mix everything together with a large spoon, taking care not to cut into the eggs.
11 – Cover the bowl of potato salad and place it in the fridge to chill for 8 hours to overnight. Potato salad tastes best when thoroughly chilled.
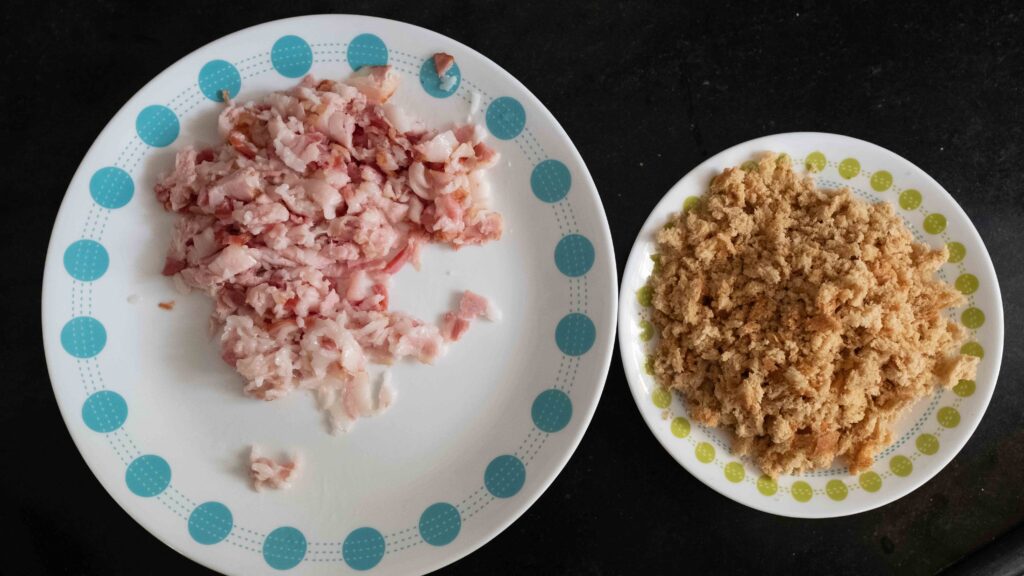
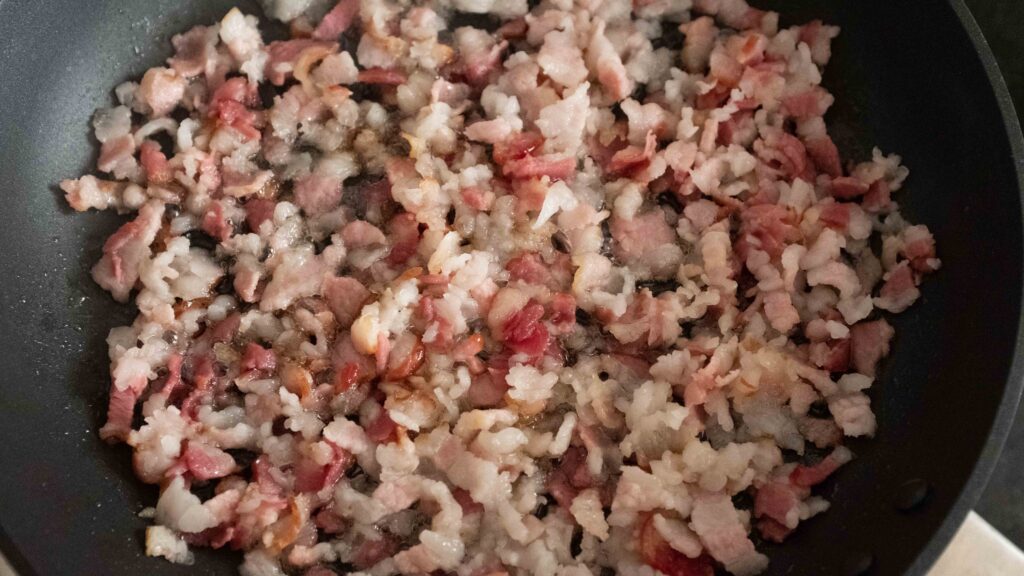
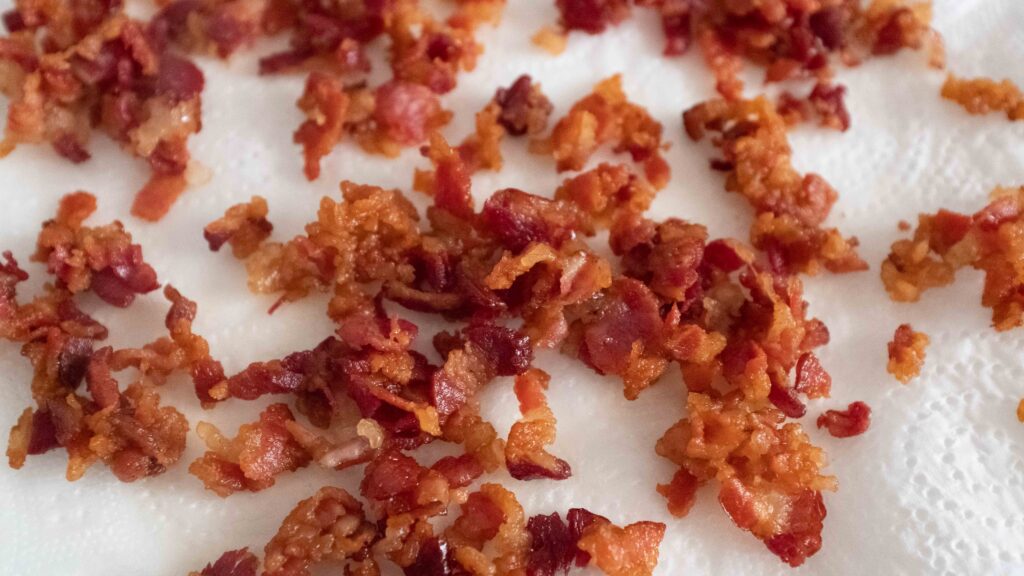
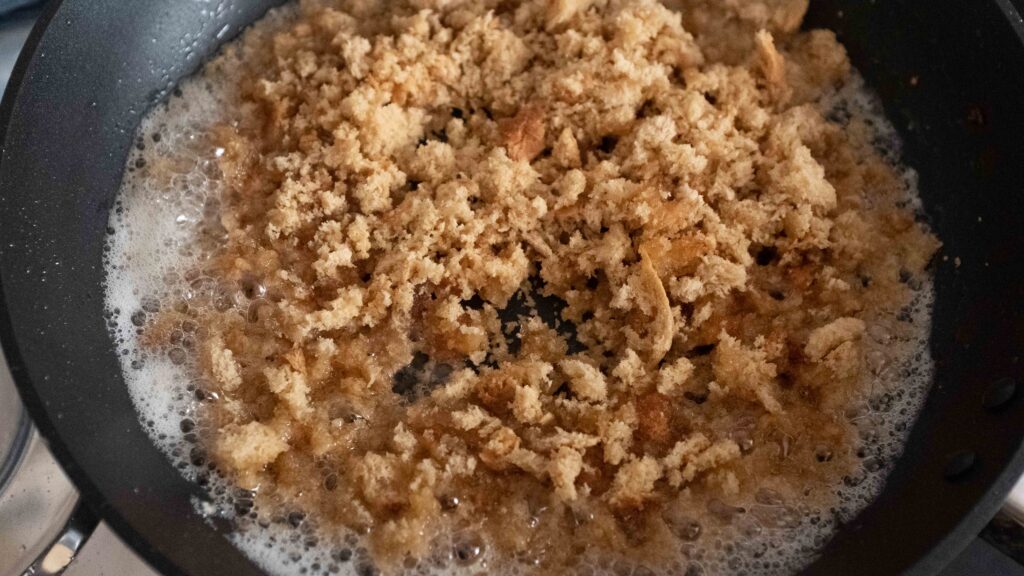
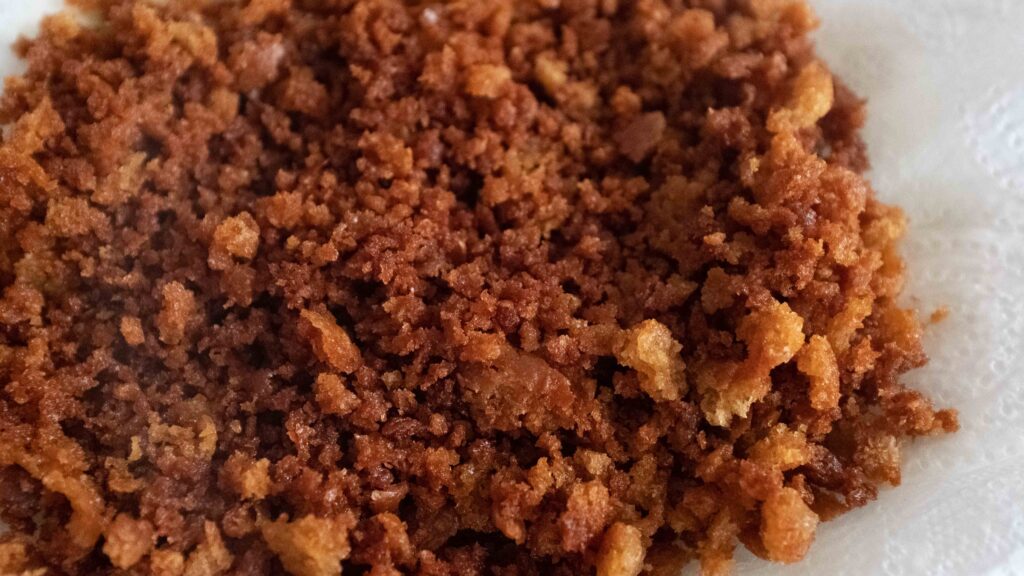
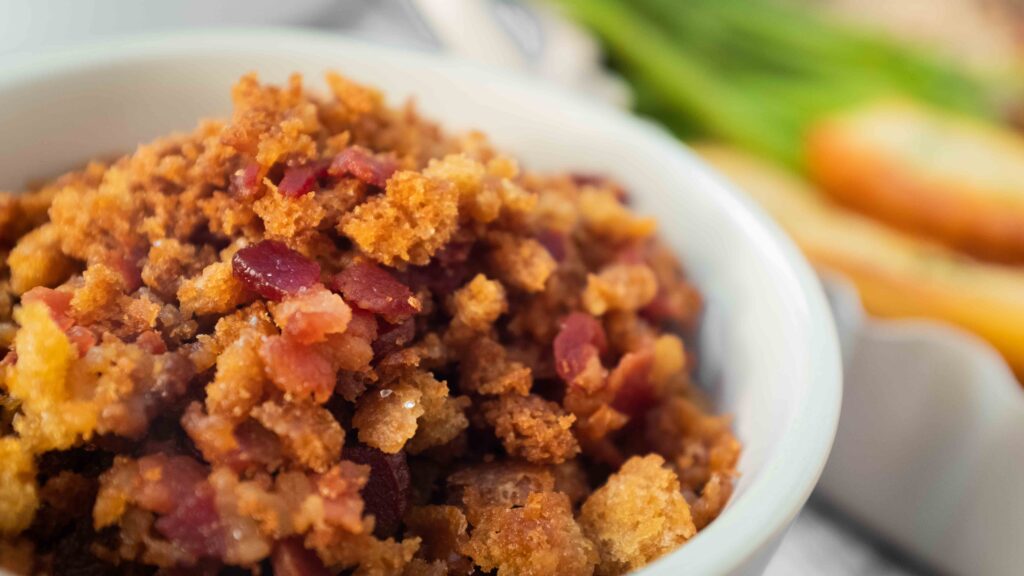
12 – To make the bacon breadcrumbs topping, chop your bacon rashers into little chunks. Place them in a cold skillet and then begin heating it on low. Cook the bacon bits on low heat for 15-20 minutes until the fat completely renders and the meaty bits become crispy and brown. Using a slotted spoon, remove the crisped-up bacon and place it to drain on paper towels. Don’t throw away the stuff in the skillet! We’re about to use all that rendered fat. Place the skillet back on low heat. Crumble your bread slices into coarse crumbs and add them to the skillet. They will fizz in the fat! Fry the bread crumbs on low heat, tossing frequently, for 5-7 minutes until they are browned and crunchy (you’ll hear them ‘scraping about’ in the pan). Transfer the fried bread crumbs to some paper towels to drain, and immediately sprinkle them with the salt. Once both the bacon and bread crumbs are cool, transfer them to a bowl, toss them together and that’s it. Your salty, crunchy potato salad topping is ready! Give it a taste and add more salt if desired. Thereafter, place it in an airtight container and store it in the fridge. Since your potato salad needs an overnight chill, now’s the best time to proceed with Stage 2.
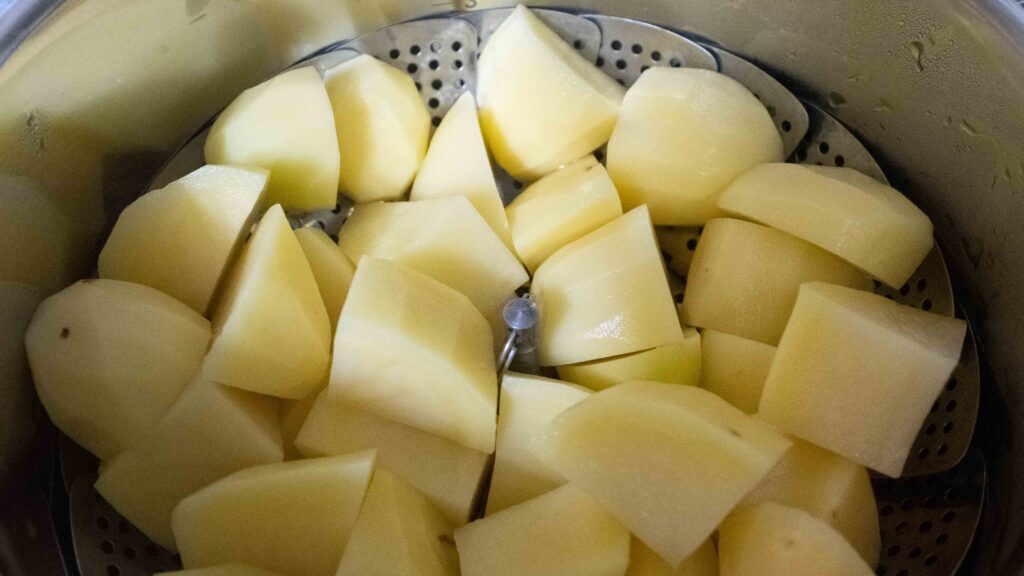
Steaming potatoes is the best way to cook them without losing moisture or nutrients. We use the same cooking technique when we’re making mashed potatoes, as steaming prevents the potatoes from absorbing too much water and becoming gluey. Check out our mashed potato frosting recipe in our Meatloaf & Mash Cake. Avoid using lean bacon when making the topping, as there’s simply not enough fat to render out, and it tends to become chewy rather than crispy . While we’ve used asparagus to add some green crunch to the salad, you could just as well use French beans or broccoli if you prefer. Leave out the bacon and the eggs and use a vegetarian mayo to make this a completely vegetarian potato salad!
Stage 2: roast chicken drumsticks
Ingredients
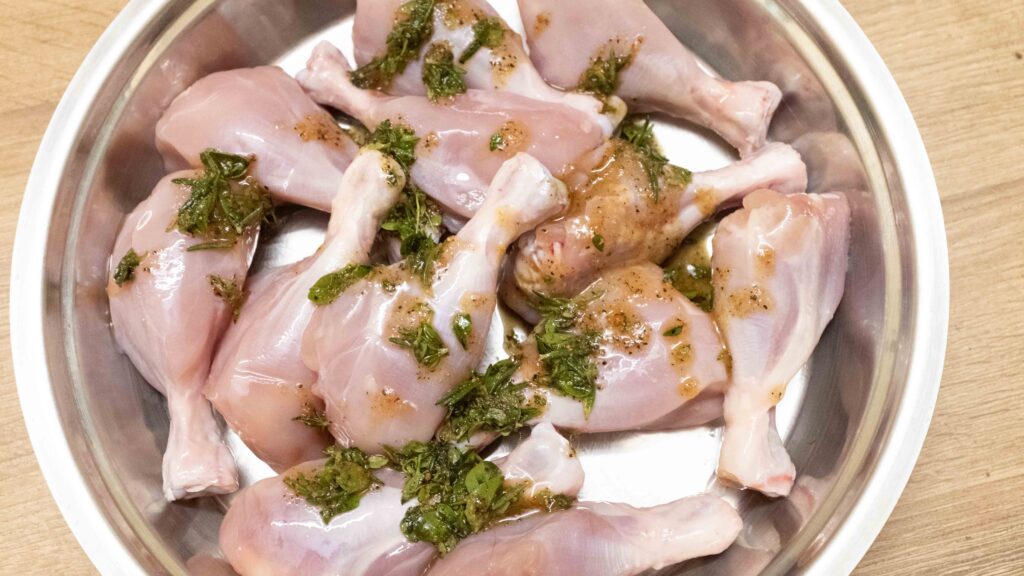
1. 12 skinless chicken drumsticks
For the marinade
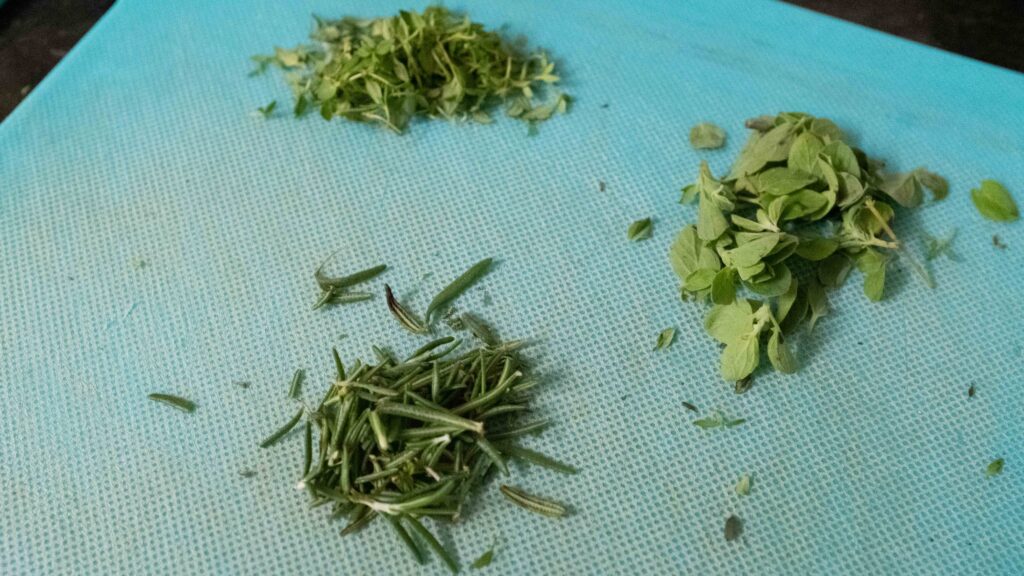
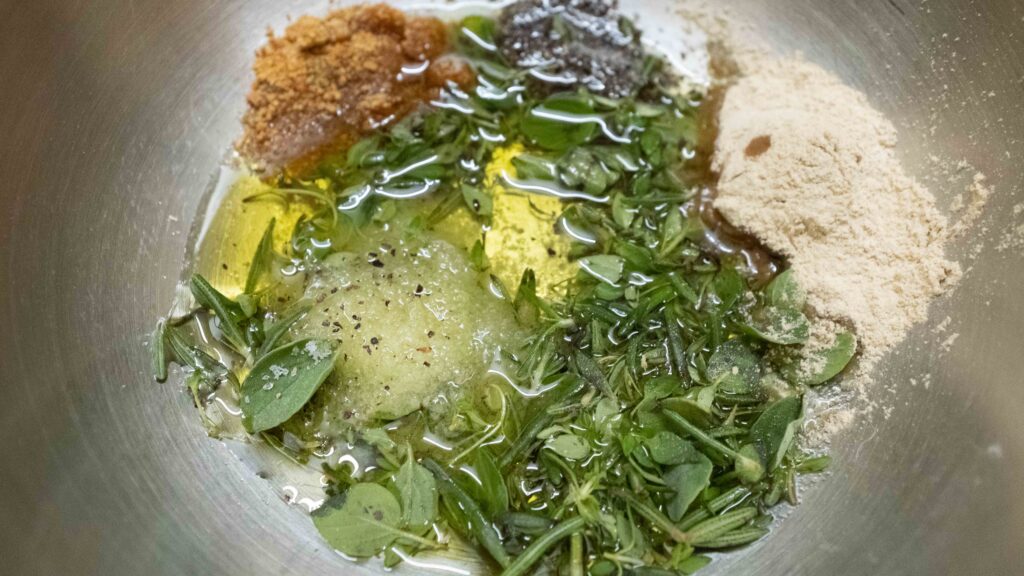
2. 1 tbsp. fresh rosemary (2-3 sprigs)
3. 1 tbsp. fresh thyme (8-9 sprigs)
4. 1 tbsp. fresh oregano (5-6 sprigs)
5. 1 tbsp. onion powder
6. 1/2 tbsp. garlic powder
7. 2 tbsp. extra virgin olive oil
8. 1/2 tsp freshly cracked black pepper
9. 1 tsp salt
Garlic butter for the roast
10. 200 gm salted butter (softened to room temperature)
11. 4-6 medium garlic cloves
12. 1/2 tsp salt
If you can’t get fresh rosemary, thyme, and oregano, you could use the dried variants, but they won’t be as nice. If using dried herbs, reduce the amounts to half tablespoon each. I don’t like cooking an entire chicken. Firstly, it’s a pain to prep, and then you have to baby sit it constantly so that the breast pieces don’t overcook while the legs are waiting to catch up. By using only the drumsticks, the time and effort is slashed. Plus, the legs are the juiciest, most-flavourful cuts, so there’s no fighting over the best pieces.
Method
1 – Clean, and then pat the chicken drumsticks dry with some paper towels.
2 – Remove the leaves from your sprigs of rosemary, thyme, and oregano. You should be left with roughly 1 tablespoon of each type of fresh herb. Roughly chop up the herbs.
3 – Transfer the chopped herbs to a large bowl. Now add the onion powder, garlic powder, cracked black pepper, salt, and the extra virgin olive oil. Give it a good mix. This is your marinade.
4 – Pour the marinade over the chicken drumsticks and rub it very well into all the pieces. Marinate the chicken drumsticks for at least 2 hours or overnight in the fridge for best results.
5 – Make your garlic butter; use a garlic press to crush all the cloves of garlic. Then stir the minced garlic into your softened butter. Add the salt and mix once again until fully combined. Store your garlic butter in an airtight container in the fridge until ready to use.
6 – The following day (or at least 2 hours later), take your marinated chicken pieces out of the fridge and let them come to room temperature. In the meantime, preheat your oven to 230OC.
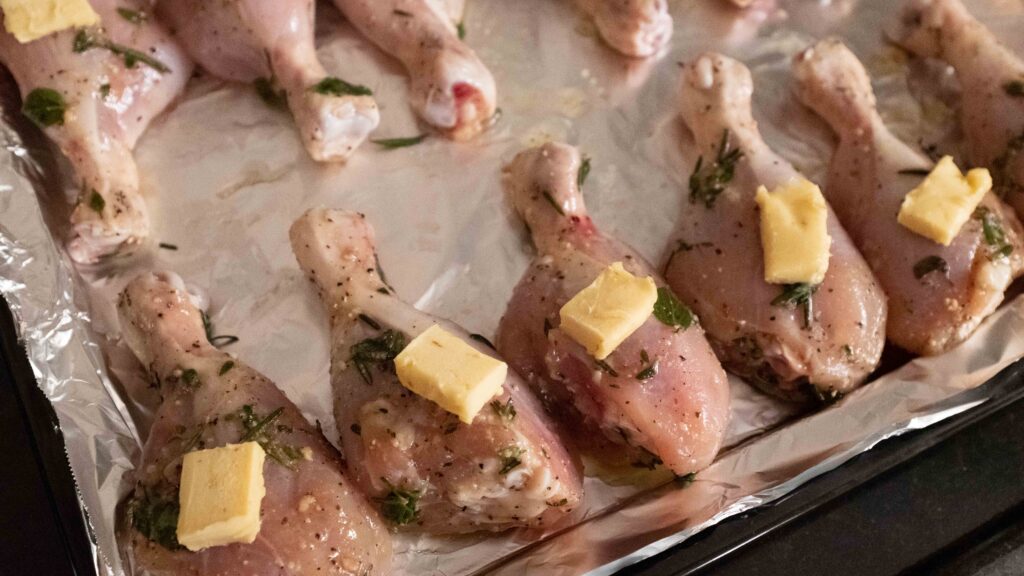
7 – Line a roasting tray with aluminium foil and place you chicken pieces in the tray in one single layer.
8 – Take your garlic butter out of the fridge and cut twelve 2 x 2 cm squares, about ½ cm thick. Keep the rest of the garlic butter aside. It will be used in Stage 3.
9 – Place a square of garlic butter on each chicken drumstick.
10 – Place your roasting tray on the highest rack of the oven. Roast the chicken drumsticks for 20 minutes at 230OC, upper heating only, turning the pieces over at the halfway mark. If you’re worried about undercooked chicken, insert a meat thermometer into the flesh next to the bone; fully cooked chicken will give a reading of 73-75OC.
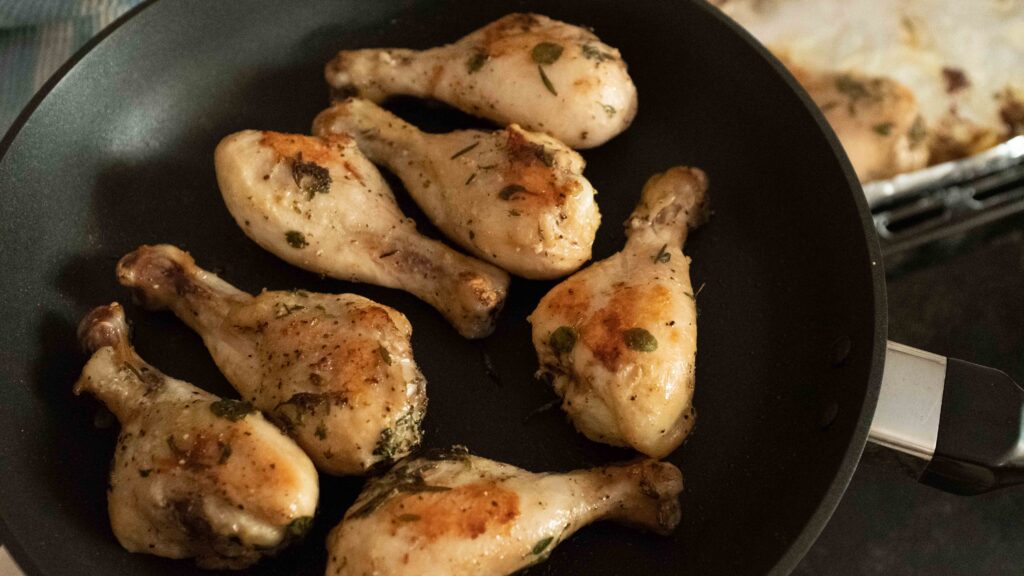
11 – Take the chicken out of the oven. Heat up a large skillet on the stove on high until it’s nice and hot.
12 – Transfer the chicken drumsticks to the hot skillet along with any residual roasting tray juices. Fry the pieces until you get a golden-brown sear on all sides, roughly 1-2 minutes per side.
13 – Your roast chicken drumsticks are ready! Remove them from the hot skillet and keep them on a tray to rest for 10 minutes – which is just enough time to whip up some garlic bread in Stage 3.
If you don’t have an oven, you can cook and fry the pieces on the stove as well. You will need to add about 50-80 ml of water to the pan and cook the chicken covered, before pan-frying it at the end. Chicken cook-time depends on the size of the pieces. If you’re finicky like me, check the internal temperature of the biggest piece in the pan. It should be 73-75 OC or 165OF. Don’t worry if the temperature is higher than that. The beauty of chicken drumsticks is that they’re very forgiving and remain juicy even if slightly over-cooked.
Stage 3: garlic bread
Ingredients
1. 2-3 baguette loaves ( 1 foot long, each)
2. Remaining garlic butter made in Stage 2
3. Fresh flat leaf parsley (1-2 sprigs)
Crusty on the outside and fluffy on the inside, the baguette is the perfect vehicle for this punchy garlic butter. You could use any type of bread you like, but since both the chicken and the potatoes are soft-textured, we like a bread with a bit of crunch and bite.
Method
1 – Begin preheating your oven to 200OC, upper heating element only.
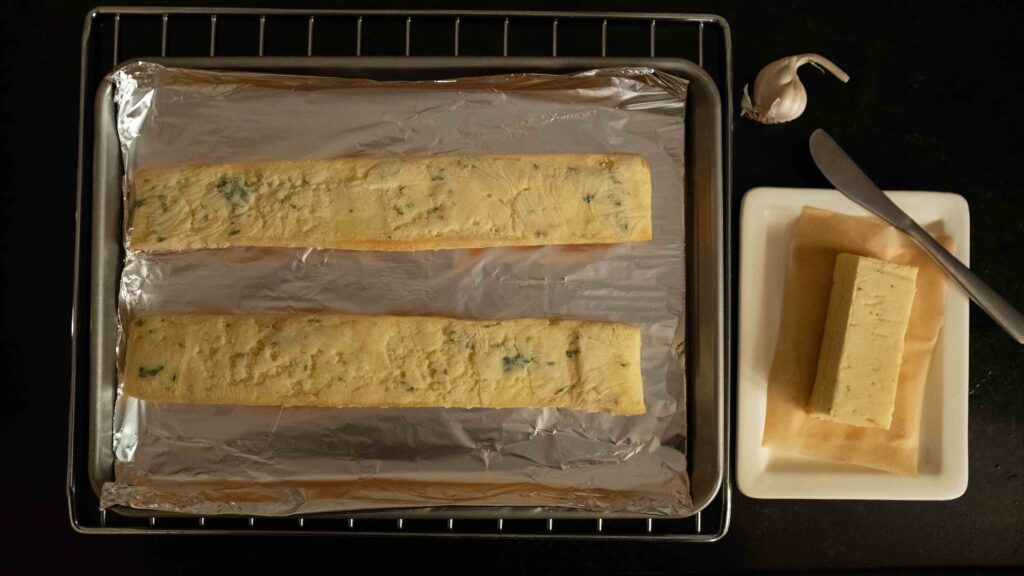
2 – Using a bread knife, saw your baguette loaves down the middle, lengthways, to get 1-foot long halves.
3 – Generously butter the cut-side of each half with the garlic butter.
4 – Finely chop your parsley leaves. Scatter about 1/4 teaspoon of chopped parsley on the buttered-side of each loaf.
5 – Line a roasting tray with aluminium foil and place your garlic bread in the tray in one single layer, buttered-side up.
6 – Place your baking sheet on the highest rack of the oven. Bake the garlic bread for 10-15 minutes at 200OC, upper heating only, until the aroma of roasted garlic fills the air, and the buttered-side is golden brown.
7 – Take your garlic bread out of the oven and get ready to serve everything up.
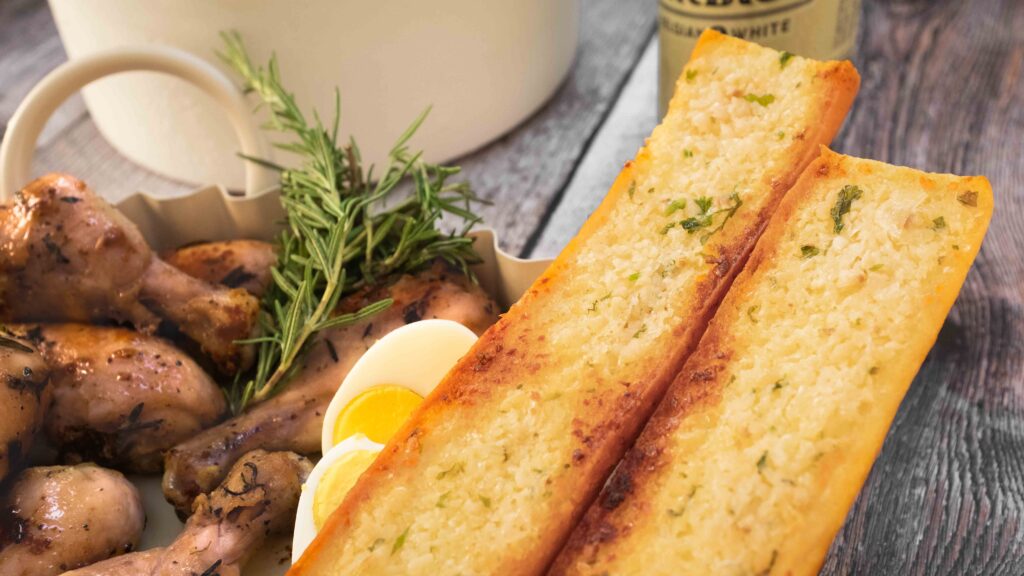
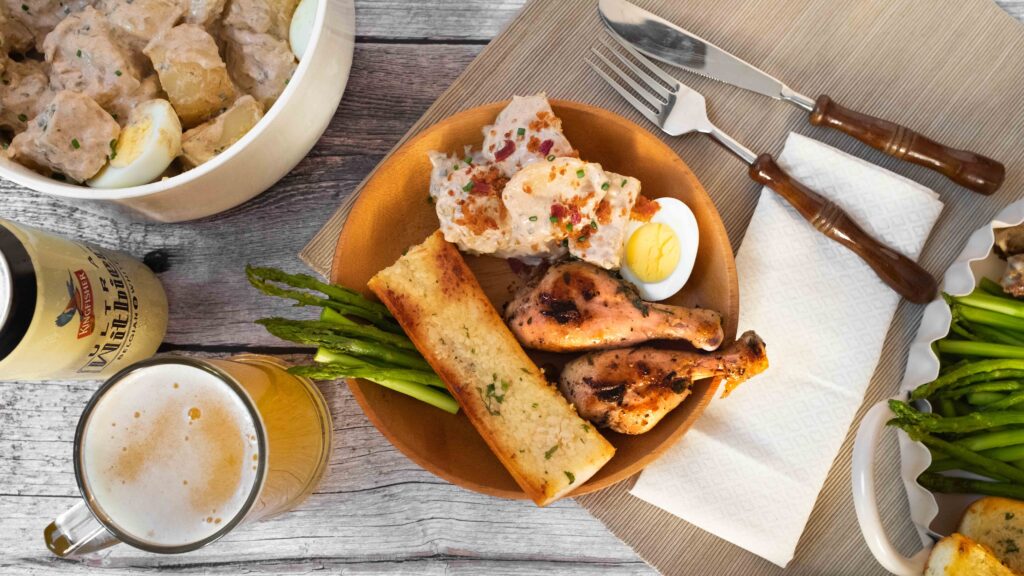
8 – Serve the garlic bread while it’s hot, along with the rested, roasted chicken drumsticks, cold potato salad, and some chilled beer on the side. Remember to sprinkle each serving of potato salad with a generous amount of the bacon and breadcrumb topping. Now eat!
Both the potato salad and the roast chicken drumsticks transport really well and make for perfect picnic food. The garlic bread should only be toasted right before serving, else it gets chewy and difficult to eat. To make the garlic bread on-site, simply toast the prepared loaves on a barbeque grill until the buttered side is golden-brown and the garlic smells cooked and fragrant. We love the roast chicken drumstick hot or cold, so how you eat them outdoors depends on your preferences and circumstances. If you like them hot ‘n’ fresh and have access to fire, take your raw, marinated chicken drumsticks with you and make them on-site, barbeque-style!
Tips & Tricks
How to trim asparagus