


Makes 40 x 1 ½ inch diamonds + extra
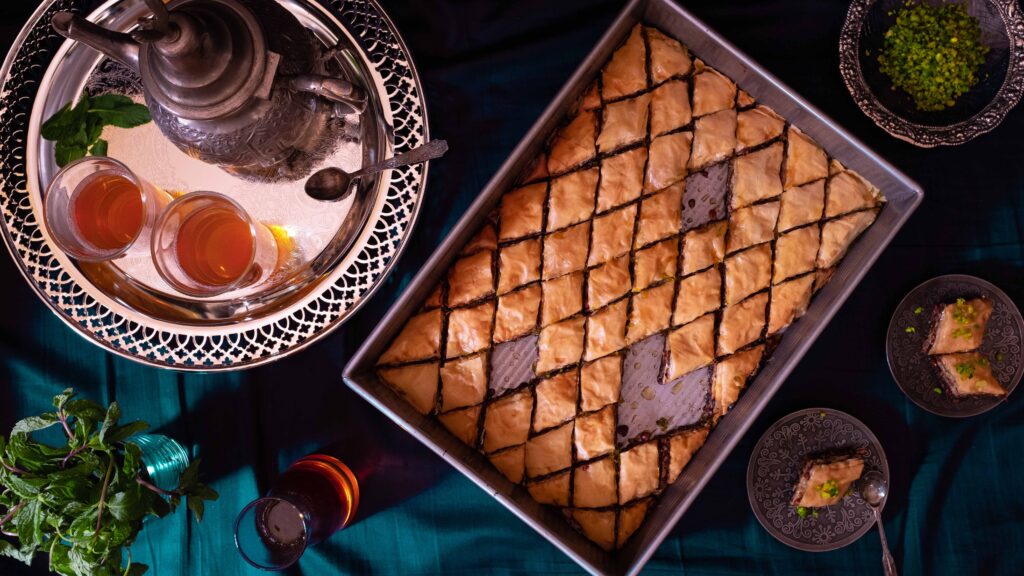
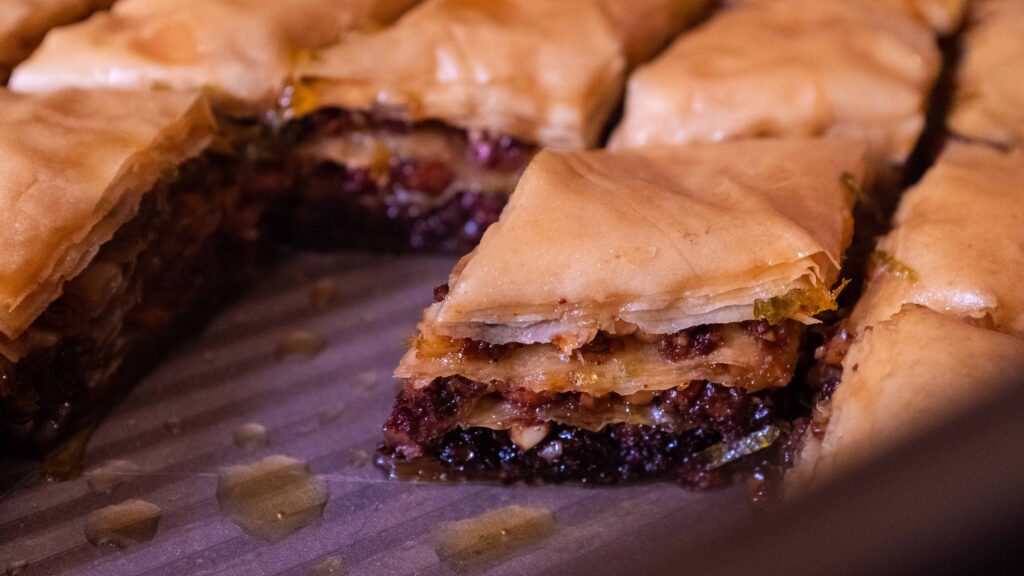
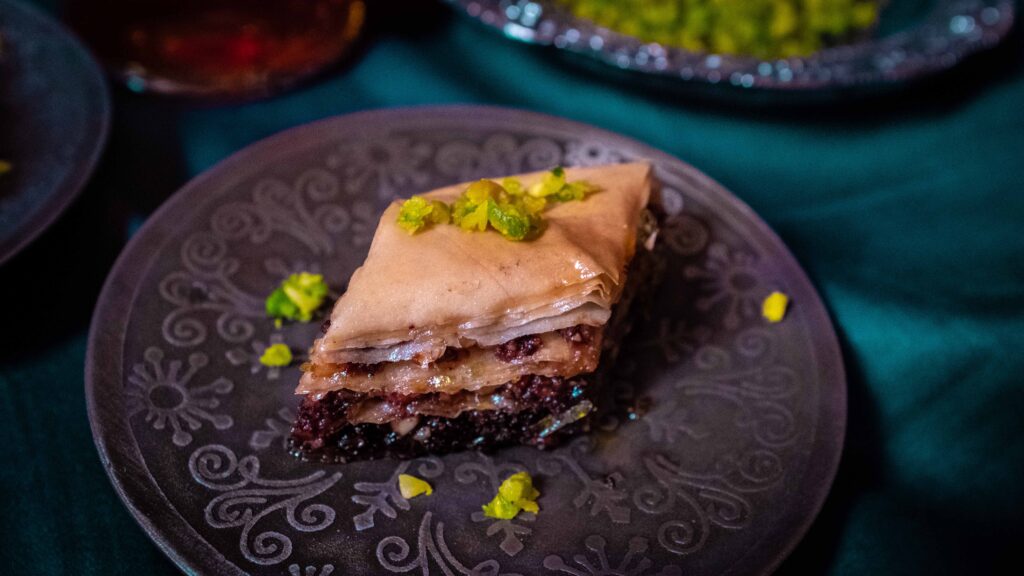
There’s a reason why Baklava is a special occasion dish. Layers of wafer-thin phyllo striated with a rich nutty filling and then doused in perfumed syrup. Talk about luxury! While many countries lay claim to Baklava’s origins, there’s no debate that this luxurious dessert is the perfect addition to an Iftar or any kind of spread. A little bit Greek, a tad Lebanese, and a whole lot Turkish, my baklava is sweet, fragrant, and utterly delicious. Served with a glass of homemade Moroccan Mint Tea, these diamond shaped bites will transform teatime into a grand feast.
At a glance
– This dish comprises Turkish Baklava + bonus recipe for Moroccan Mint Tea.
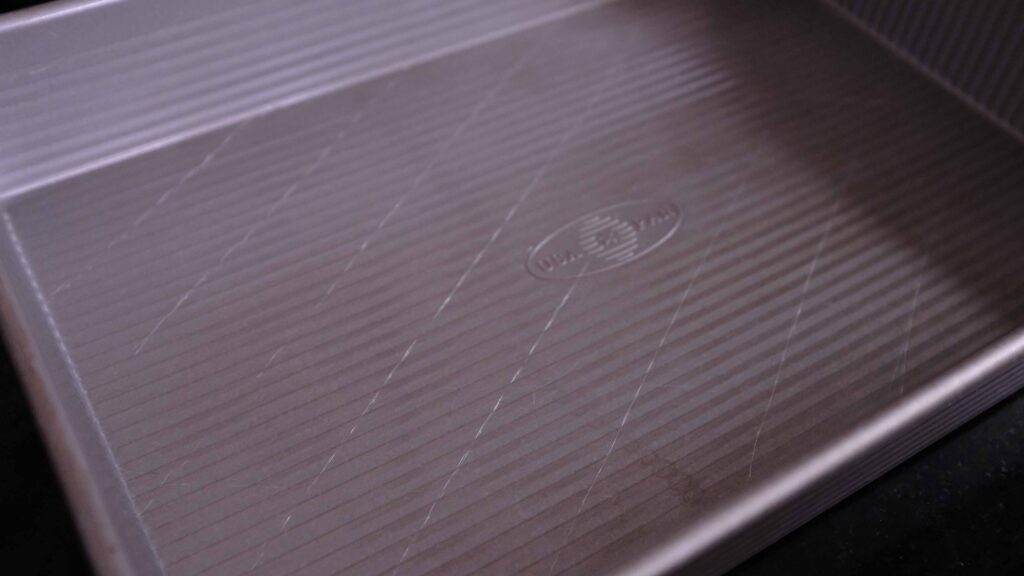
– You will need a food processor, some cooking pots, and a 9×13 light-coloured, high-sided, metal baking dish.
– This recipe has been broken into 5 stages for ease and comprehension. Please read the entire recipe from start to finish before beginning.
Stage 1: Blanch your pistachios
Ingredients
1. 250 gm pistachios (de-shelled weight)
2. 1 litre water for boiling
3. 1 litre cold water for rapid-cooling
Method
1 – To start, bring 1 litre of plain water to a gentle boil.
2 – Add 250 gm pistachio kernels to the simmering water and boil them for 1 minute.
3 – Remove the pistachios with a slotted spoon and immediately transfer them to a bowl of cold water.
4 – Let the pistachios sit in the cold water for 1 minute and then strain them through a colander. Discard the water. This process of blanching and rapidly cooling the nuts will loosen their skins.
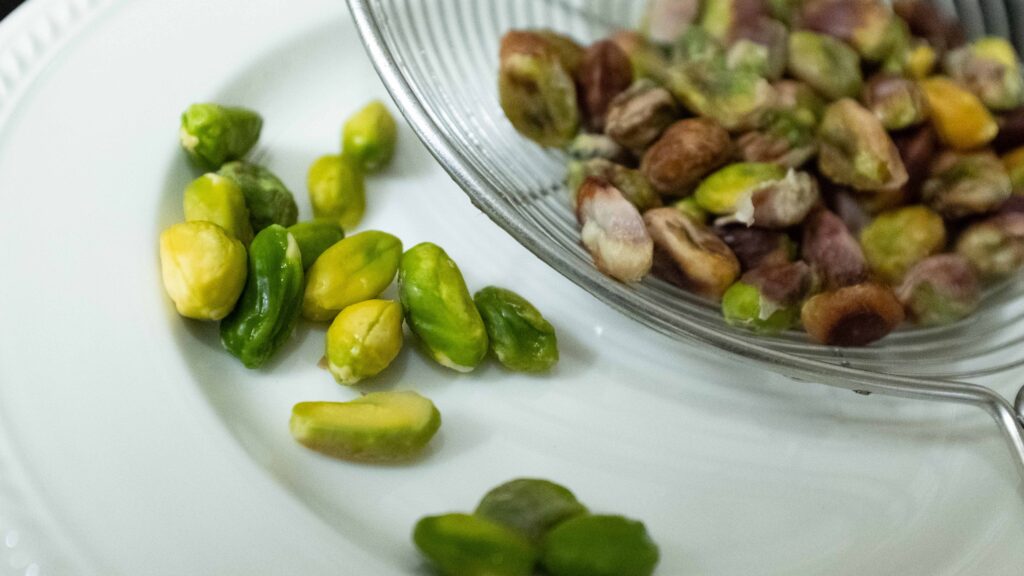
5 – To peel, pinch each nut and slip off the skin. See this for the technique.
6 – Spread the skinned pistachios on some kitchen paper to fully dry. Once they’re dry, store them in an airtight container in the fridge. Blanched pistachios ready, set aside.
Do not skip this step, because it makes a huge difference! Removing the skins intensifies the pure pistachio flavour and eliminates any unsavoury mustiness from the skins. Plus, that intense green colour of a skinless pistachio is inimitable.
Stage 2: Prep your baklava components
Ingredients
For the pouring syrup:
1. 4 cloves
2. 220 gm white granulated sugar
3. 220 gm golden syrup
4. 120 gm honey
5. 220 ml water
6. 1 tbsp. freshly squeezed lime juice
7. 1 tsp freshly grated lime zest
8. 1 tsp vanilla extract
9. 1 tbsp. freshly grated orange zest (optional but recommended)
10. 1 tsp rose water (optional but recommended)
This is a thin pouring syrup, which makes for a lighter, less-sweet baklava. The syrup plays a key role in how the final baklava will taste. Add or omit whatever flavourings you like. My husband loves the fruity note from orange zest and I love the light floral hint of rose water, so we add both. If you don’t like one/any, simply leave it/them off. You can also play with the ratio of golden syrup:honey. We don’t like honey to dominate the dish, so we’ve tempered it with the buttery, caramel notes of golden syrup. Feel free to swap the amounts if you like a strong honey flavour.
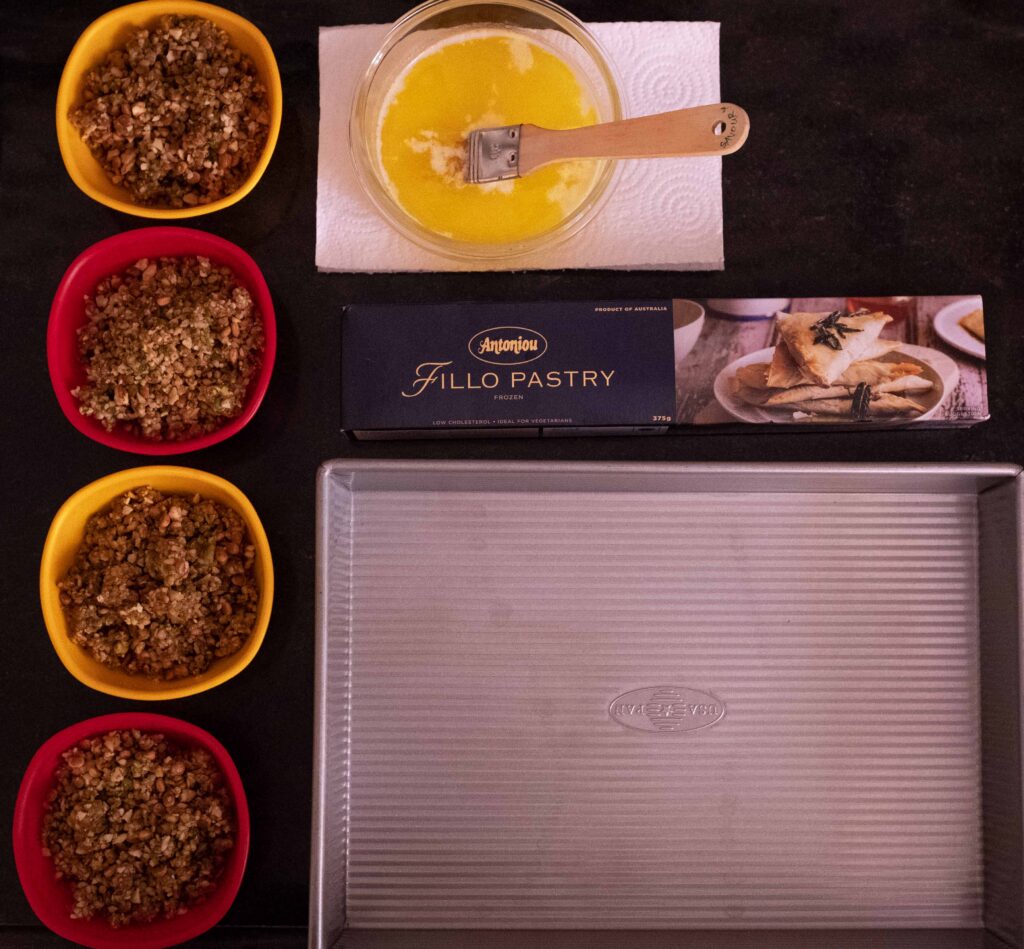
For the nut filling:
11. 200 gm blanched and skinless pistachios
12. 100 gm walnuts (de-shelled weight)
13. 100 gm raw almonds (skin on)
14. 100 gm almondette kernels aka ‘charoli’
15. ½ tsp salt
16. 2 tsp ground cinnamon
17. 3 tbsp. golden syrup
18. 2 tbsp. honey
For the phyllo layers:
19. 21 phyllo sheets (at least 9×13 inches)
20. 40 gm unsalted butter
21. 40 gm ghee
22. 40 gm extra light olive oil
For the garnish:
23. 50 gm blanched and skinless pistachios
Prep
1 – Thaw your phyllo sheets as per the package instructions (this can take 2 hours or more, so plan accordingly). Even if your phyllo sheets have been stored in the fridge, let them rest on your counter for a minimum of 2 hours.
Method
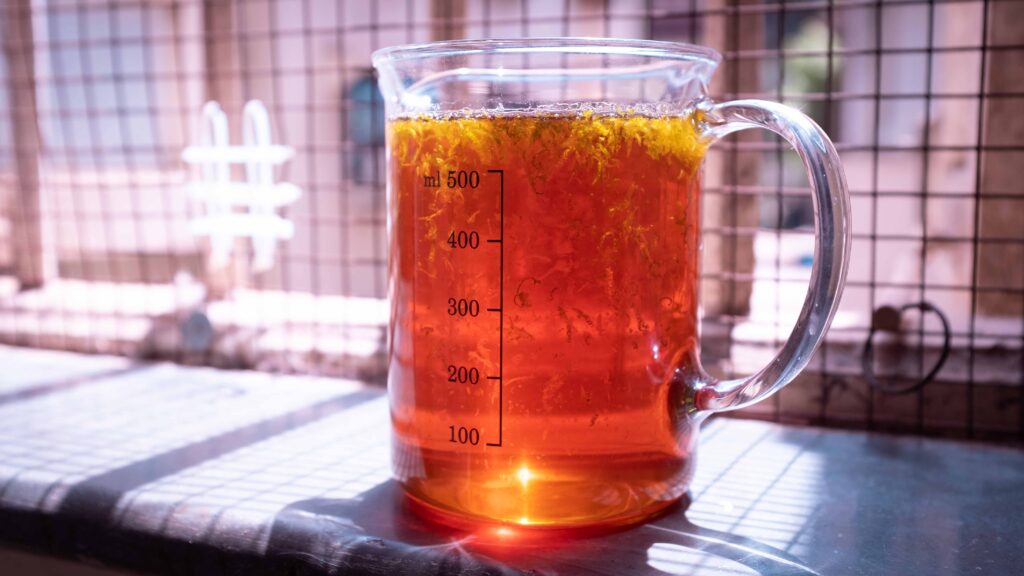
1 – Place the granulated sugar, the cloves, the golden syrup, the honey, and the water in a medium saucepan. Stir together to combine. Bring the saucepan to a boil and then reduce the heat to low. All the sugar will have dissolved by now. Simmer the mixture for 12-15 minutes. Thereafter, turn off the heat. Add the vanilla extract, lime juice, lime zest, orange zest, and rose water and stir the mixture. Set it aside to cool. Once it is cool, remove the whole cloves from the syrup and discard them. Pouring syrup ready. Set it aside.
2 – To the jar of a food processor, add 250 gm blanched and skinless pistachios. Blitz until you have fine chunks. Set aside 50 gm for garnish and place 200 gm in a large bowl. Then, add 100 gm almonds to the processor and blitz until powdery with a few small chunks. Do not over-process or the oils will start to release from the nuts. Transfer the processed almonds to the large bowl containing the processed pistachios. Next, add 100 gm walnut kernels to the food processor and blitz until you have fine chunks. Transfer the processed walnuts to the large bowl containing the processed almonds and pistachios. Now add the almondette kernels to the bowl. Finally, add the cinnamon powder, the salt, the golden syrup, and the honey to the bowl. Mix everything together with a fork until you have a coarse, crumbly, slightly sticky mixture. Nut filling ready. Set aside.
3 – Melt your fats together; add the ghee, butter and extra light olive oil to a medium bowl/saucepan. Microwave or heat on the stove until the ghee and butter have just melted, and then stir together. This fat mixture will be used to brush your layers of phyllo. Fat mixture ready, set aside.
4 – Once they’re fully thawed, unwrap your phyllo sheets. You will need 21. My packet had exactly 21, so I trimmed all the phyllo sheets (together) to 9×13 inches, to fit my baking dish. After the sheets are cut to the exact dimensions of your baking dish, lay a sheet of cling wrap on your counter and place the phyllo sheets on top of it. Lay another sheet of cling wrap on top of the phyllo sheets. Then lay a damp tea towel on top of the cling wrap. This will keep your phyllo sheets from drying out and cracking as you construct your layers of baklava. Phyllo sheets ready, set aside.
5 – Keep the following tools ready; a pastry brush and a sharp serrated knife.
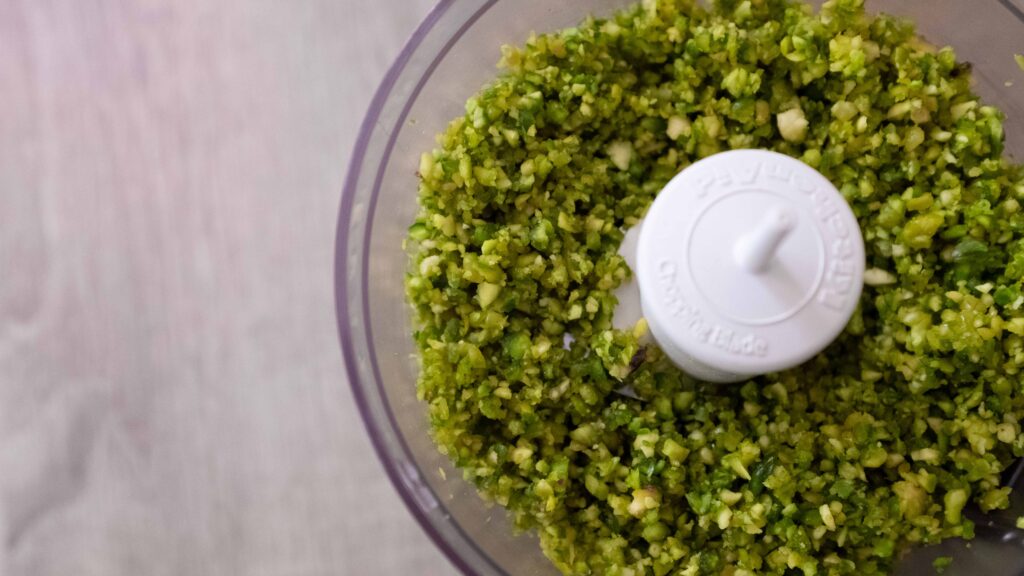
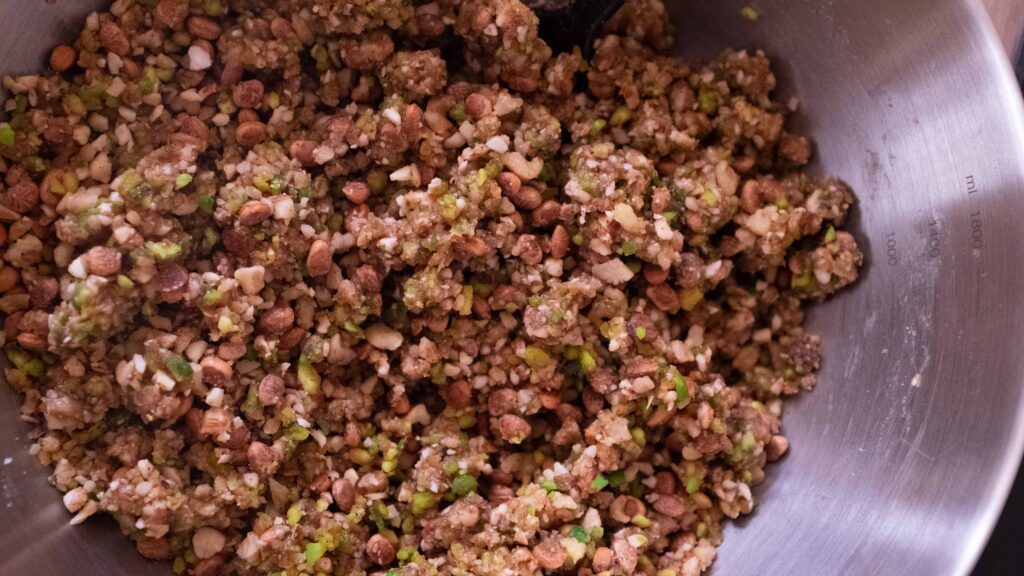
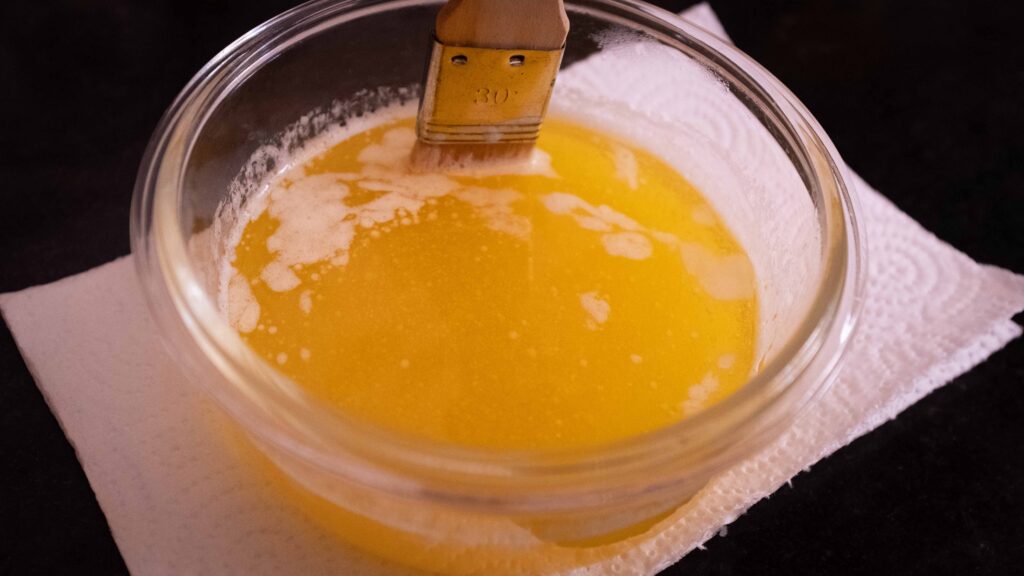
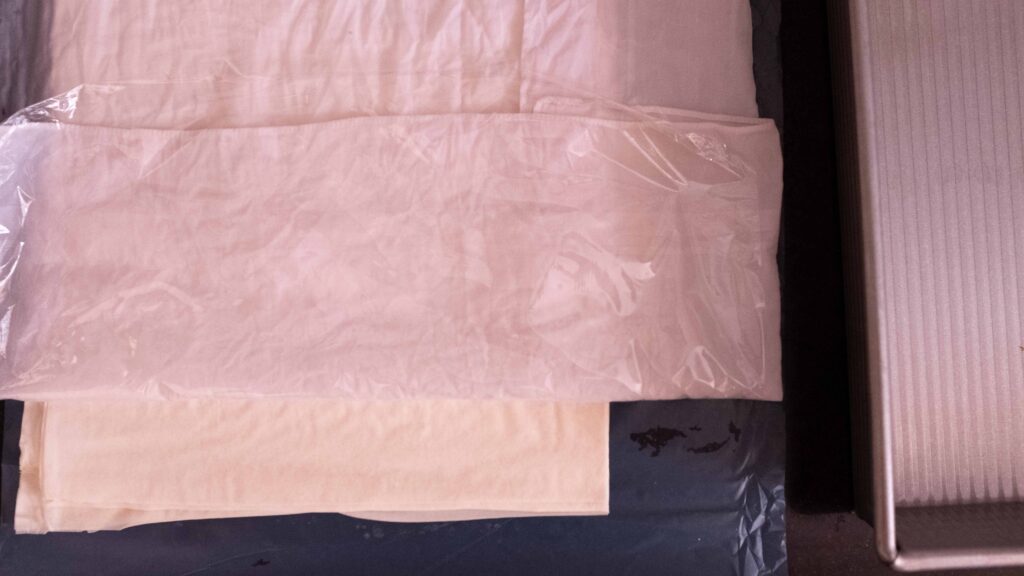
Traditionally, pistachios or walnuts make up the nut filling in a baklava. But why limit yourself to either? We like to use a combination of our favourite nuts and be really generous with them! For the perfect bite of baklava, don’t process your nuts too finely or too coarsely. Too powdery and you won’t be able to taste the individual textures and flavours. Too chunky, and the nuts will fall out while you’re cutting or biting into the pastry. Since pistachios, almonds, and walnuts have different levels of ‘hardness’, I like to process each type separately, lest I end up over-processing my walnuts and under-processing my almonds. With regard to the fat mixture, you could go all butter, all ghee, or all oil. We wanted the glorious richness of butter and ghee, mitigated with extra light olive oil. This fat blend makes the baklava super tasty but not super heavy. Whichever fat you choose, avoid extra virgin olive oil, as it carries a pretty strong flavour, which will overwhelm or muddle any of the other delicate flavours. When trimming your phyllo sheets to size, use a sharp pair of scissors rather than a knife. It’s much easier to get clean cuts without pressing down on the entire stack.
Stage 3: Construct your baklava
Components
1. 21 phyllo sheets trimmed to the size of your baking dish
2. Prepared nut filling
3. Prepared fat mixture
Method
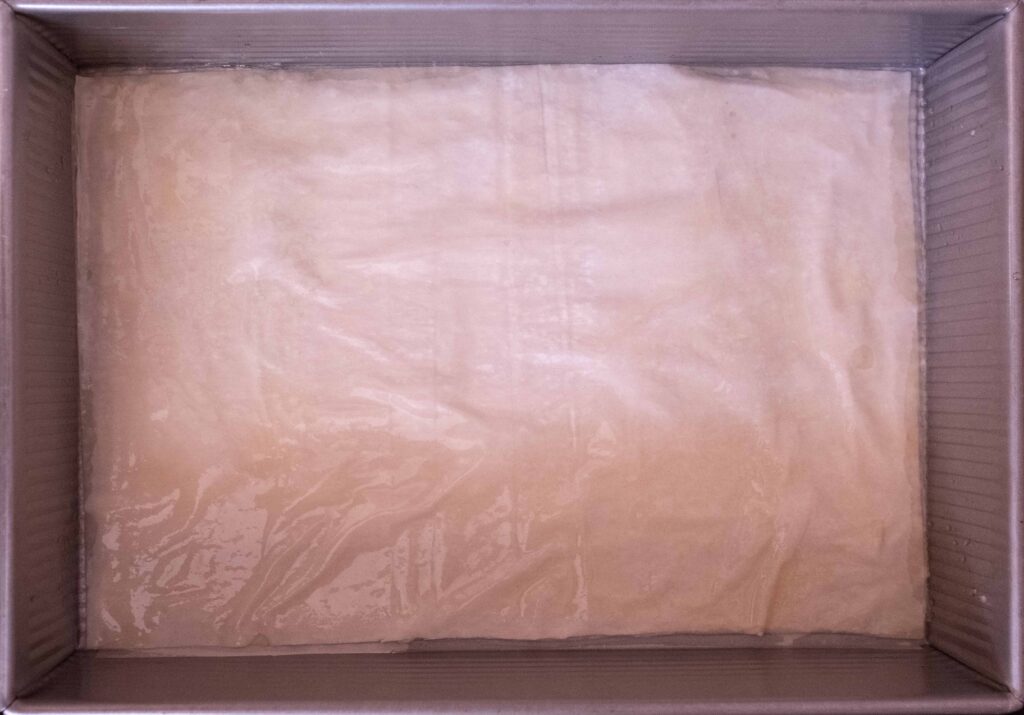
1 – Get your baking dish and lightly grease it with a thin brushing of fat. Don’t use a dark coloured metal dish or a glass dish. Dark metal dishes will cause your phyllo to overbake and glass dishes will prevent your phyllo from crisping up.
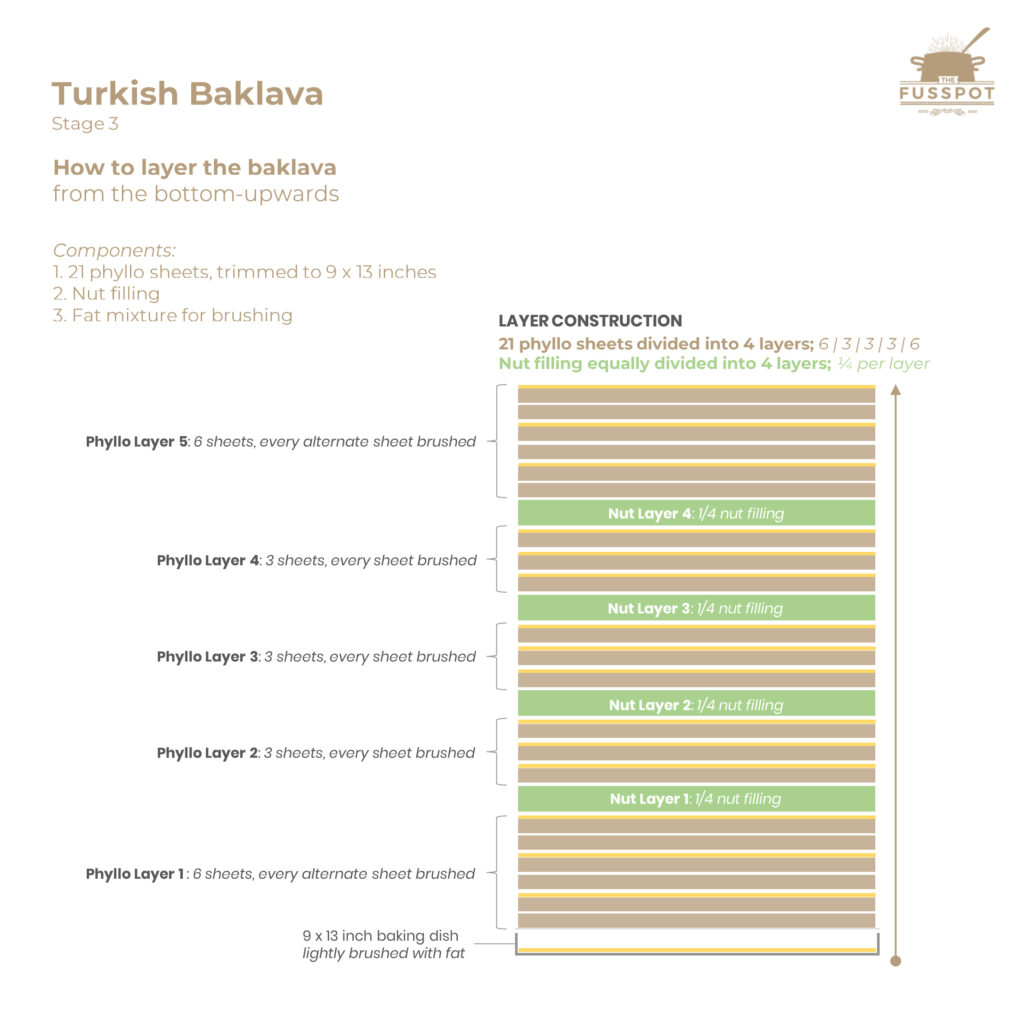
2 – Phyllo Layer 1; Grab 2 sheets of phyllo and lay them on the bottom of the dish. The sheets should be flush with the baking dish. Using a pastry brush, brush the top sheet with fat. Grab another 2 sheets of phyllo. Lay them on top and brush the top sheet with fat. Grab 2 more sheets of phyllo. Lay them on top and brush the top sheet with fat. You should have 6 sheets, with every alternate sheet brushed with fat.
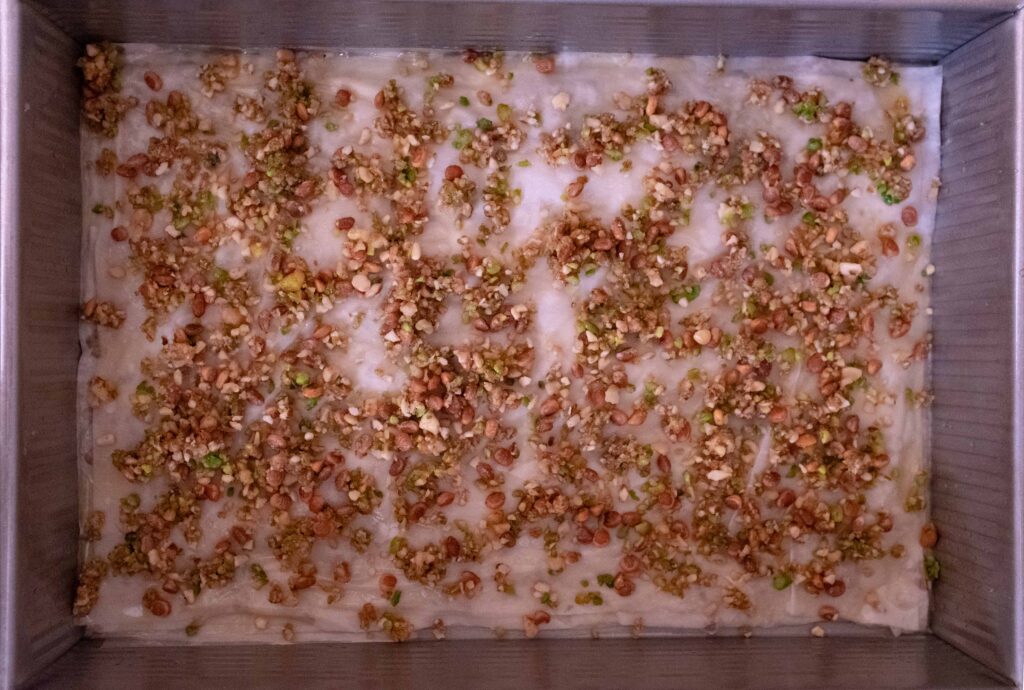
3 – Nut Layer 1; Scatter ¼ of the nut filling evenly over Phyllo Layer 1. Lightly press the nuts down onto the phyllo sheet.
4 – Phyllo Layer 2; Grab 1 sheet of phyllo and lay it on top of Nut Layer 1. Brush it with fat. Grab a second sheet of phyllo. Lay it on top and brush it with fat. Grab a third sheet of phyllo. Lay it on top and brush it with fat. You should have 3 sheets, with every sheet brushed with fat.
5 – Nut Layer 2; Scatter another ¼ of the nut filling evenly over Phyllo Layer 2. Lightly press the nuts down onto the phyllo sheet.
6 – Phyllo Layer 3; Grab 1 sheet of phyllo and lay it on top of nut layer 2. Brush it with fat. Grab a second sheet of phyllo. Lay it on top and brush it with fat. Grab a third sheet of phyllo. Lay it on top and brush it with fat. You should have 3 sheets, with every sheet brushed with fat.
7 – Nut Layer 3; Scatter another ¼ of the nut filling evenly over Phyllo Layer 3. Lightly press the nuts down onto the phyllo sheet.
8 – Phyllo Layer 4; Grab 1 sheet of phyllo and lay it on top of Nut Layer 3. Brush it with fat. Grab a second sheet of phyllo. Lay it on top and brush it with fat. Grab a third sheet of phyllo. Lay it on top and brush it with fat. You should have 3 sheets, with every sheet brushed with fat.
9 – Nut Layer 4; Scatter the final ¼ of the nut filling evenly over Phyllo Layer 4. Lightly press the nuts down onto the phyllo sheet.
10 – Phyllo Layer 5; Grab 2 sheets of phyllo and lay them on top of Nut Layer 4. Brush the top sheet with fat. Grab another 2 sheets of phyllo. Lay them on top and brush the top sheet with fat. Grab 2 more sheets of phyllo. Lay them on top and brush the top sheet with fat. You should have 6 sheets, with every alternate sheet brushed with fat. That means the top-most sheet will be brushed with fat. Cover the baking dish with cling wrap and place it in the fridge for an hour to firm up.
Do not brush too much of the fat mixture onto the phyllo sheets. This will over-saturate the phyllo sheets and make them greasy and soggy after baking. A light, thin brushing of the fat mixture is all that’s required for perfectly crispy layers of phyllo.
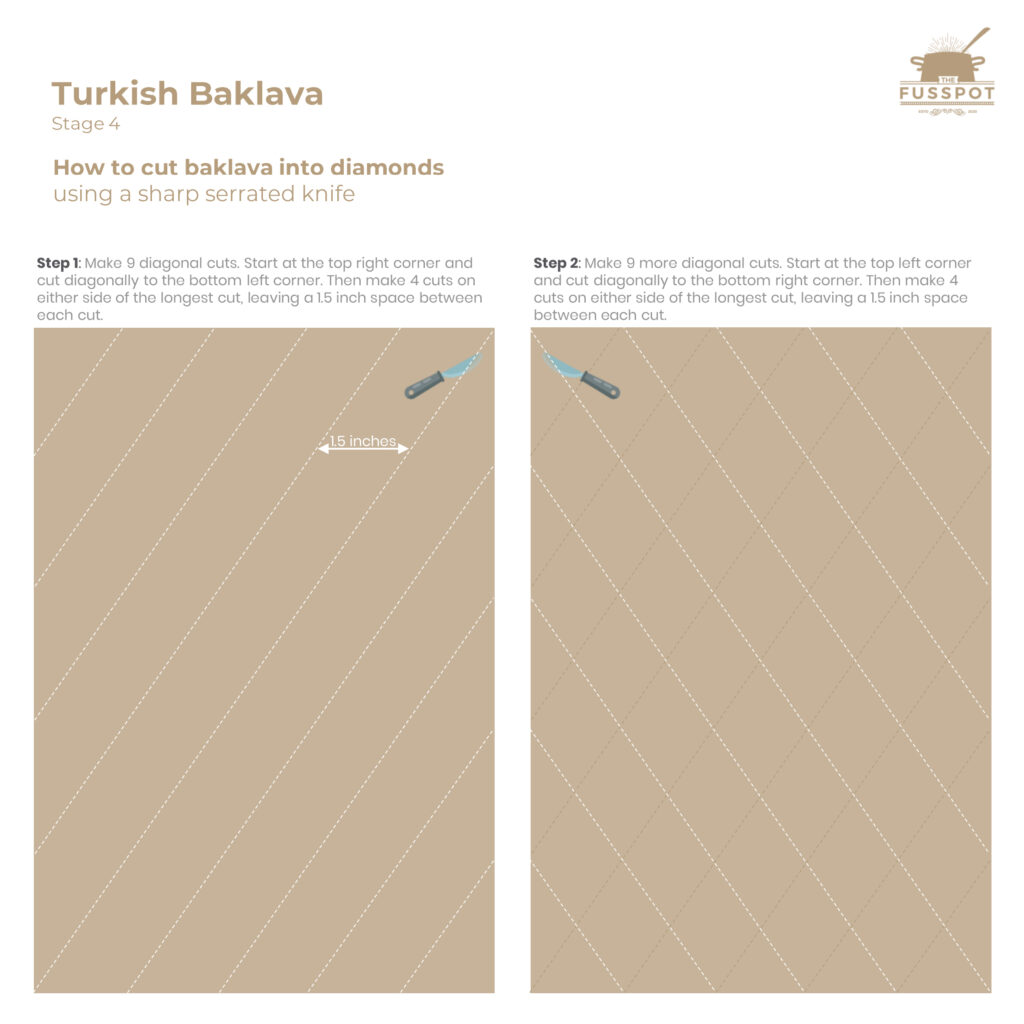
Stage 4: Cut your baklava
Components
1. Fully constructed and chilled baklava from Stage 3
Method
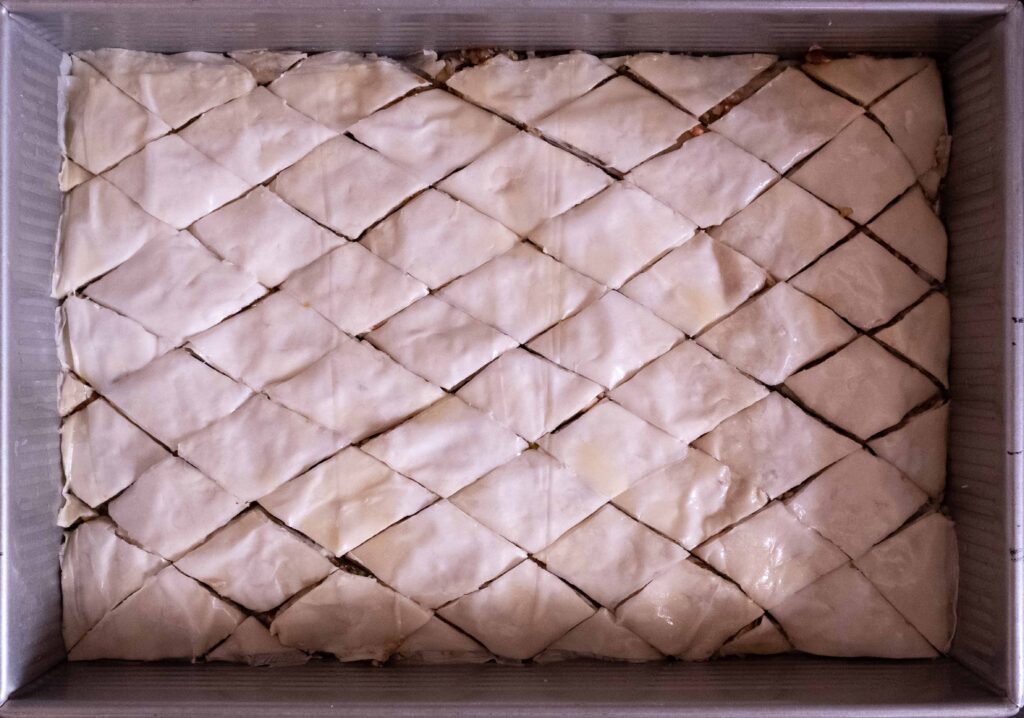
1 – After 1 hour in the fridge, take the baklava out. Using a very sharp serrated knife, cut through all the layers right down to the bottom of the dish. I do a small sawing motion. Make 9 diagonal cuts from top right to bottom left, and then 9 diagonal cuts from top left to bottom right—to form a diamond pattern. These cuts not only create serving portions, they also form the pathways for the flavoured syrup to trickle down, and then travel upwards into the layers of pastry. Try not to put any pressure or press down on the pastry while you’re cutting it. If you’ve used a 9×13 dish, you will get around 40-42 perfect diamonds and some random triangles all around the periphery.
2 – Place the baking dish back in the fridge, and set your oven to pre-heat at 175OC for 20 minutes.
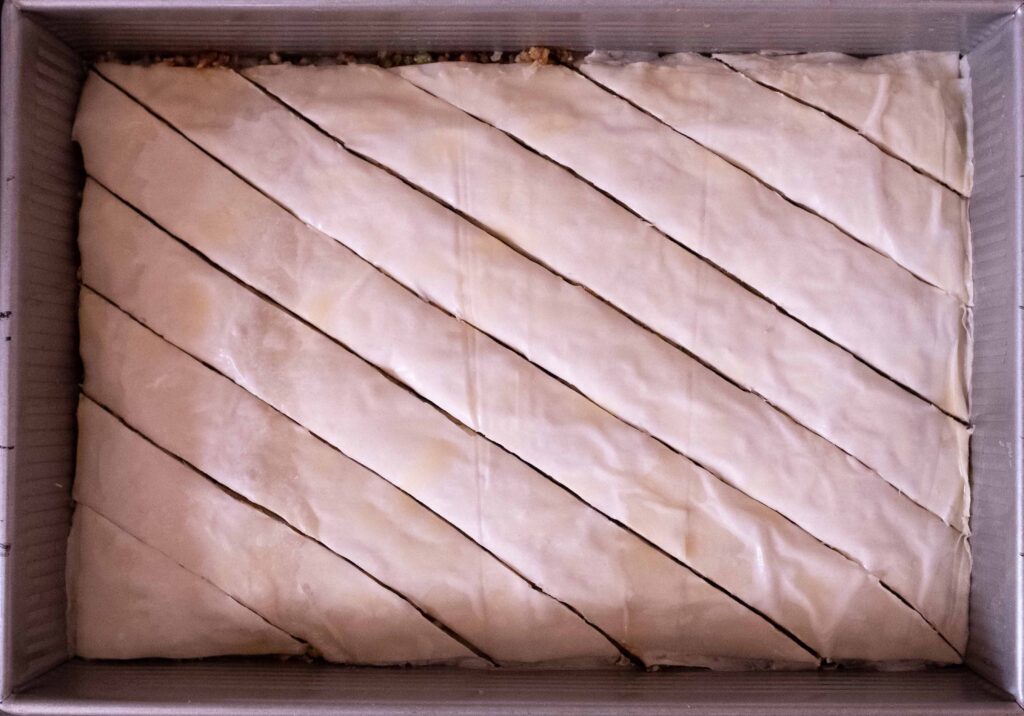
Phyllo is delicate and slippery once it’s brushed with fat and cutting cleanly can be challenging in hot weather. You may need to refrigerate your dish for 30 minutes halfway through making the cuts, to firm up the pastry (I did). It’s incredibly important to make your cuts of baklava before you bake it. Once phyllo pastry is baked, it’s crispy and brittle. If you try to cut through it after baking, it will simple break apart and all your meticulous layering will be for nought.
Stage 5: Bake & decorate your baklava
Components
1. Pre-cut and chilled baklava from Stage 4
2. Room temperature syrup from Stage 2
3. 50 gm finely processed blanched and skinless pistachios from Stage 2
Method
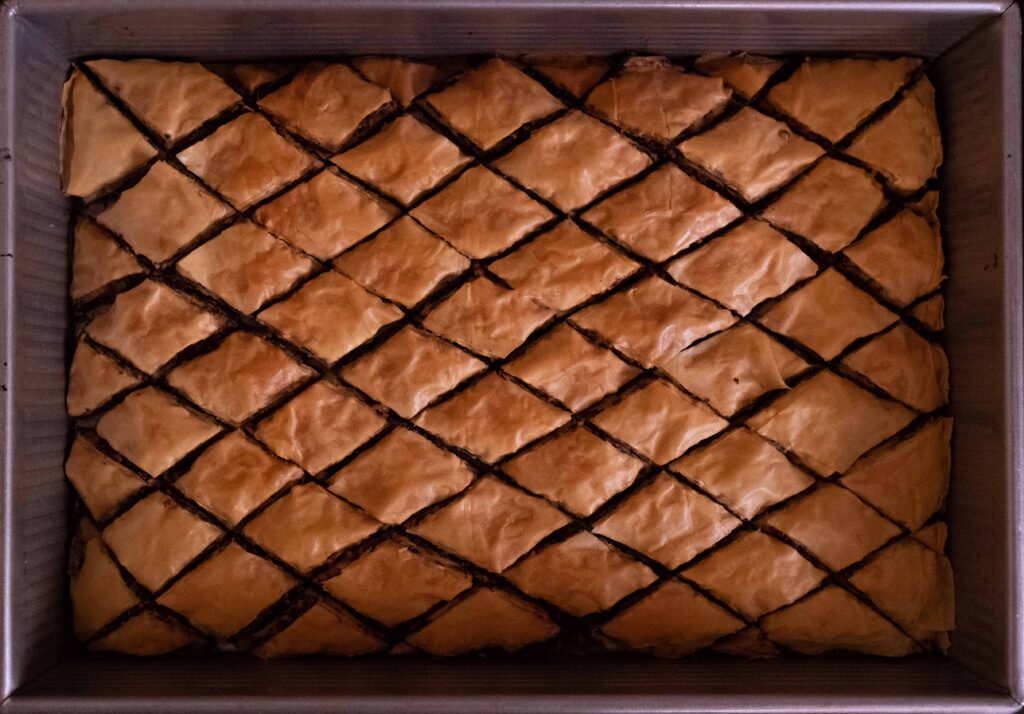
1 – Place your chilled baklava in the middle rack of the oven and bake the baklava for 50-55 minutes at 175OC, rotating the dish halfway though. Bake until the top layer of phyllo is golden and crispy. Mine took 52 minutes.
2 – Remove the baking dish from the oven. While the baklava is still piping hot, pour the room temperature syrup onto it, only trickling it between the cuts and around the edges of the dish. It will sizzle! Do not pour the syrup on the surface of the baklava as this will ‘glaze’ the tops. You will have some extra syrup left over (we had about 1/3rd left). Do not be tempted to add all of the syrup and over-saturate the baklava. Reserve the leftover syrup to pour on individual servings to taste. If for whatever reason, you forget to add the syrup step while the baklava is hot, all is not lost. Simply wait for the baklava to fully cool, then heat up the syrup till boiling, and then trickle it on the baklava as already instructed.
3 – Once the baklava has cooled down completely, cover the dish with a tea towel or a cheesecloth and allow the baklava to soak up the syrup for 24 hours. After this period, it’s at its crispiest, juiciest best. Don’t skip the waiting time — it’s crucial for your Turkish style baklava to reach optimum yumminess,
4 – When you’re ready to eat, use a regular butter knife to re-cut the already marked out diamonds (just in case the syrup has melded any bottom layers together or you didn’t cut all the way through the first time). Then, use a small offset spatula to gently ease and lift out the individual diamonds of baklava. Ice tongs really help to grab and lift up individual diamonds as well.
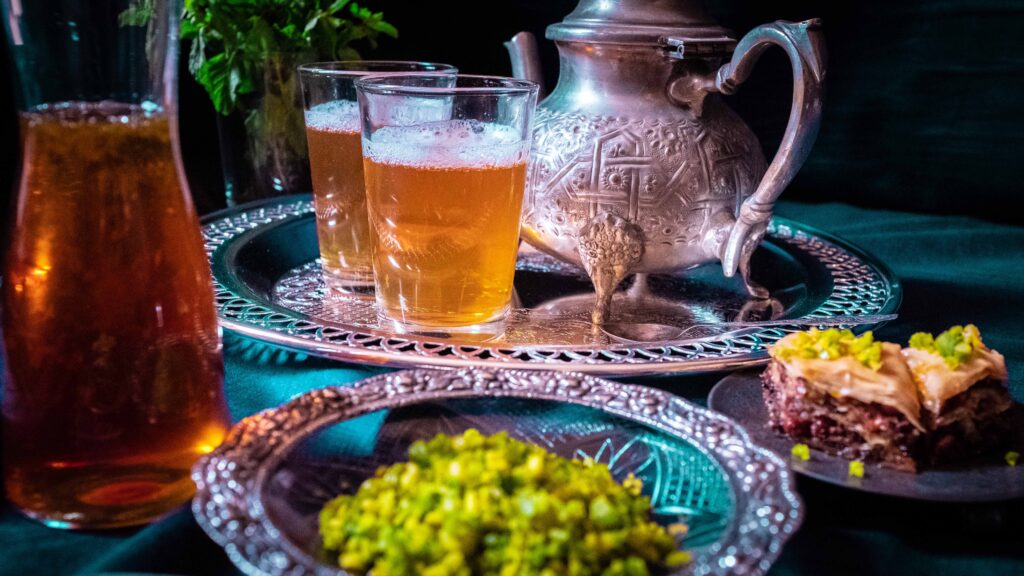
5 – Decorate the tops of each diamond with 1/8 teaspoon finely chopped pistachios and serve each portion with extra syrup on the side. Now…ea…wait! You could serve your Turkish Baklava just like this. Or, you could check out my bonus recipe for delicious Moroccan Mint Tea and serve it with that!
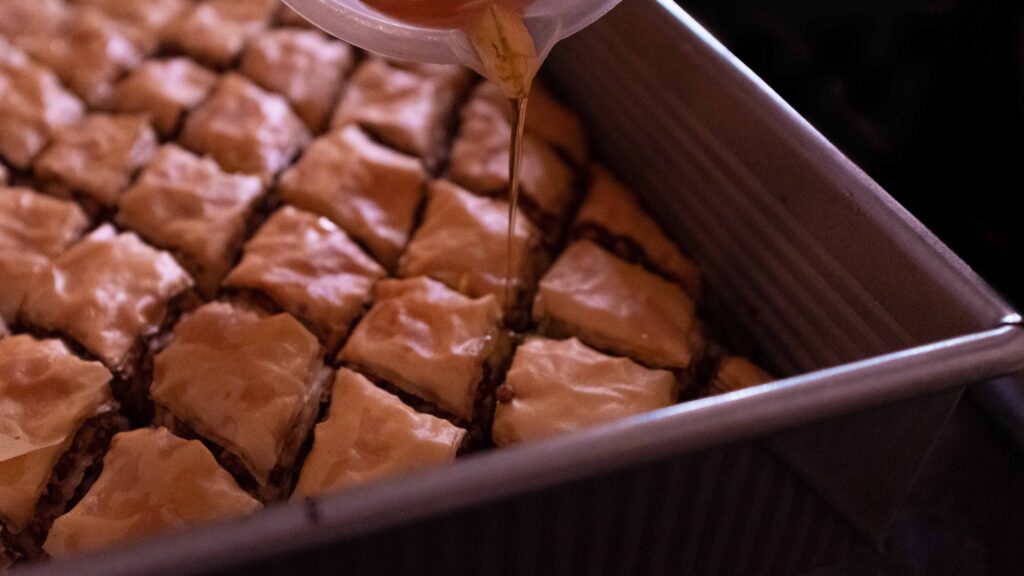
Baklava 101. Pour cooled syrup onto hot baklava, or hot syrup onto cooled baklava. This hot+cold combination ensures that the baklava layers will slowly absorb as much of the syrup as possible and become evenly sweet, without making the pastry sodden. If you pour hot syrup on hot baklava, you’ll oversaturate the pastry and make the whole dish soggy. If you pour cold syrup on cold baklava, you’ll end up with pools of syrup on the bottom, which will make the lower layers soggy and leave the top layers unsweetened. In my recipe, I pour cooled syrup onto the hot, freshly-baked baklava as soon as it comes out of the oven. This way, the hot flaky phyllo properly absorbs the cooled syrup and stays crisp at the same time. Keep your baklava covered with a tea towel and store it at room temperature for up to 5 days. Storing it at room temperature preserves its crispy texture for days, even in Bombay’s hot and humid climate. The longer you keep the baklava, the more solid and crystallised it becomes (not a terrible thing!). But let’s be honest, it’s not going to last more than 5 days! Post the 5-day mark, it starts drying out. If you anticipate that you won’t be able to finish it up within a week, freeze your baked baklava for up to 4 months. Remember to store it in small batches (diamonds of 4) so that you won’t have to thaw the entire amount whenever a craving hits. Thaw your frozen baklava overnight in the fridge, and then leave it on your counter for a few hours to bring it to room temperature before eating. If you still have a lot of syrup left over, use it as a simple syrup to sweeten beverages. We made mojitos and lemonade with our extra syrup!
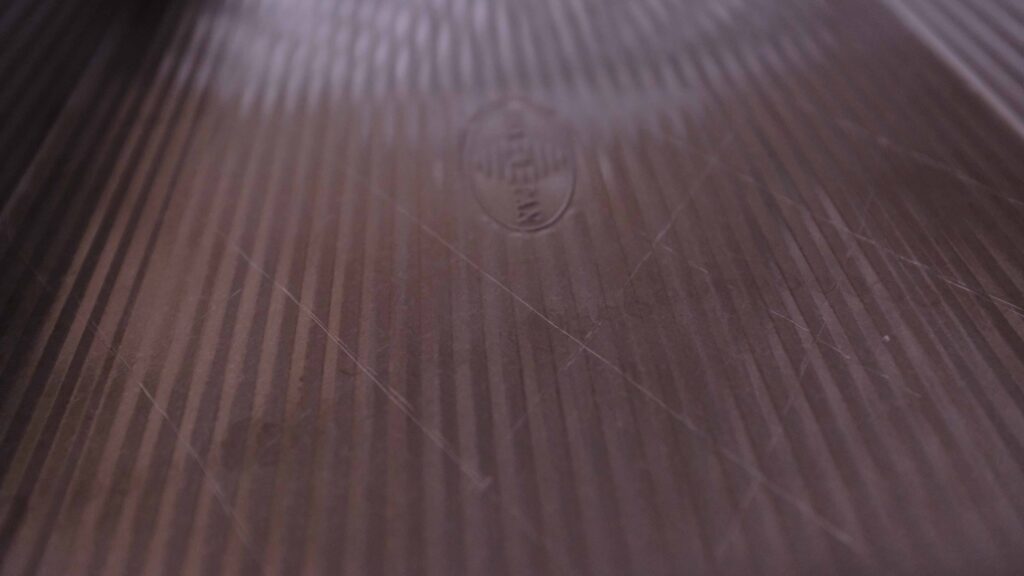
P.S. When you’re making your baklava “cuts”, you’re going to scratch the crap out of your metal baking dish. Since you have to saw through all the layers down to the bottom of the tray with a very sharp serrated knife, there’s no way to avoid this. The base of my beautiful non-stick 9×13 baking dish is permanently tattooed with a fishnet pattern; an unfortunate memento of my baklava exploits. However, as I always line my pans with baking parchment or aluminium foil, it’s still perfectly reusable if a little scarred.
Bonus Recipe! Moroccan Mint Tea
Ingredients
1. 1200 ml water
2. 1 ½ level tbsp. loose leafed gunpowder green tea like this
3. 6-12 fresh spearmint sprigs (depending on how you like it)
4. 6-8 tbsp. white granulated sugar
Materials
1. 2 litre stainless steel pot (for preparing tea)
2. Tea strainer
3. 1 litre teapot
4. 6 heatproof tea glasses or cups (120-150 ml capacity)
Prep
1 – Boil 1200 ml of hot water in a kettle. Set it aside and keep it hot.
2 – Pluck your mint leaves and discard the stems.
Method
1 – Place all the tea leaves inside your 2 litre pot. Pour 120 ml of just boiled water on top of the tea leaves. Let them steep, undisturbed for 1 minute. Resist the urge to swirl, shake, or stir the contents of the pot! After a minute, pour out this liquid into a tea glass, catching the leaves with the strainer. You’ll only get about 50 to 70 ml liquid, as the tea leaves will have absorbed a fair bit of water. This clear reddish-golden liquid is referred to as the “spirit” of the tea since it contains the unadulterated essence of the water’s first contact with the leaves. Set this ‘tea spirit’ aside; it will go back into the pot in a bit. Remember to catch all the loose leaves in a strainer and return them to the pot.
2 – Add another 120 ml of just boiled hot water to the pot. Let it sit for a minute, then swirl the pot around to wash the leaves. Pour out the murky liquid and discard it. This gets rid of any bitter, sour, and acrid notes in the tea, as opposed to the clear, clean “spirit” which will go back into the pot. Once again, remember to catch all the loose leaves in a strainer and return them to the pot.
3 – Add 1 litre of just boiled hot water to the pot. Then pour the reserved tea “spirit” back into the pot.
4 – Place the pot over medium-low heat and bring it to a simmer.
5 – As soon as you see bubbles forming on the surface of the liquid, add the fresh mint leaves. Gently push all the leaves down into the pot to submerge them. Do not add whole sprigs, as the stems can impart a lot of bitterness. Also keep in mind that the more mint you add, the more bitter the brew will become.
6 – After you push the mint leaves down, add the sugar. I added 6 tablespoons.
7 – Raise the heat to medium and bring the tea to a boil. The mint leaves will first rise to the top, and then the green tea leaves will surface as the brew becomes bubbly and frothy. This will take roughly 2-3 minutes. Take the pot off the heat.
8 – Strain the tea into your 1 litre teapot, making sure no tea leaves or mint leaves find their way into the brew.
9 – Instead of stirring, Moroccan Mint Tea is traditionally mixed by pouring the just-brewed tea into a tea glass and then pouring the tea back into the teapot. Repeat this process about 4 times. When you’re doing this action, try to pour from a height of at least 1 foot to aerate the tea. Carefully! The brew is hot!
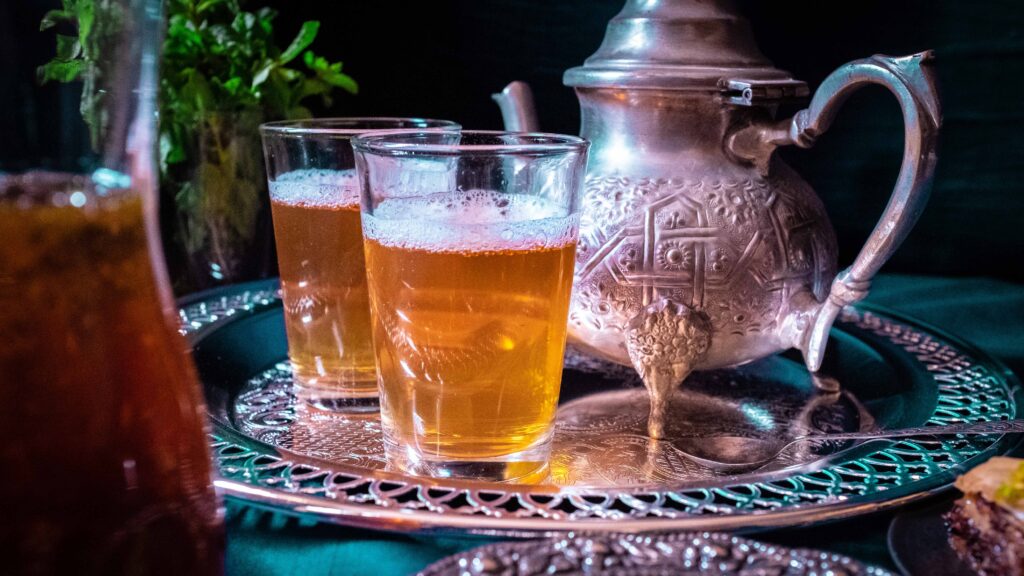
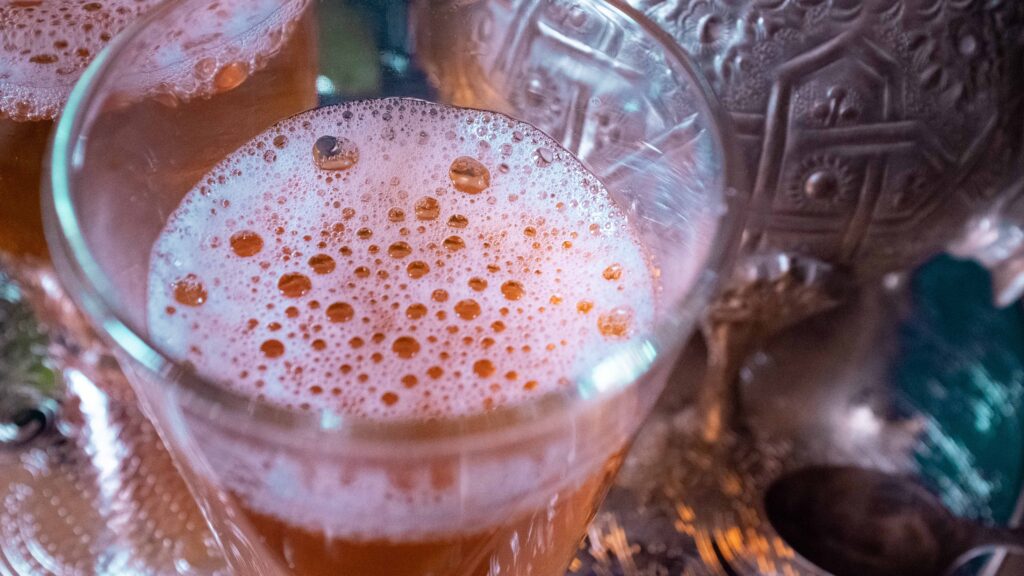
10 – When you’re done aerating the tea, serve it in each glass, pouring from a height of at least 1 foot to create the signature foam on the on the surface of each glass of tea. Only fill the cup two-thirds full; this enables the aroma to develop fully. Garnish each glass with a few fresh spearmint leaves and serve the tea along with your already prepared Turkish Baklava. Now eat!
To make truly traditional Moroccan Mint Tea, you will need either a Moroccan teapot or a heat-resistant teapot. This is because Moroccan mint tea is prepared by ‘active infusion’, whereby tea leaves infuse in boiling water on the stovetop for a few minutes. If you own a heat-proof, stove safe Moroccan teapot, always use a diffuser to keep the pot protected from harsh flames. Like me, if you don’t have a heatproof teapot, you can still make this tea on the stove, using a regular steel vessel and a strainer. Authentic Moroccan Mint Tea is very sweet, so please adjust sugar quantity to match your taste preferences. Be as generous as you want with the spearmint; some like it bitter! Remember to wash the sprigs well and remove the stems before adding your leaves in. You can also flavour your mint tea with anything you like, from orange blossom water to cinnamon, but we like it in this pure form.
Tips & Tricks
How to pour Moroccan Mint Tea (at your own risk)