


Makes 4-6 servings.
One lazy winter evening, I was rummaging around in the fridge and saw some leftover rajma curry and day-old stir fried carrots and beans. Sigh. Then I spotted a chain of Goan sausages, and thought, huh, that stuff can zhuzh up anything. Thus was born my Goan Chorise chili. A one-pot wonder housing 3 types of protein, 5 types of veg, and even fruits (tomatoes and chillies, ok?). Part Goan, part Spanish, part Tex-Mex, this hybrid is a warming, smoky chili with all of the flavour and none of the bite.
At a glance

– This recipe comprises Poee bread + Goan Chorise chili
– You will need parchment paper and a baking tray for the bread, and a pressure cooker (3-4 litre capacity) for the chilli.
– This recipe has been broken into 2 stages for ease and comprehension. Please read the entire recipe from start to finish before beginning.
Stage 1: Poee bread; 8 servings
Ingredients
1. 240 gm all purpose flour (maida)
2. 120 gm whole wheat flour (atta) + extra for dusting
3. 1 tsp salt
4. 1 ½ tsp instant yeast
5. 1 tbsp. granulated sugar
6. 250 ml warm water (38-43OC)
7. 1 tbsp. vegetable oil
8. ½ cup wheat bran or more as needed
Method
1 – Place the all purpose flour, whole wheat flour, and salt in a large bowl. Whisk to combine.
2 – Add the instant yeast and sugar to the flour.
3 – Pour in the oil and about 1/4th cup of warm water and using your hands like a claw, begin mixing the flour with your fingers.
4 – Add the rest of the warm water, a little at a time, all the while mixing with your fingers. Once the dough is a sticky, shaggy mass, stop adding water. I used exactly 250 ml of water. Depending on environmental humidity as well as your flour, you may need to use more or less water. That’s why it’s important to add only a little at a time.
5 – Begin kneading the dough, as you would for chapatti dough. Knead for 10 full minutes or until the dough is elastic, smooth, and only slightly sticky,
6 – Transfer the dough to a lightly greased bowl and cover it with cling wrap. Set it to proof in a warm, drought-free area for 1½ – 2 hours or until it has doubled in size. Mine took about 90 minutes.
7 – While you wait, cut 8 squares of parchment paper measuring 6×6 inches. Set aside.
8 – Once the dough has risen to the desired size, remove the cling wrap. Gently press down on the dough to deflate it.
9 – Transfer the dough to a lightly floured surface and knead it for 2-3 minutes, or until it is smooth, elastic, and has reverted to its original size.
10 – Divide the dough into 8 portions and shape each into a tight, smooth ball.
11 – Sprinkle wheat bran onto your work surface. Place a ball of dough on the wheat bran and using a rolling pin, flatten the ball. Turn it over and continue flattening the ball until both sides are coated in wheat bran, and you have a disc roughly 5-6 inches across and a quarter of an inch thick. Place the disc onto a 6 inch parchment square. Repeat this step for the other 7 dough balls.
12 – Lightly cover the discs of dough with a kitchen towel and let them proof for 30 minutes. They will rise slightly.
13 – Place a baking tray on the lowest rack of your oven. Preheat your oven to 270OC or to the highest temperature it can go, (mine is 230OC) for a full 20 minutes.
14 – With the help of a spatula, transfer the discs with their parchment onto the baking tray that has been pre-heating on the bottom rack of the oven. Bake the discs for 6-8 minutes at 270OC. The poees should puff up like pita bread. Mine took 7 minutes at 230OC. Be careful not to overbake, or they will become crisp, and hard to eat.
15 – Transfer the hot poees to a cloth lined bowl or a basket. They’re ready to be eaten when they’re cool enough to handle.
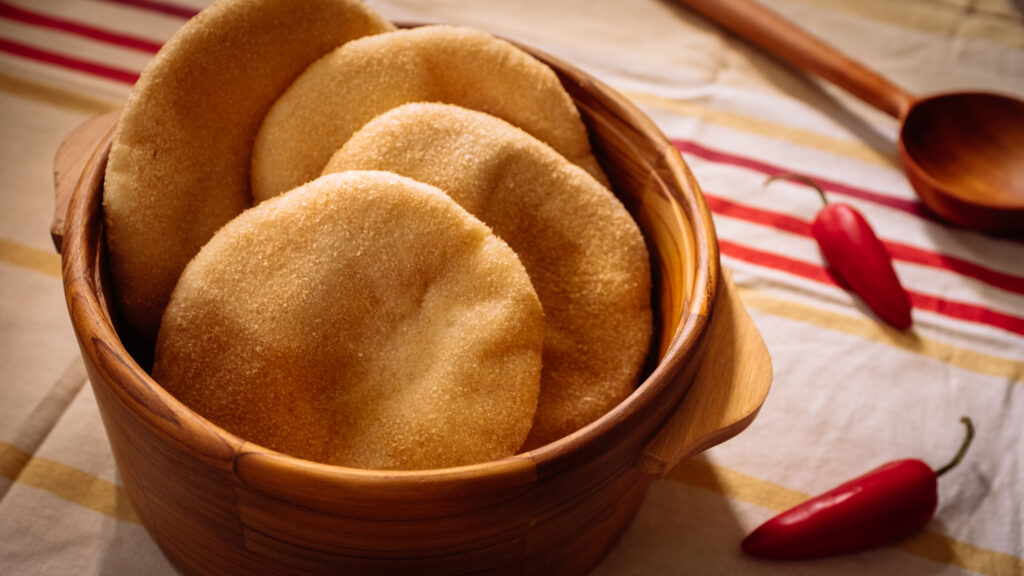
Poee (Poi?) bread, also known as Cuniachi Bhakri, Goan pão or Goan bread, is a type of leavened flatbread that is hard to source outside of Goa. Correctly made, its outsides should be coarse and its insides, hollow and fluffy like pita bread. 3 steps are crucial to a successful poee. 1 – Adding adequate water to the dough so that ample steam is generated in the presence of heat. 2 – Ensuring your discs are rolled no thicker than 1/4th inch so that their tops are light enough to be lifted by the steam. 3 – Preheating both your oven and your baking tray for at least 20 minutes, so that the moment the poee are in, steam is instantly generated inside them and the ‘puffing’ process begins. Too little water, too thick a disc, too cool an oven—and they won’t puff. I should know, my first batch failed! After troubleshooting and making the proper adjustments, all 8 in my second batch puffed up. For my poee, I set my oven to top and bottom heating with the fan on (convection mode) to get it as hot as possible. Owing to its hollow interior, poee bread is ideal for scooping up and mopping up curries and stews; which makes it the perfect partner for this chili. Although poees are at their best fresh ‘n’ hot, straight out of the oven, you can make them a day ahead to save yourself some cooking time. Like you would store any freshly baked bread, keep them in an airtight container at room temperature for 1 day and no more. When you serve your poee, remember to cut each bun down the middle to display its hollow, fluffy interior.
Stage 2: Goan Chorise chili
Ingredients
1. 2 tsp of any neutral cooking oil
2. 120 gm carrot cut into 3 x 1.5 cm wedges (roughly)
3. 85 gm french beans cut into 3 cm long batons
4. 370 gm rosary Goan chorise/Goan sausage
5. 1 large red onion finely diced
6. 1 tsp ginger paste
7. 1 tsp garlic paste
8. 1 large red capsicum, cut into 1.5 cm squares
9. 200 gm potato cut into 3 x 1.5 cm wedges (roughly)
10. 100 gm Brown lentils (Sabut masoor)
11. 100 gm dried small red kidney beans (Kashmiri rajma)
12. 200 gm tomato puree
13. 1 tsp Worcestershire sauce
14. 1 tsp tamarind paste concentrate
15. 1 ½ tbsp. brown sugar
16. 3-4 tbsp. tomato powder
17. 1/4th tsp liquid smoke like this
18. Salt to taste
19. Pinch of citric acid (optional)
20. 500 ml plain water
21. 500 ml hot water
For the spice blend:
1. 3 tsp smoked paprika
2. 1 tsp sweet paprika
3. 2 tsp garlic powder
4. 1 tsp dried oregano
5. 1 tsp white onion powder
6. ½ tsp dried thyme
7. ½ tsp white pepper powder
8. ½ tsp ground black pepper
9. ¼ tsp cayenne pepper or a spicy red chilli powder like this.
For the toppings:
1. 100 gm Colby cheddar cheese
2. 1 fresh Jalapeño pepper (optional)
3. 2 limes
4. ½ cup sour cream
5. Tabasco or chipotle sauce (optional)
Prep
1 – Pre-cook your kidney beans. First, submerge and soak them in plain water for 8-10 hours or overnight. Thereafter, strain and wash the beans. Transfer them to a pressure cooker and add 500 ml of water with half a teaspoon of salt. Pressure cook the kidney beans on high heat for 1 whistle and then lower the heat to medium. Cook for an additional 12-15 minutes and then switch off your stove. Let the pressure release naturally. Open your pressure cooker and check that the beans are full cooked. They should mash down without any resistance. Transfer the beans and their stock to another bowl and set aside.
2 – Wash your brown lentils and soak them in water for half an hour. Thereafter, drain them and set aside.
3 – Remove the Goan chorise from its casing. Discard the casing and strings. You will be left with small knobs of meat, weighing 350 grams in total.
4 – Make your spice blend. Place all the dry spices and herbs in a small jar. Shake together to combine. Set aside.
Method
1 – Place your pressure cooker back on the stove and begin heating it on medium.
2 – Once your cooker is hot, add the oil. Toss in the carrot wedges and fry them on medium heat until lightly caramelised, roughly 2-3 minutes. Remove them from the cooker and set aside.
3 – Throw your french bean batons into the cooker, and once again fry on medium heat for 1-2 minutes or until their outsides are lightly caramelised. Set aside.
4 – Lower the heat to minimum. Add all the chorise chunks to the cooker, and fry them on low heat for 6-7 minutes, or until all the fat renders from them.
5 – Add the chopped onions. Sauté them with the spicy chorise till they soften and become translucent. Roughly 8 minutes.
6 – Add the ginger and garlic pastes and sauté for a minute.
7 – Raise the heat to medium. Add in the diced red capsicum and fry until it has lightly softened. Roughly 2 minutes.
8 – Toss in your potato wedges, and continue frying for 2 minutes.
9 – Now put in your soaked and drained lentils. Stir fry everything together for 1 minute.
10 – Pour in the tomato puree and give everything a stir.
11 – Add ½ tablespoon of salt and pour in just enough hot water to submerge the mixture by about half an inch. I added 500 ml to mine. Give everything a stir to combine, and ensure that nothing is stuck to the bottom of the pot.
12 – Close the pressure cooker and cook on high heat. After 1 whistle, lower the heat to minimum and cook for an additional 5 minutes. Turn the heat off, and let the pressure release naturally before you open the cooker.
13 – After you’ve opened the cooker, add in the cooked red kidney beans along with their stock, and the lightly caramelised carrots and french beans. Stir, and put the cooker back on the stove on low heat.
14 – It’s now time to add some more salt (I added 1 tablespoon more) and your spice blend. I recommend putting in the entire amount (roughly 3 tablespoons) as it is smoky, and not spicy per se.
15 – Simmer everything on low heat for 15-20 minutes, uncovered. Stir routinely to prevent the mixture from sticking to the bottom of the pan.
16 – After 15-20 minutes, taste the chili. Balance the heat with some umami, sweet, and sour notes. Add as much Worcestershire sauce, tamarind paste, and brown sugar as your palate prefers. I added approximately 1 teaspoon of Worcestershire sauce, 1 teaspoon of concentrated tamarind paste, and 1 ½ tablespoons of brown sugar.
17 – Simmer the chili for 1 minute and then turn off the stove. It should be thick by now. It will continue to thicken owing to the lentils. Add in your tomato powder and liquid smoke and give it a stir. If adding the citric acid, do so now. Rest your chili for at least 30 minutes before serving. It tastes even better the next day. In the meanwhile, prepare your toppings.
18 – Shred your cheddar cheese. Slice your green jalapeño pepper into thin rings. Cut your limes into wedges. Keep sour cream and Tabasco/chipotle sauce handy.
19 – Ladle generous portions of chili into bowls. Top each bowl with a sprinkle of cheddar cheese, jalapeno pepper rings, a dollop of sour cream, and wedges of lime. Serve with Tabasco/chipotle sauce (or both!) and your freshly baked poee breads, cut down the middle. Bom apetite!
Chili or chile con carne is a Tex-Mex chilli pepper seasoned stew that most often features meat, beans, and tomatoes. Goan chorise or Goan sausage on the other hand is an Indo-Portuguese creation. Porky and spicy and sundried or smoked; to me, it tastes like the Spanish chorizo’s much hotter cousin. Hence, this hybrid, with its liberal notes of oregano, garlic powder, and paprika. Even though I use Goan chorise as well as additional spices in this chili, it is only mildly spicy—as I’ve mellowed out the heat with lentils and beans. Moreover, my spice blend—made up primarily of paprika—adds warmth and smokiness rather than pungency. If you prefer a much hotter chili, I suggest adding more cayenne to the dish, or whatever fresh or dried chillies you like. We like to keep the chili itself less pungent, and serve it with fresh jalapeños and hot sauce for even more Tex-Mex-ness. This lets everyone customise their own bowl according to their individual tolerance for spice. Goan chorise is difficult to source if you live outside Goa, although in Mumbai, this delicious sausage is easily available. If you ever visit Goa, stock up on a big batch. When you get home, make small 200-250 gm batches and store them. Because they’re cured with chillies, spices, and vinegar, they last an age in the fridge or freezer. Boring stew? Bland curry? Simply add in some Goan chorise, whenever you want tonnes of flavour without the effort.