


Makes 4-6 servings.
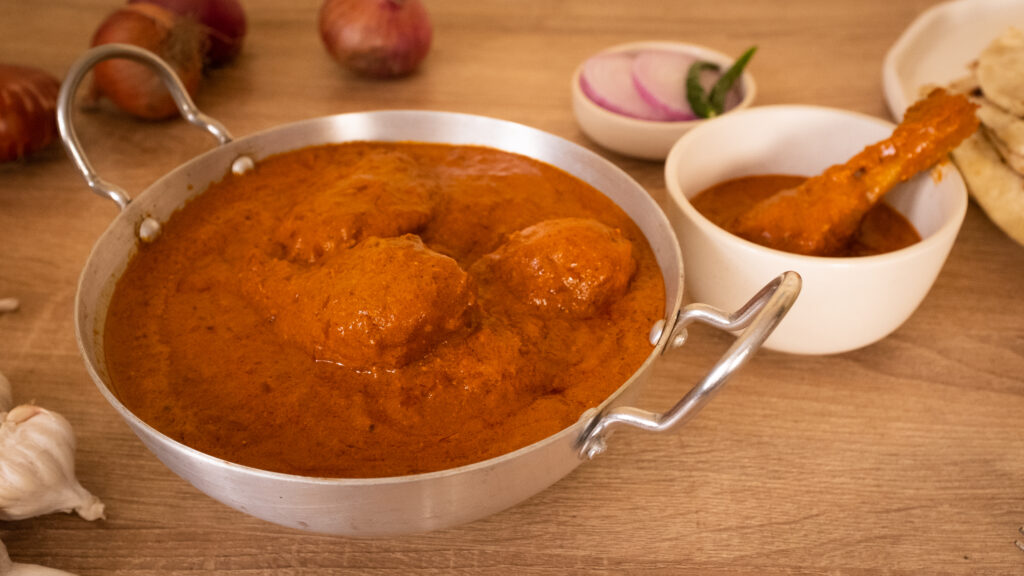
Necessity is the mother of invention. This recipe was born of all the disappointing butter chickens that we’ve ordered in Bombay. I’m yet to eat anything here that matches even the most average Delhi butter chickens. Ergo, making butter chicken became an absolute necessity. This dish is completely homemade, but involves a make or break cheat. And while it takes a long time to make, I promise you, it truly is up there with the top butter chickens of Delhi.
At a glance
– This dish comprises tandoori chicken + butter chicken sauce
– You will need a big kadhai/cooking pot (5 litre capacity).
– This recipe has been broken into 2 stages for ease and comprehension. Please read the entire recipe from start to finish before beginning.
Stage 1: tandoori chicken
Ingredients
1. 6 skinless chicken drumsticks + 6 skinless chicken thighs
Marinade 1:
2. Juice from 2 limes
3. 1 tsp salt
4. 2 tsp Kashmiri laal mirch powder (Kashmiri red chilli powder)
Marinade 2:
5. ¼ tsp haldi (turmeric powder)
6. 1 ½ tsp Punjabi garam masala
7. 1 tsp Kashmiri laal mirch powder (Kashmiri red chilli powder)
8. 2 tsp kala namak (black salt)
9. 2 tbsp. mustard oil
10. 2 tbsp. ginger and garlic paste
11. 250-300 gm thick curd/yoghurt to yield 150 gm hung curd
12. Tandoori food colouring (optional)
Tikka sized pieces/boneless chicken eats easier, but we prefer bone-in as it’s always more flavourful. If using tikka pieces, get about 1-1.5 kg for this recipe.
Prep
1 – Scour the chicken pieces. 3 slits per piece, on either side should do it.
2 – Marinate the chicken with Marinade 1. Leave aside for a minimum of 20 minutes.
3 – Next, proceed with Marinade 2. Rub the marinade very well into all crevices. Cover and rest in the fridge overnight, or for at least 2 hours. The longer you let it steep, the more tender the pieces will be.
Method
1 – The following day (or at least 2 hours later), take your marinated chicken pieces out of the fridge and let them come to room temperature. In the meantime, preheat your oven to 200OC.
2 – Line a roasting pan with aluminium foil. Pick up each piece of chicken and shake off the extra marinade before placing it in the pan. You don’t want superfluous marinade in the pan while roasting the chicken, as any that isn’t stuck to the chicken will simply burn.
3 – Roast the chicken pieces for 20 minutes at 200OC, upper and lower heating, convection mode.
4 – After 20 minutes, pull the roasting pan out, turn the pieces over, baste them with the marinade, and roast the pieces for 15 minutes at 200OC, upper and lower heating, convection mode.
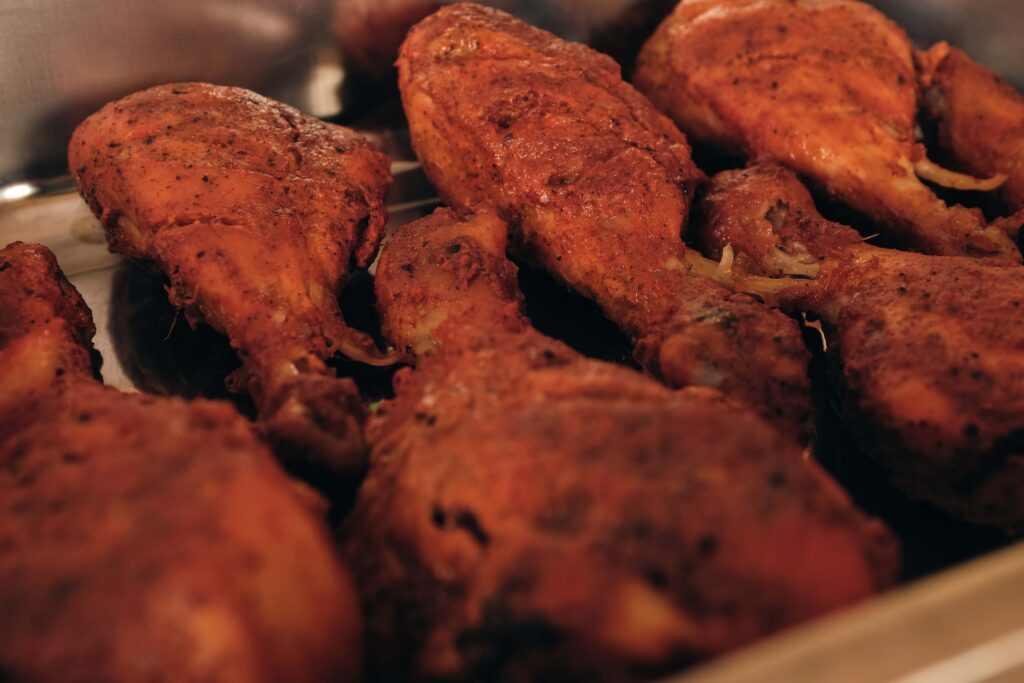
5 – After 15 minutes, raise the temperature to 230 OC (upper heating only) convection mode, and roast the chicken for 5-7 minutes. You’re looking for intentional spot-charring, not burning.
6 – You now have tandoori chicken! Keep it aside to rest. Refrigerate, covered; if you’re not immediately proceeding with Stage 2.
If you don’t have an oven, you can pan fry the pieces. Chicken cook-time depends on the size of the pieces. If you’re finicky like me, check the internal temperature of the biggest piece in the pan. It should be 75 OC or 165OF. Don’t worry if the temperature is higher than that. The beauty of chicken thighs and drumsticks is they’re very forgiving and remain juicy even if over-cooked. Conversely, don’t stress too much if they’re not fully cooked, as they will be simmered in the sauce for a bit, later on.
Stage 2: butter chicken sauce
Don’t eat meat? No worries! This sauce tastes amazing with tandoori paneer/tofu/soya chaap/mushrooms/cauliflower, stir-fried or steamed mixed vegetables, or even plain boiled eggs. If you plan to make the sauce minus the tandoori chicken, you might need to add a little extra salt, (since the tandoori chicken is seasoned as well). For a meatless dish, I recommend preparing the sauce separately and then adding in your pre-cooked protein or veg.
Ingredients
1. 100 gm salted butter + 1 tbsp. for frying
2. 2 tbsp. unflavoured cooking oil
3. 3 large onions very finely diced
4. 600 ml packaged tomato puree
5. 2 tsp Kashmiri laal mirch powder (Kashmiri red chilli powder)
6. Here’s the cheat! 6 tbsp. Roopak Butter Chicken Masala. Get it here.
7. 250 ml warm water
8. 1 ltr of boiled water, kept hot
9. ½ tbsp. crushed kasoori methi (dried fenugreek leaves)
10. 200 ml fresh cream
11. 2 tsp sugar/honey + extra as per taste (taste the sauce and add)
12. 1 – 1 ¼ tbsp. salt
13. Your cooked tandoori chicken pieces
Ok, so my cheat is that I use a readymade butter chicken masala. I make no apologies for that, because this particular masala of this particular brand is the only thing that lends a truly authentic Delhi butter chicken flavour to the dish. You could try other brands or even your own spice mix, but this is what works for me. And no, I haven’t been paid to say this, alas. Keep in mind that store-bought tomato puree is quite concentrated. If you you’re using fresh, homemade tomato puree, keep some tomato powder handy to add at the end, to boost the tomato flavour.
Method
1 – In a large heavy bottomed pan, heat 1 tablespoon of butter with 2 tablespoons of cooking oil.
2 – Once it’s melted and simmering, add the chopped onion. Fry very well on low-heat till the raw onion smell goes. I add 2 teaspoons of sugar at this point to intensify the caramel notes. Keep sautéing, taking care not to burn the onions. You’re looking for the onions to become golden brown but not dark. This can take a good 10-15 minutes.
3 – Mix the butter chicken masala and kashmiri laal mirch powder with 250 ml warm water to make a slurry. Add this slurry to the fried onions and stir everything together. Let it simmer for 5-7 minutes.
4 – Pour in all of the tomato puree and stir everything together.
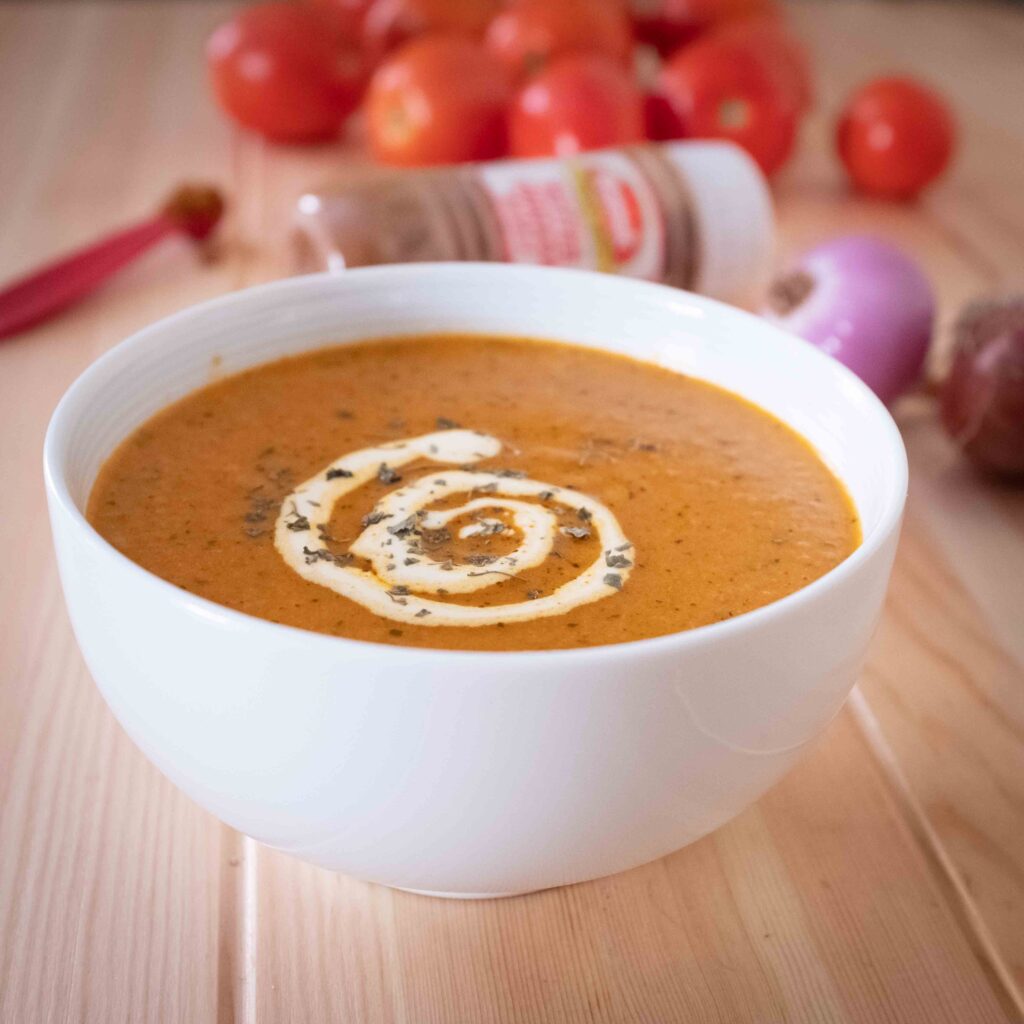
5 – Raise the flame to medium, cover with a lid, and cook. Now, here’s where both your patience and intuition need to kick in. During this step, there’s a lot of waiting, stirring, adding hot water, stirring, putting the lid back on etcetera. Tomatoes take their time to cook. You will need to keep checking the simmering gravy for doneness. Every 10 minutes or so, take the lid off, stir the mixture well and taste it. If it has reduced a lot, still tastes raw, and is sticking to the bottom of the pan, add half a cup of hot water, cover the pan again and let it cook. Do this as many times as is necessary. You’ll know when it’s done when the gravy is thick like molten lava, no longer tastes like raw tomatoes, and has a sweetish depth of flavour. This can take anywhere from 30 to 80 minutes!
6 – When your sauce is cooked, reduce the heat to the lowest setting. Submerge all your tandoori pieces in the gravy and gently simmer everything for 5 minutes. (If you’re keeping it meatless, now’s the time to add your pre-cooked veg or protein and simmer it in the sauce for 5 minutes. Proceed with the rest of the steps below to complete the dish.)
7 – Add crushed kasoori methi and stir it in. Simmer for another minute.
8 – Pour in the fresh cream and stir gently to incorporate. Your gravy will turn from deepreddishorange to brightpinkishorange. Make sure the flame is low, as fresh cream will split on high heat. Simmer for another 2 minutes.
9 – At this point, taste and adjust all seasonings. Add as much sugar/honey and salt as you like, to make it your own. Go easy on the salt because the next step involves adding 100 gm of salted butter. I added exactly 1 tablespoon of salt.
10 – Switch the stove off and add the salted butter. I just plop the whole slab of butter on top of the curry and pop the lid back on. The residual heat melts the butter. Once it’s melted, stir gently to incorporate.
11 – Wait at least half an hour before plating up, to rest the meat and let the flavours infuse. Reheat gently. Serve with naan or roti. Devour.
When making this curry, avoid aluminium vessels as they leech into acidic foods like tomatoes. Remember, the sweeter the tomato, the faster it will cook. In India, winter tomatoes are far sweeter than the ones you get in summer. Additionally, how much sweetener you add to the dish at the end depends on how sweet the tomatoes are to begin with. Either way, if you don’t slowly cook the tomatoes down and extract all their natural sweetness, your end dish won’t be tasty. Like most meat dishes, this curry tastes even better the next day, once the flavours have really had time to work their magic.