


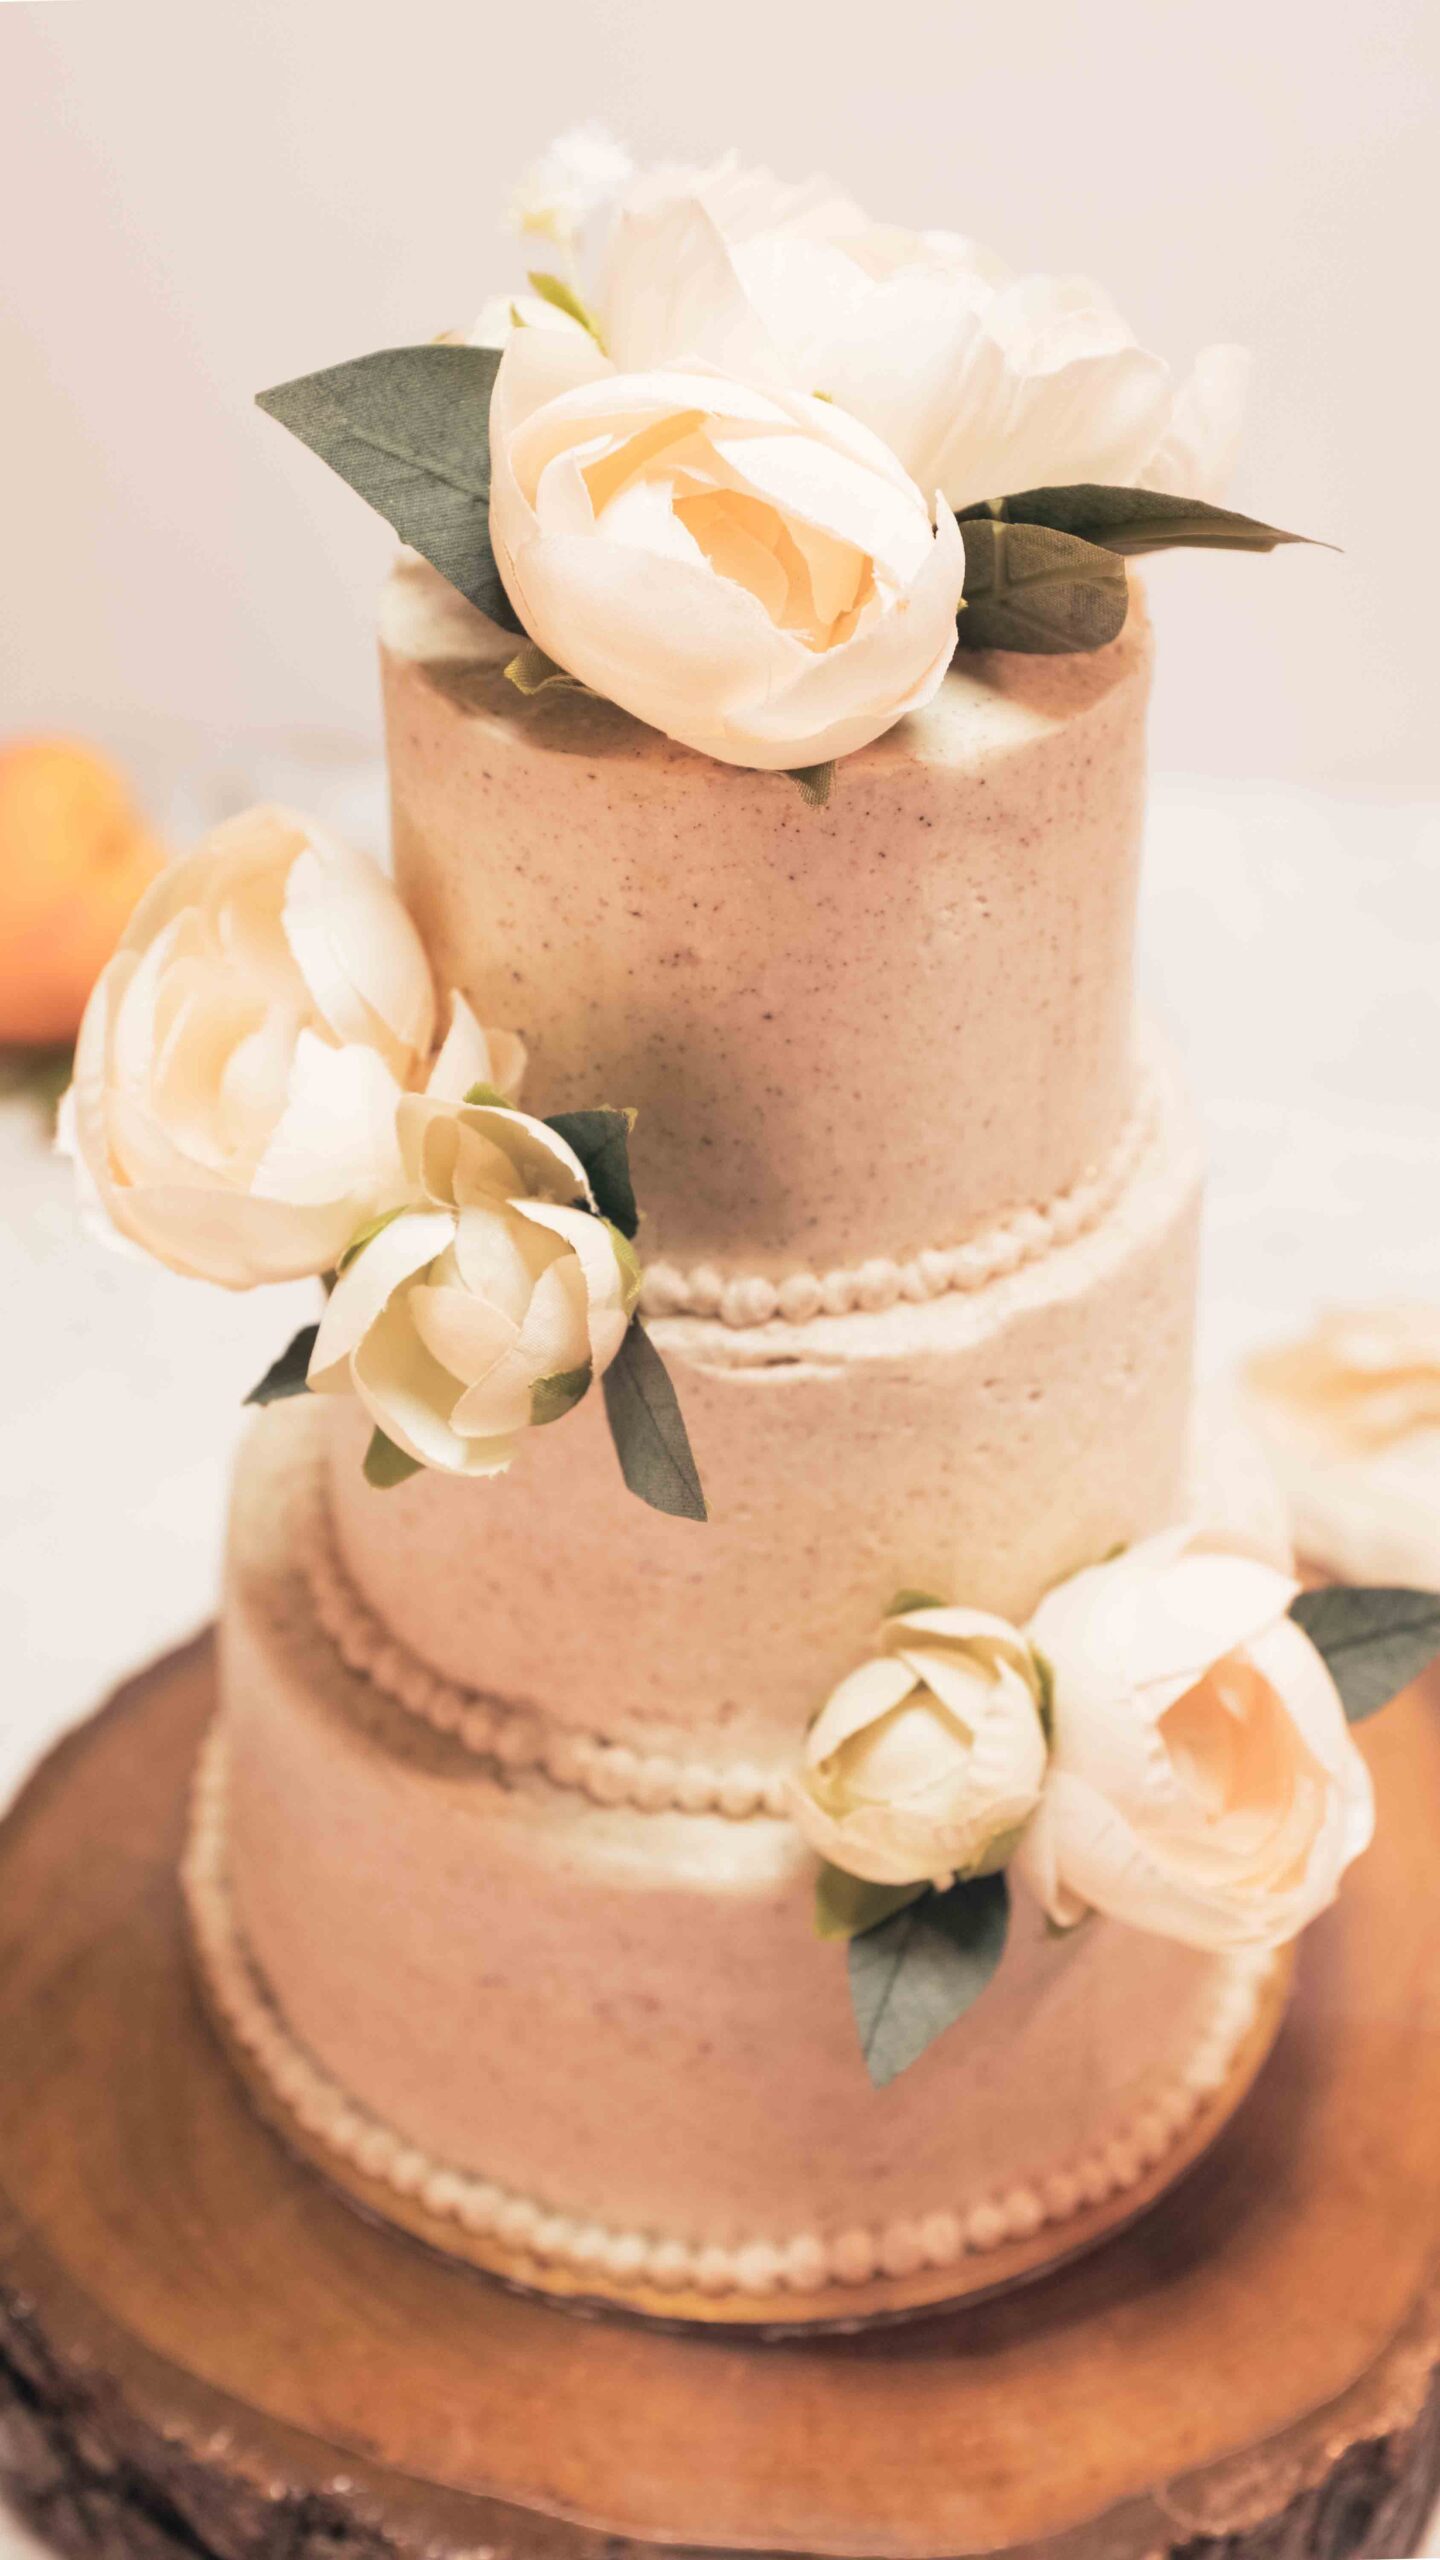
Makes a 3-tiered, stacked mini wedding cake.
Usually a feature of Christian nuptials, today, the cutting of the wedding cake is a part of popular wedding culture, irrespective of faith. We got married in 2016, way before the world changed. Back then, we chose a bitchin’ Star Wars themed cake, over the traditional white wedding cake #noregrets. To celebrate our 5-year anniversary in these irregular times, I decided to stick with tradition! Featuring layers of nutty brown butter sponge, a fresh pear filling, and a silky vanilla bean buttercream, this cascading wedding cake is for all of us at home, celebrating by ourselves. A wedding cake with all the works, scaled down for two.
At a glance
– This recipe comprises brown butter cake + peach filling + vanilla bean buttercream.
– You will need one 10 inch round cake pan, three round cookie cutters (5 inch, 4 inch and 3 inch), parchment paper, a 6 inch cake board, some piping bags, and a 2 mm round piping tip.
– This recipe has been broken into 4 stages for ease and comprehension. Please read the entire recipe from start to finish before beginning.
Stage 1: brown butter cake
Ingredients
For the brown butter
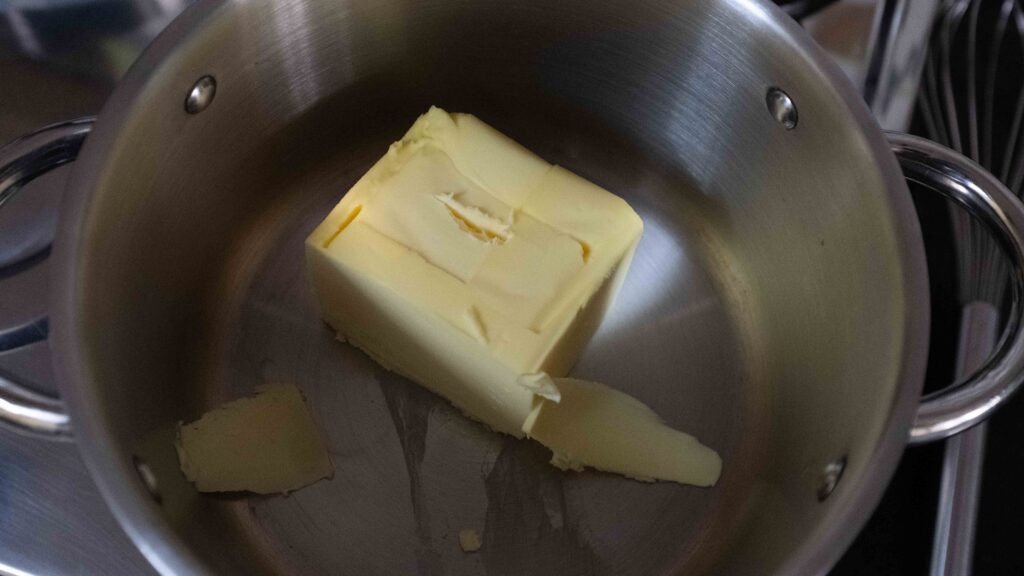
1. 225 gm unsalted butter to give 170 gm brown butter
For creaming:
1. 170 gm brown butter
2. 100 gm dark brown sugar
3. 200 gm castor sugar
4. 3 large eggs (60 gm/egg in-shell weight) at room temperature
For the dry mixture:
5. 300 gm cake flour (or 255 gm all purpose flour + 45 gm corn flour)
6. 3/4 tsp baking powder
7. 3/4 tsp baking soda
8. 1/2 tsp salt
For the wet mixture:
9. 210 ml buttermilk (or 1 tbsp. lemon juice + 195 ml milk) at room temperature
10. 115 ml neutral flavoured oil
11. 1 ½ tbsp. pure vanilla extract
Cake flour has a lower protein content than all-purpose flour. This makes for a more tender cake crumb. However, sometimes it’s hard to procure, which means adapting and making your own cake flour substitute. Whenever you make homemade cake flour – measure out 1 cup of all purpose flour, and then remove 2 tablespoons. Then, add 2 tablespoons of corn flour to the all purpose flour. Sift them together three times. This is your cake flour substitute. It’s not quite the same as store bought cake flour, but it does give a lighter, more tender crumb than if you were to use all-purpose flour only. Cultured buttermilk is another ingredient that’s often hard to procure. Luckily, soured milk can work as a substitute. To make your own “buttermilk” – put 1 tablespoon of fresh lemon juice or white vinegar into a liquid measuring cup with volumetric markings. Thereafter, top the cup up with whole milk till you reach the 240 ml mark. Stir gently and set it aside for 5-10 minutes to thicken. It’s then ready to use. In baked goods, this buttermilk substitute adds sourness and moistness like cultured buttermilk, although it lacks the same ‘yoghurt’ like taste.
Prep
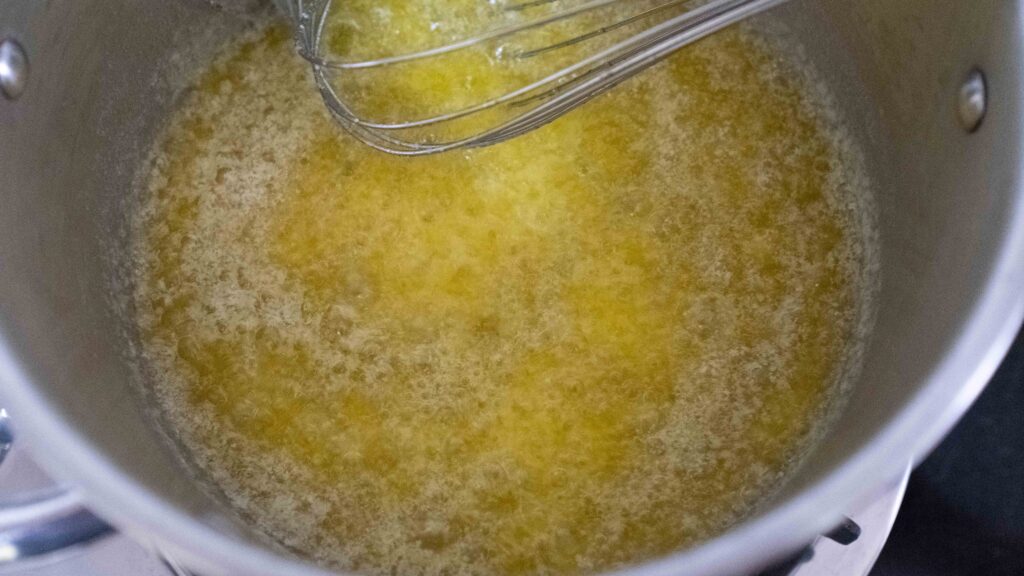
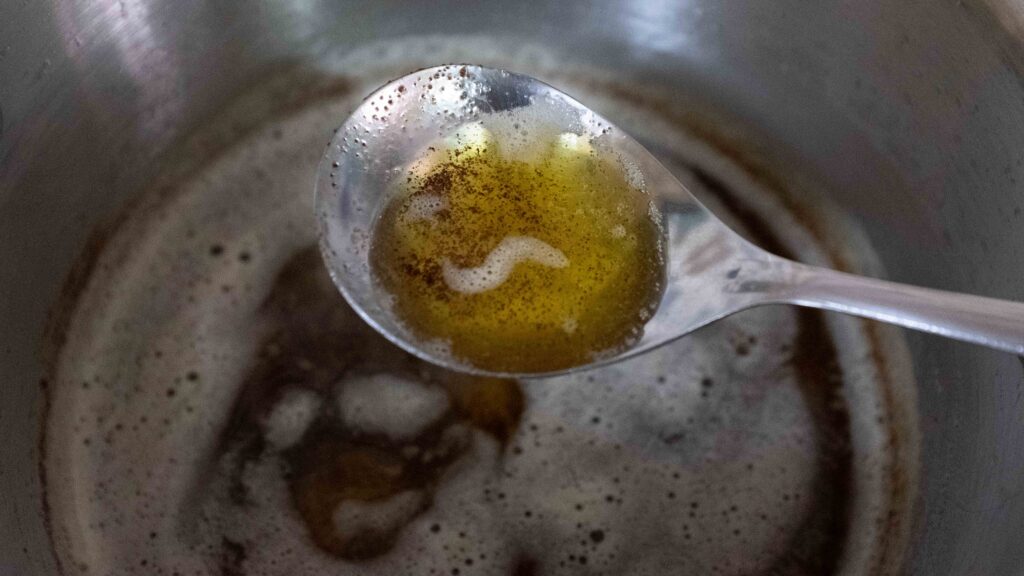
1 – Make your brown butter. Place 225 gm unsalted butter in a stainless steel or light-coloured saucepan. Begin melting the butter on medium heat, whisking it ever once in a while. Once the butter has melted, it will begin to foam and bubble up. Keep whisking and cooking the butter on medium heat until it goes from deep yellow to a toasty brown colour. This will take about 4-5 minutes. The butter goes from melted and bubbling to brown and toasty in a flash, so keep your eye on it throughout the cook. When it’s ready, you will be able to see some dark brown solids in the pan and the butter will smell gorgeously nutty. Immediately remove the butter from the heat and transfer all of it (brown milk solids and all) to a heat proof container to stop the cooking process. You will have lost about 50-55 gm in water weight during the cooking process. The butter now needs to be cooled to room temperature so that it reaches a scoopable consistency (think apple sauce). To speed things up, you can place the hot butter it in the fridge for about 60 minutes.
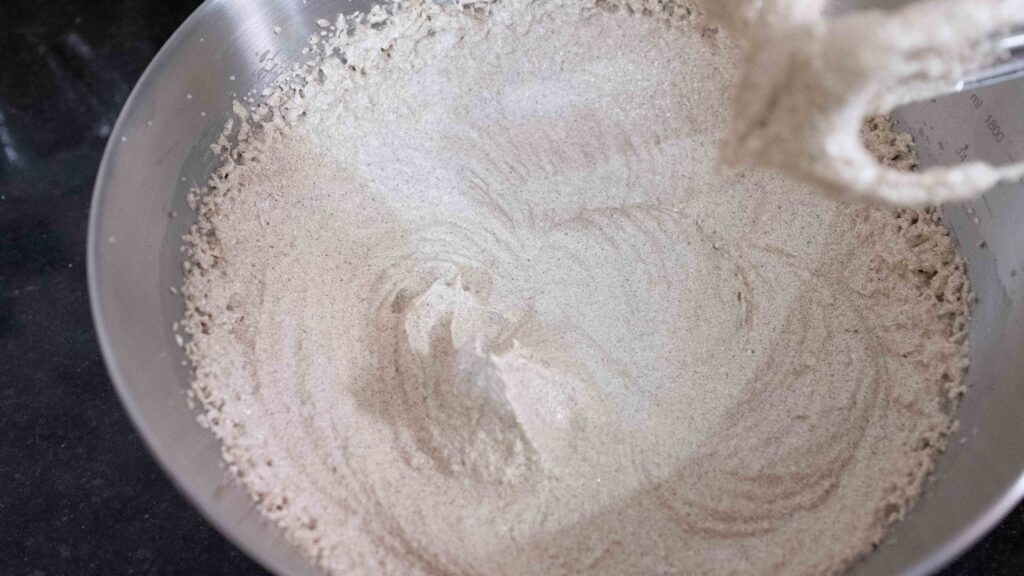
2 – Sift the cake flour, baking powder, baking soda, and salt into a large bowl and give them a very good whisk to aerate. This is your dry mixture. Set aside.
3 – Combine your buttermilk, oil, and vanilla extract in a jug and give it a whisk. This is your wet mixture. Set aside.
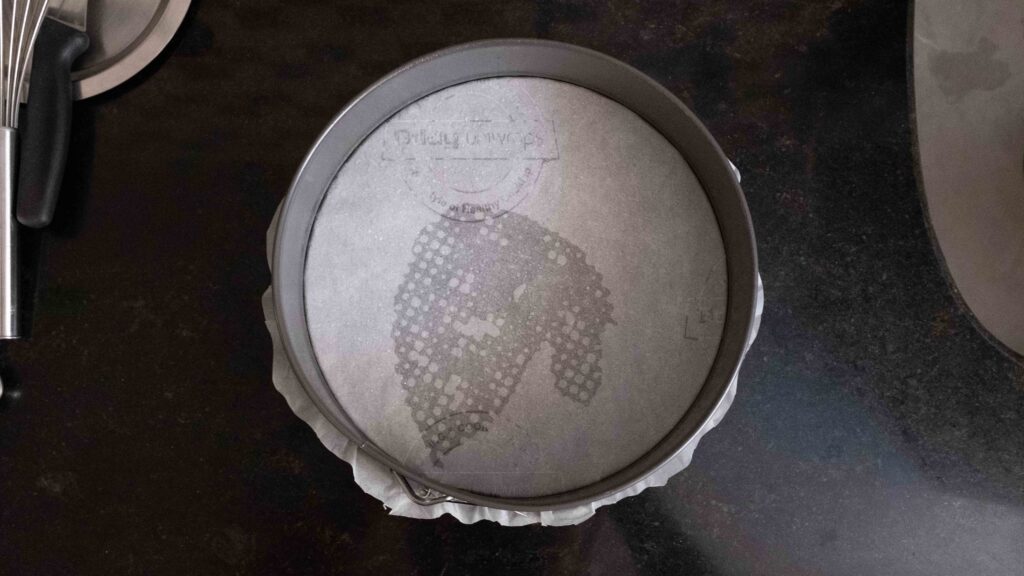
4 – Grease and line the bottom of your 10-inch round cake pan. Then grease the parchment and sides of the pan. Keep aside.


Method
1 – Start preheating your oven at 175OC.
2 – Add the room temperature brown butter to a medium bowl. Using a handheld mixer, beat on high speed for 1 minute or until pale and creamy.
3 – Sprinkle in both varieties of sugar. Now beat the brown butter and the sugars together on high until pale and fluffy, roughly 4-5 minutes or until the sugar has all but dissolved.
4 – Add in the eggs one at a time, and beat on high speed for roughly 10 seconds with each new addition. Do not add them all at once, as the mixture could separate. Remember to periodically scrape down the sides of the bowl to ensure that everything is being mixed properly. Turn the mixer off.
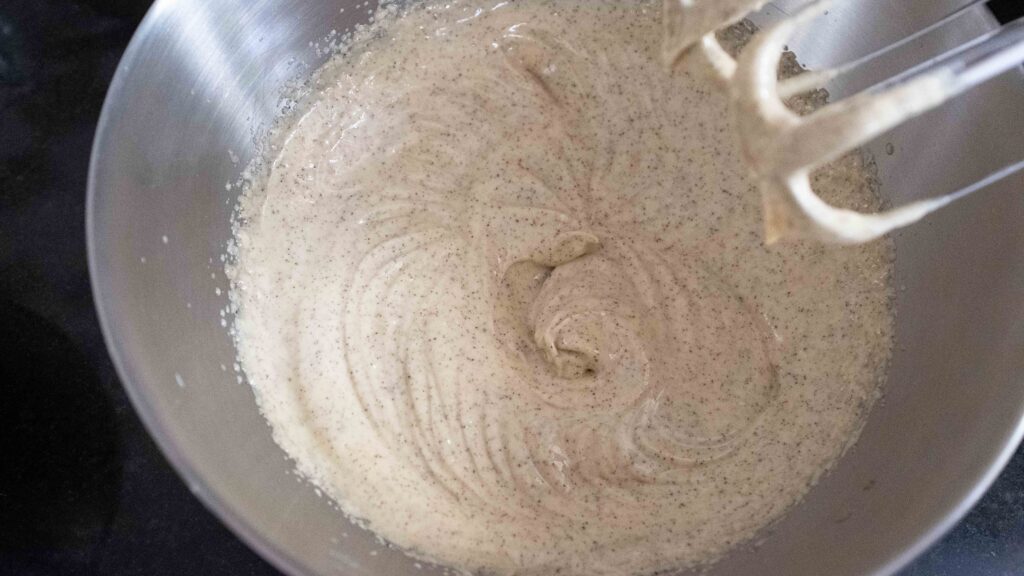
5 – Grab the bowl of dry ingredients and the glass of wet ingredients. Now turn your mixer on at the lowest speed. You could also use a large hand whisk for this step. Add the dry ingredients and the wet ingredients to the batter in thirds; starting with the dry, alternating between the two, and ending with the wet. After each fresh addition, mix on low until just incorporated. This is a pretty thick batter, so go slow, and ensure that its properly mixed. Once combined (you should see no floury pockets or liquidy pools), stop mixing the batter! Overmixing will result in a dense, stodgy cake.
6 – Pour the batter into your prepared cake pan and then level it out with a spatula. Finally, gently tap the pan on your counter 3-4 times to pop any air bubbles.
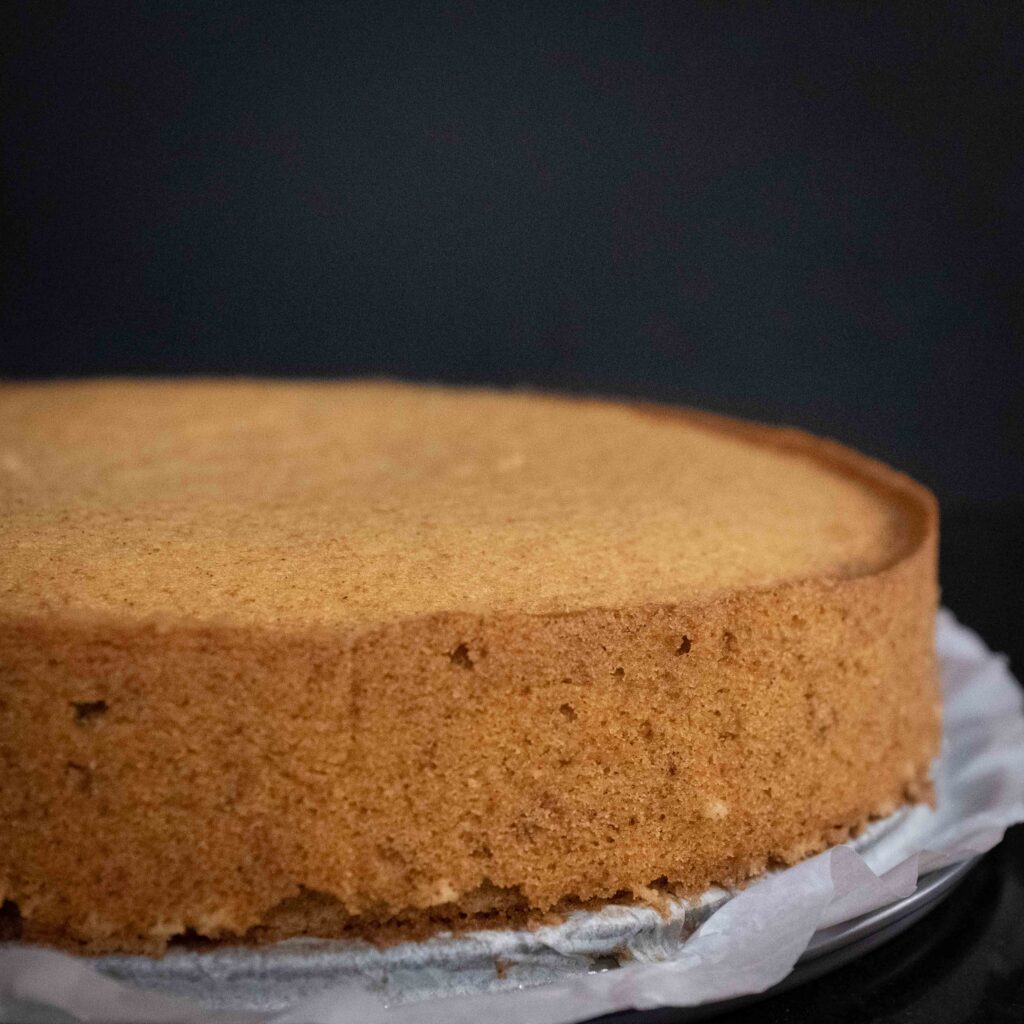
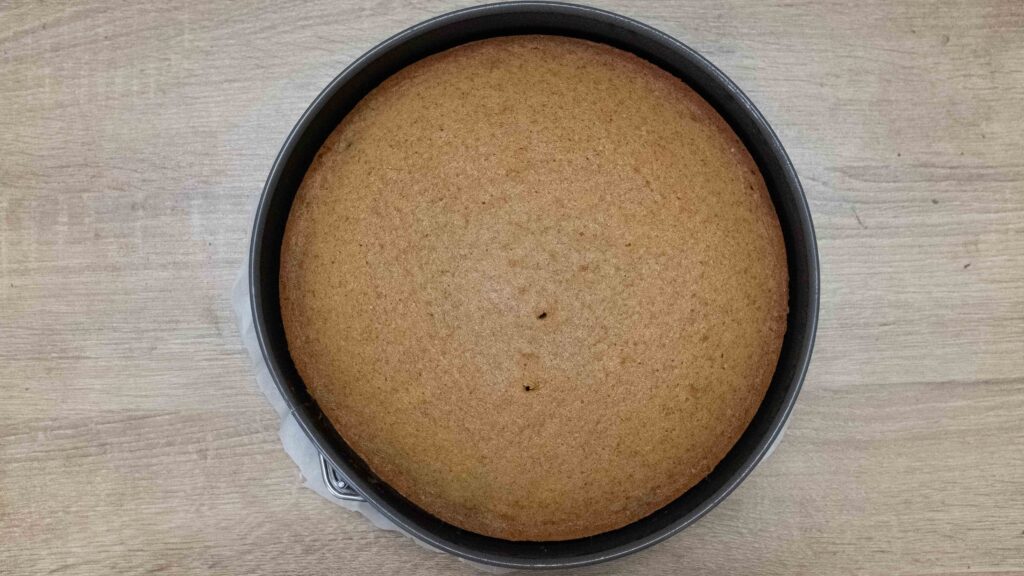
7 – Place your cake pan inside your preheated oven and bake for 35-40 minutes at 175OC. This is a large cake, so the edges will cook a lot faster than the centre and may even brown just a bit. Don’t stress about that, since we’re going to be trimming it. At around the 35-minute mark, the cake’s edges will start pulling away from the sides of the pan, and you should check it for doneness; that is if the top springs back when you touch it, or a toothpick inserted in the centre of the cake comes out clean, it’s done. Mine took exactly 35 minutes.
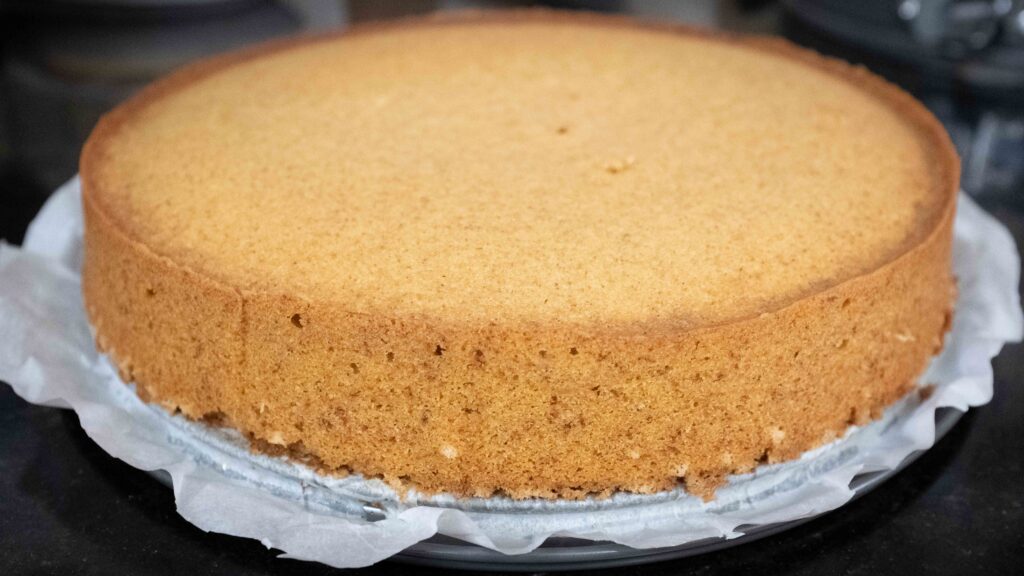
8 – Remove the pan from the oven and place it on a wire rack to cool for about 10-15 minutes. Once the pan is comfortable enough to handle, run a knife around the edges of the cake and invert the cake onto a wire rack to completely cool. I used a springform pan, so removal was very easy, and I didn’t have to flip my cake.
9 – When it’s completely cool to the touch, wrap your cake with cling wrap and store it in an airtight container in the fridge to chill overnight. This is a crucial step because we have to torte and trim our cake, and a cold cake is easier to handle. It will be trimmed, layered, and frosted straight out of the fridge.
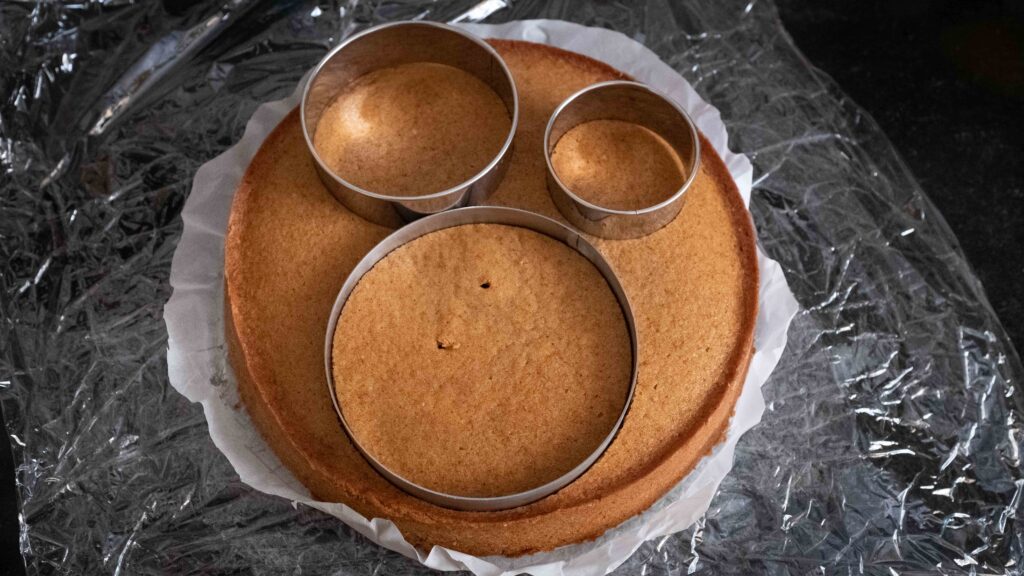
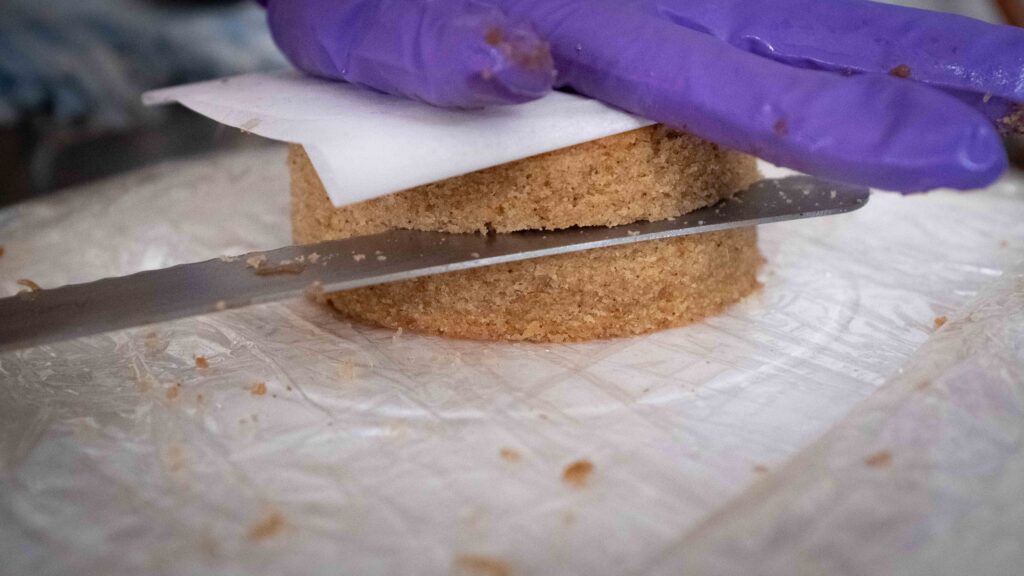
10 – When you’re ready to portion out your cake, take it out of the fridge, remove the cling wrap and get torting. If the top of your cake is uneven, level it with a large serrated knife. Now measure the height of your cake. My cake was 1.5 inches tall.
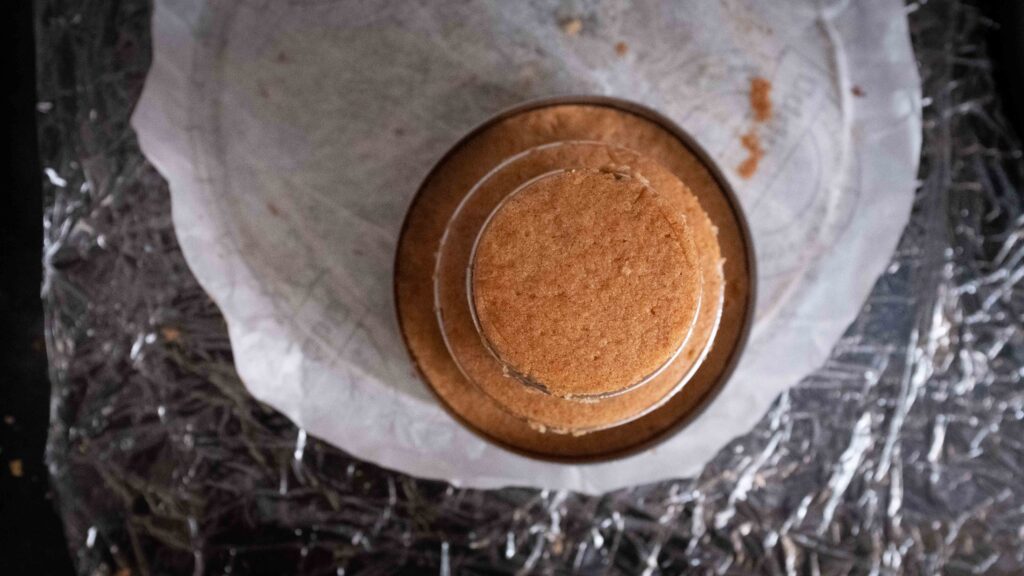
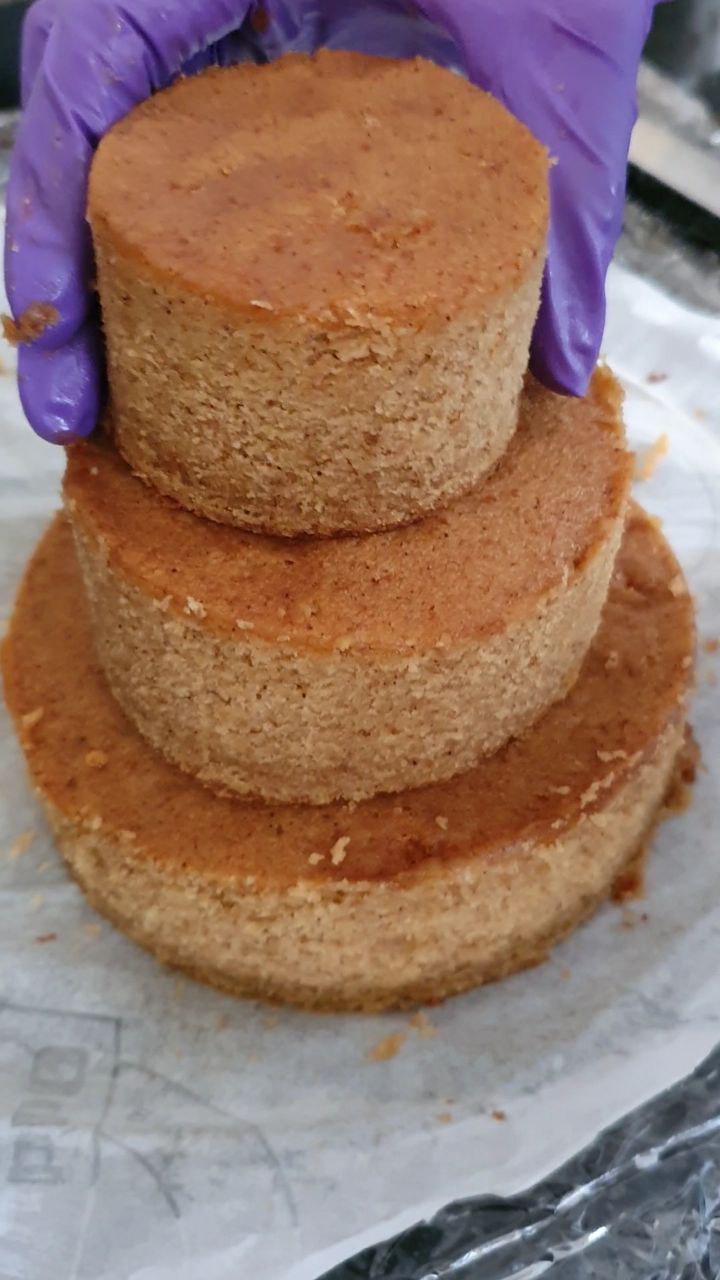
11 – Using your 5-inch cookie cutter, cut out a 5 inch circle from the cake.
12 – Using your 4-inch cookie cutter, cut out a 4 inch circle from the cake.
13 – Using your 3-inch cookie cutter, cut out a 3 inch circle from the cake. Set the scraps aside for a moment.
14 – Using a large, serrated knife, split each cake into two even layers. All in all, you should have two 5-inch layers, two 4-inch layers, and two 3-inch layers; where each cake layer is about ¾ inches tall. These are your stackable cake layers. Wrap each one up individually in cling wrap, place them inside airtight containers and store them in the fridge.
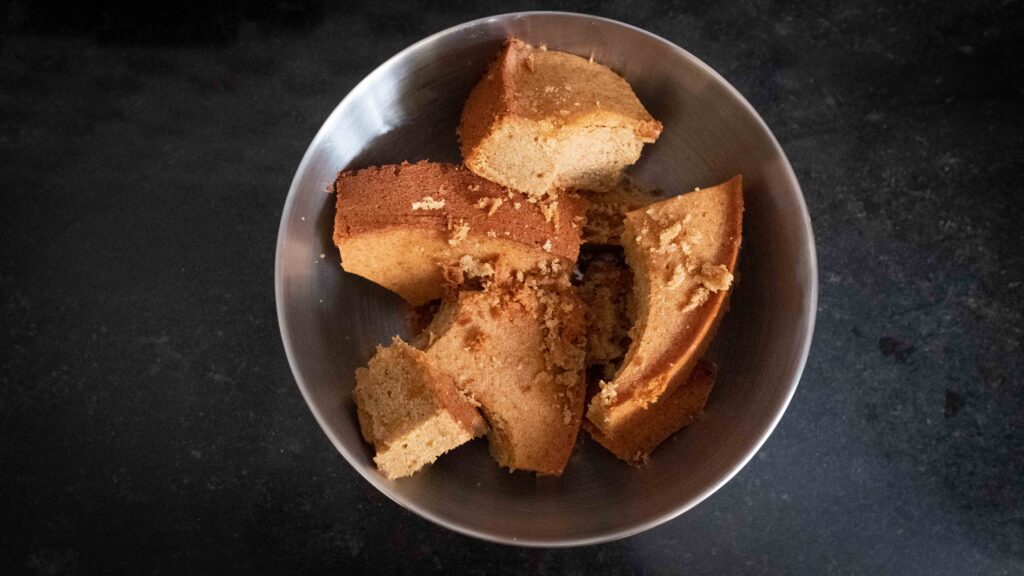
15 – Gather all your cake scraps and store them inside an airtight container in the fridge and eat at leisure. Don’t waste even a crumb! Move on to Stage 2.


Brown butter is like butter but better. Nutty, with notes of toffee and caramel, it gives dishes a depth of flavour and richness that can’t be achieved with regular butter and oil. Similar to clarified butter and ghee, it can be substituted in any cake recipe that calls for regular butter. Make a giant batch and keep it in the fridge for up to a month; it can be used in sweet baked goods or added to savoury dishes as a last-minute flavour enhancer. Always strive for even heating with cakes. My oven has both top and bottom heating sources, so I always place my cakes on the middle rack, unless a recipe specifies otherwise. If you’re serious about baking, get to know your oven, and all its “hotspots”. This is essential to evenly cooked baked goods. If your cakes tend to rise unevenly, or get cracks, or dome rapidly and then sink, their spot in the oven is too hot. To compensate for these irregularities, you’ll need to lower the temperature and/or move your pan around during the baking process. Keep in mind, if your oven has a convection mode, avoid using it for cakes if you can. Although it may speed up your overall bake-time, it will also dry out your sponge, and you definitely don’t want that.
Stage 2: peach filling
Ingredients
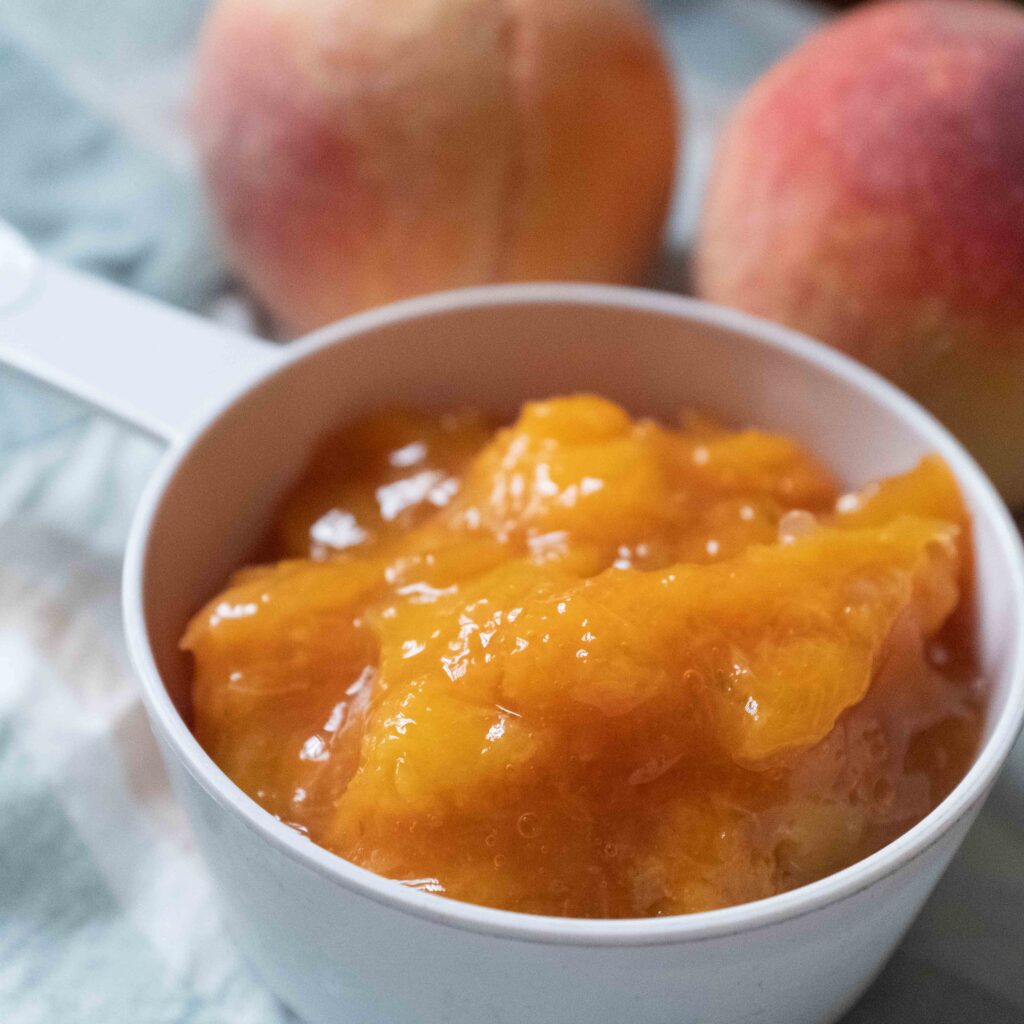
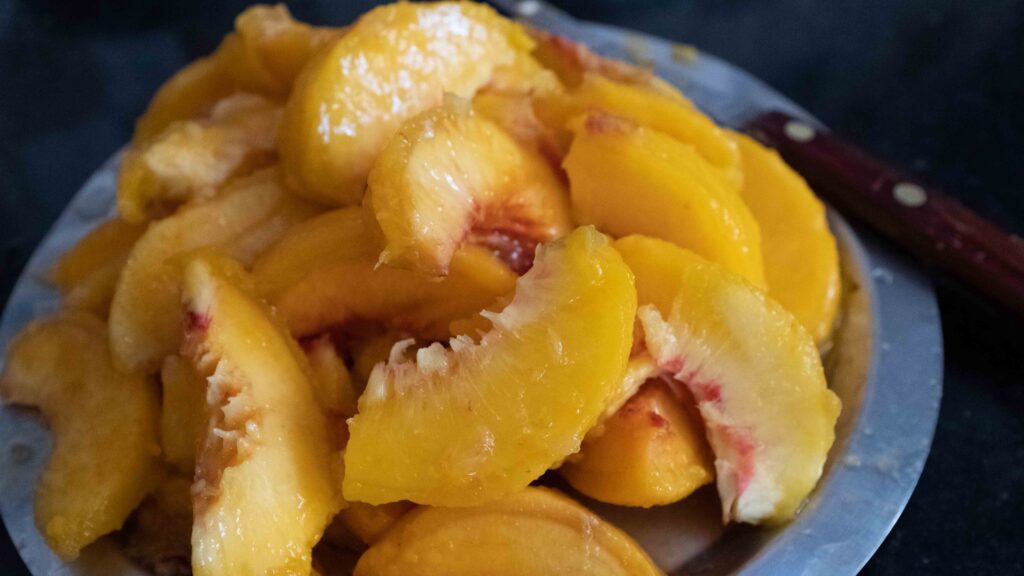
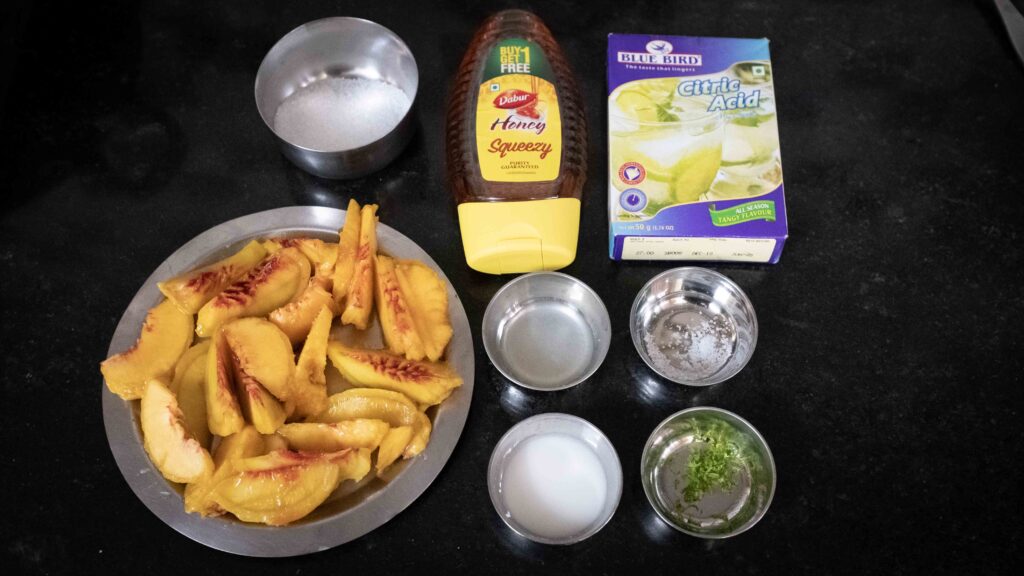
1. 2 medium, ripe peaches (roughly 250 gm) to give 200 gm peach flesh
2. 20 gm white granulated sugar
3. 2 tsp honey
4. 1/4 tsp freshly grated lemon zest
5. 1/2 tsp freshly squeezed lemon juice
6. Cornflour slurry; 1/2 tsp cornflour + 2 tsp water
7. 1/8 tsp citric acid
8. 1/8 tsp salt
9. Optional; 1 drop peach flavour like this
You could make the filling with the same amount of frozen peaches, but you will get a completely mushy filling, and I prefer something with a little more texture.
Prep
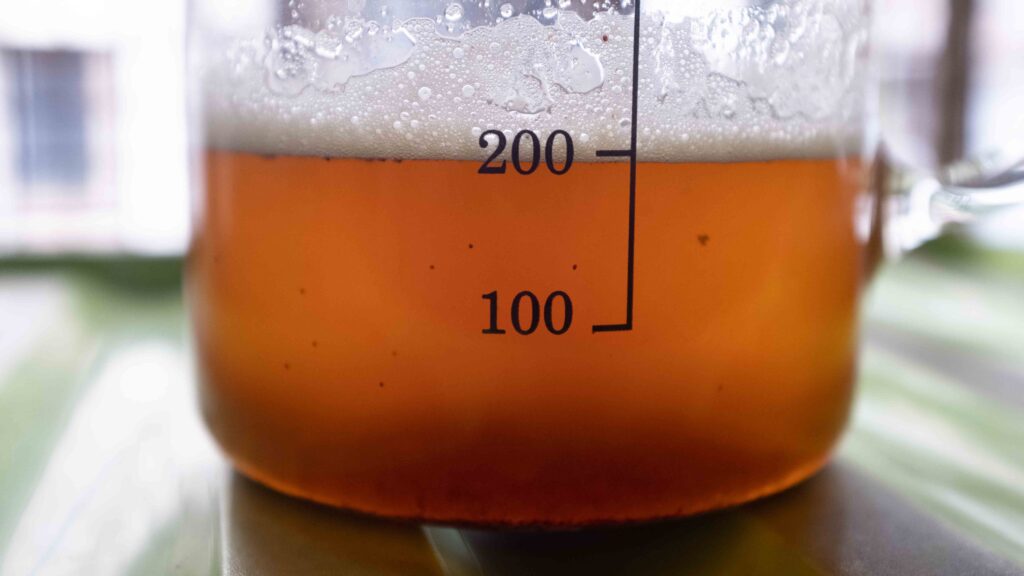
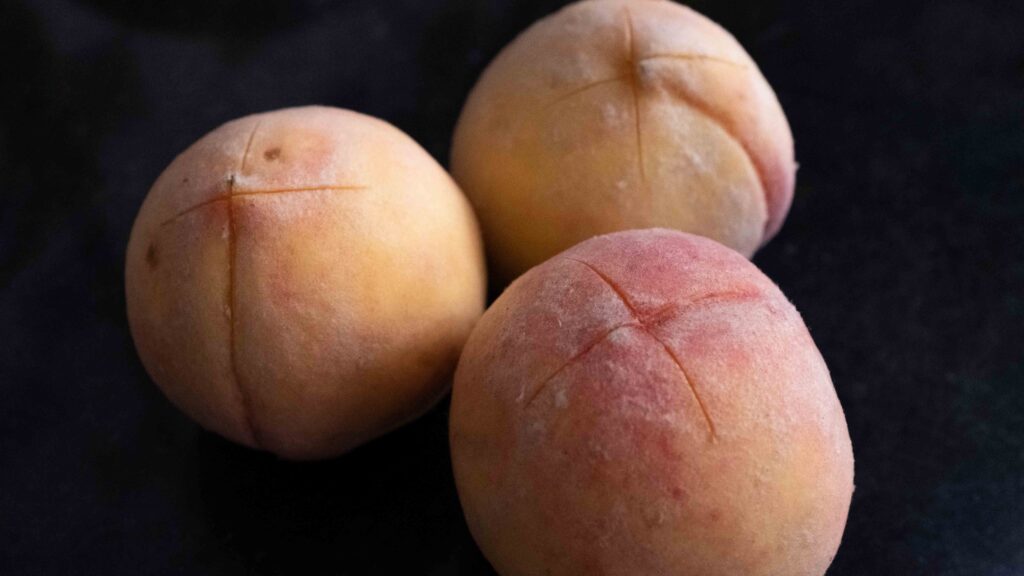
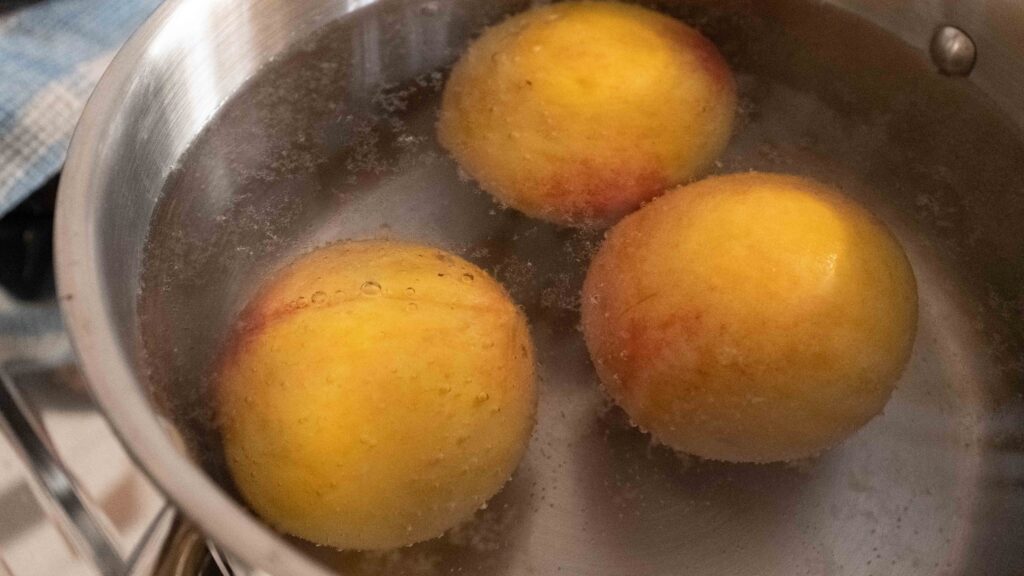
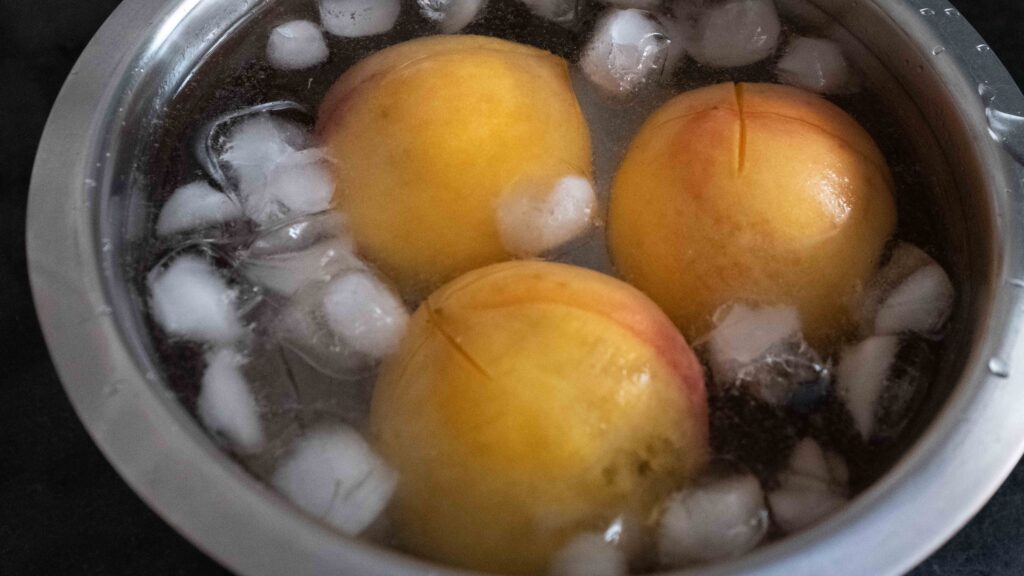
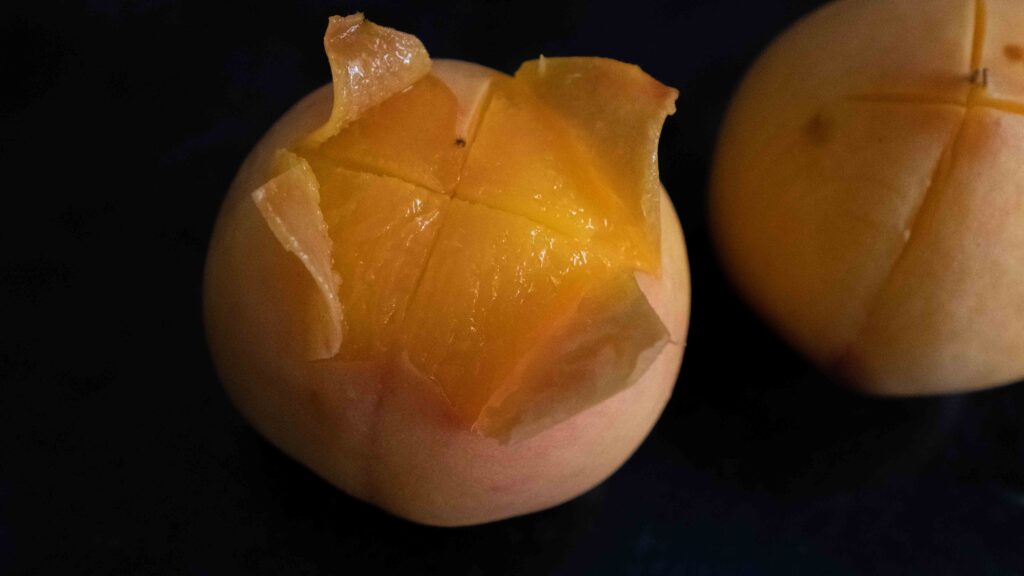
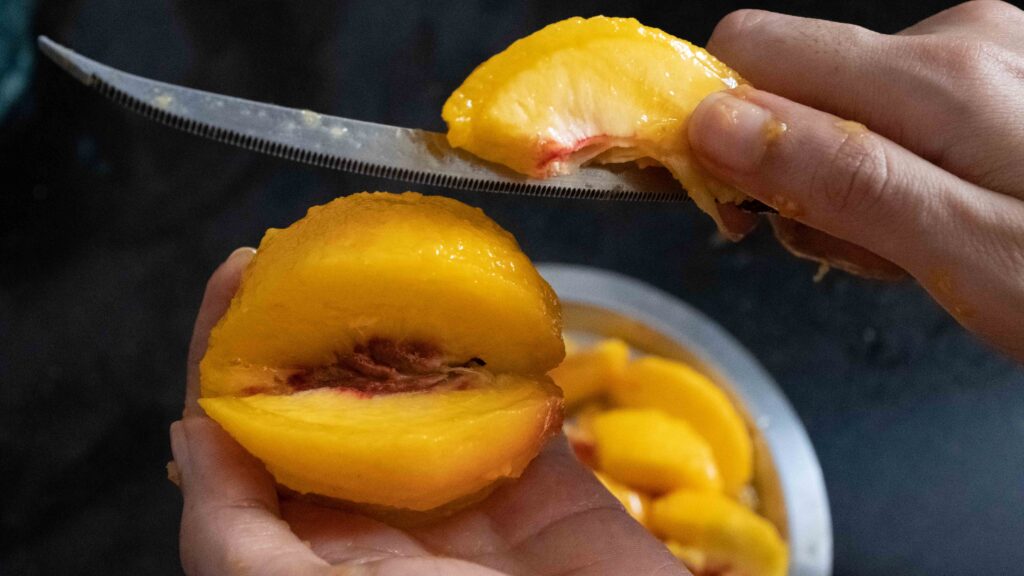
1 – To remove your peach flesh, you will first have to skin and de-stone your peaches. First cut an ‘x’ at the bottom of each peach. Don’t cut deep, simply score the flesh. Now bring a medium pot of water to a boil. As soon as the water is boiling, lower the heat to a simmer and then submerge your peaches into the water. Let the peaches steep for 30 seconds and then turn off the heat. Using a slotted spoon, immediately transfer the blanched peaches to an ice bath to stop the cooking process. The skin where you marked the ‘x’ will be peeling back. Simple tug the skin back to remove it. Watch this video to see how. Once the skin is done away with, segment your peaches into slices and discard the stone. You will get 200-210 gm peach flesh after discarding the skin and stones.
Method
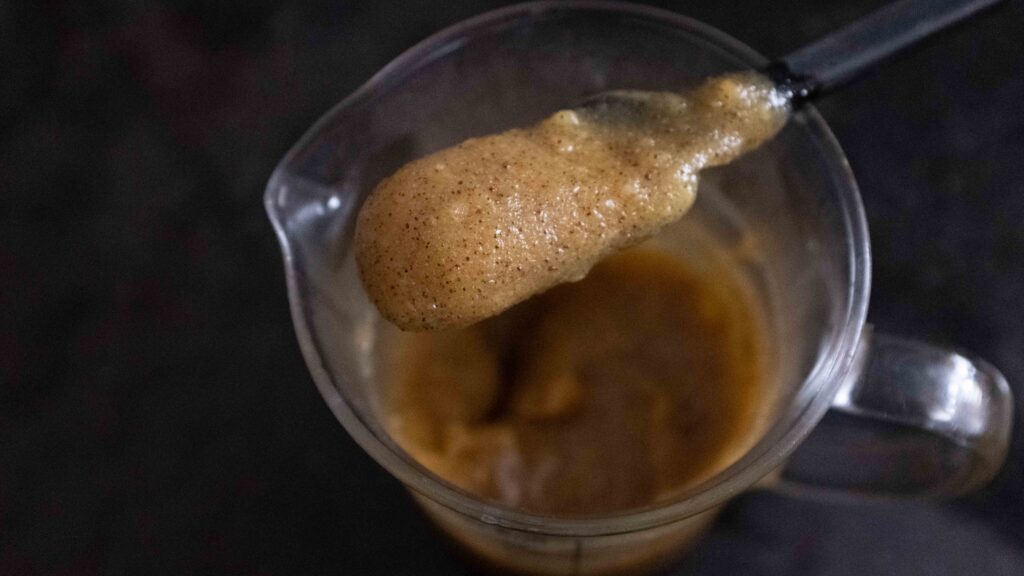
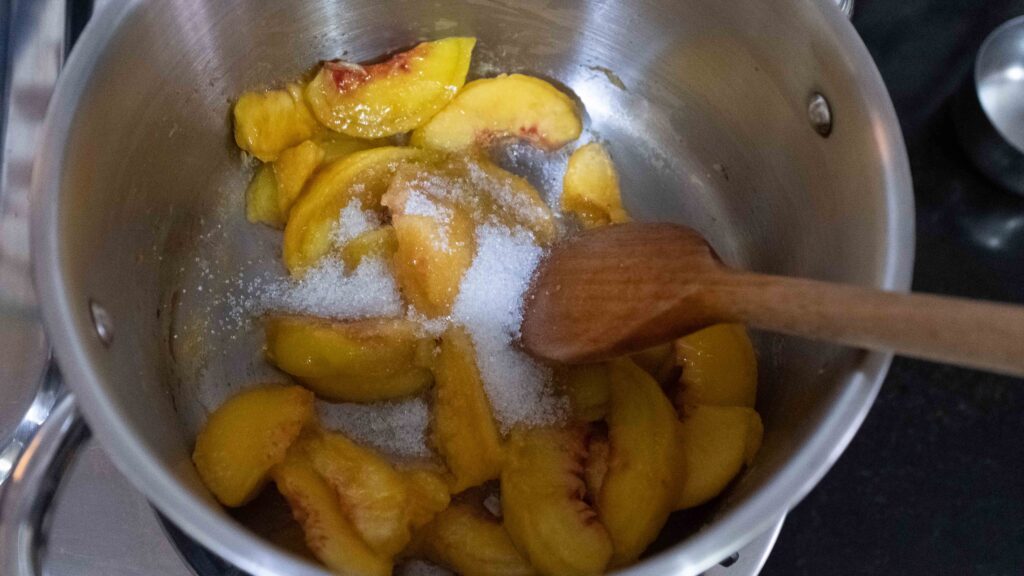
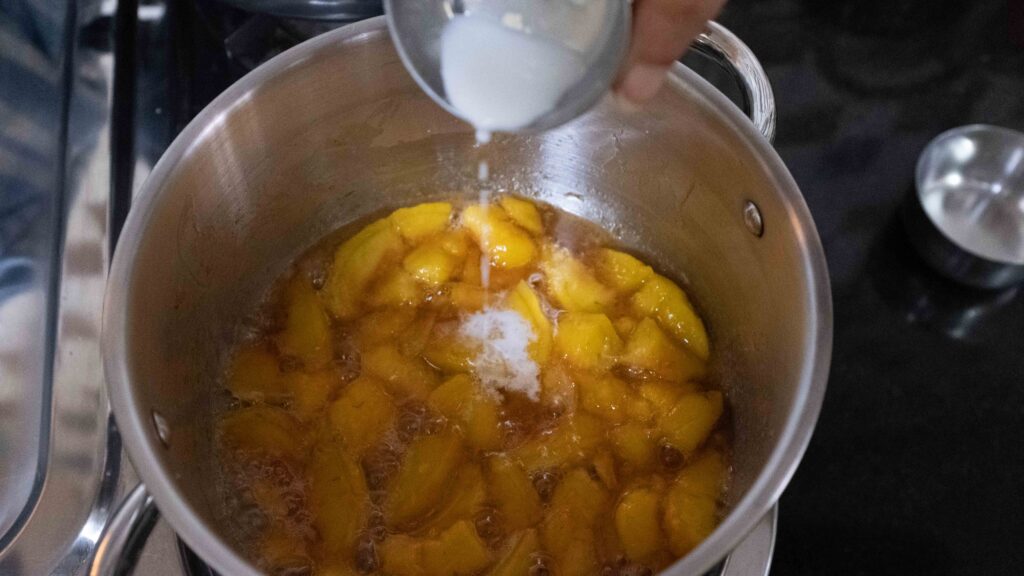
1 – Place the peach flesh in a small saucepan. Cook the peaches over medium heat until they just start to stick to the pan, roughly 1 minute (this will take 6-7 minutes if you’re using frozen peaches).
2 – As soon as the peaches are sticking, add the sugar, honey, lemon juice and lemon zest, and cook for another 1-2 minutes until all the sugar has dissolved and peaches soften slightly. At this point, I like to lightly mash the peaches, keeping some parts whole and some parts mushed.
3 – Dissolve ½ a teaspoon of cornflour in 2 teaspoons of water. Mix well to combine and ensure there are no lumps. This is the cornflour slurry.
4 – Add the cornflour slurry to the pan and cook the peach filling for another minute or until the mixture thickens.
5 – Turn off the heat, add the citric acid, the salt, and the peach flavour, and give the mixture a stir. Let the peach filling cool down to room temperature. Thereafter store it inside an airtight container in the fridge until it’s ready to use. Proceed to Stage 3.
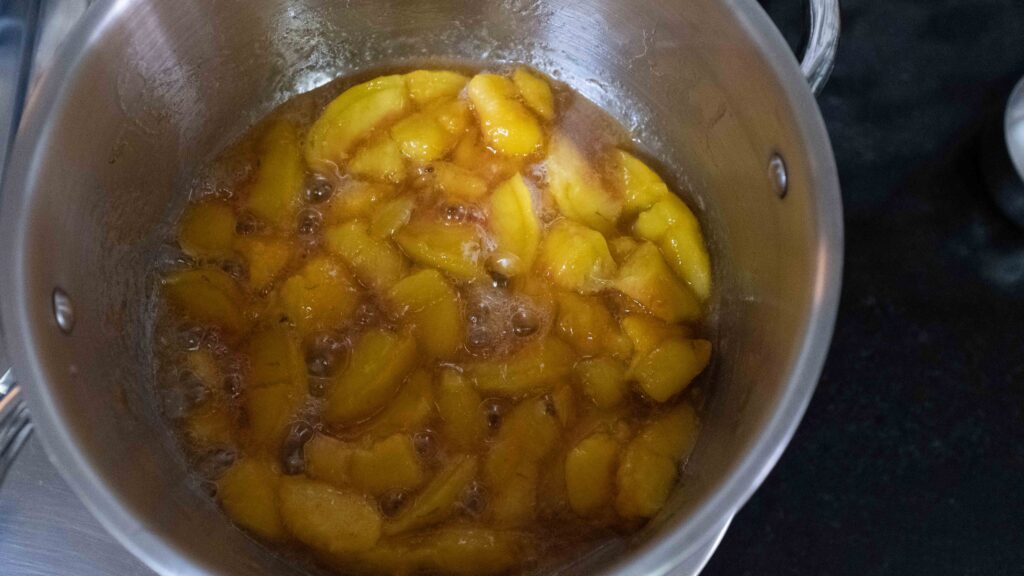
This makes about 178 gm of filling and you will need about half of that for the filling. I served the leftover filling along with the slices of cake. When making this filling, try to find the ripest peaches possible; or leave your peaches to ripen until there is some “give” when they are gently squeezed. In India, peak peach season is early April to late June (sometimes early July), so that’s the best time to make this dish if you live here. Always taste the raw peach before you begin cooking; a ripe peach will taste sweet and juicy and have deep-yellow coloured flesh. Unripe, hard, or sour peaches lack natural flavour and sweetness and you’ll have to increase the amount of sugar in the recipe to make it taste nice. Here’s how to quickly ripen peaches at home. If you’re using the peach flavour, be really stingy with it. A hint too much and it will taste ‘soapy’.
Stage 3: vanilla bean buttercream
Ingredients
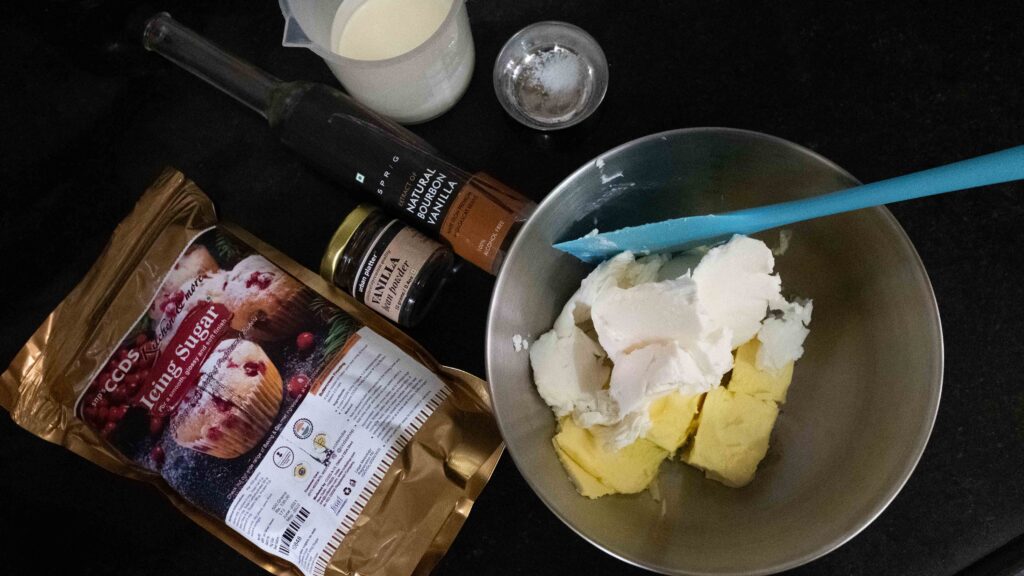
1. 100 gm high ratio vegetable shortening at room temperature
2. 100 gm unsalted butter at room temperature
3. 450 gm icing sugar + 50 gm extra if needed
4. 1-2 tsp heavy cream (full fat) at room temperature
5. 1 tsp pure vanilla extract like this
6. 1 tsp vanilla bean powder like this
7. 1/4 tsp salt
It’s super important to use real vanilla extract and not essence or flavour for this buttercream. For that speckled vanilla look and genuine taste of vanilla, you could also scrape out the seeds from a fresh vanilla pod and add it to your buttercream. Since I didn’t have any, I used readymade powdered beans. In an ideal world, a buttercream would be all-butter. But thanks to temperatures fluctuating between 35-40OC during Summer months here, there’s no way such a buttercream would hold up. The addition of high ratio shortening is purely to make it stable in this hot and humid weather. Please feel free to replace all of the shortening with butter of the same weight, i.e. 200 gm butter, total.
Prep
1 – Bring your butter to room temperature (18-22OC). It should be firm but soft to the touch (and never melted).
2 – Sift your icing sugar. Set it aside.
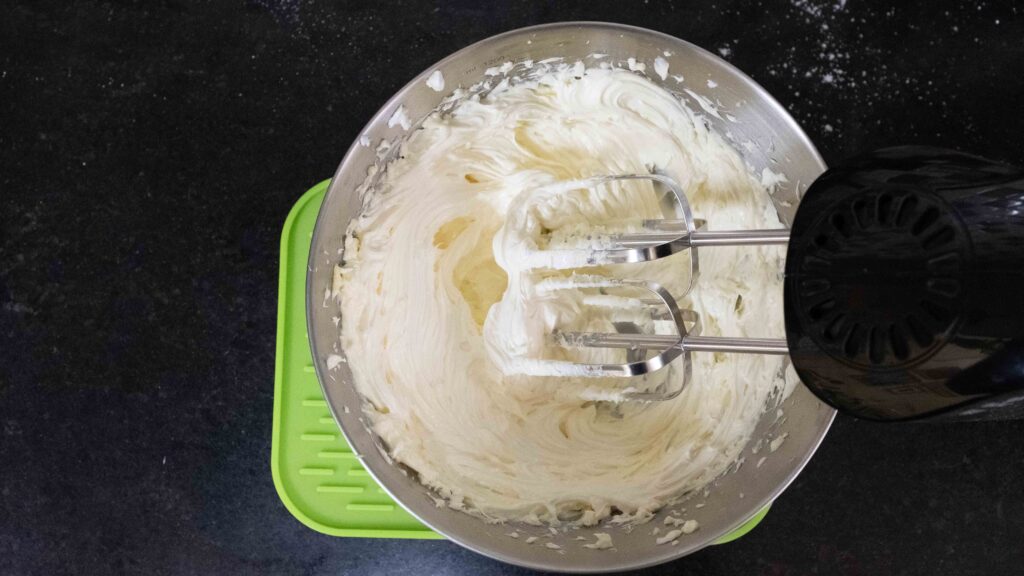
Method
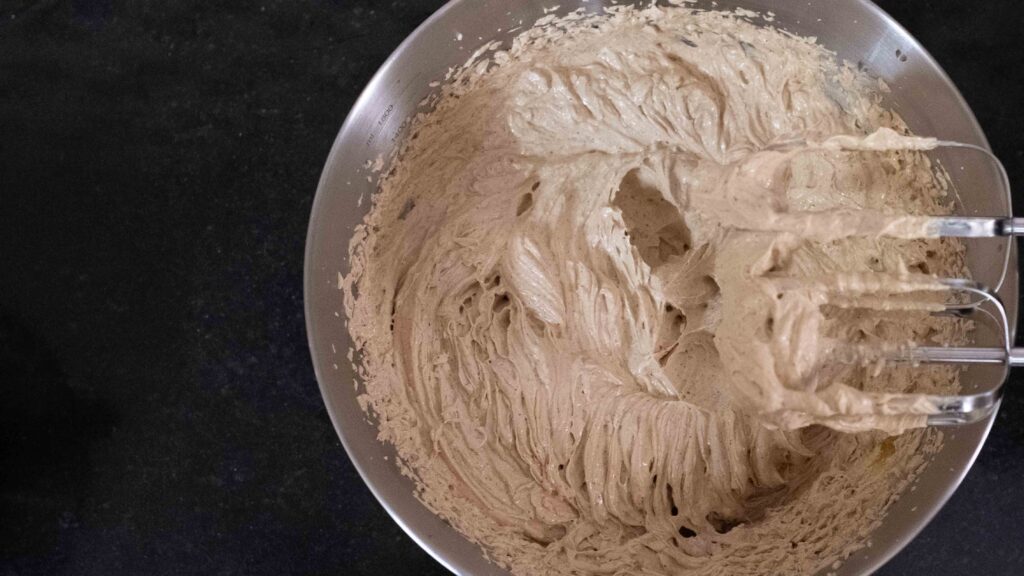
1 – Place the butter and vegetable shortening in a large bowl. Using a hand held mixer, beat them together for 2-3 minutes on medium speed until very smooth and creamy. Scrape the bowl down as needed to ensure even mixing.
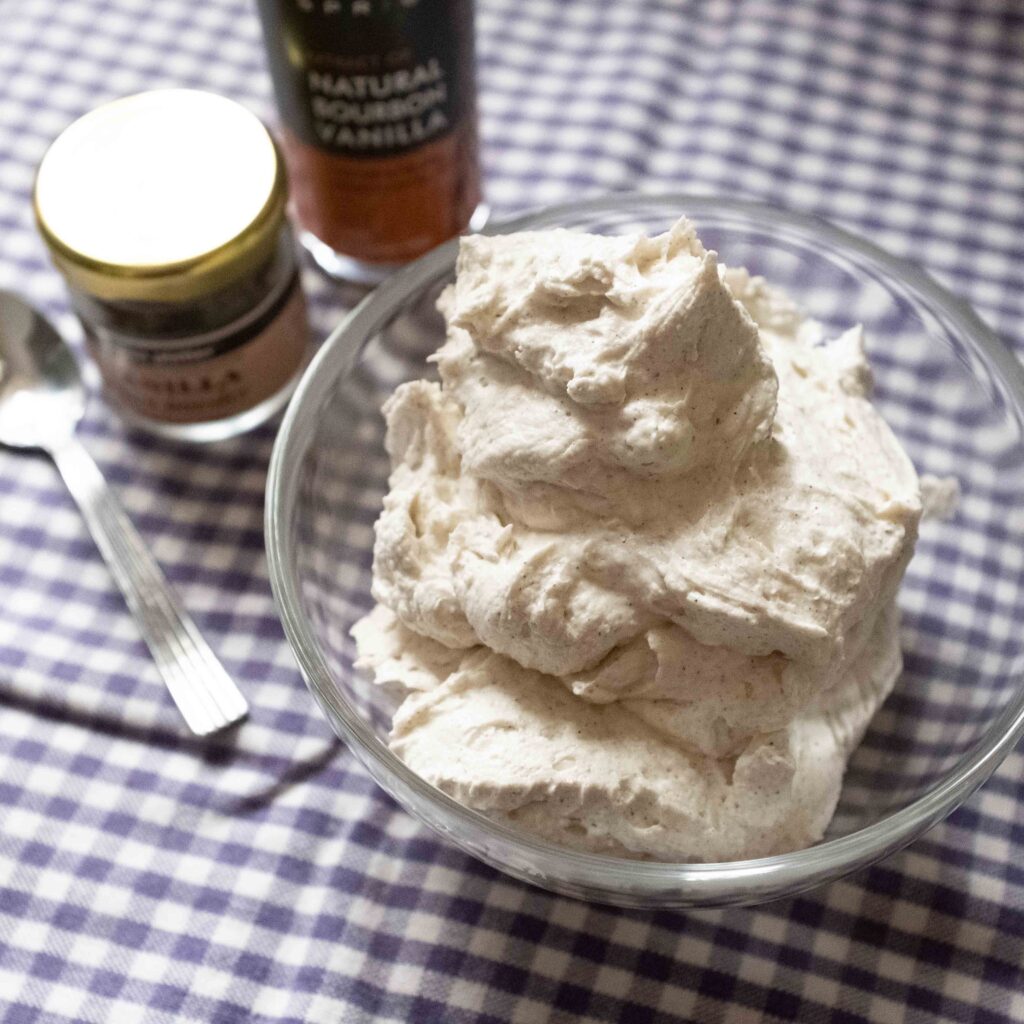
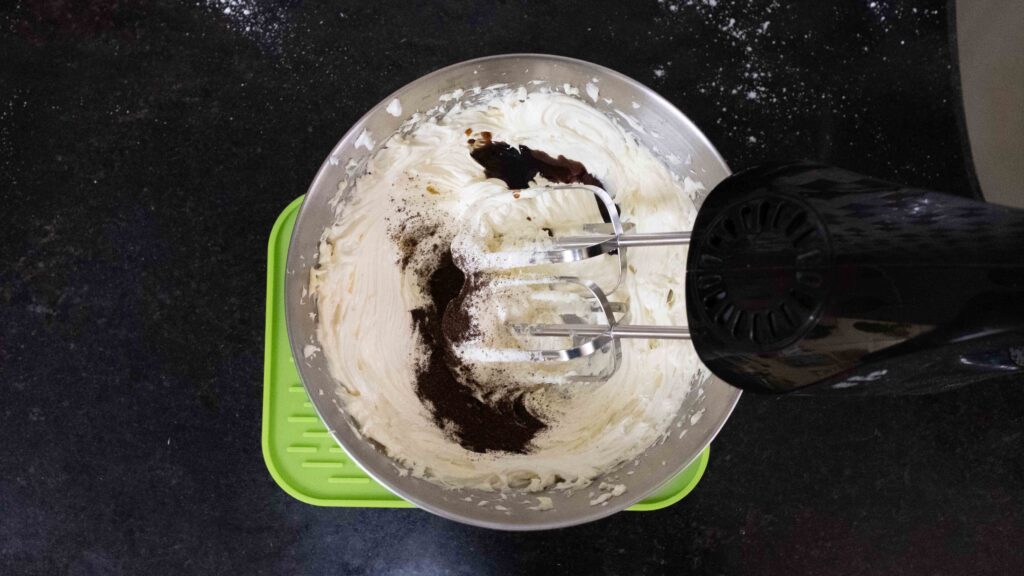
2 – Add in the vanilla extract, vanilla bean powder, and the salt. Beat on medium for 60 seconds to combine. You will see flecks of vanilla evenly visible throughout the buttercream.
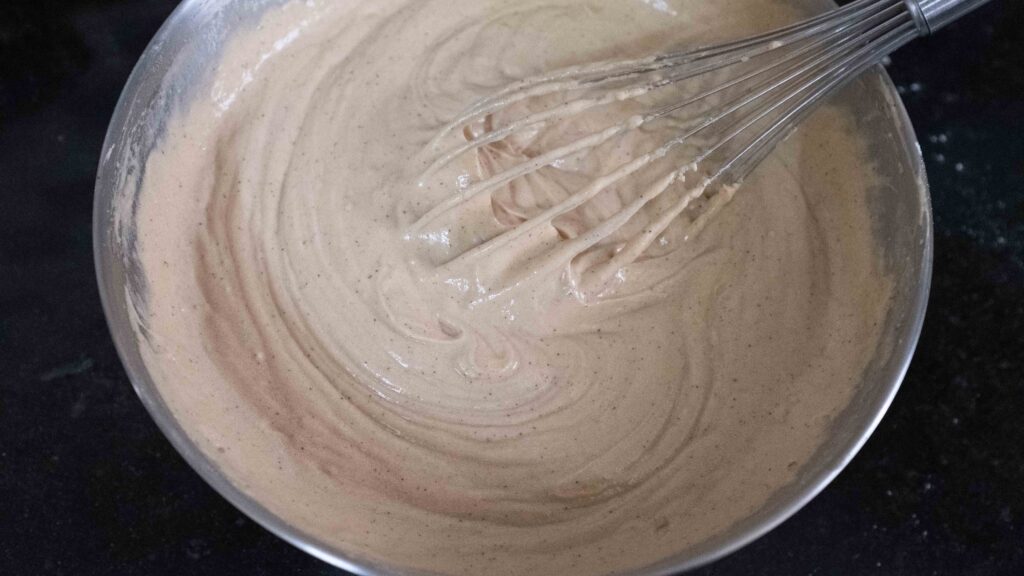
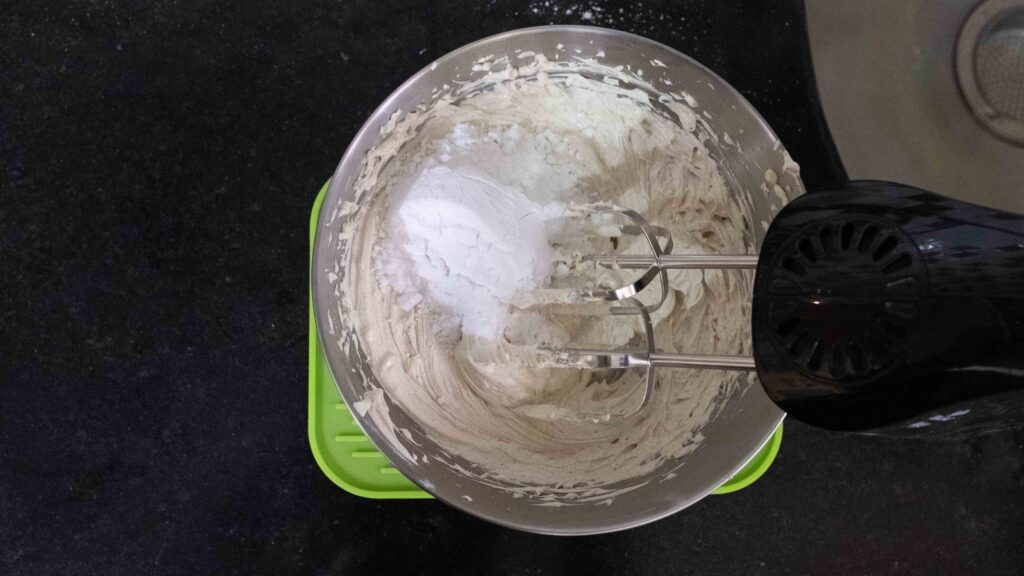
3 – Add in the icing sugar, ¼ cup at a time, beating on low speed for 30 seconds with each addition. Repeat until all the icing sugar has been incorporated and is well-combined. I added 450 gm in total. Scrape down the bowl as needed to make sure the sugar has been incorporated properly and fully. Beat for an additional 2-3 minutes until the mixture is smooth and thick.
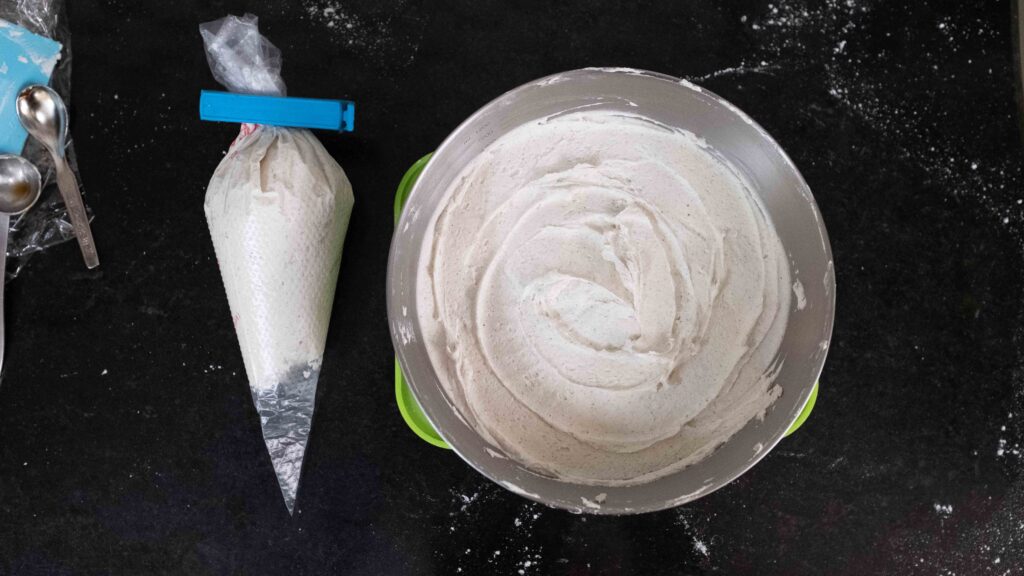
4 – Transfer ¼ of the buttercream to a piping bag and place it in the fridge for 15 minutes before you move on to Stage 4. This thick consistency buttercream will be used for piping our ‘dams’ when we’re constructing the cake tiers.
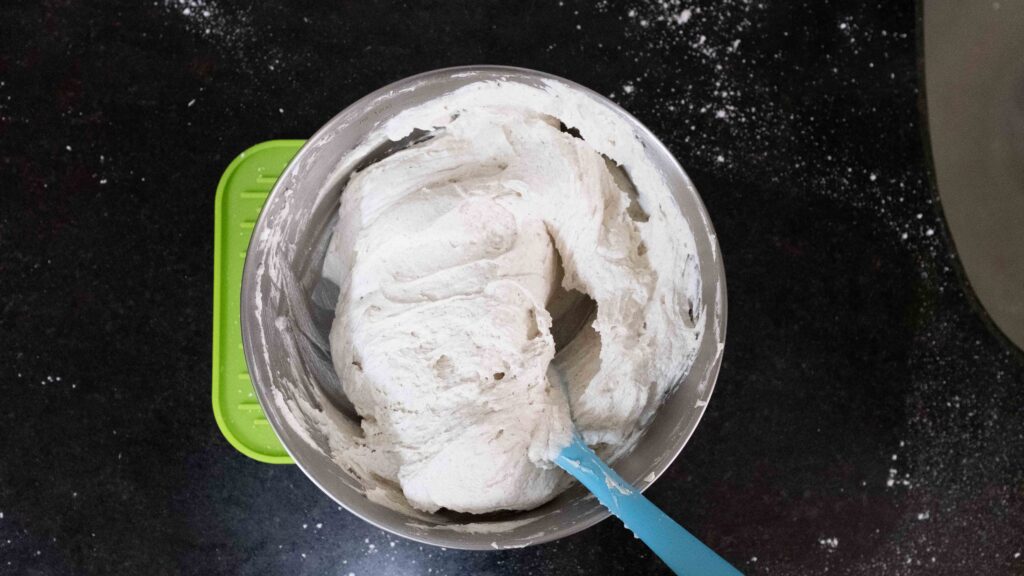
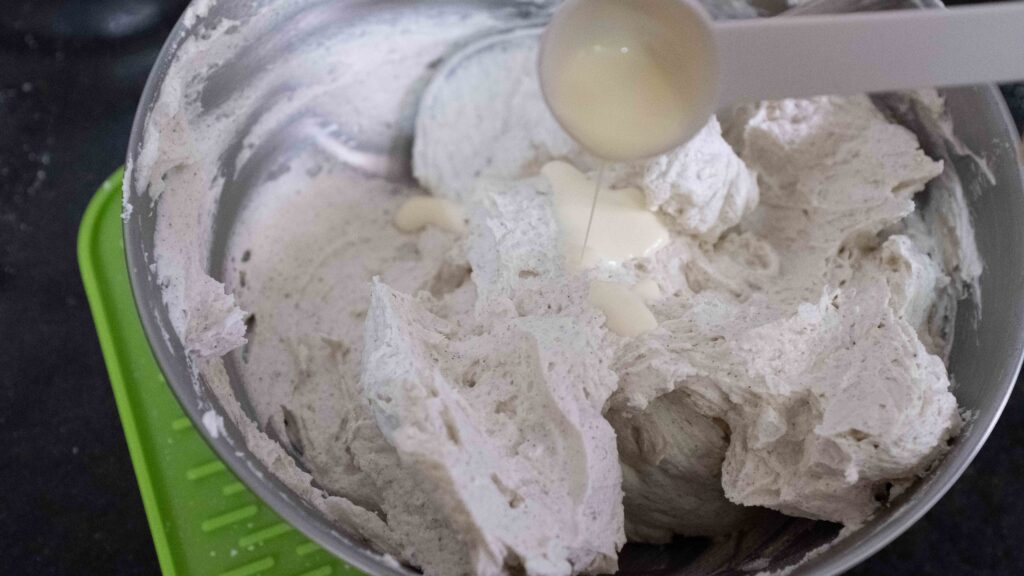
5 – Now we will thin out the remaining buttercream in the bowl. Add the cream in 1 teaspoon increments, beating on medium speed for 20 seconds after each addition. The more cream you add, the wetter and runnier your buttercream will become. I added just 1 teaspoon, as the weather was quite humid.
6 – After you add all the cream you want, beat for an additional minute until the mixture is smooth and creamy. Cover the bowl with cling wrap, making sure to push the plastic down against the surface of the buttercream to prevent a crust from forming. Place this thinner consistency buttercream in the fridge for 15 minutes before you move on to Stage 4.
Just so you know, even with the minimum amount of sugar needed for optimum stability ( i.e. 450 gm), this is a very sweet buttercream. If your buttercream is too loose, keep adding icing sugar, a teaspoon at a time until you achieve the desired consistency. If it becomes too thick, add a teaspoon of room temperature milk or cream. This buttercream can be made up to 3 months in advance and stored in the freezer, or up to 5 days in advance and stored in an airtight container in the fridge. Before using chilled buttercream, take it out of the fridge and rest it on your counter for 15-20 minutes. If you’re using frozen buttercream, thaw it in the fridge first. If it looks a little seized up, re-beat the buttercream for a few seconds so that it’s light, airy, and creamy again. This amount of buttercream is more than enough to generously layer, frost and decorate your entire cake, and have about 1/4 cup left over.
Stage 4: Finale; cake construction & assembly
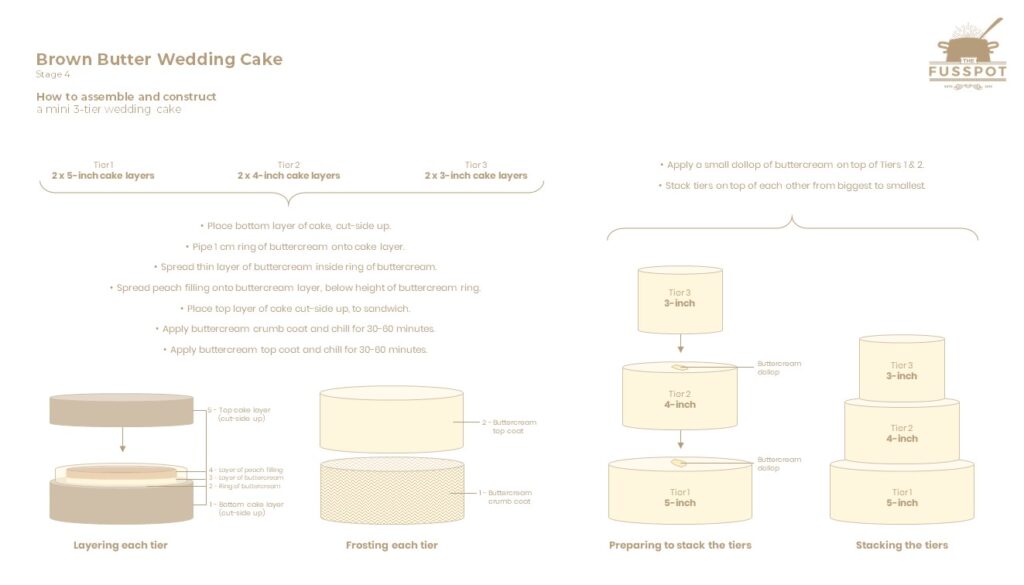
40 steps? What? Before you start panicking, keep in mind that most of the steps will be repeated for each cake tier. Click on the image below to see the overall scope of work.
Components
1. 2 x 5-inch brown butter cake layers (trimmed and chilled)
2. 2 x 4-inch brown butter cake layers (trimmed and chilled)
3. 2 x 3-inch brown butter cake layers (trimmed and chilled)
4. Peach filling (chilled)
5. Thick consistency vanilla bean buttercream
6. Thin consistency vanilla bean buttercream
7. To decorate; small artificial flowers and leaves. I got mine from here
8. To serve; leftover peach filling
Materials
1. 6-inch cake board
2. Baking parchment
3. Small offset spatula
4. Small bench scraper
5. Cake turntable
6. 2 medium bowls to hold any scraped-off buttercream
7. A piping bag fitted with a 2 mm round tip
Prep
1 – Take your piping bag of thick consistency vanilla bean buttercream and your bowl of thin consistency buttercream out of the fridge and bring them to piping consistency (about 15 minutes).
2 – Ready your decorating surface. Place the cake board in the centre of your turntable.
3 – Cut 2 squares of baking parchment; a 5 inch square, and a 4 inch square.
Method
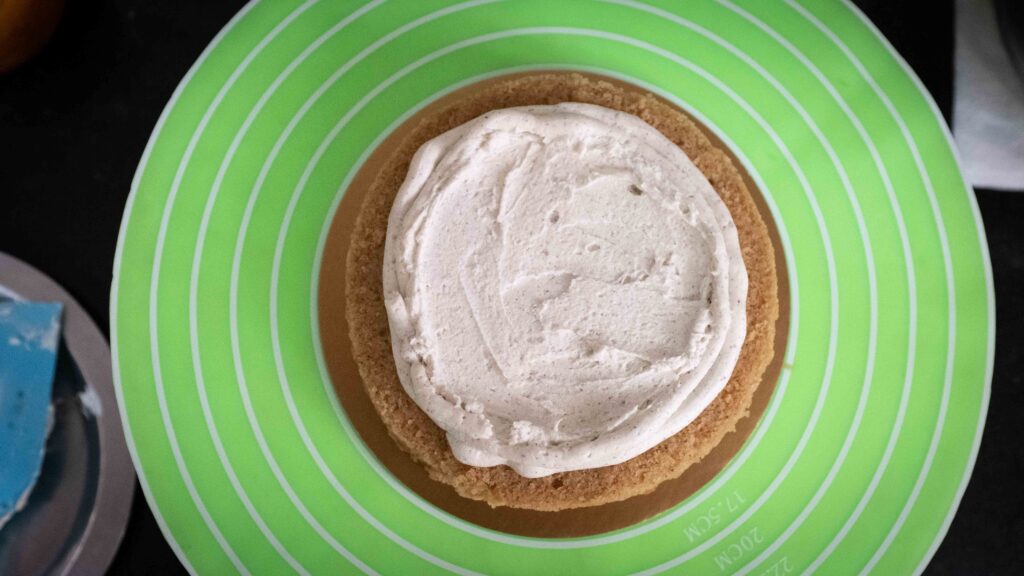
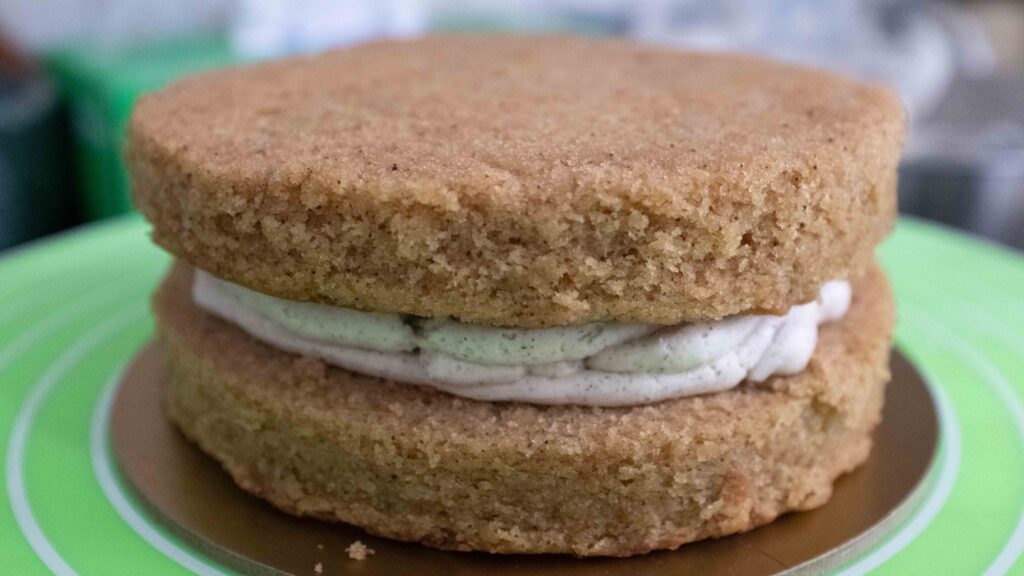
1 – Grab your piping bag of thick consistency buttercream and snip the tip about 1 cm wide. Pipe a 2 cm blob of buttercream on the centre of your cake board. This will be the glue that holds the first 5-inch cake layer in place.
2 – Place the bottom 5-inch cake layer on the buttercream ‘glue’, cut-side up. Pipe a 1 cm ring of buttercream around the top circumference of the cake keeping a 1 cm gap from the edges. This will function as a ‘dam’ that holds in the filling.
3 – Grab your bowl of thin consistency buttercream. Spoon 2-3 tablespoons of buttercream on the centre of the cake and then spread it evenly inside the ring, coming ¼ up the height of the ‘dam’. This layer will prevent the filling from soaking into the sponge.
4 – Fill the ring of buttercream with 1-2 tablespoons of peach filling, making sure to spread it in an even layer and keep it just below the height of the ‘dam’. Do not overfill. I repeat, do not overfill.
5 – Place the top 5-inch cake layer atop the pear layer, cut-side up. Lightly press down to secure. Is filling oozing out? You’ve overfilled! Fix asap by removing some.
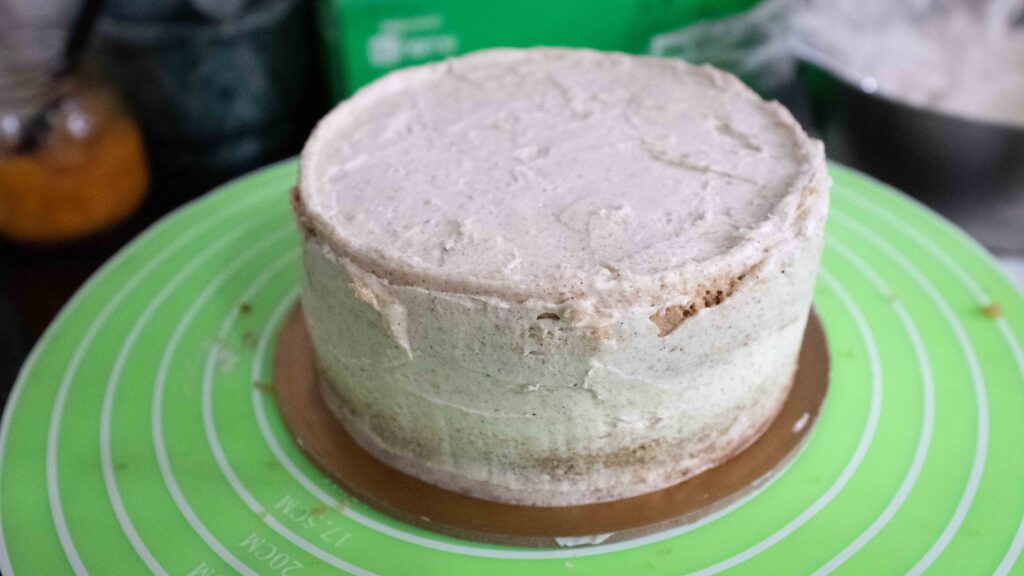
6 – It’s time to create the ‘crumb coat’, which is basically a layer of buttercream that will seal in any loose cake crumbs. Use an offset spatula to generously dollop thin consistency buttercream right on top of the cake. Then generously lop thin consistency buttercream all around the cake, starting at the base, and moving upwards.
7 – Use your palette knife to evenly spread the buttercream all around the outside of the cake (sides and top) and then use a bench scraper to remove the extra buttercream. Place this extra buttercream in a fresh bowl.
8 – Place your crumb-coated 5-inch tier in the fridge for 30-60 minutes to firm up, and proceed with the 4-inch tier.
9 – Place your 5-inch parchment square on the cake turntable. Pipe a 2 cm blob of thick consistency buttercream on the centre of the parchment. This will be the glue that holds the first 4-inch cake layer in place.
10 – Place the bottom 4-inch cake layer on the buttercream ‘glue’, cut-side up. Pipe a 1 cm ring of thick consistency buttercream around the top circumference of the cake keeping a 1 cm gap from the edges. This will function as a ‘dam’ that holds in the filling.
11 – Spoon 1-2 tablespoons of thin consistency buttercream on the centre of the cake and then spread it evenly inside the ring, coming ¼ up the height of the ‘dam’. This layer will prevent the filling from soaking into the sponge.
12 – Fill the ring of buttercream with 1 tablespoon of peach filling, making sure to spread it in an even layer and keep it just below the height of the ‘dam’. Do not overfill. I repeat, do not overfill.
13 – Place the top 4-inch cake layer atop the pear layer, cut-side up. Lightly press down to secure. Is filling oozing out? You’ve overfilled! Fix asap by removing some.
14 – Create the ‘crumb coat’ (re-use the scraped off buttercream for this purpose). Use an offset spatula to generously dollop thin consistency buttercream right on top of the cake. Then generously lop thin consistency buttercream all around the cake, starting at the base, and moving upwards.
15 – Use your palette knife to evenly spread the buttercream all around the outside of the cake (sides and top) and then use a bench scraper to remove the extra buttercream. Place this extra buttercream in the bowl containing the previously scraped-off buttercream.
16 – Place your crumb-coated 4-inch tier in the fridge for 30-60 minutes to firm up, and proceed with the 3-inch tier.
17 – Place your 4-inch parchment square on the cake turntable. Pipe a 2 cm blob of thick consistency buttercream on the centre of the parchment. This will be the glue that holds the first 3-inch cake layer in place.
18 – Place the bottom 3-inch cake layer on the buttercream ‘glue’, cut-side up. Pipe a 1 cm ring of thick consistency buttercream around the top circumference of the cake keeping a 1 cm gap from the edges. This will function as a ‘dam’ that holds in the filling.
19 – Spoon ¾ tablespoon of thin consistency buttercream on the centre of the cake and then spread it evenly inside the ring, coming ¼ up the height of the ‘dam’. This layer will prevent the filling from soaking into the sponge.
20 – Fill the ring of buttercream with 1 teaspoon of peach filling, making sure to spread it in an even layer and keep it just below the height of the ‘dam’. Do not overfill. I repeat, do not overfill.
21 – Place the top 3-inch cake layer atop the pear layer, cut-side up. Lightly press down to secure. Is filling oozing out? You’ve overfilled! Fix asap by removing some.
22 – Create the ‘crumb coat’ (re-use the scraped off buttercream for this purpose). Use an offset spatula to generously dollop thin consistency buttercream right on top of the cake. Then generously lop thin consistency buttercream all around the cake, starting at the base, and moving upwards.
23 – This is the hardest past, because this cake is so tiny and fiddly! Use your palette knife to evenly spread the buttercream all around the outside of the cake (sides and top) and then use a bench scraper to remove the extra buttercream. Place this extra buttercream in the bowl containing the previously scraped-off buttercream. If there are a lot of crumb particles in this batch, you won’t be able to use it for the final coat. Save it to serve along with the cake and grab a fresh bowl for the final coat! If the buttercream is devoid of crumbs, feel free to use it for the final coat.
24 – Place your crumb-coated 3-inch tier in the fridge for 30-60 minutes to firm up.
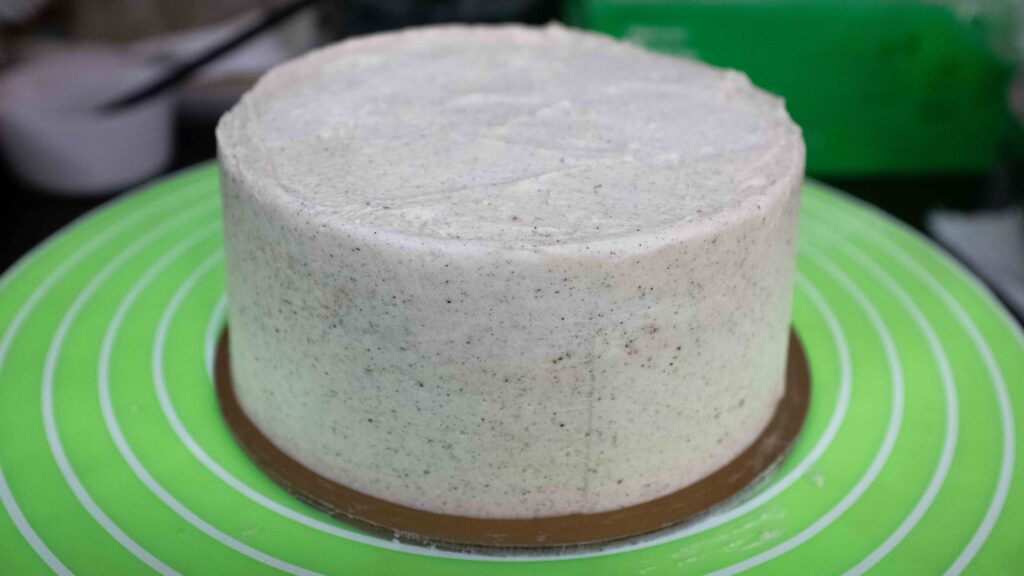
25 – After its crumb-coat has set, get back to your chilled 5-inch cake, to apply the top-coat of buttercream. Place your 5-inch tier back on the turntable. Going in a circle from the inside out, spread a generous layer of thin consistency buttercream, right on top of the cake. While rotating your turntable, spread a generous layer of thin consistency buttercream all around the cake, starting at the base, and moving upwards.
26 – Use the bench scraper and the offset spatula to completely smoothen the buttercream on top and around the sides of the cake. Place scraped-off buttercream in a new bowl. Place the fully-coated 5-inch tier back in the fridge to chill for 30-60 minutes.
27 – After its crumb-coat has set, get back to your chilled 4-inch cake, to apply the top-coat of buttercream. Place your 4-inch tier back on the turntable. Going in a circle from the inside out, spread a generous layer of thin consistency buttercream, right on top of the cake. While rotating your turntable, spread a generous layer of thin consistency buttercream all around the cake, starting at the base, and moving upwards.
28 – Use the bench scraper and the offset spatula to completely smoothen the buttercream on top and around the sides of the cake. Place scraped-off buttercream in the new bowl containing the previously scraped-off buttercream. Place the fully-coated 4-inch tier back in the fridge to chill for 30-60 minutes.
29 – After its crumb-coat has set, get back to your chilled 3-inch cake to apply the top-coat of buttercream. Place your 3-inch tier back on the turntable. Going in a circle from the inside out, spread a generous layer of thin consistency buttercream, right on top of the cake. While rotating your turntable, spread a generous layer of thin consistency buttercream all around the cake, starting at the base, and moving upwards.
30 – Use the bench scraper and the offset spatula to completely smoothen the buttercream on top and around the sides of the cake. Place scraped-off buttercream in the new bowl containing the previously scraped-off buttercream. Place the fully-coated 3-inch cake tier in the fridge to chill for 30-60 minutes.
31 – At this point your 3 tiers should be chilling in the fridge getting ready to be stacked. The hard part is over! Transfer any remaining ‘clean’ buttercream (thick and thin) to the piping bag fitted with the 2 mm round tip and place it in the fridge. Leave your scraped-off buttercream in its bowl.
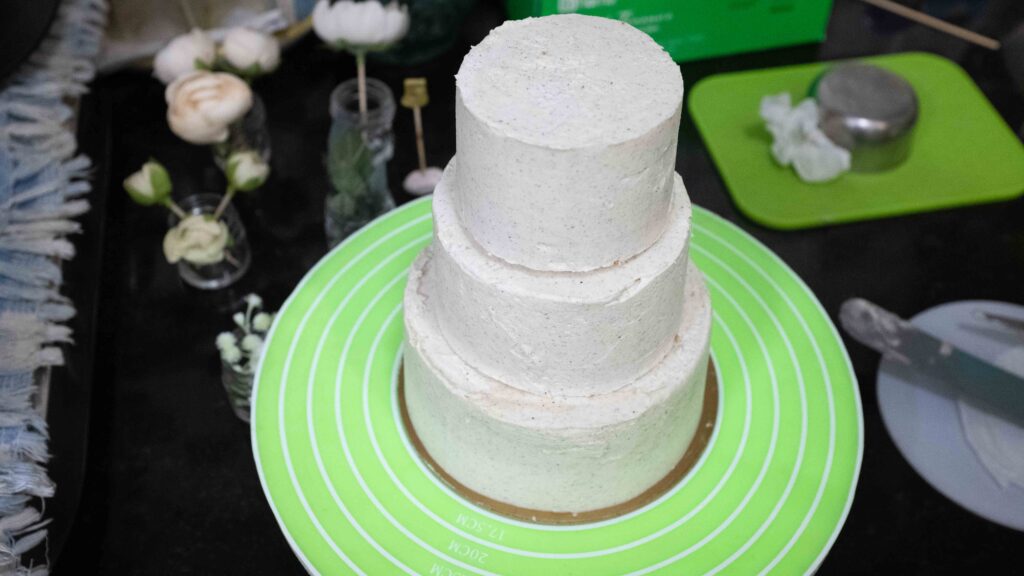
32 – Once all your cake tiers have chilled and the top-coat of buttercream has fully set, it’s time to get stacking. Place the 5-inch tier on your turntable. Get your bowl of scraped-off buttercream and spread a 2 cm blob of buttercream on top of the 5-inch tier, bang in the centre. This will act as a glue.
33 – Get your 4-inch tier. Very carefully, slide your offset spatula between the cake and the baking parchment it’s sitting on. In a scraping motion, drag the spatula under the cake to release it from the parchment. Now gently mount the 4-inch tier on top of the 5-inch tier, making sure that it’s centred. Press down lightly to secure.
34 – Spread a 2 cm blob of scraped-off buttercream on top of the 4-inch tier, bang in the centre. This will act as a glue.
35 – Get your 3-inch tier. Very carefully, slide your offset spatula between the cake and the baking parchment it’s sitting on. In a scraping motion, drag the spatula under the cake to release it from the parchment. Now gently mount the 3-inch tier on top of the 4-inch tier, making sure that it’s centred. Press down lightly to secure. Place the stacked cake in the fridge to chill for 60 minutes or until fully-set.
36 – After your stacked cake has chilled for 60 minutes, it’s ready for decorating. Take your piping bag of buttercream fitted with the 2 mm round tip out of the fridge and let it sit at room temperature for 15 minutes or until pipeable. Now take your stacked cake out of the fridge and place it back on the turntable.
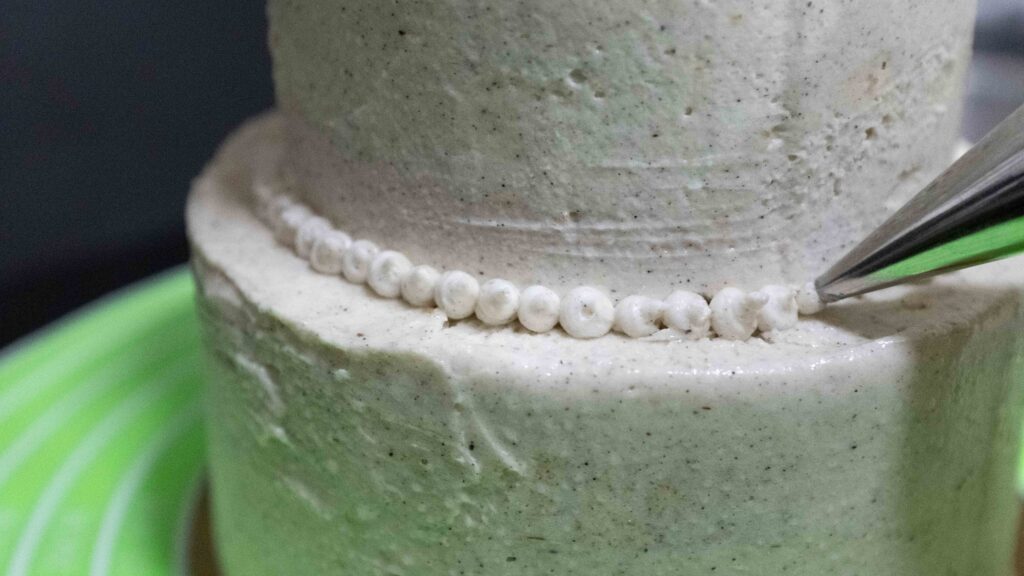
37 – Pipe a string of 4 mm dots all along the seam between the bottom tier and your cake board, as well as along the seam between each stacked tier. To do this, hold the piping bag at a 90-degree angle over the spot on which you want to pipe, and squeeze a 4 mm dot onto the spot. Then stop squeezing the bag and swipe right and pipe another dot. Repeat all around the cake, for all 3 tiers. Watch this video to see how.
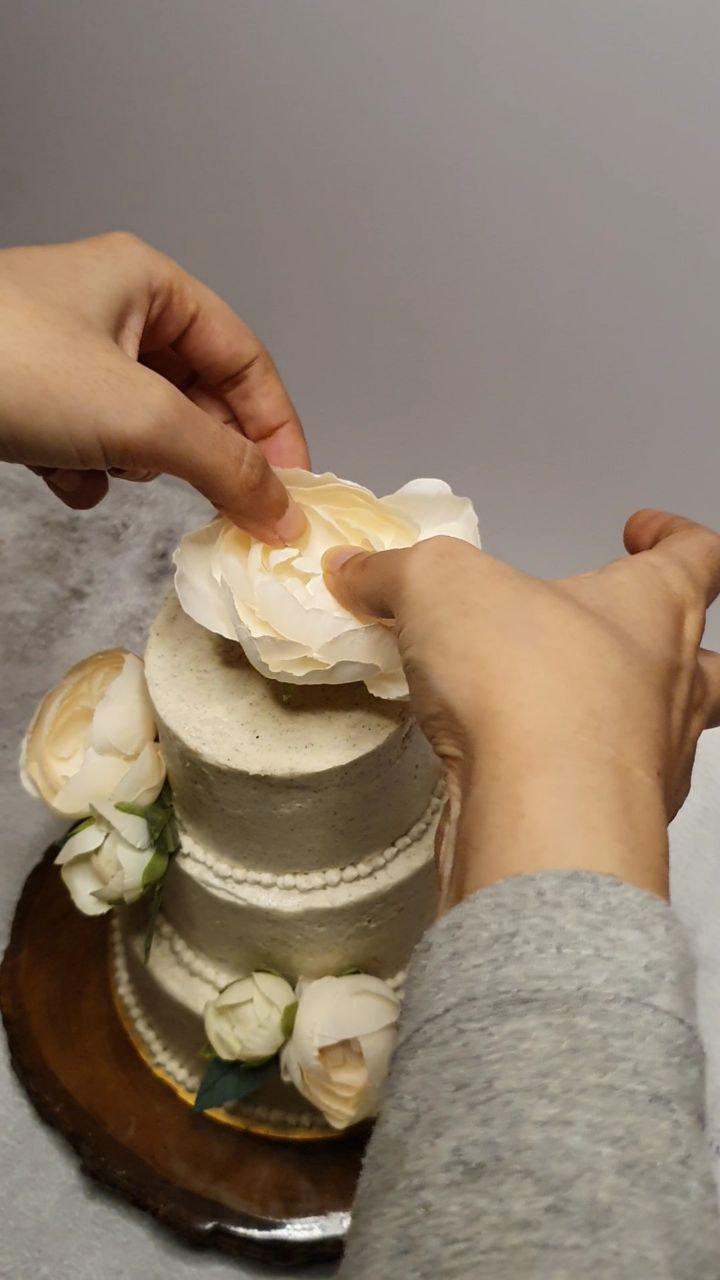
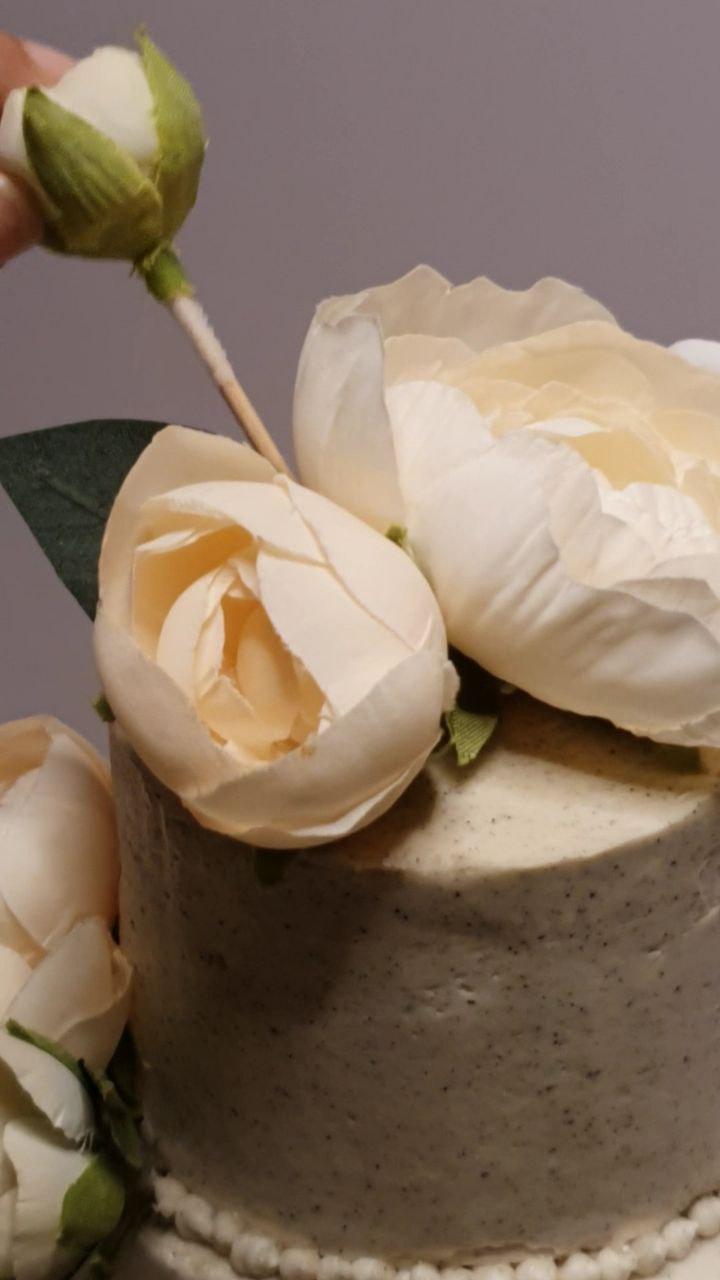
38 – Zhuzh up the cake with whatever you like. Great options are sugar flowers, edible flowers, or even fresh or artificial flowers. We decorated ours with artificial ranunculases and leaves from Ikea, because even these have been designed to be modular! You can actually pull the flowers off their stems, insert toothpicks into their cavities, and plant them into the cake. When you’re done, you can remove the toothpicks and reattach the flowers to their stems! Additionally, you can dismantle the larger flowers and re-assemble them to be the size you want (which is particularly helpful when you want your flowers to be proportional to a mini wedding cake).
39 – Now place the cake back in the fridge for 30-60 minutes to fully set the flowers into the buttercream before serving.
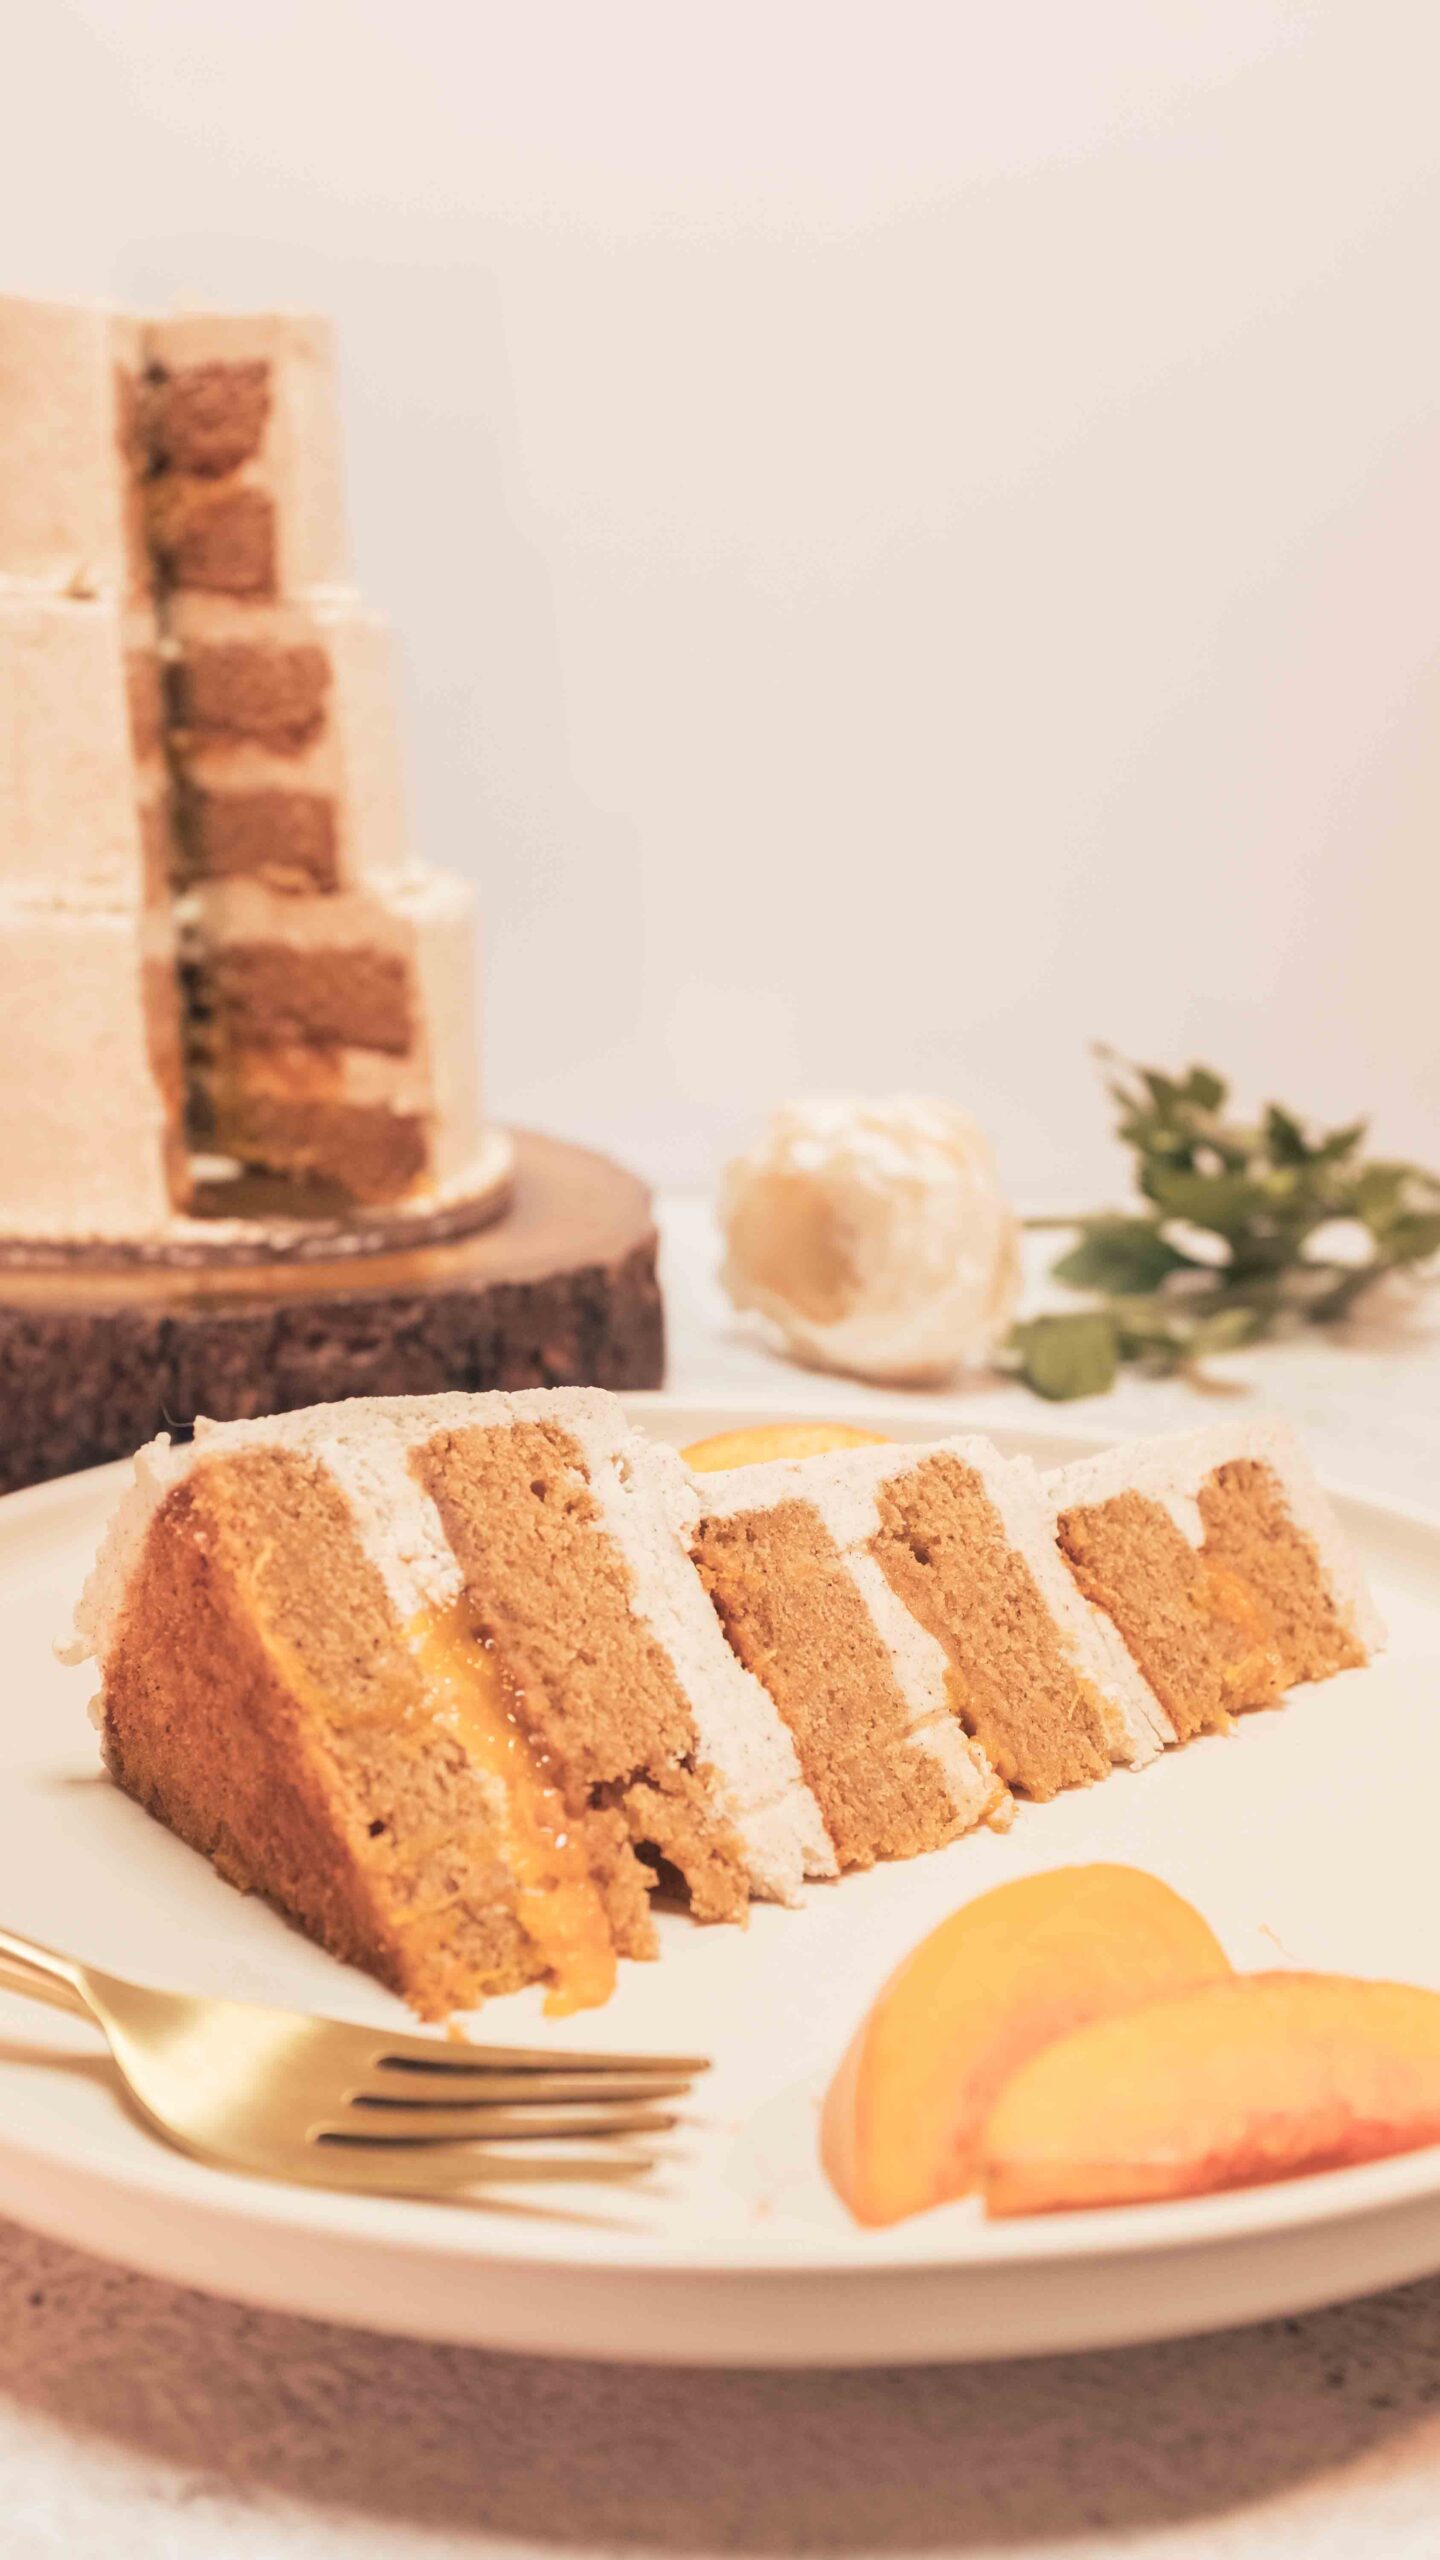
40 – Stand the fully decorated cake on your serving platter. Take a bow! You’ve just made an 8 inch tall, 3-tiered, stacked mini wedding cake! When serving, cut through all 3 stacked layers to see every gorgeous layer. Serve with extra peach filling on the side. Now eat!


The nemesis of stacked cakes is overfilling. If your filling oozes out when you press down to sandwich your cake layers, you won’t be able to apply a ‘secure’ coat of buttercream. Too much filling will also cause the individuals layers to slip about inside and compromise the overall stability. Always under-fill your cakes and serve extra filling on the side. Since this is such a small cake, there’s no need to reinforce the individual tiers with cake boards and dowels. However, if you’re a nervous ninny like me, you might want to push 3 bamboo skewers down into all 3 tiers, just to be super safe! When transferring your cake from the fridge to a room temperature environment, you’ll want to first place the cake in an air conditioned room to prevent condensation from appearing on the cake (which always happens when it goes from a very chilled to a warm environment). Gradually increase the AC temperature over an hour, until it’s about the same as room temperature. Because the buttercream has been stabilised with high-ratio shortening, the cake will hold up relatively well at room temperature for an hour or so. Do not keep it under any hot lights or direct sunlight, as the butter in the frosting will start to melt! For best results, cut yourself a slice whenever you get a craving and store the rest of the cake, covered, in the fridge. This is narrow tall, tapering cake, so cutting a clean slice can be a bit challenging. I find that a large, sharp serrated knife is the best tool for the job and cutting a slice is easiest when the cake is a bit cold.
Tips & Tricks
How to torte a cake
How to trim cakes for even layers
How to ripen peaches fast
How to peel peaches the easy way
How to fill cake layers
How to pipe buttercream dots