


Makes 18 rings
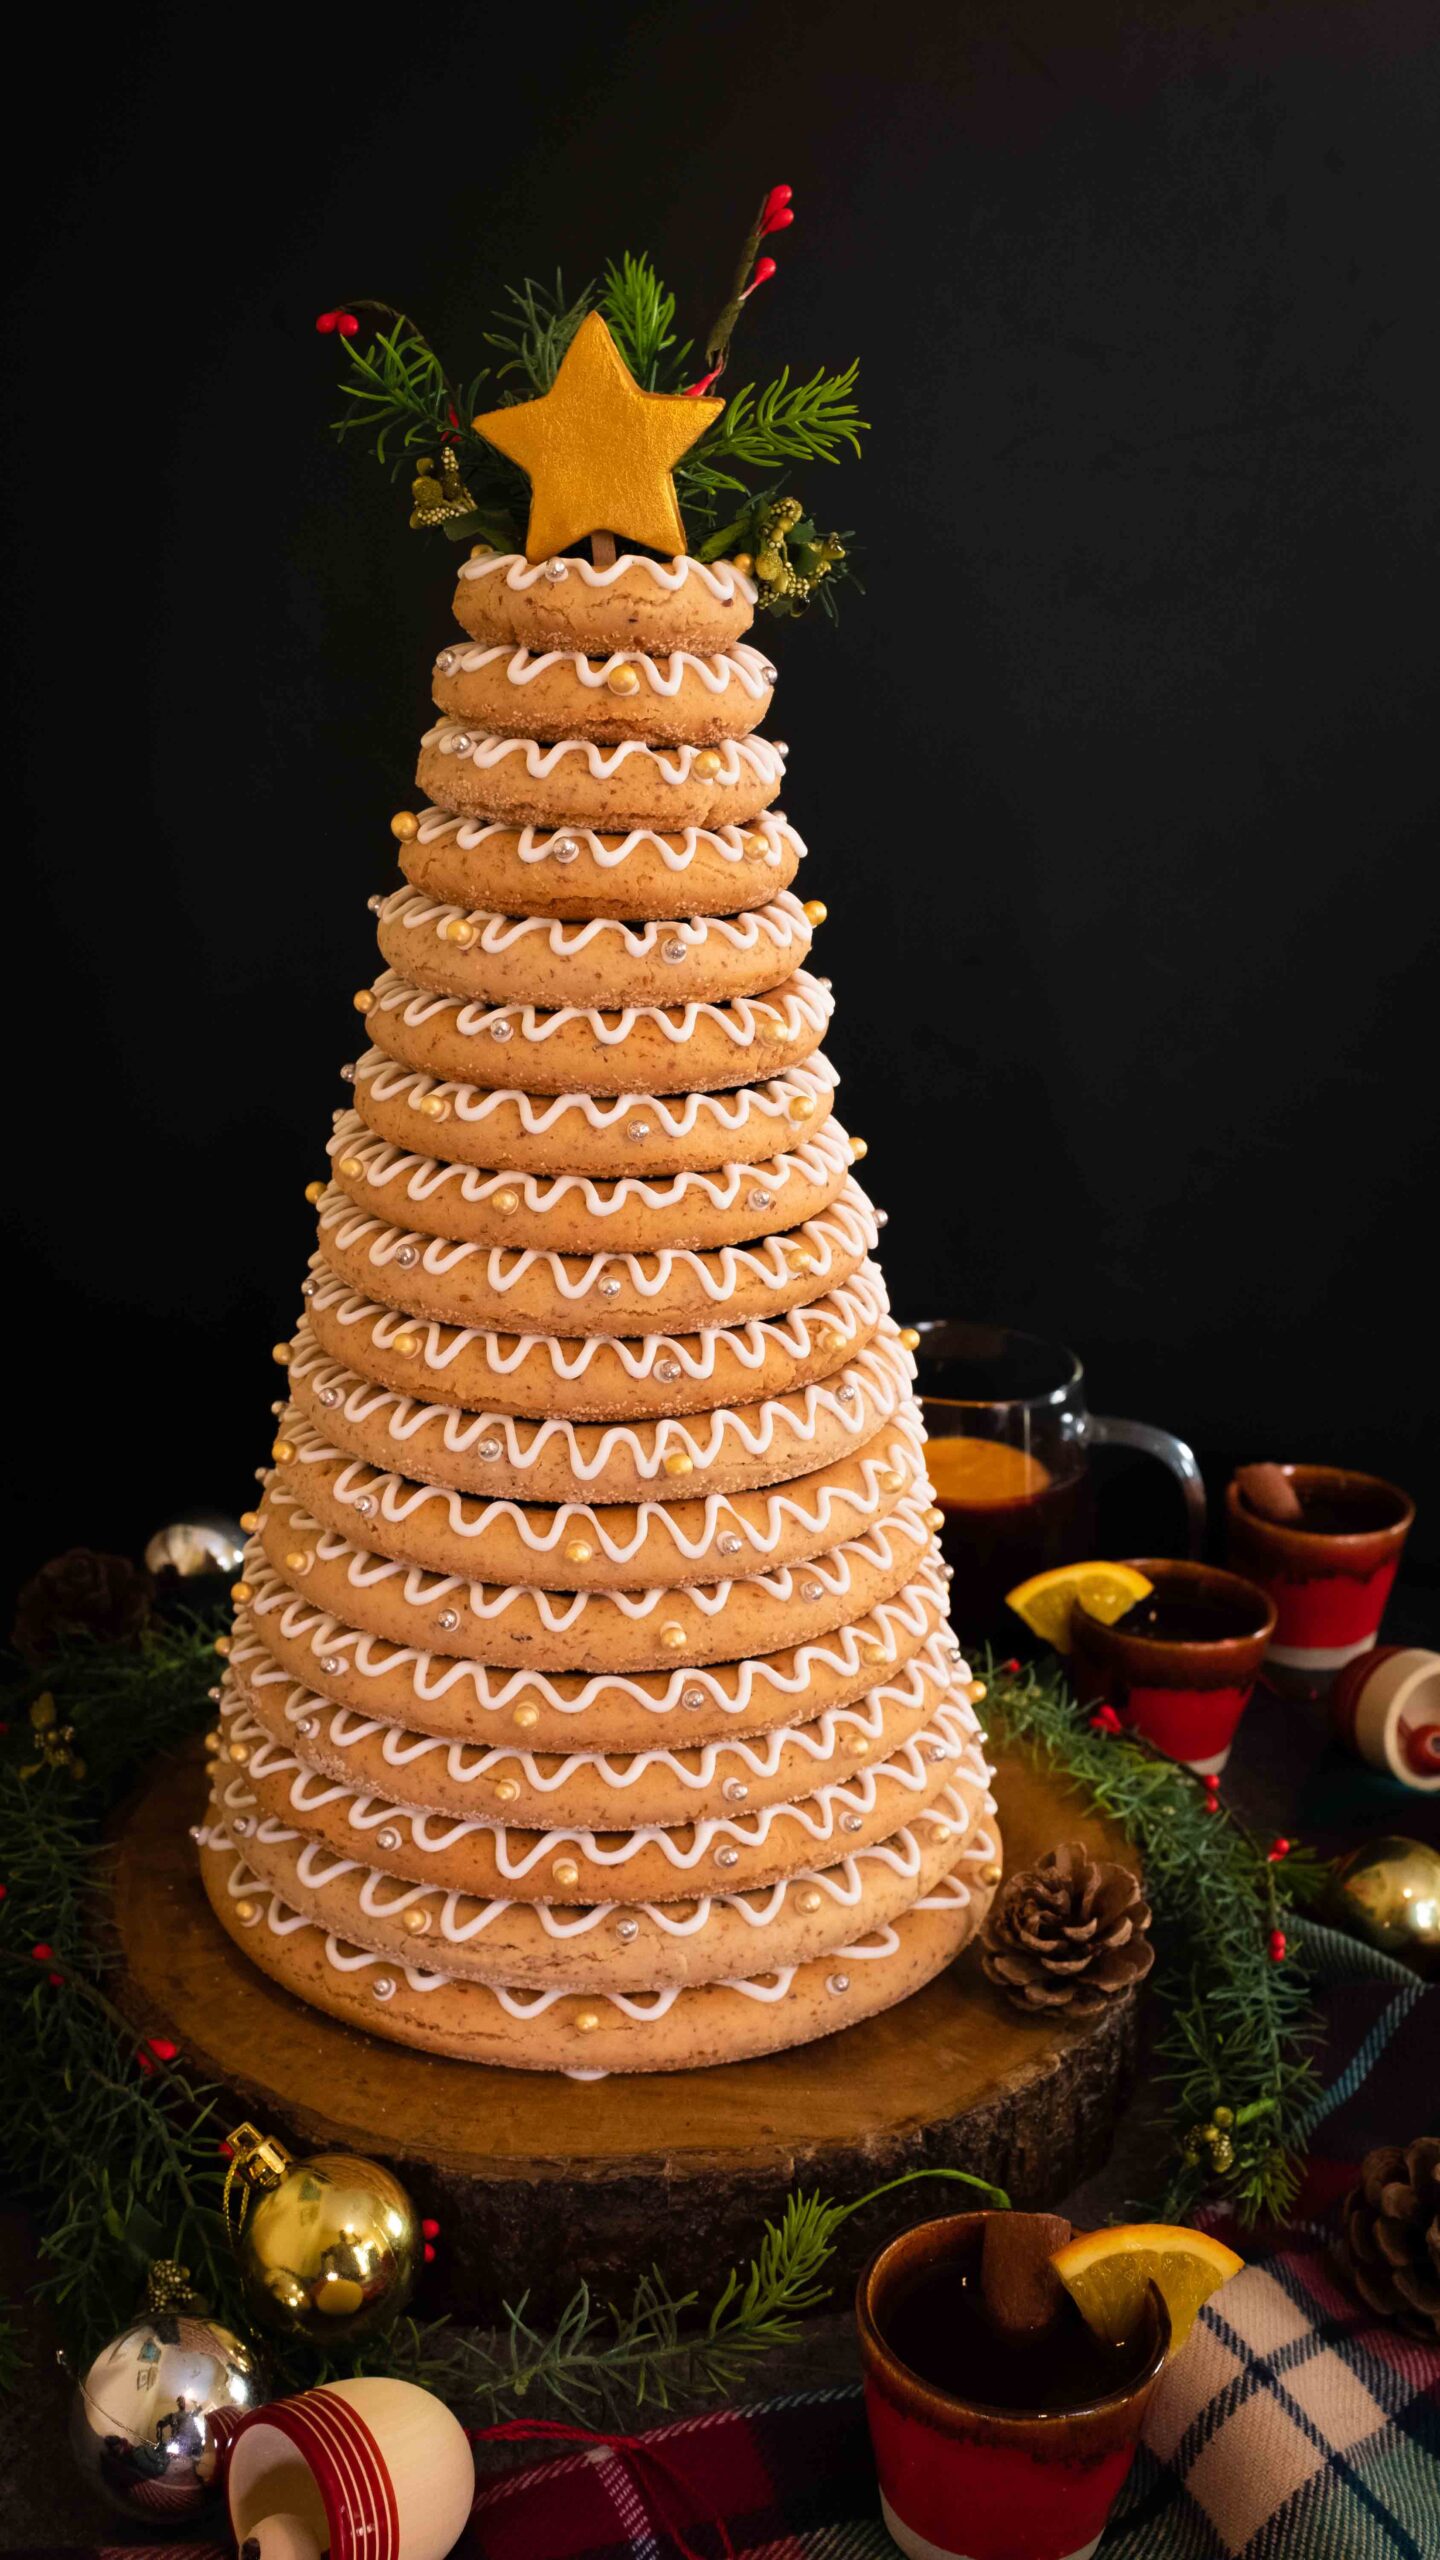
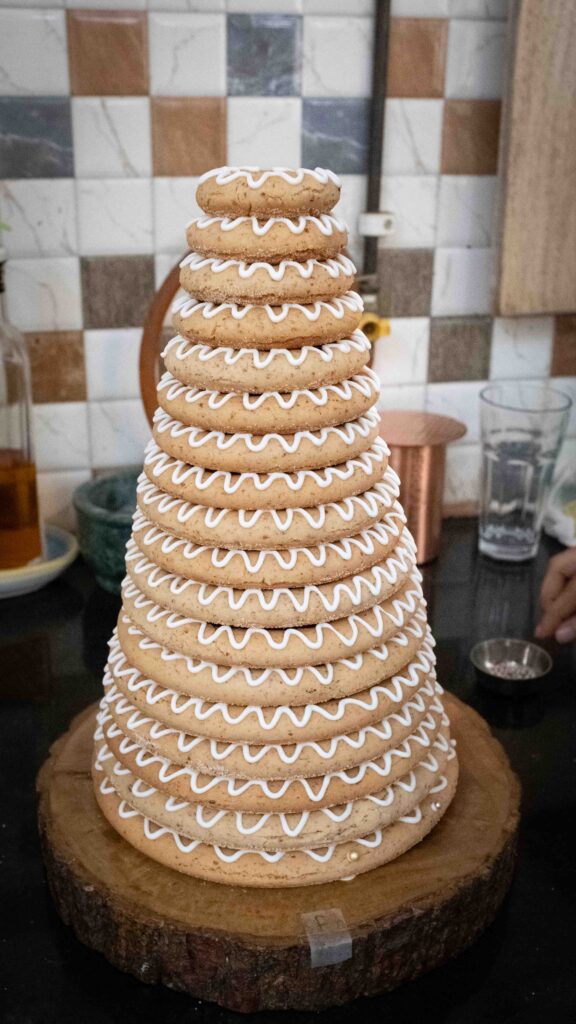
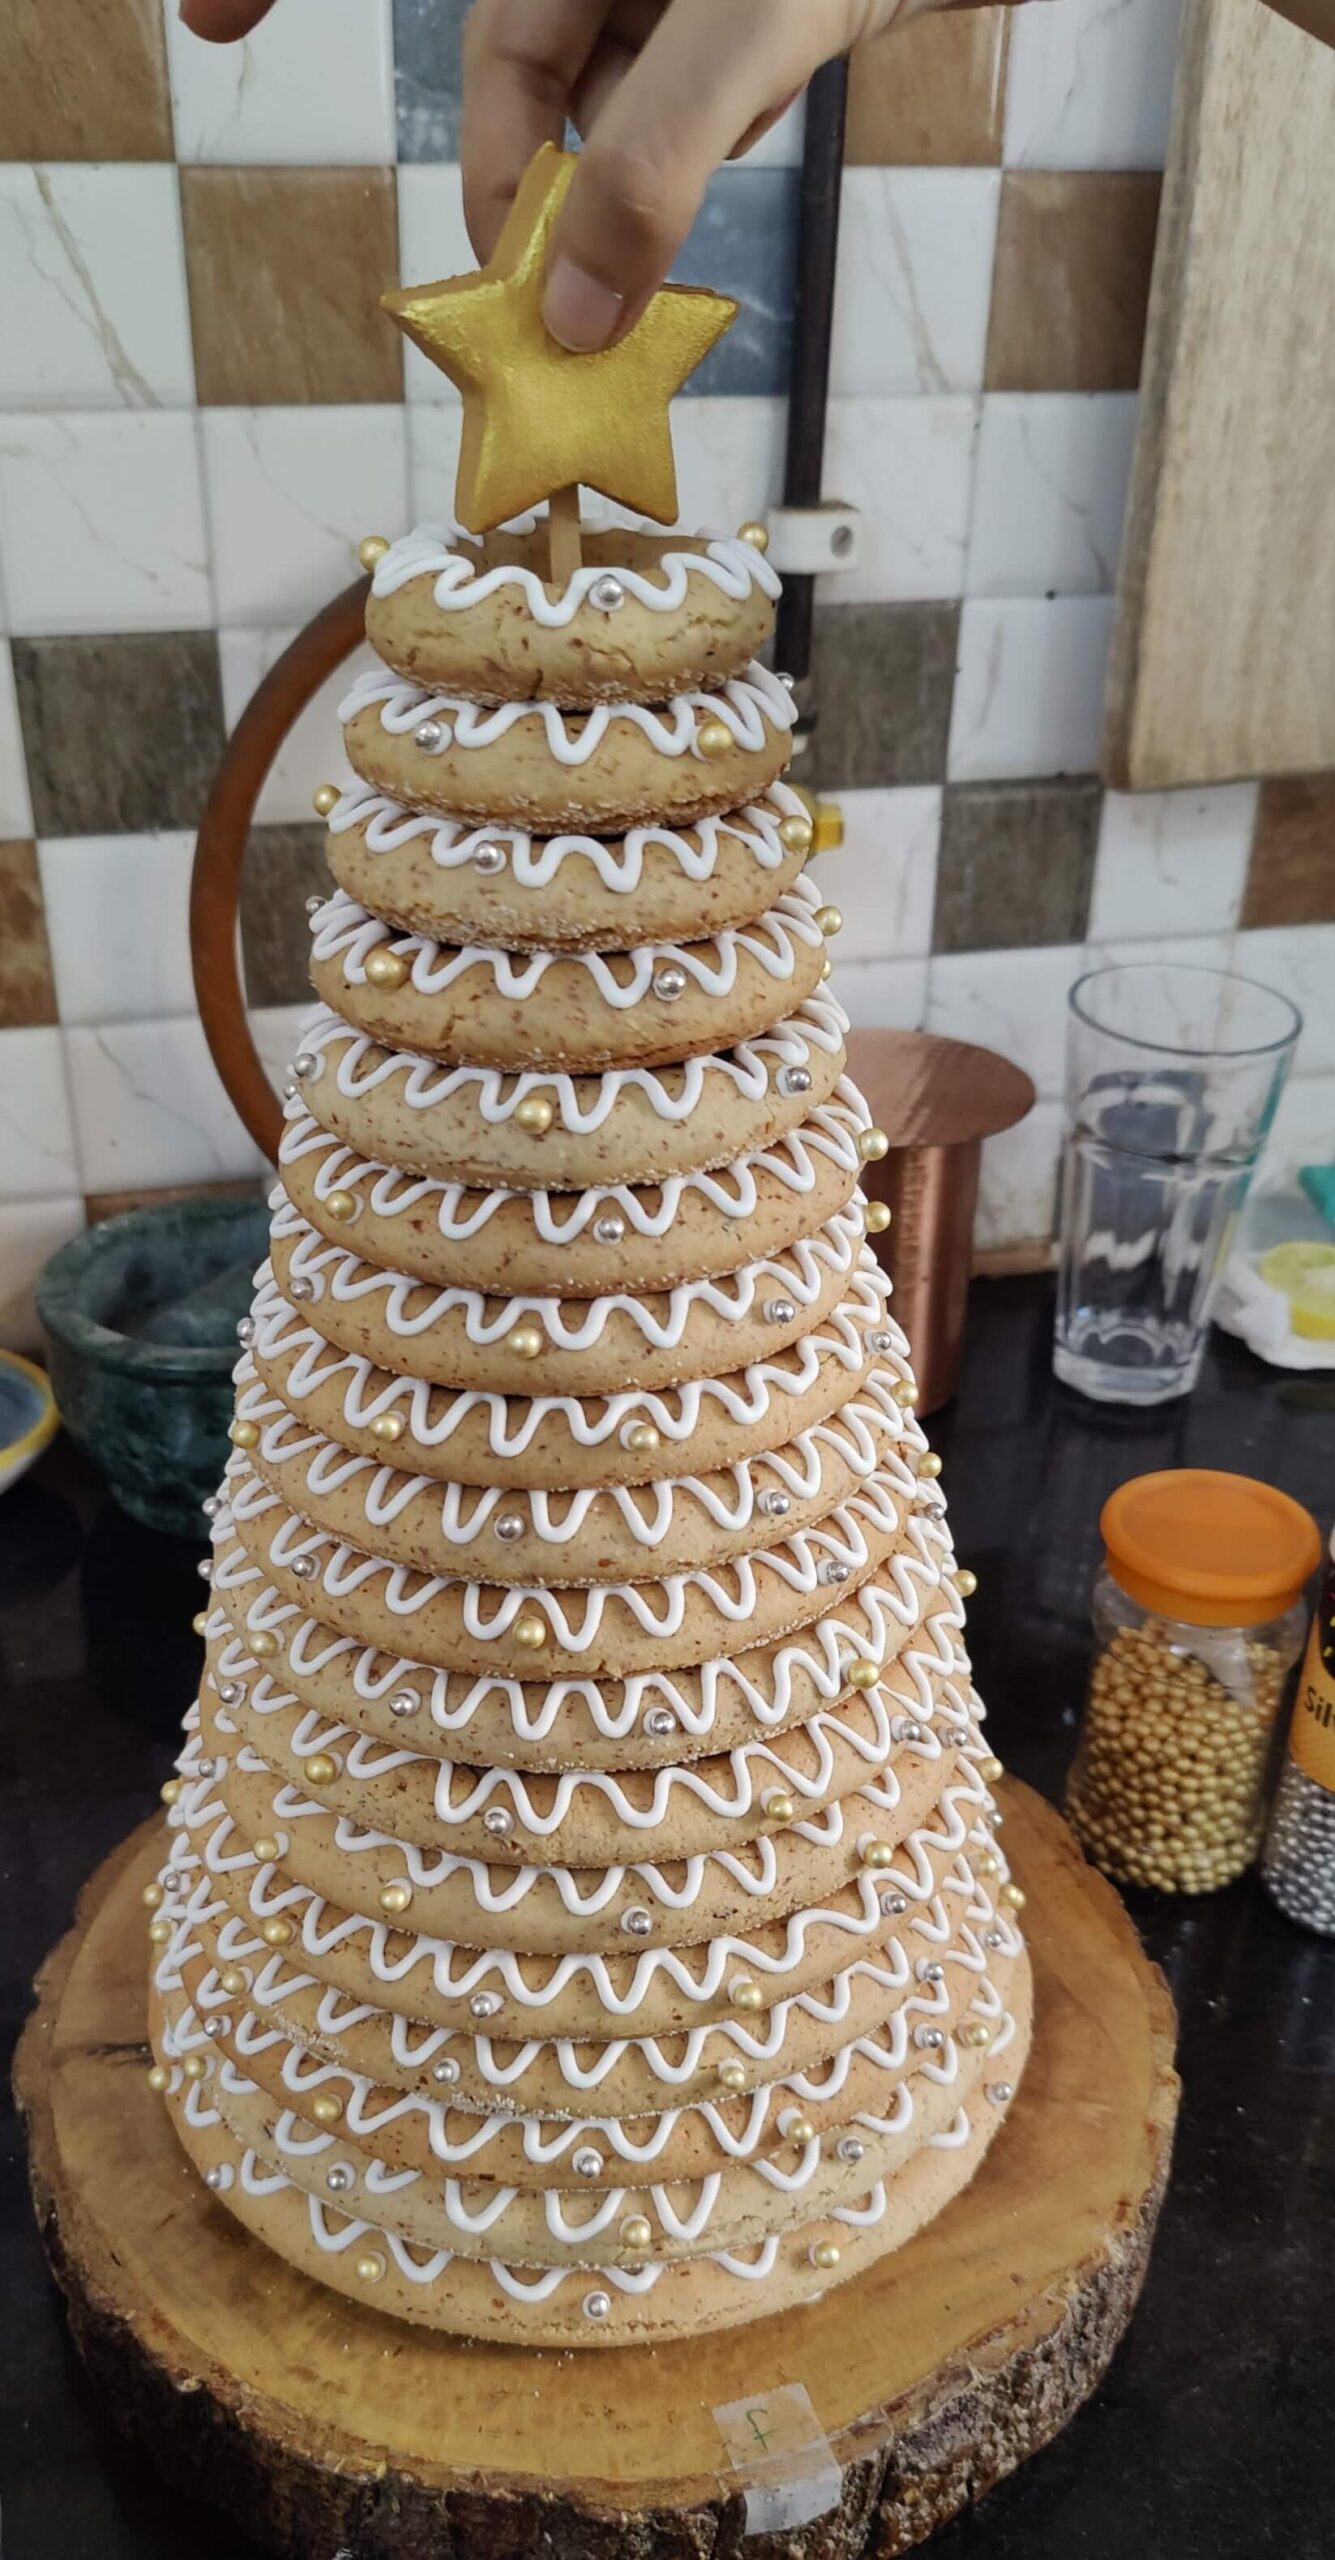
This Christmas, how about an Xmas tree you can make, decorate, and then eat! And since a Norwegian kransekake (pronounced kran-zay-kah-kuh) looks like a tree, it’s perfect! Meaning “wreathe-cake”, it is basically a tower built with ring-shaped cookies. Crisp on the outside and chewy on the inside, the cookies are similar to baked marzipan and are bursting with almond flavour. Standing 18 rings high, adorned with royal icing, and topped with a fondant star – this cookie-cake makes for one lofty and eye-catching Christmas centrepiece. We served ours with glasses of warm, homemade mulled wine. Perfect for dunking nutty morsels of kransekake.
At a glance
– This recipe comprises kransekake rings + royal icing + fondant star + bonus recipe for mulled wine.
– You will need a hand mixer, a kransekake mould, baking paper, unrimmed baking trays, and a piping bag. You will also need a 2 litre non-reactive pot to make the mulled wine.
– This recipe has been broken into 5 stages for ease and comprehension. Please read the entire recipe from start to finish before beginning.
Stage 1: mixing the kransekake dough
Ingredients
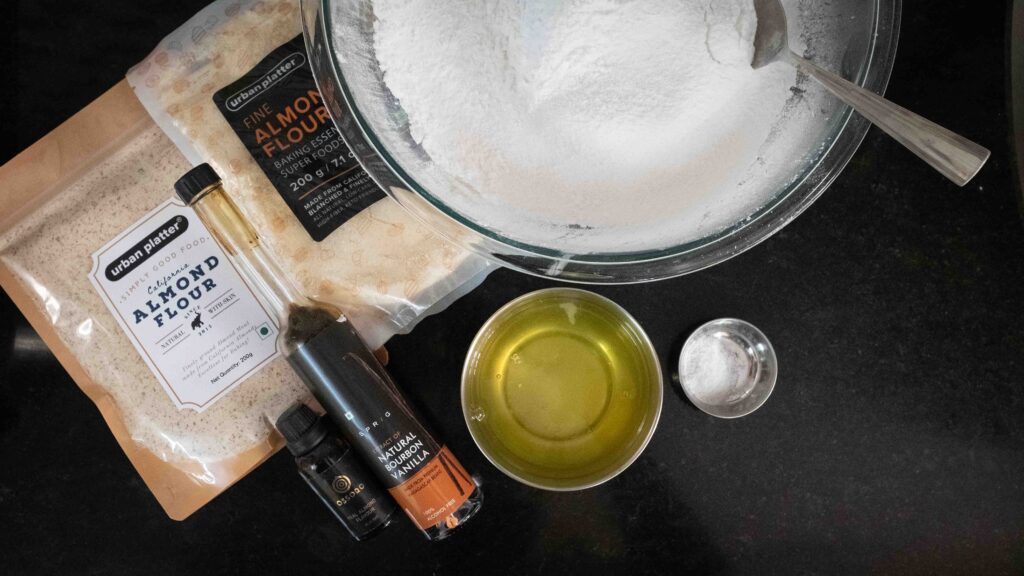
1. 300 gm almond flour (blanched and skinless ground almonds)
2. 300 gm almond meal (skin-on ground almonds)
3. 600 gm confectioner’s sugar
4. 165 gm egg whites (whites from roughly 5 large eggs where 1 large egg = 57 gm in-shell weight)
5. 1 tsp pure vanilla extract
6. 1/8 tsp almond extract
7. ½ tsp salt
Prep
1 – Sift the confectioner’s sugar and set it aside in a very large bowl.
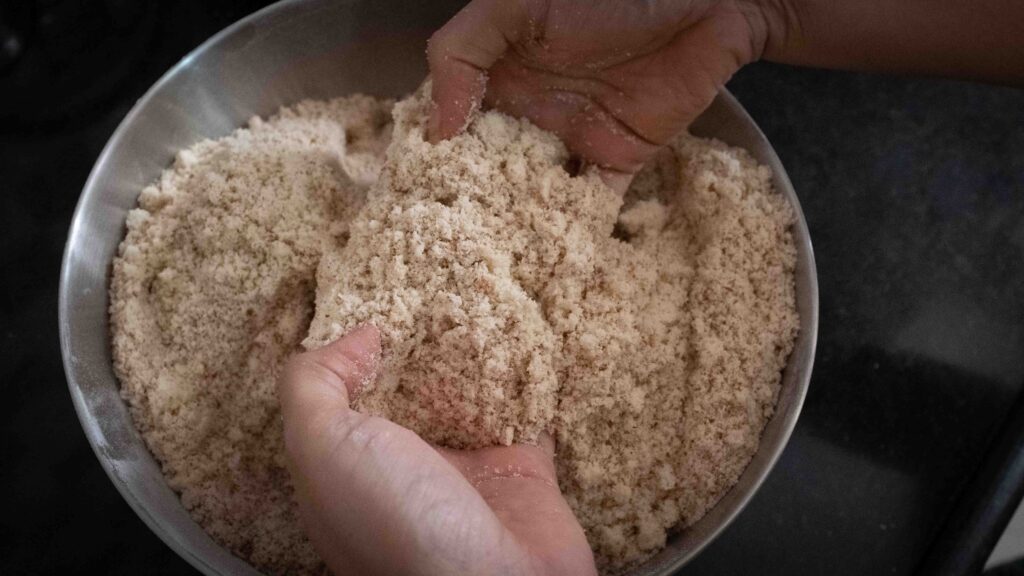
2 – Add both types of grounds almonds and the salt to a bowl and toss together to evenly combine.
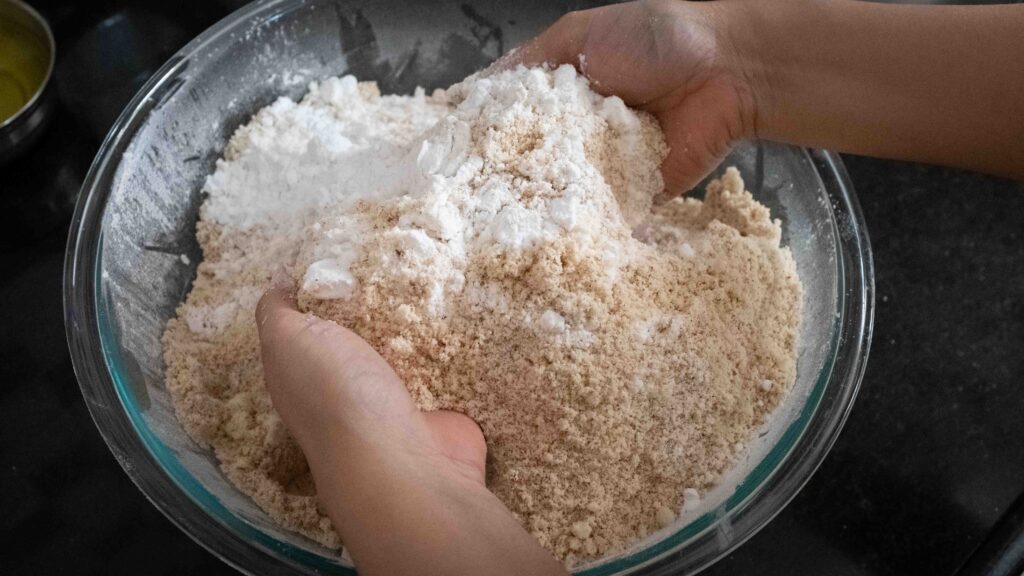
3 – Add the almond mixture to the bowl of sifted confectioner’s sugar. Gently toss together with your hands to mix.
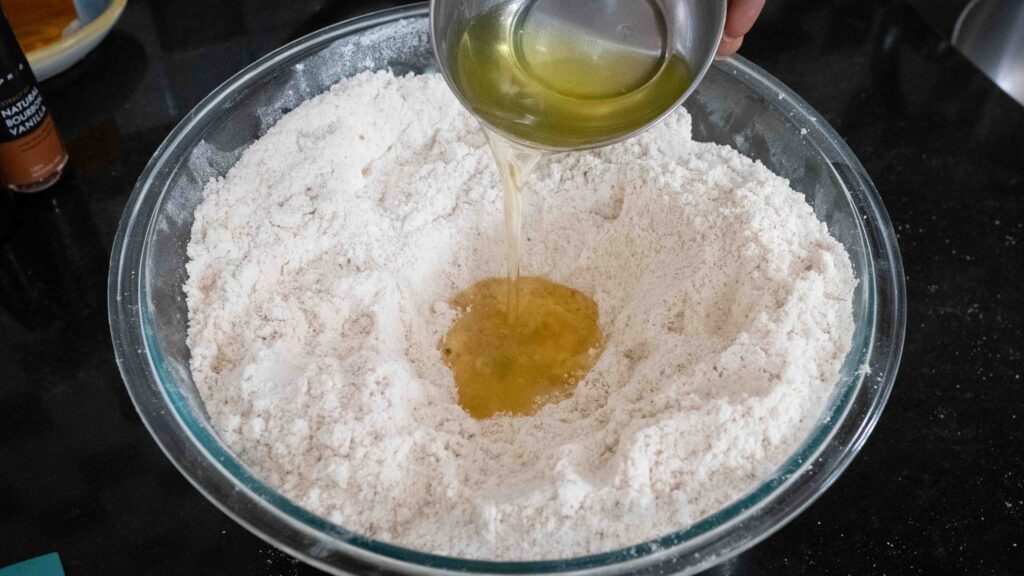
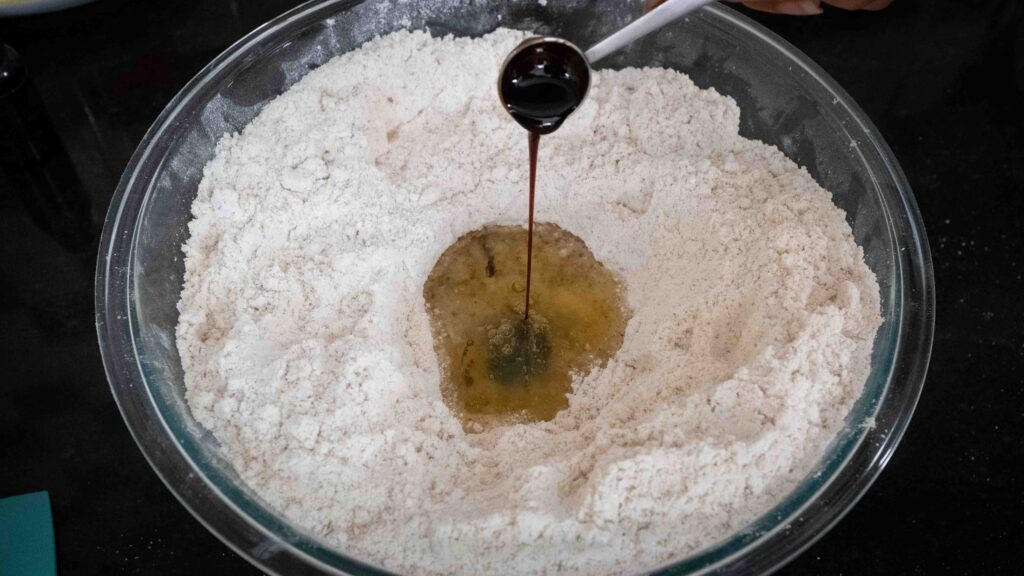
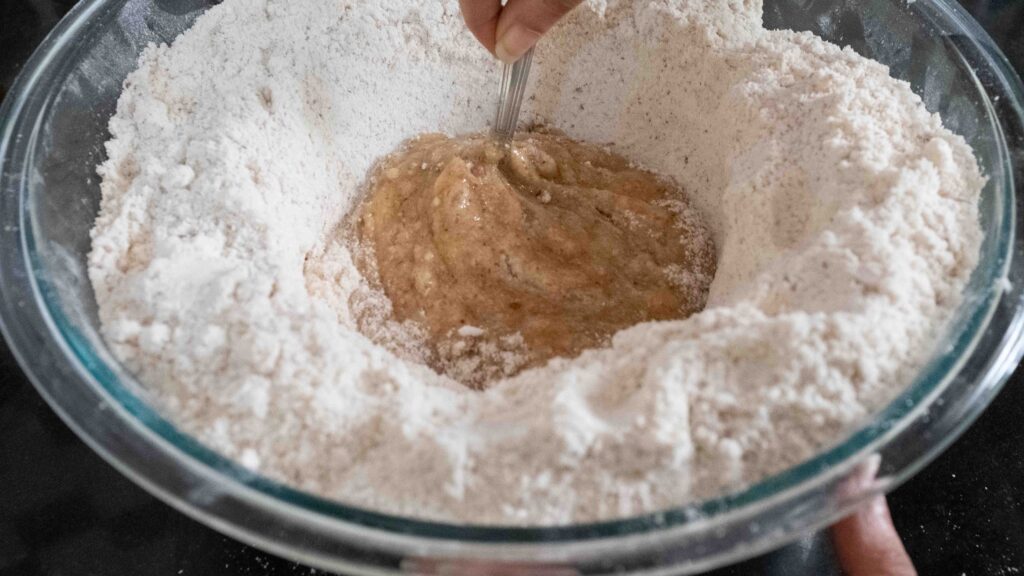
4 – Make a well in the centre of the mixture, and pour the egg whites into the well. Add the vanilla extract and almond extract on top of the eggs and whisk the wet ingredients together with a fork to evenly distribute the extracts. Continue whisking the egg mixture, pulling in bits of “flour” from the sides as you’re going (similar to when you’re making fresh pasta). Keep using the fork to mix the dough until there are no more liquid bits visible.
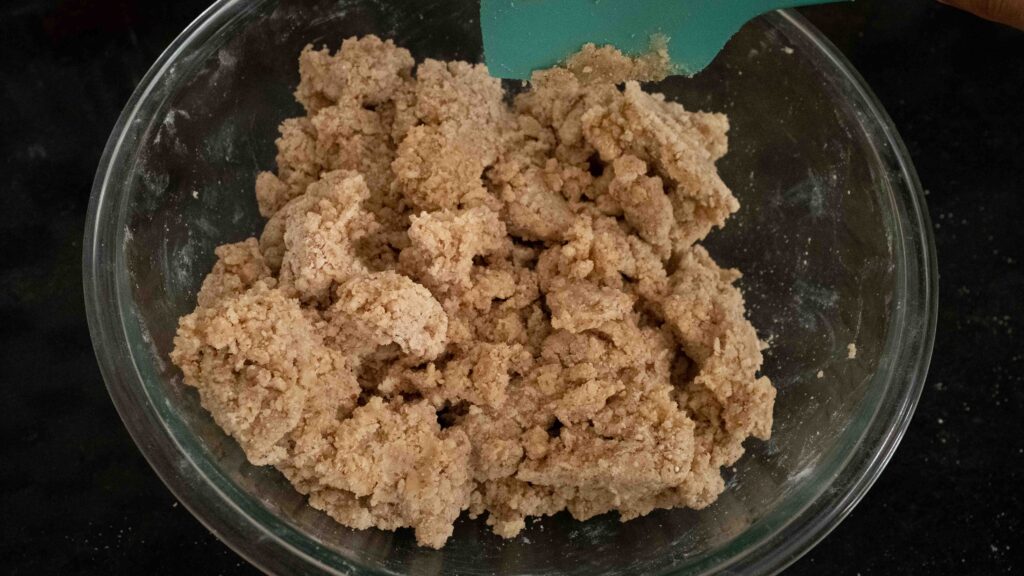
5 – Switch to a spatula. Stir and press the mixture until the dough clumps together in wet, sticky crumbs. This takes some time and a bit of elbow grease, but you will get there.
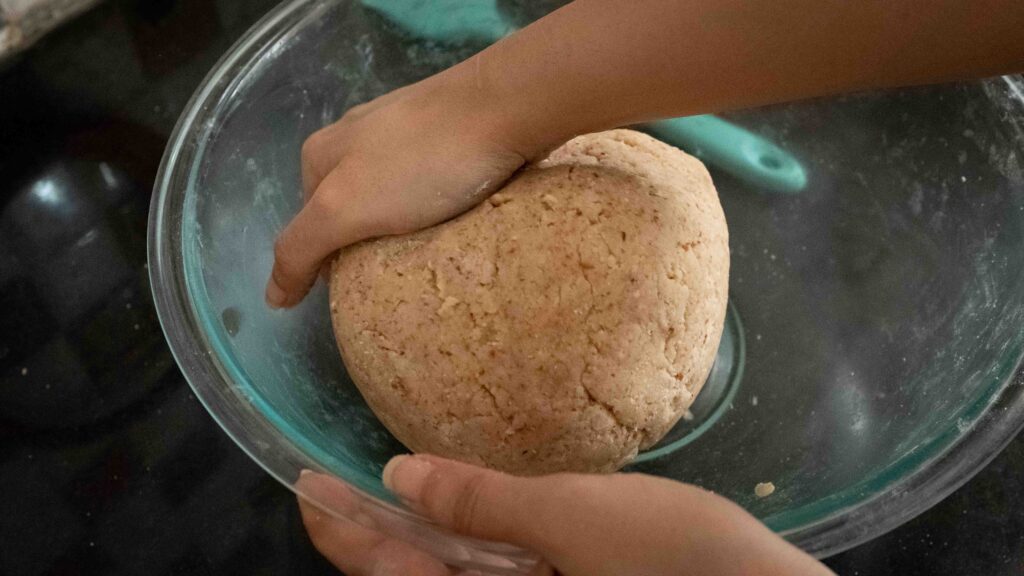
6 – Finally, use your hands to shape the dough into a ball that’s slightly sticky (think cookie dough). If the dough is still crumbling apart, knead it for a bit. The heat from your hands will bring it all together.
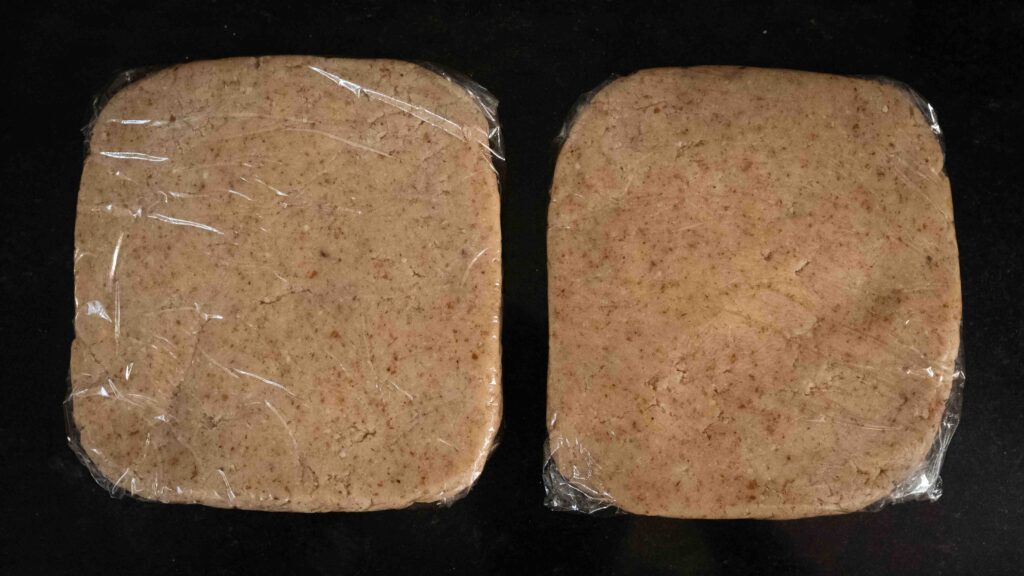
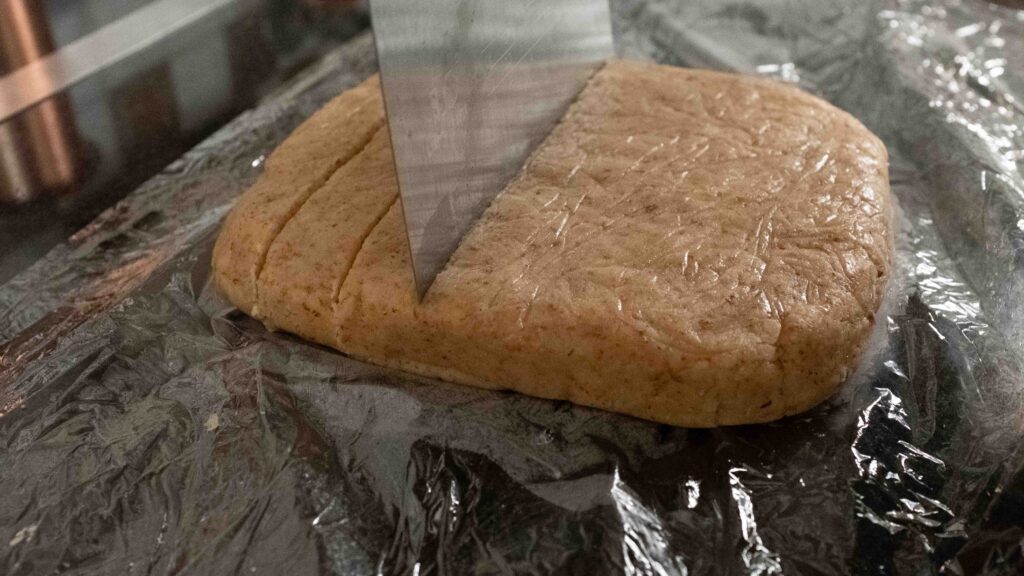
7 – Split the dough into two and pat into rectangles. Wrap individually in plastic wrap, and leave to chill in the fridge overnight. You could chill the dough as one big mass as well, but I find it easier to manage when it’s in 2 portions.


A traditional kransekake dough is made with equal parts almond flour and almond meal. Almond flour has a finer texture than ground almonds. The almond flour gives a smooth texture, and the almond meal adds flavour. If you don’t feel like buying both, you could use just one, but the colour, texture, and taste of the dough will vary depending on which one you use. Almond skins impart both flavour and colour. A kransekake made exclusively with almond flour will look just fine, won’t be as tasty as one made with the addition of almond meal. Many recipes advise you to grind your almonds from scratch. In my experience, as long as store-bought ground almonds are not too powdery in texture, they will work just fine.
Stage 2: shaping and baking the kransekake
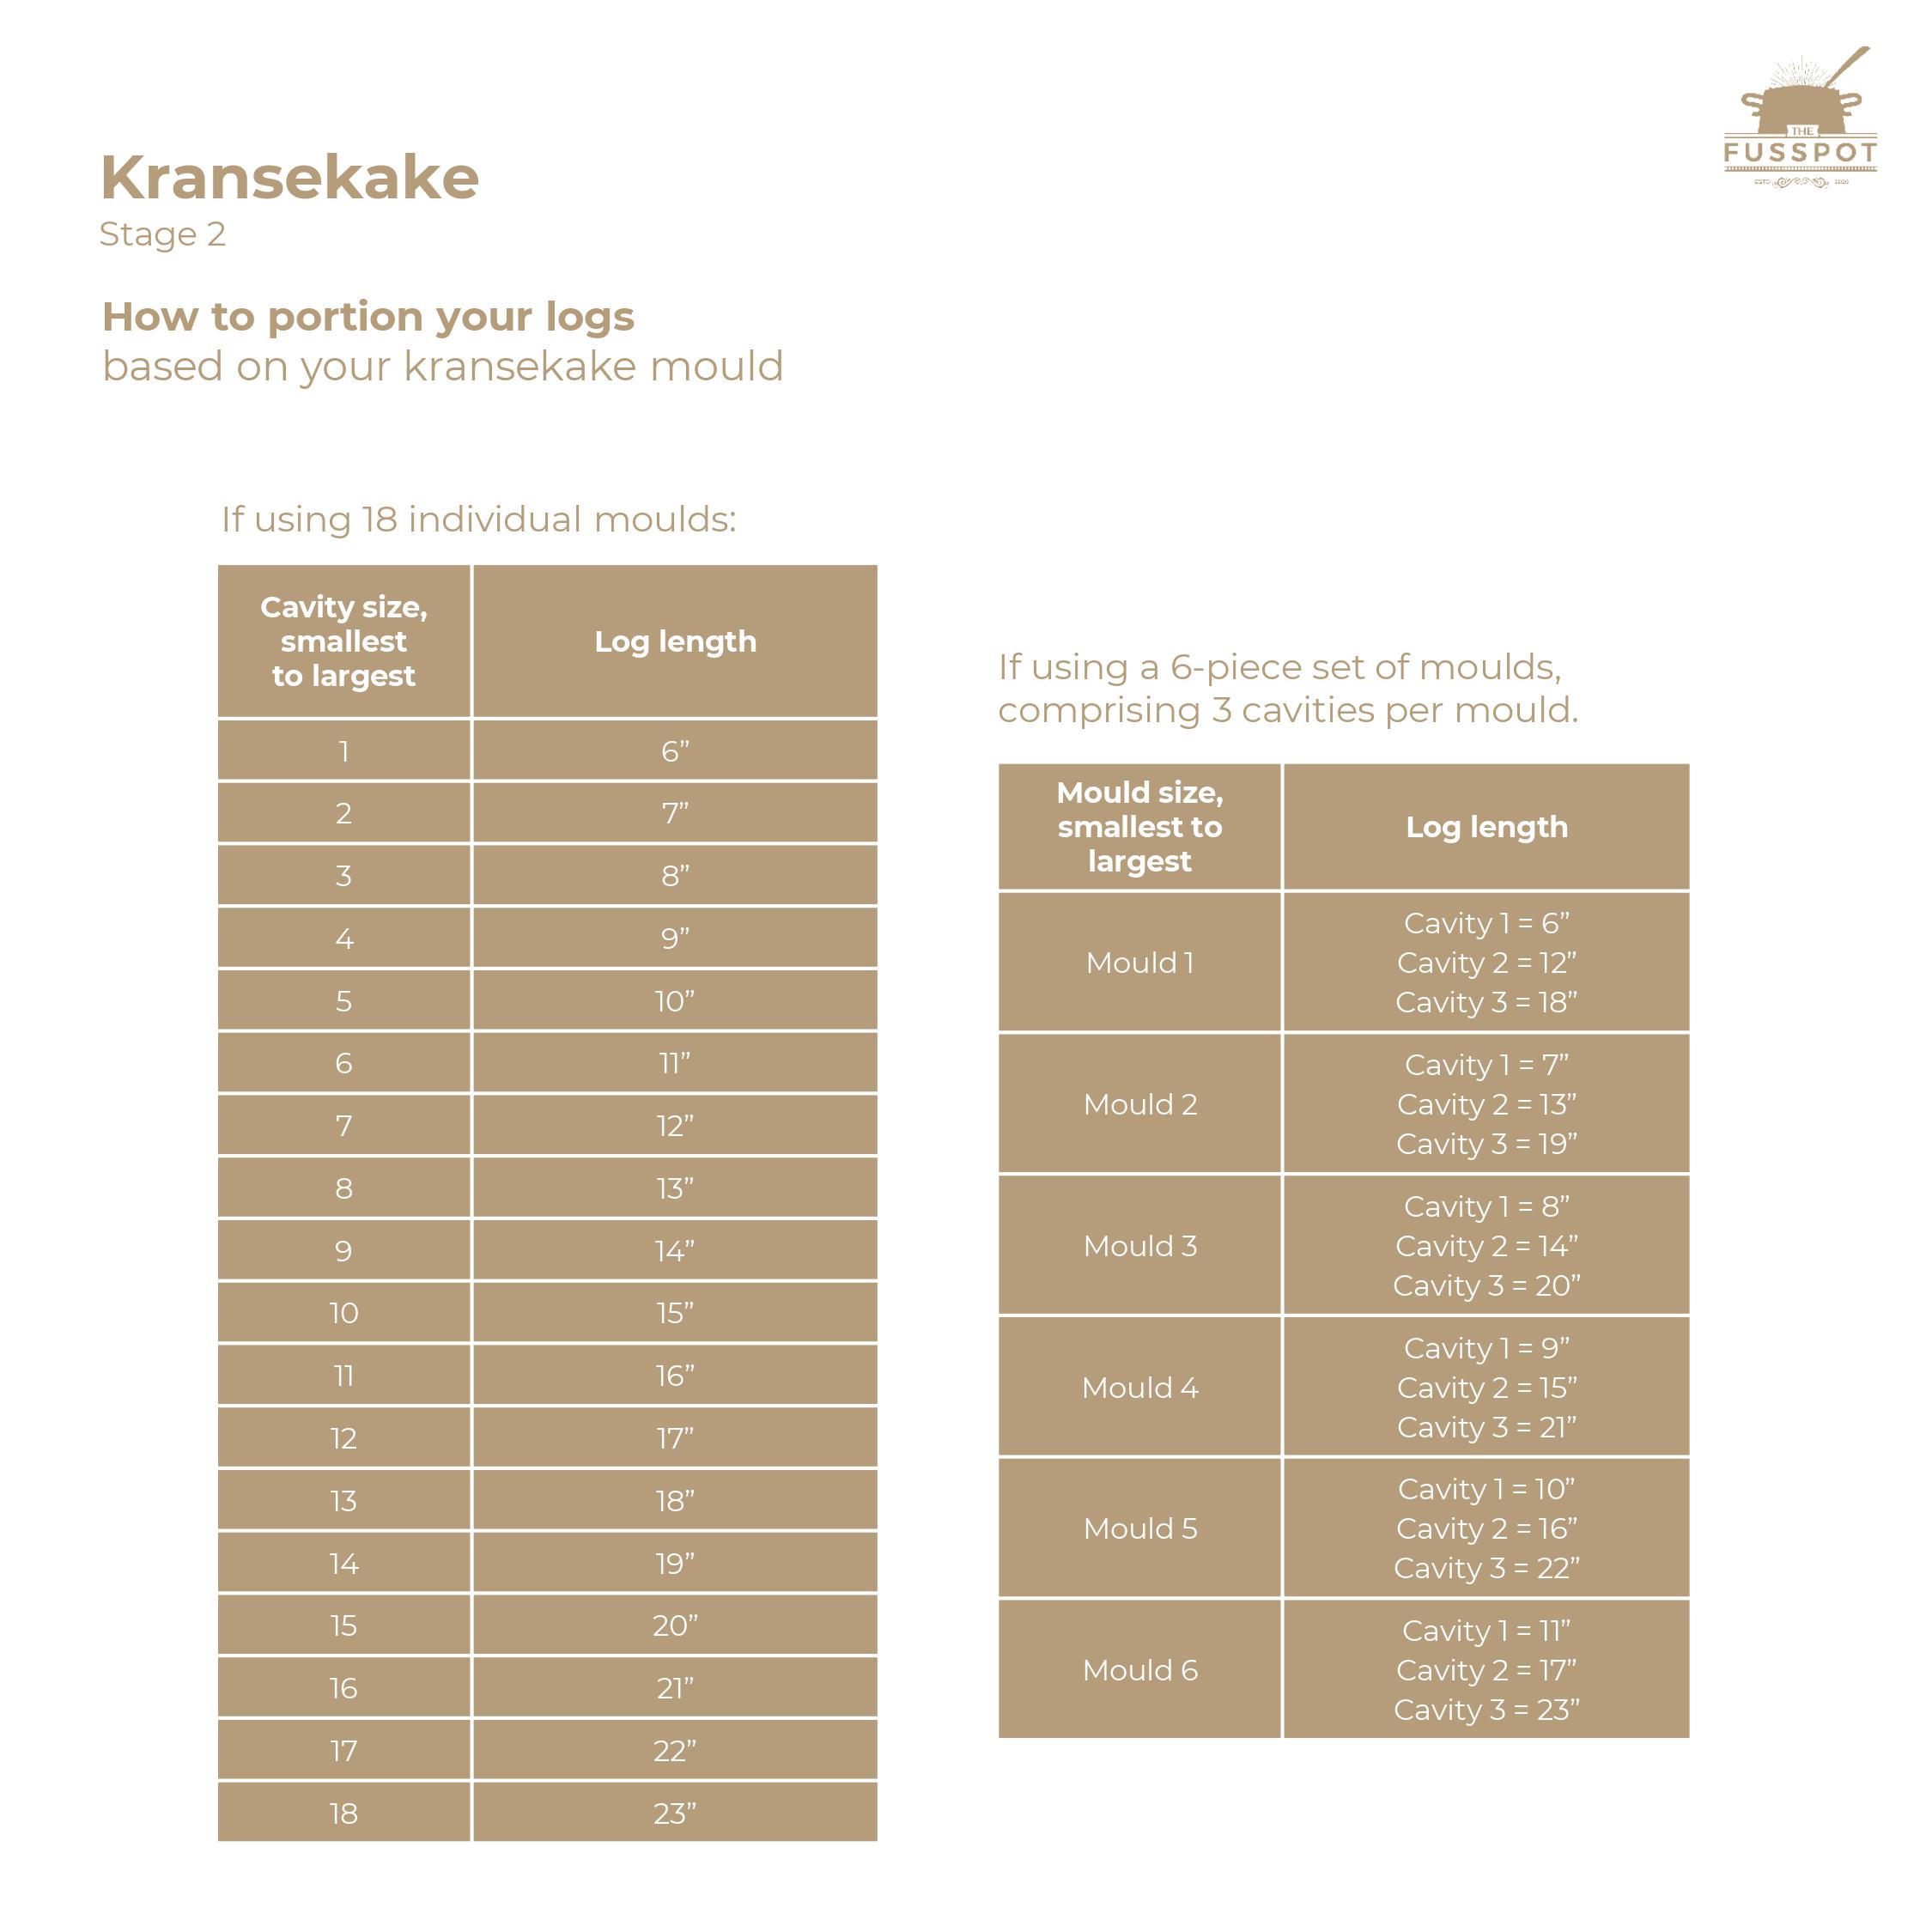
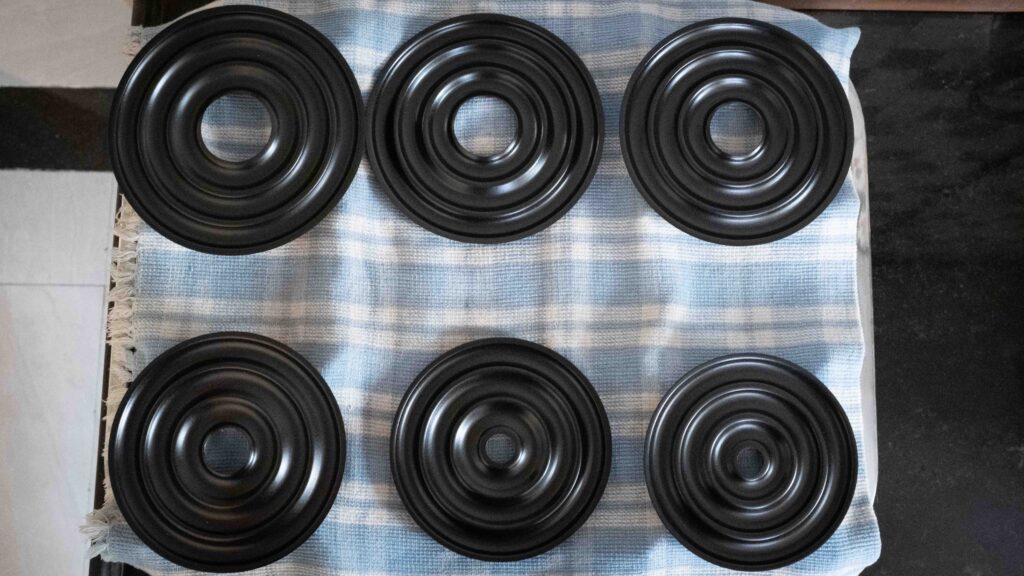
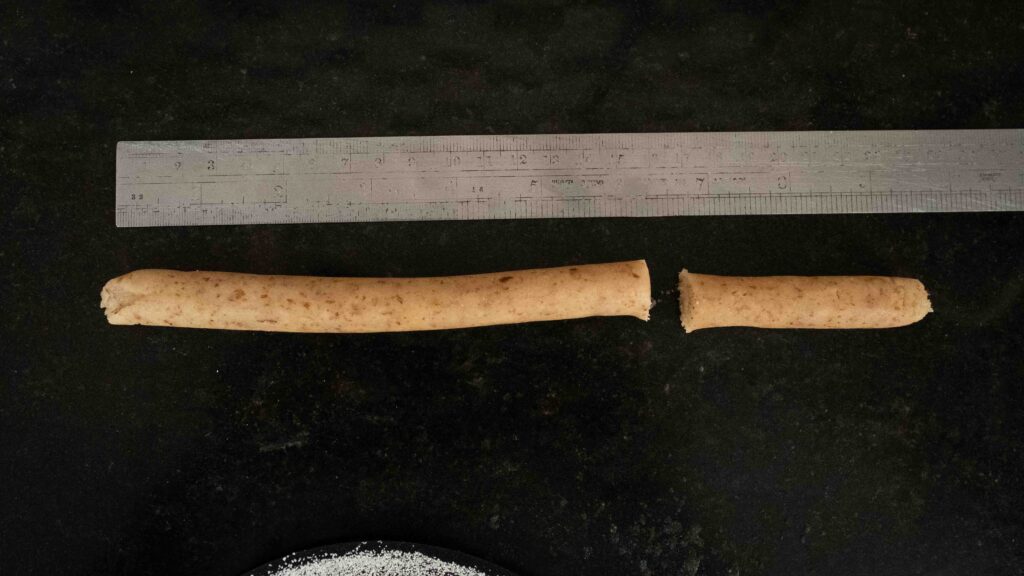
To make a neat kransekake, you will need a set of kransekake moulds like this. Individual baking rings can also be used, but I haven’t seen these in India. Either way, the smallest cavity needs a 6-inch log, the second cavity needs a 7-inch log, the third cavity needs an 8-inch log…right up to the 18th cavity, which needs a 23-inch log. See the guide below for details. If you don’t have a mould, you can still make a kransekake using my printable template. First print the template without resizing it (the template is the size of a quarter-sheet pan, roughly 9×13 inches). Next, place the printed templates under parchment paper and form your rings on top of the parchment. Proceed with the rest of the recipe as directed. Please note, the greasing and dusting step is not needed if you’re forming and baking your rings on parchment.
Components
1. Chilled kransekake dough
2. Butter or shortening for greasing
3. Semolina (fine sooji) for dusting
Method
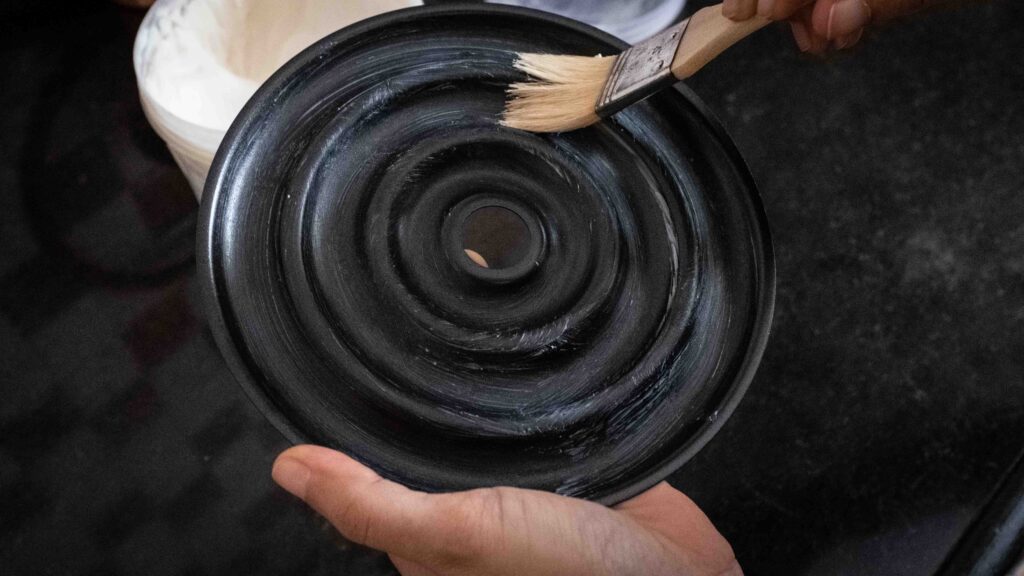
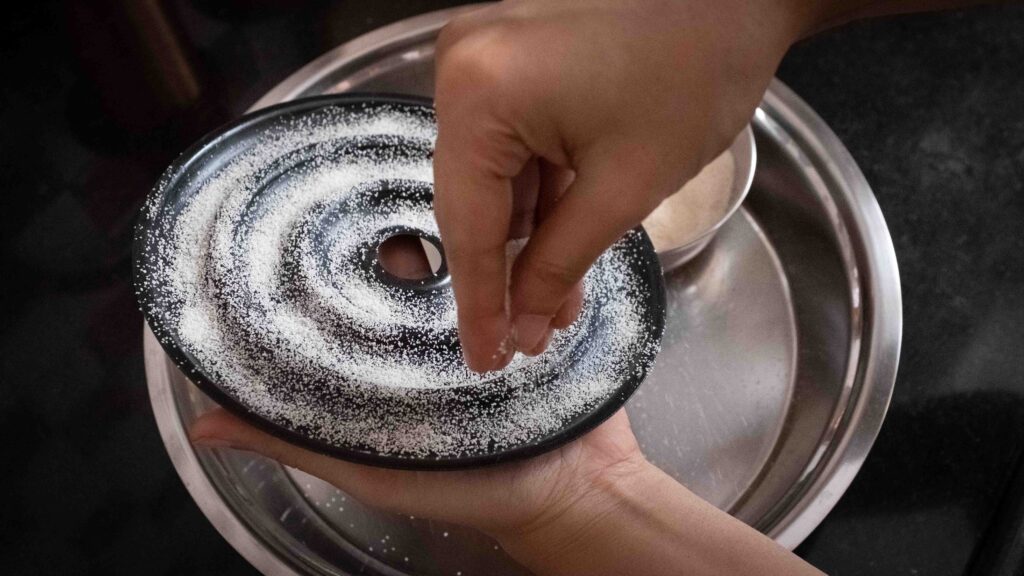
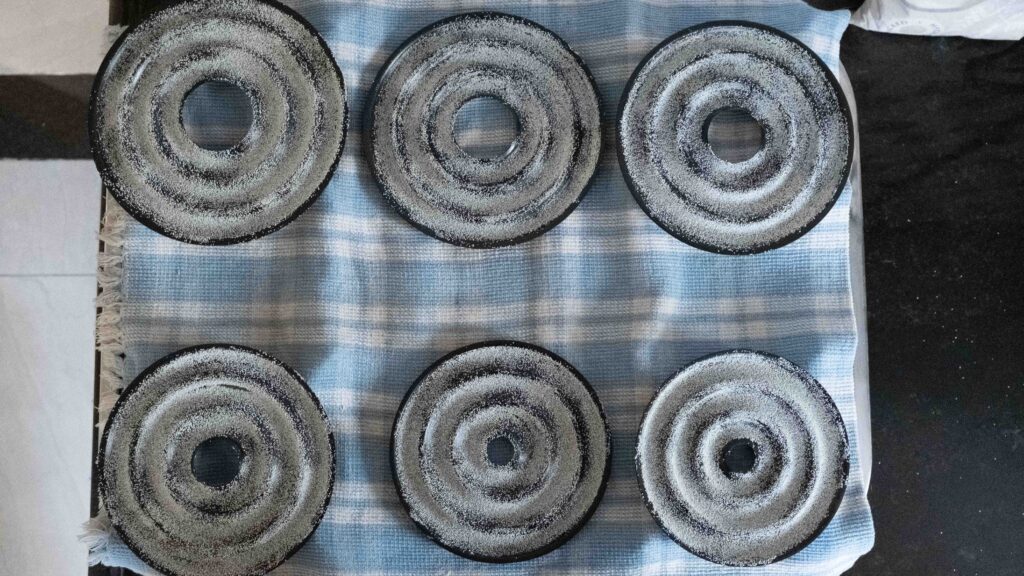
1 – Grease your kransekake moulds with butter or shortening and then dust them with semolina, tapping out the excess.
2 – Take out your rectangles of chilled dough. Cut each rectangle into 9 strips (total 18). Take 1 strip and keep the remaining 17 strips covered and chilled in the fridge.
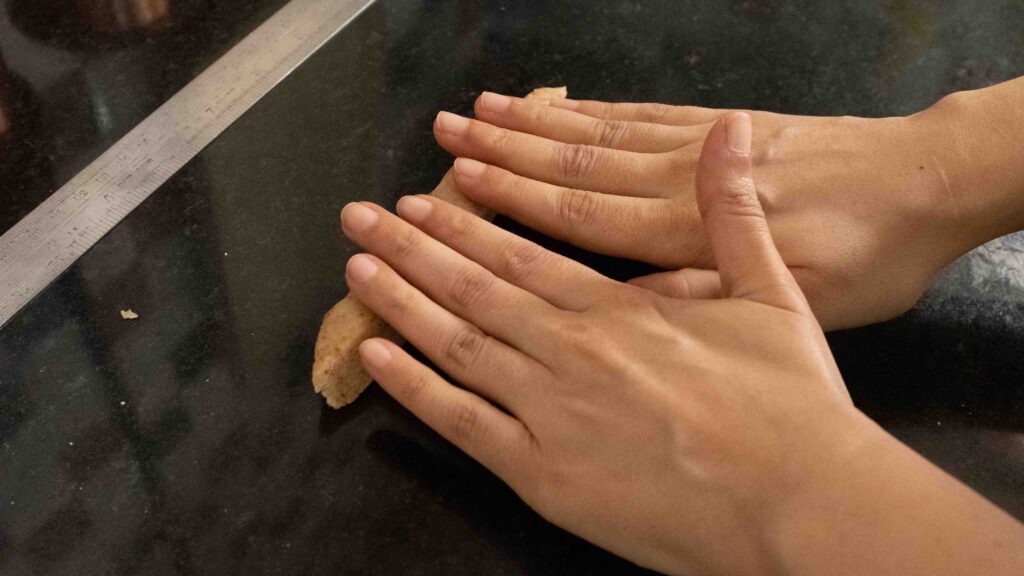
3 – Roll the strip into a ½-inch thick log (about the thickness of your middle finger).
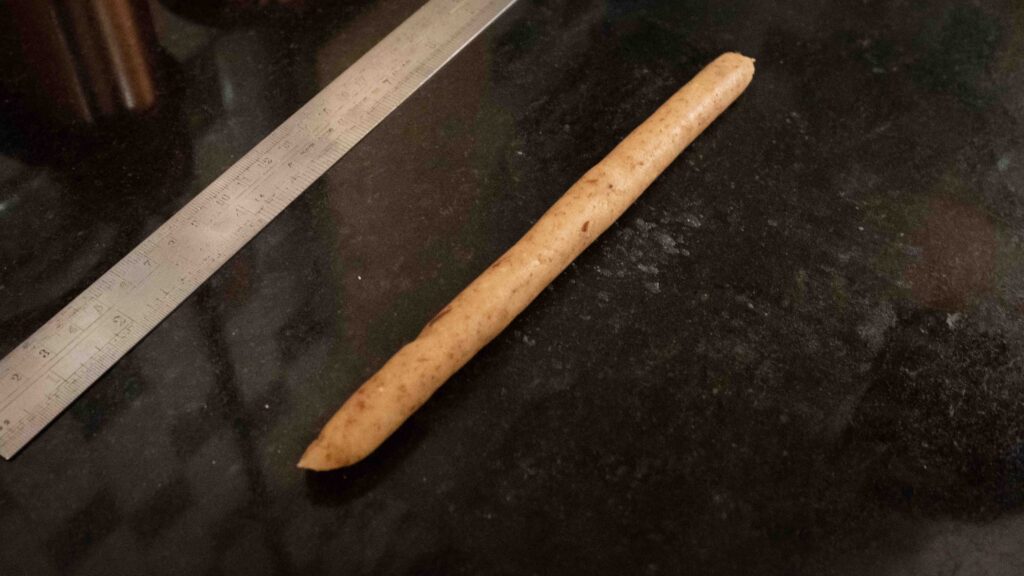
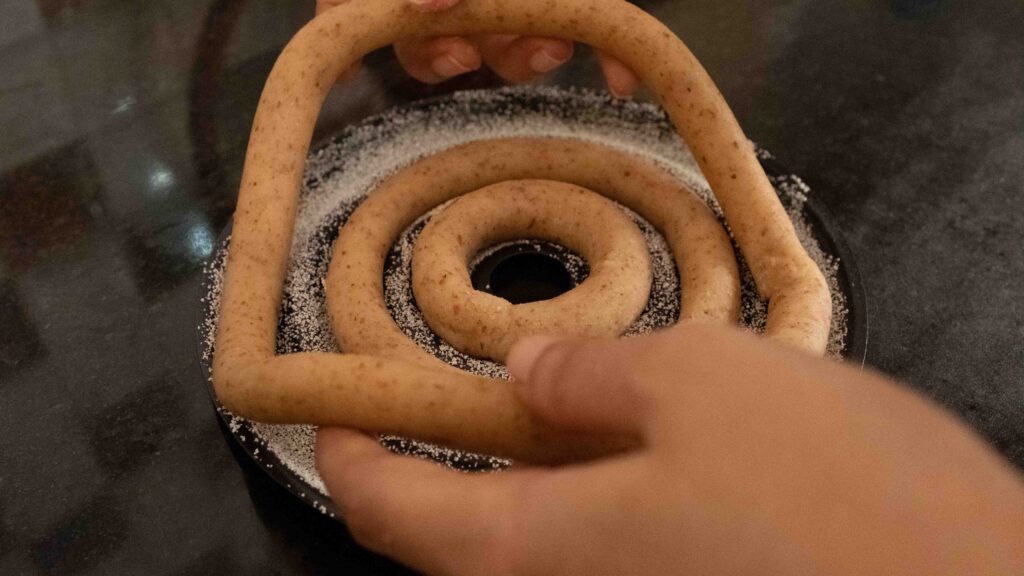
4 – Cut a 6-inch-long section from the rolled log, bring the two ends of the log together to make a circle, and then press the ends together to form a closed ring. Lift the ring and place it inside the smallest cavity of your kransekake mould.
5 – Repeat the rolling, cutting, shaping, and filling process with the remaining dough until all 18 cavities are filled. This amount of dough comfortably makes 18 rings, but I recommend filling your kransekake moulds going from the smallest to the largest cavity. That way, if you run out of dough because your logs are too thick, you’ll still have a stackable tower (albeit featuring fewer rings). If you’ve rolled your logs to the correct thickness, you will have a teeny bit of dough left over. Shape it into a ring, place it on some parchment and bake it with the others. That way you can treat yourself to a cookie before you build your tower!
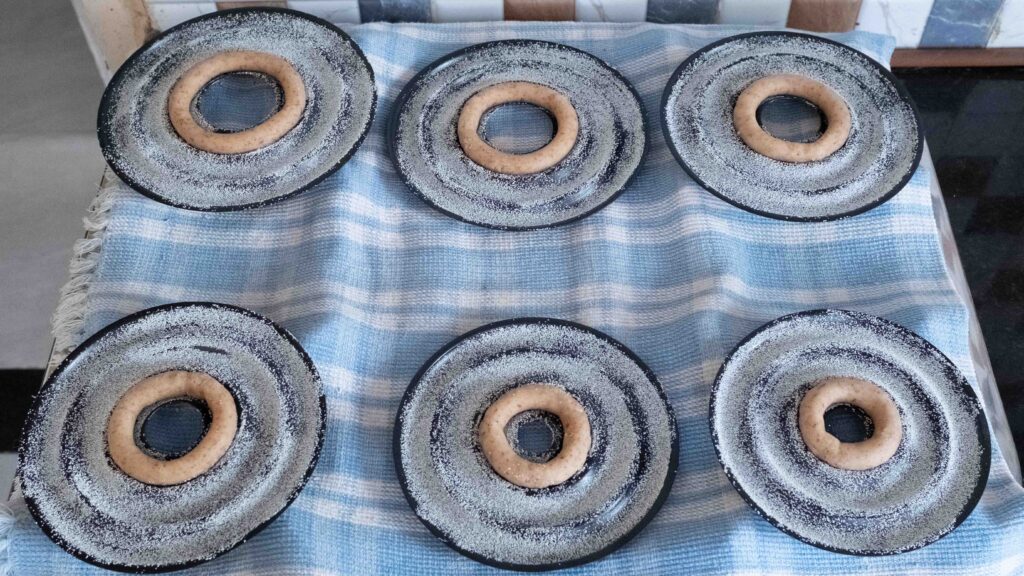
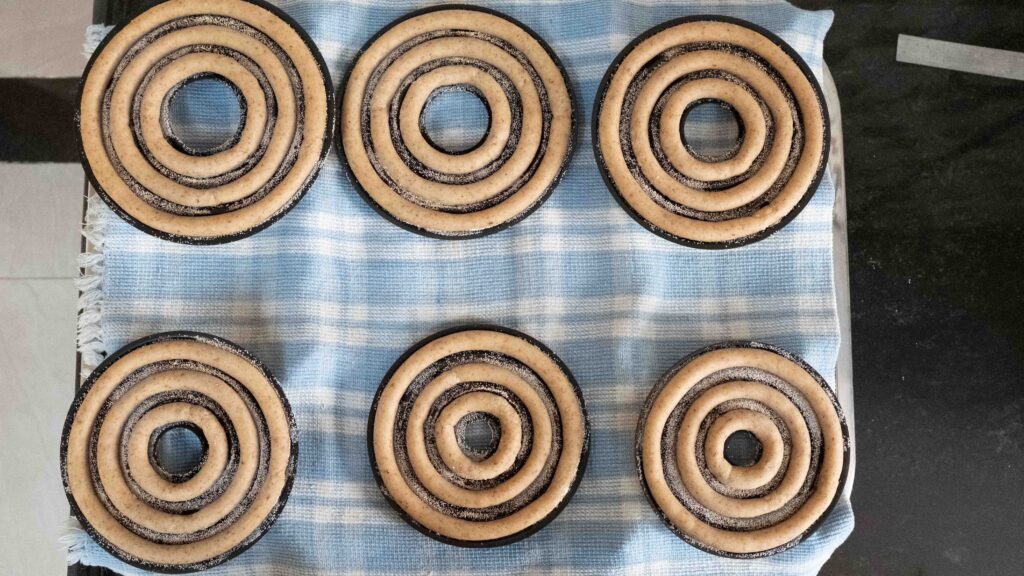
6 – Place your filled moulds to chill in the fridge for 20-30 minutes. In the meantime, preheat your oven to 150°C.
7 – Transfer the filled kransekake moulds to a baking tray. If you have a modest, table-top oven like me, you’ll probably need to bake the rings in multiple batches. Just keep any unbaked rings in the fridge. Working with one tray at a time, place the tray in the middle rack of your preheated oven. Bake at 150OC until puffed and lightly golden brown, about 20-25 minutes, rotating halfway through if necessary. If baking on parchment, remove the rings at the 20-minute mark to prevent the bottoms from over-browning.
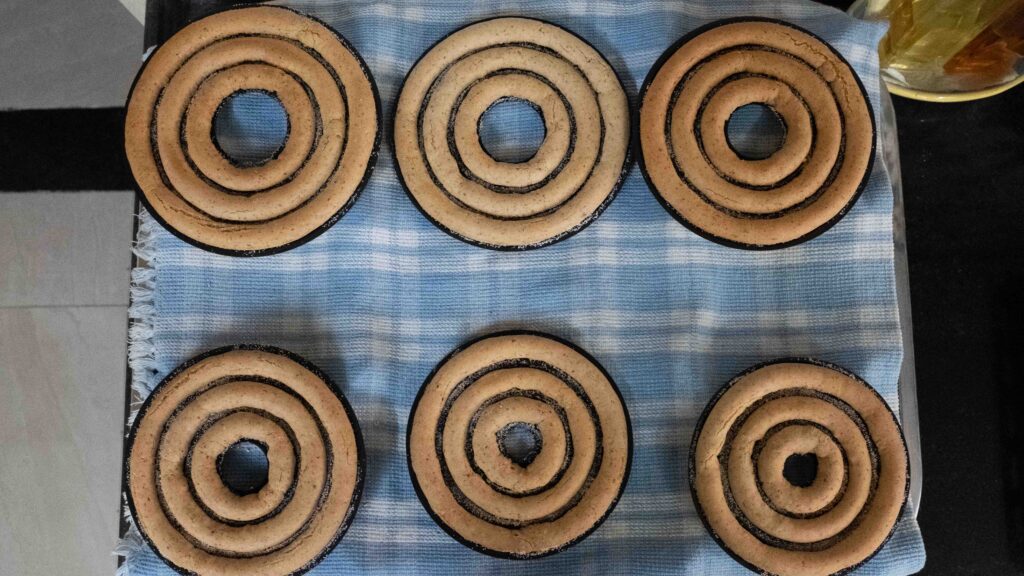
8 – Take the tray out of the oven and set the moulds aside until cool enough to handle, roughly 15 minutes. The rings will crisp up as they cool.
9 – To demould, gently twist each ring in its cavity until it rotates. Don’t try to dislodge the rings while they are hot, as they may break. Once fully cool, carefully lift out each ring and set aside. Rings baked on parchment should lift right off. Repeat the baking and demoulding process until you have all 18 rings.
10 – Let the rings “rest” for 24 hours to pick up some moisture before assembling. If you live in a humid location, leave the rings out in the open. If you live in a dry location, place the rings in an airtight container with an apple slice.

Traditionally comprising 18 layers, you can make a smaller tower by reducing the amount of dough. Here’s the deal – the rings are not at their best, straight out of the oven. Like macarons, kransekake gets better after absorbing a little moisture, whereby the cake’s unique soft-yet-chewy texture and almond flavour is improved. If you live in a very dry climate, I recommend storing the rings overnight in an airtight box with a slice of apple. Alternatively, you can freeze the rings for up to 3 months and then thaw them before assembly. This freezing and thawing process results in the ideal kransekake texture. Since I live in a very humid climate, I let the rings sit around uncovered at room temperature for a whole day before I proceeded with assembly. Either way, you can make the rings well in advance and assemble the tower later.
Stage 3: fondant star
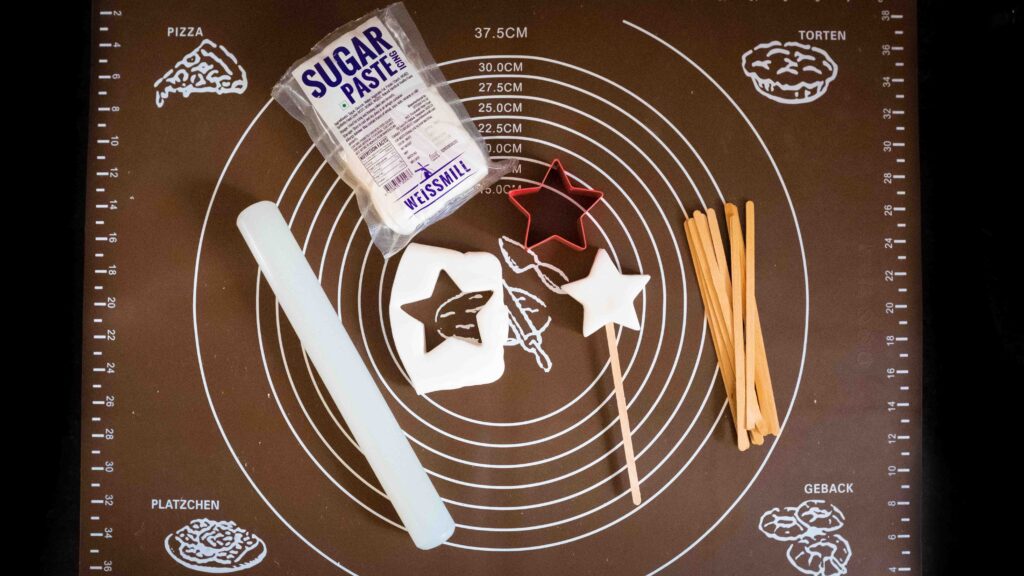
Fondant takes a day or so to harden, and will require another few hours of drying after it’s painted. If you would like to make this element, plan ahead so that it’s dry by the time you’re ready to serve your kransekake. I made my star while my rings were resting.
Components
1. 100 gm readymade white fondant or sugar paste
2. ½ tsp edible gold dust
3. ½ – 1 tsp vodka
4. Wooden coffee stirrer/bamboo skewer
Method
1 – Roll out about 100 gm readymade fondant to ½ inch thickness.
2 – Use a 2-inch star cookie cutter to cut out a star.
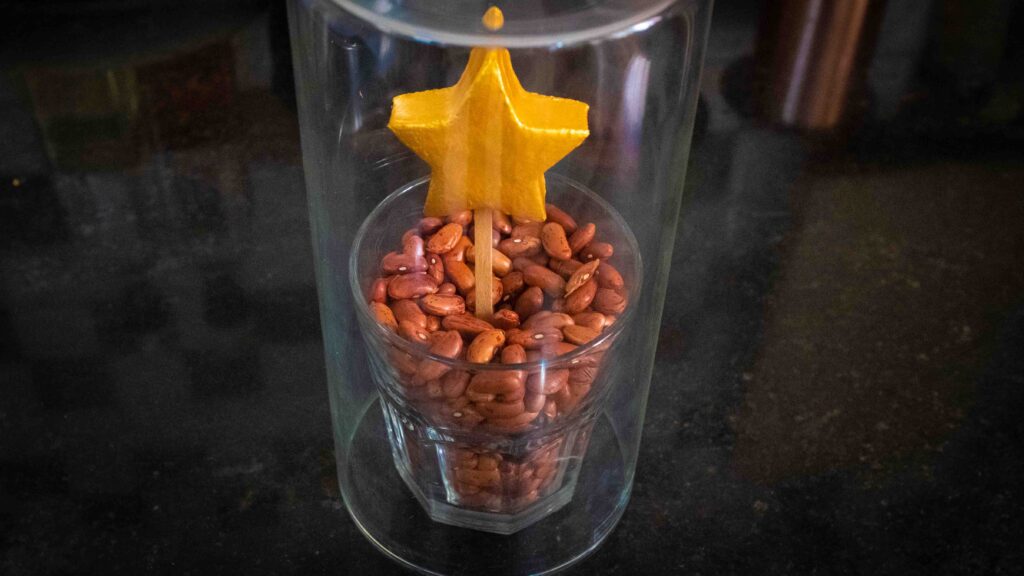
3 – Embed a coffee stirrer or bamboo skewer into the underside of the star. Leave the star to dry for at least 24 hours. I like to stick the skewer into a glass of dried beans for this purpose.
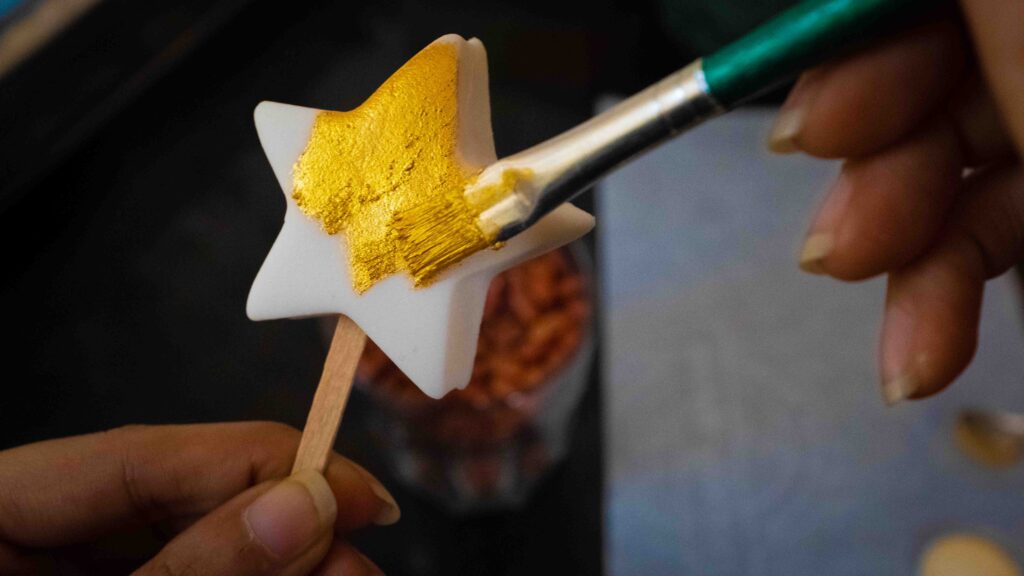
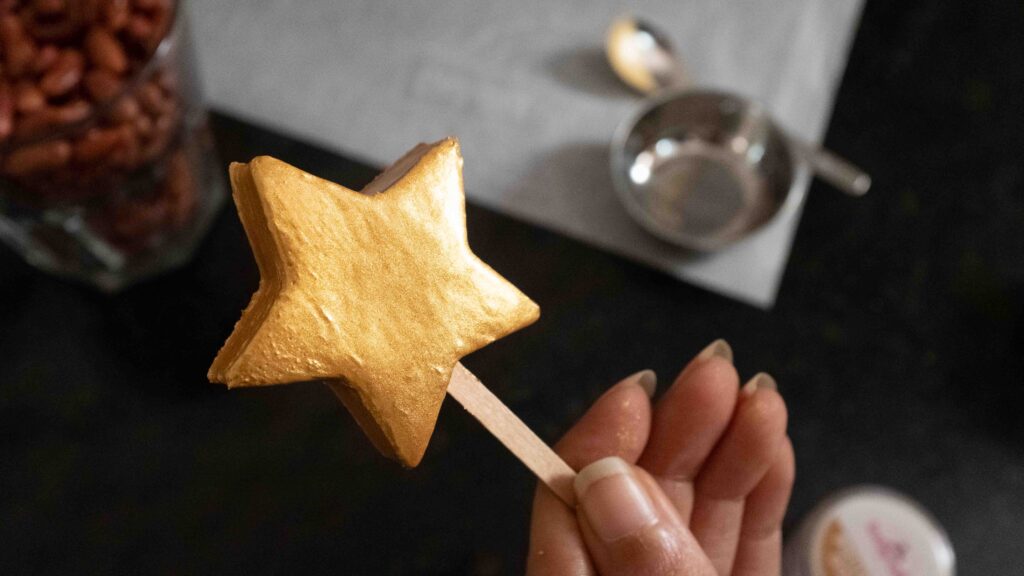
4 – Once it’s dry, mix half a teaspoon of edible gold dust with about a teaspoon of vodka to make a smooth paste. Use a small paintbrush to paint the star gold. Do a double coat if necessary and leave the star to dry for 2-3 hours or until no longer tacky. .

Stage 4: royal icing
This is an essential component of a kransekake, as it’s literally the glue that holds the tower together. Yes, I know. Royal icing can suck. It’s often sickly sweet, rock hard, and unpleasant to eat. Trust me, if you make your own batch, it tastes so much nicer. Not too sweet and with just a hint of vanilla, this royal icing is both functional and yummy. My husband will happily eat a bowlful of this royal icing, with or without a cookie! I recommend making your royal icing only when you’re ready to assemble your kransekake.
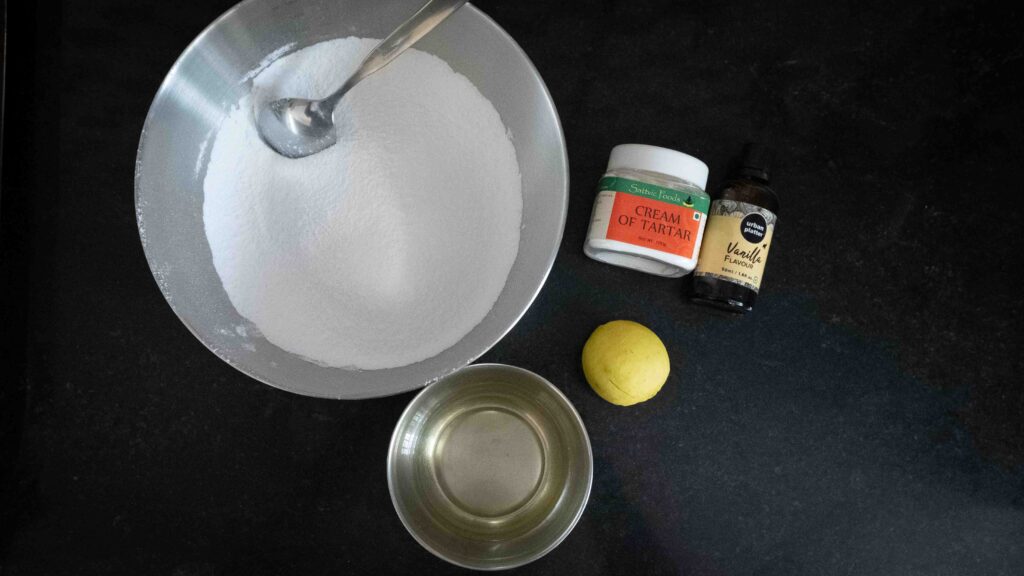
Ingredients
1. 240 gm icing sugar
2. 1/8 tsp cream of tartar
3. 35 gm egg whites (whites from 1 large egg where 1 large egg = 57 gm in-shell weight)
4. ½ tsp clear vanilla essence
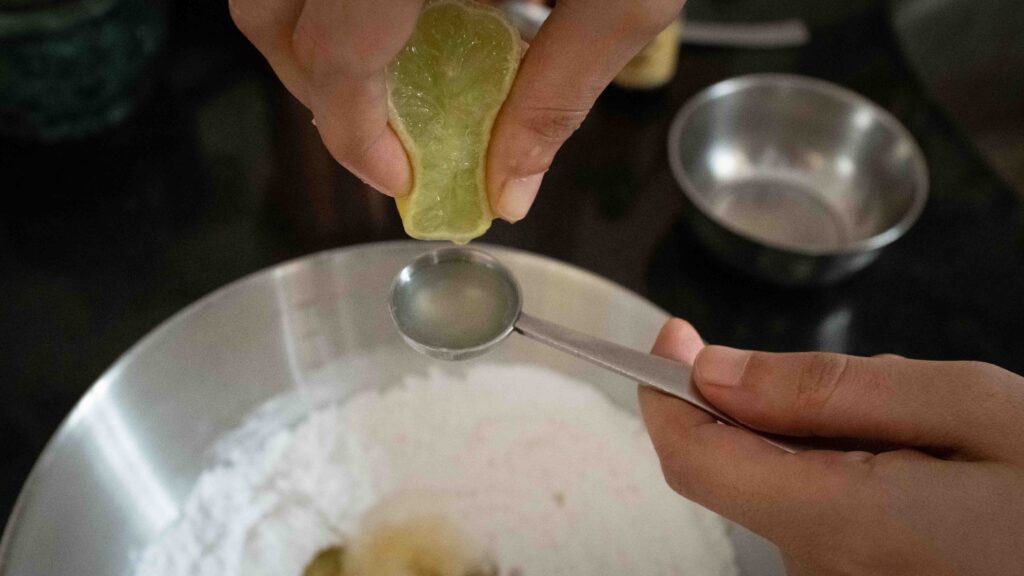
5. 2 tsp fresh lemon juice + more as needed
6. Water as needed
Method
1 – Sift your icing sugar with a fine-meshed strainer.
2 – Put the icing sugar in a bowl and add the cream of tartar. Whisk together to combine.
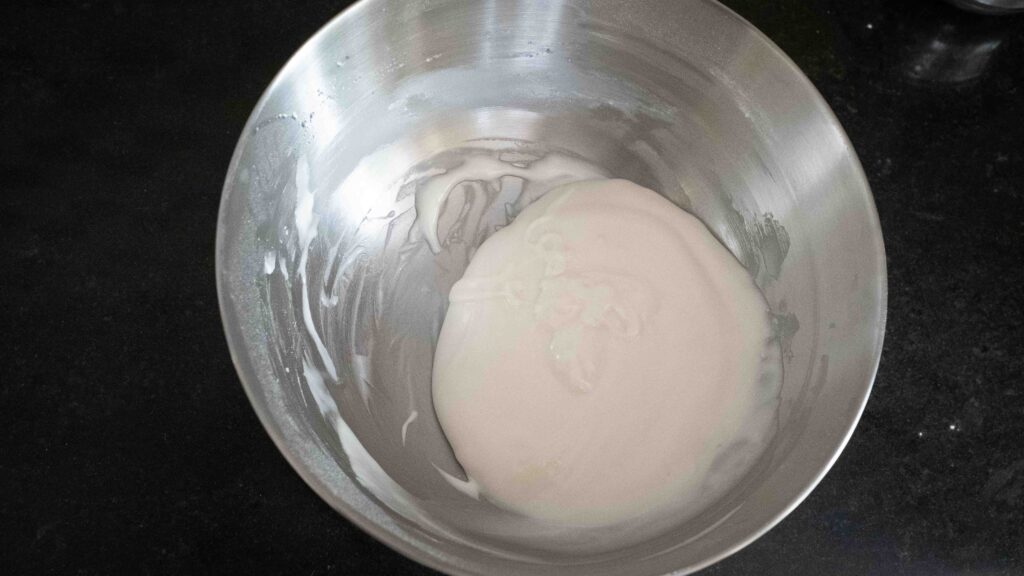
3 – Add the egg whites, vanilla essence and 2 teaspoon lemon juice to the bowl. Using a spatula, stir everything together to moisten the sugar. It will look like a wet paste.
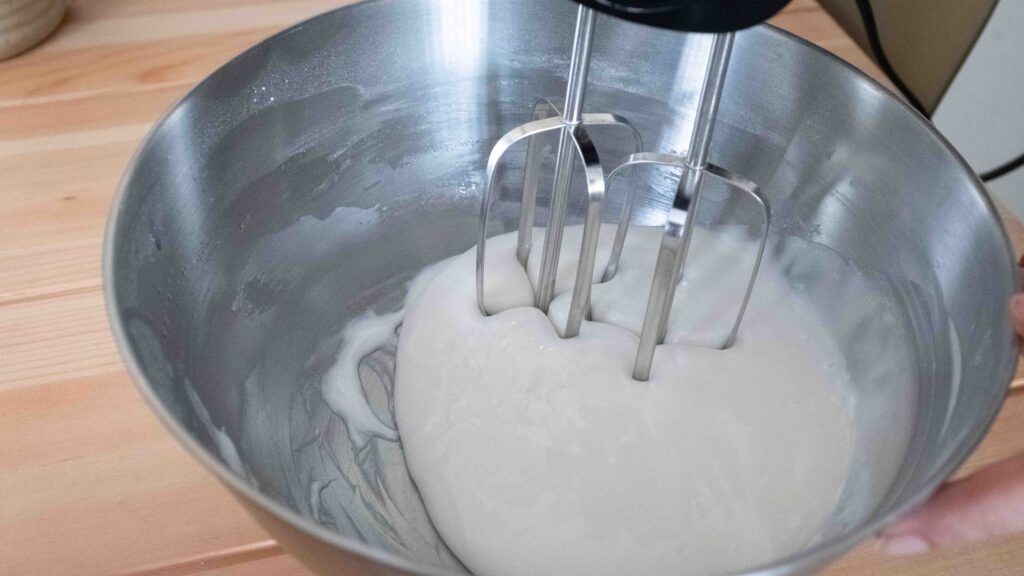
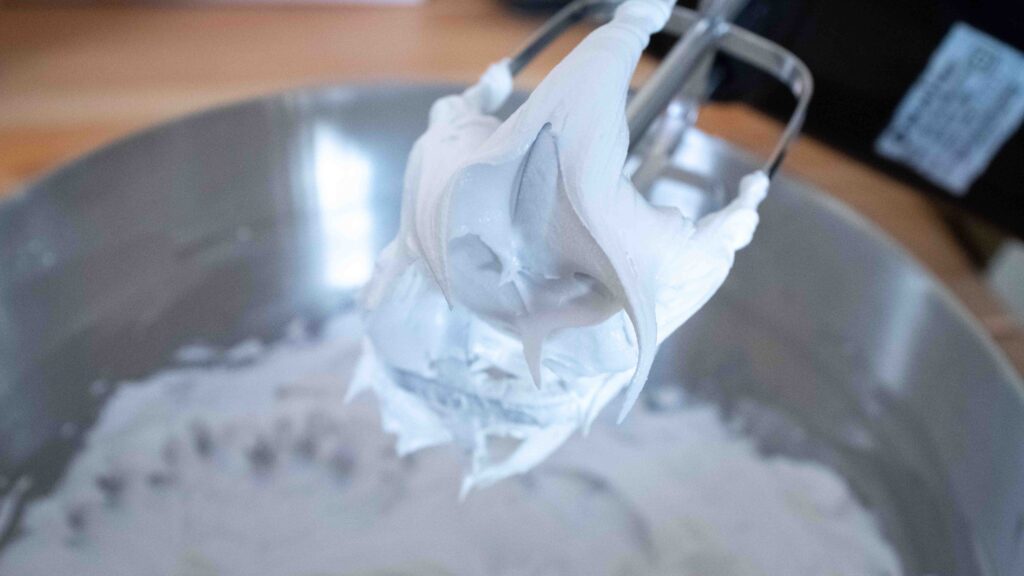
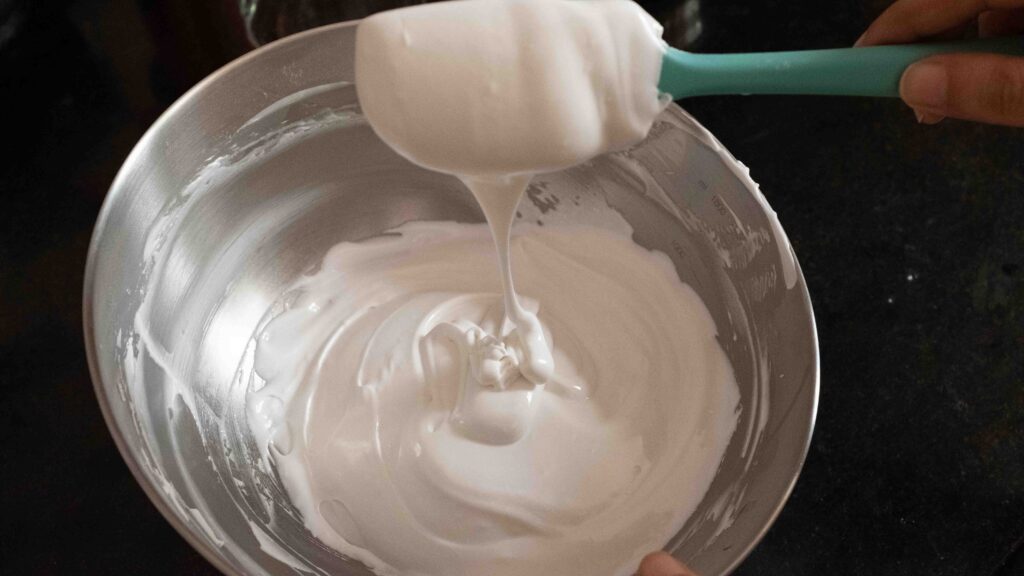
4 – Using a handheld mixer, beat this mixture on low, to evenly mix everything. Thereafter, increase the speed to medium and beat for 1-2 minutes or until the mixture forms thick, stiff peaks and is bright white. Do not whip or whisk the royal icing from this stage onwards, as you don’t want to incorporate air bubbles.
5 – Your royal icing will be too thick to pipe at this point. Add lemon juice or water, 1/2 teaspoon at a time and mix with a spatula until you have the correct consistency (do not whisk). I added 2 more teaspoons of lemon juice and 3 ½ teaspoons of water. To check the consistency of your royal icing, drag a line down the middle of the icing with a table knife. Count the number of seconds it takes for the line to disappear fully. If the line evens out after 25 seconds, it’s perfect for piping. Alternately, when you dip a spoon into the icing and lift it out, the icing should take 2-3 seconds before slowly oozing off the spoon.
6 – Once you’re happy with the consistency, transfer the icing to a piping bag and proceed to construct your kransekake.

Feel free to use readymade royal icing for this recipe, although that never tastes as good as the homemade stuff. These quantities make roughly twice the amount you will need to decorate your cake, but it’s hard to make a successful batch with smaller quantities. Royal icing made with egg whites should be used immediately. Leftover royal icing must be stored in an airtight container in the fridge, and used up within a few days.
Stage 5: Finale; kransekake construction & assembly
Components
1. 18 kransekake rings
2. Royal icing
3. Silver edible pearls and gold edible pearls
4. Fondant star topper
Method
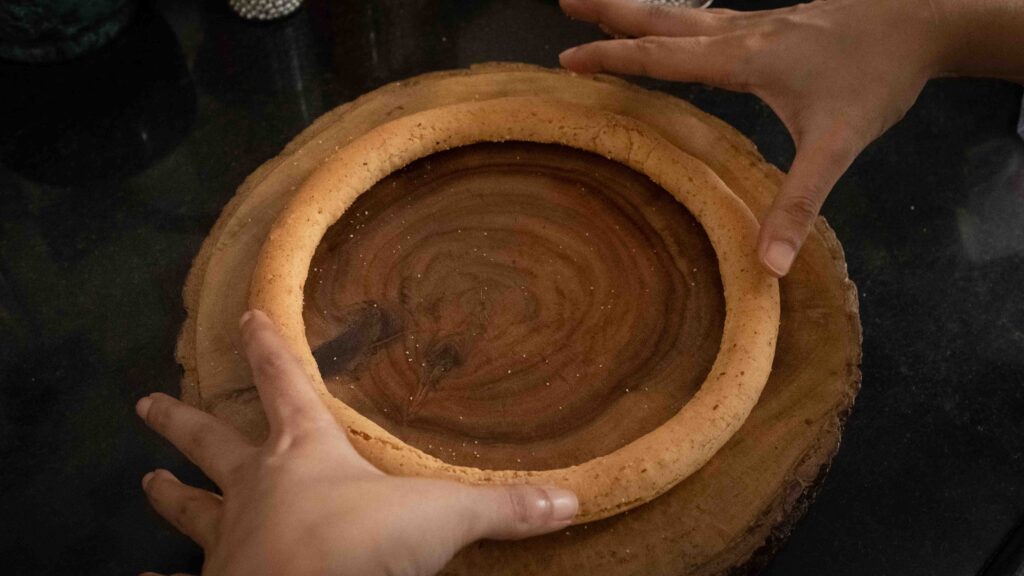
1 – To begin assembling the kransekake, sort the baked rings in order of size and keep the semolina-side facing downwards.
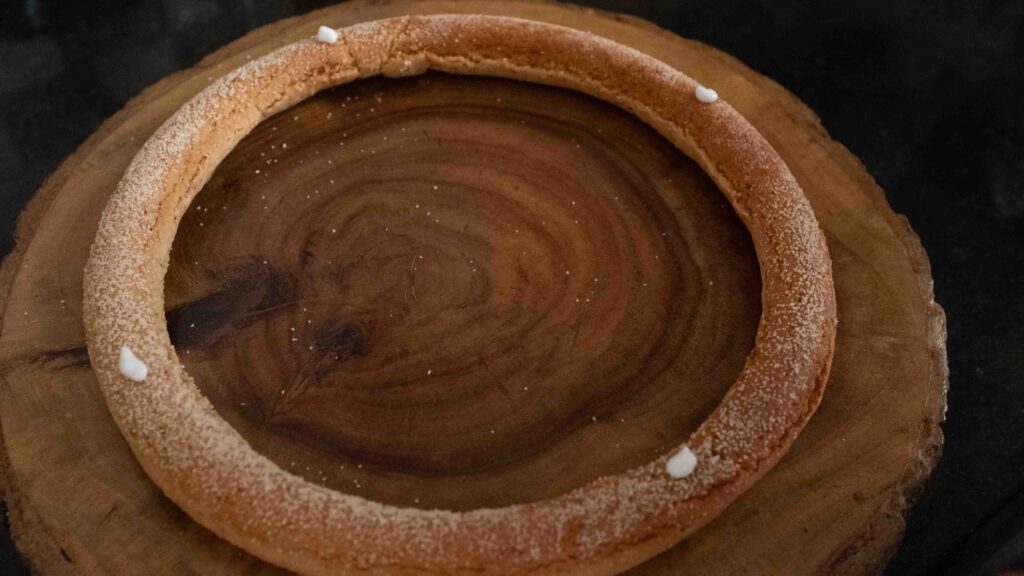
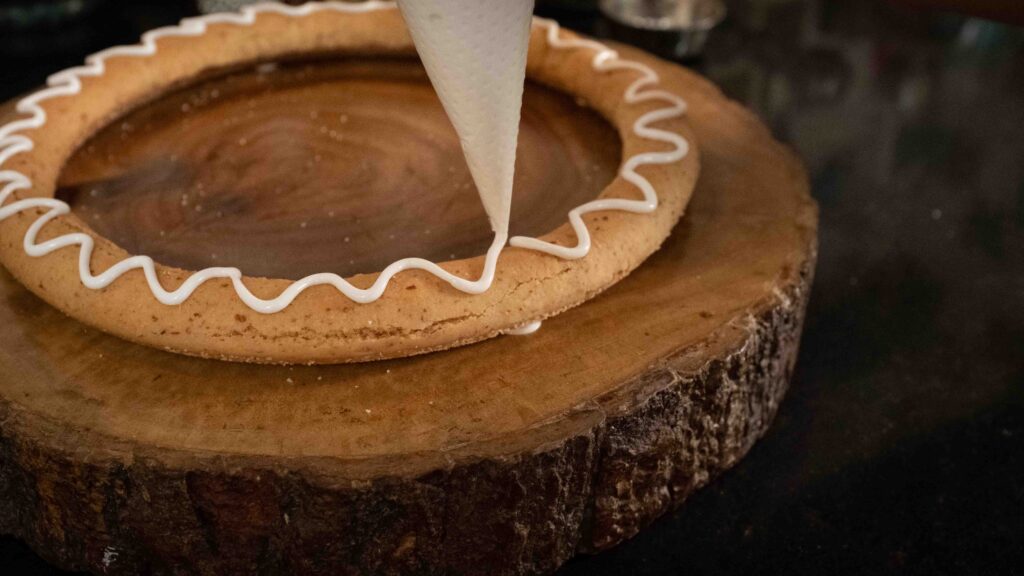
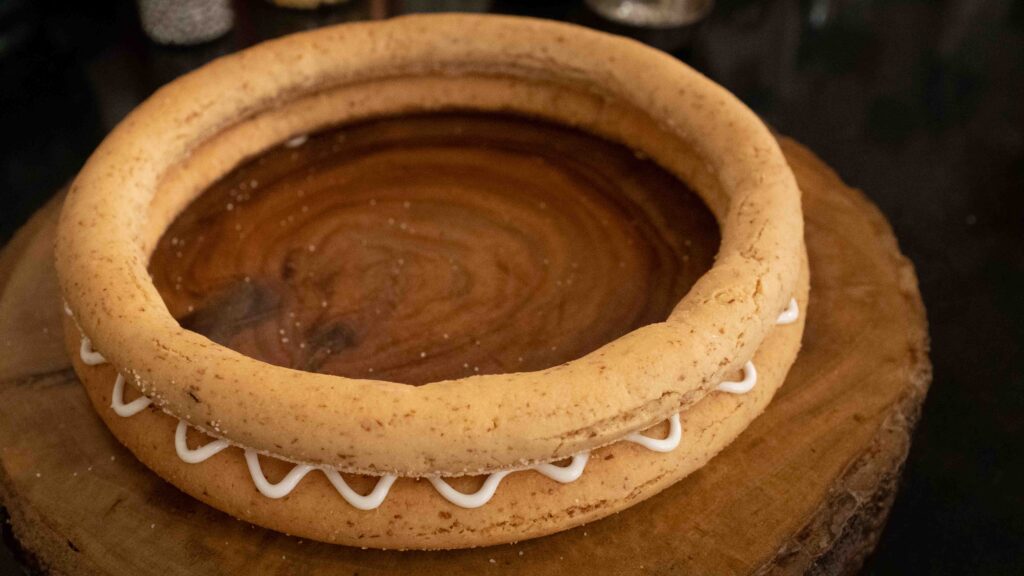
2 – Cut the tip of your piping bag 2 mm wide. Pipe 4 dots of icing onto the 4 corners of the base of the largest ring and adhere it to a large serving plate.
3 – Pipe zig-zag patterns of royal icing onto the largest ring.
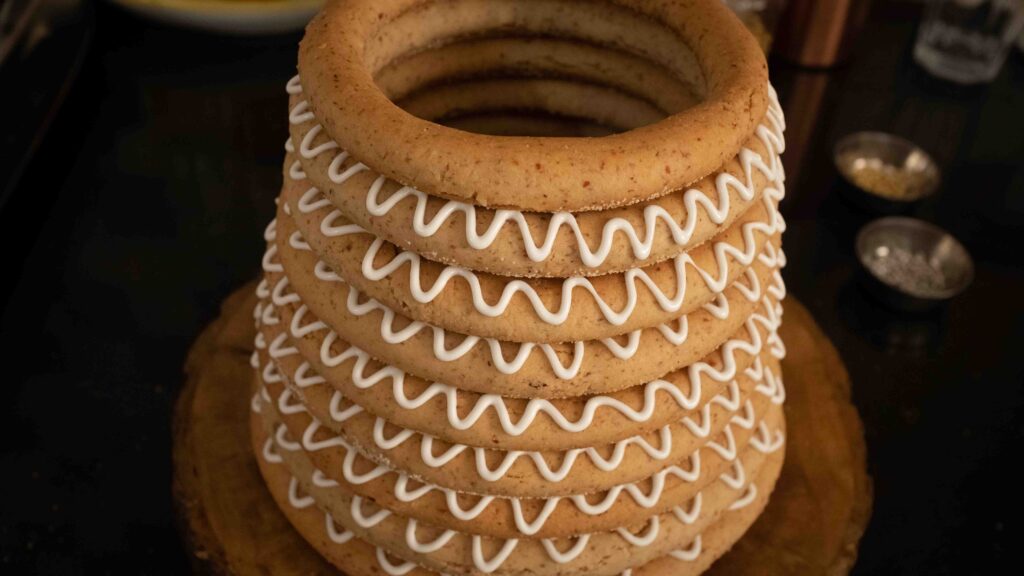
4 – Place the second-largest ring on top of the largest ring and repeat the icing and decorating process. Continue to stack rings in decreasing size to form a tower of 18 rings.
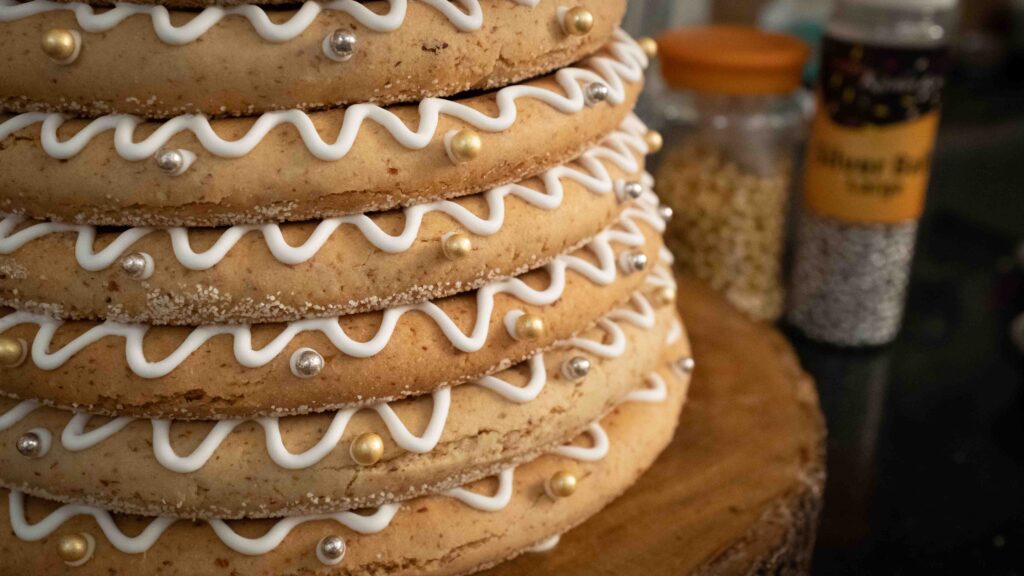
5 – Pipe dots of icing all over the rings and attach some silver edible pearls and gold edible pearls to the dots.
6 – Allow the icing to set and fully harden, roughly 24 hours. This will adhere the rings to each other and make for a sturdy construction.
7 – After your kransekake is good and set, top the tower with your fondant star. Now eat!
Kransekake is eaten by pulling off the rings and eating them like cookies. Ours was a Christmas-themed tower, but feel free to decorate your kransekake however you like. In Norway, they adorn kransekake with the national flag. You can also build the rings around a bottle of alcohol, or decorate the tower with any kind of edible goodies or food-safe ornaments.
Bonus recipe! Mulled wine
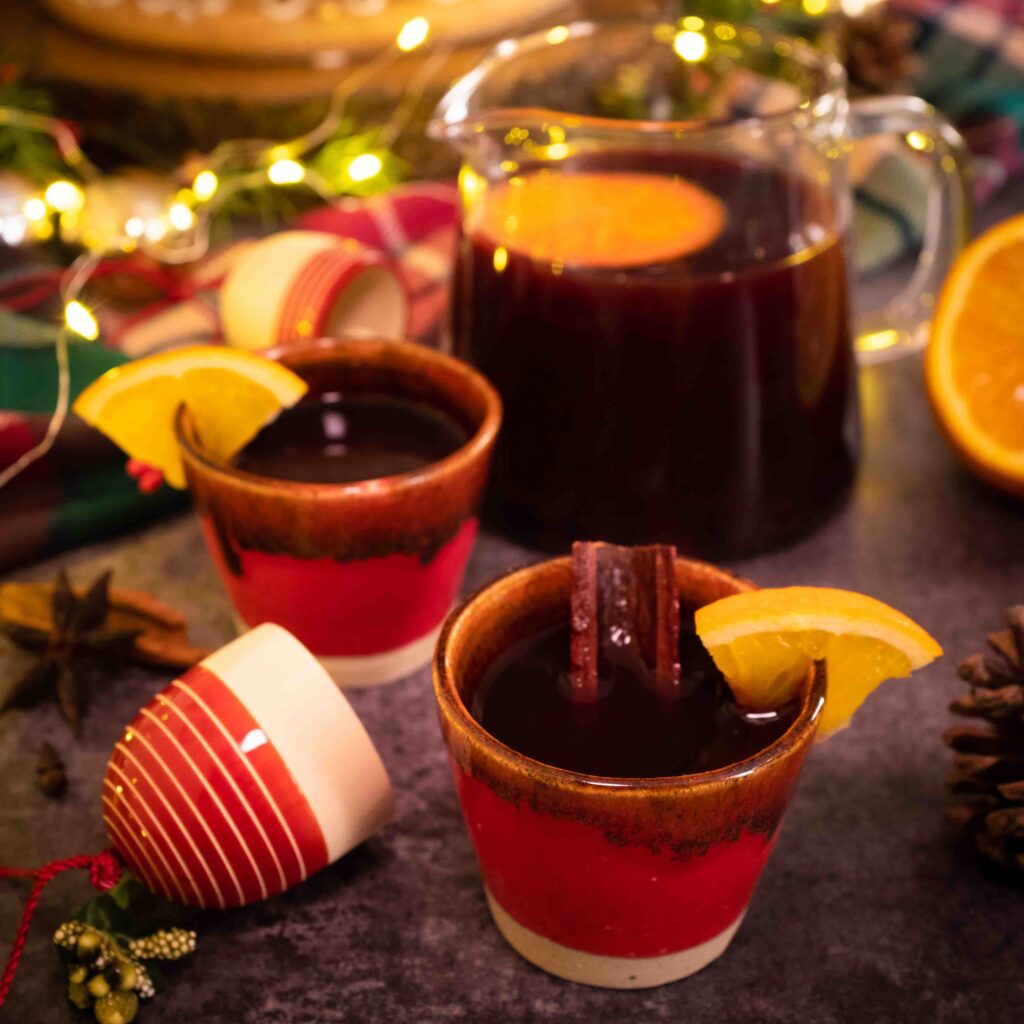
Served during winter and primarily around Christmas, Mulled Wine is a hot, spiced alcoholic beverage that is traditionally made with red wine. Popular across many parts of the world, every household has a unique recipe and this is simply how we have been enjoying it for years. Warming and punchy, our version pairs wonderfully with the almond-forward kransekake and I encourage you to get a-dunking!
Ingredients
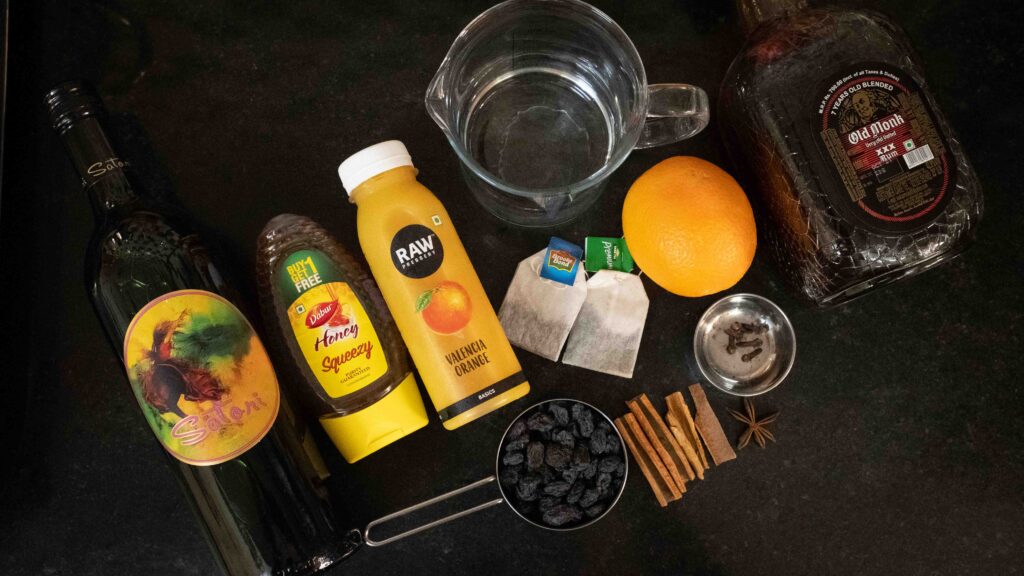
1. 1 x 750 ml bottle merlot
2. 300 ml plain water
3. 2 tsp black tea leaves (or 2 tea bags)
4. 250 ml orange juice (freshly squeezed or packaged)
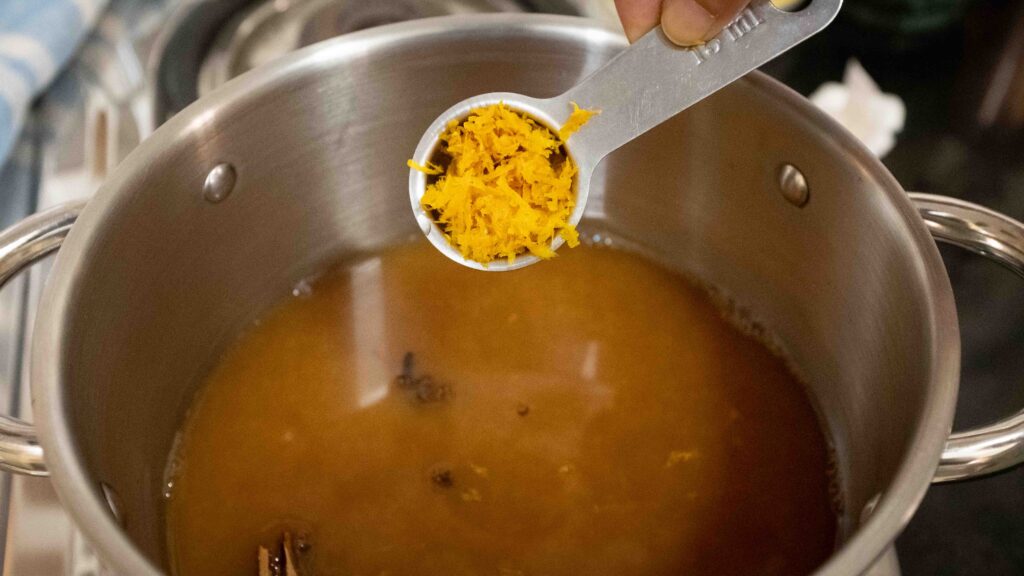
5. 1 tbsp freshly grated orange zest
6. 2 tbsp. honey
7. 3 x 2-inch cinnamon stick
8. 6 cloves
9. 1 star anise
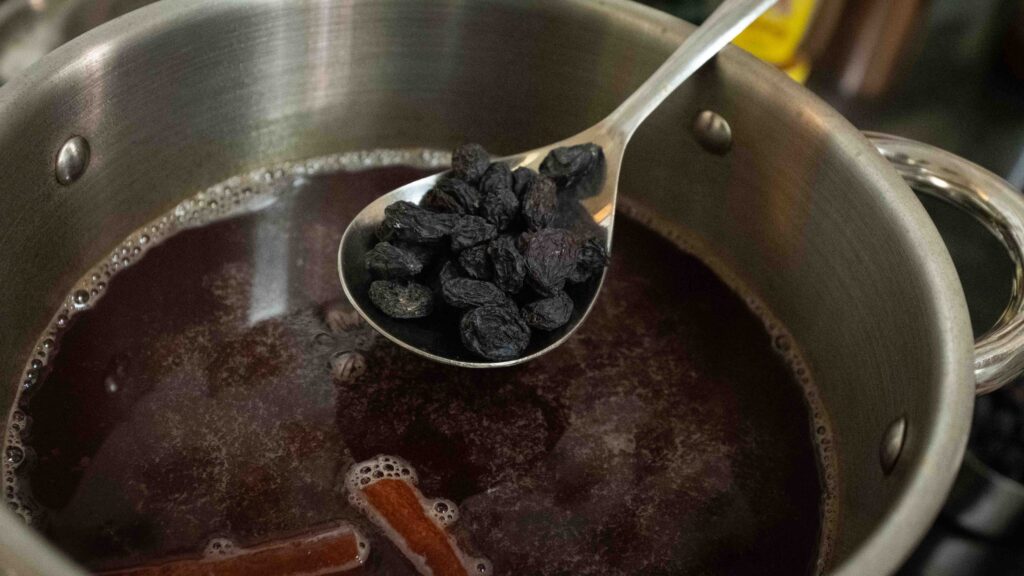
10. ½ cup black raisins
11. Optional; 50-100 ml dark rum, depending on your taste
To garnish:
1. Fresh orange slices
2. Cinnamon quills
Method
1 – Place your tea leaves in a heat proof vessel. Bring 300 ml plain water to a boil, turn off the heat and then let the water sit for 1-2 minutes. Pour the hot water onto the tea leaves and let it steep for 5 minutes. Then immediately strain the tea and discard/compost the tea leaves. Set the brewed tea aside.
2 – Zest and juice your oranges.
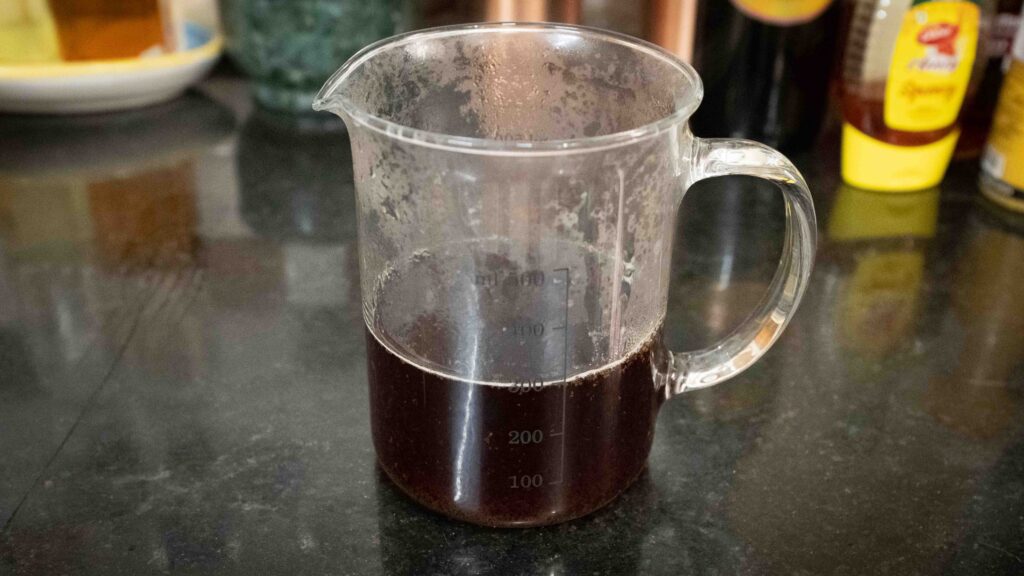
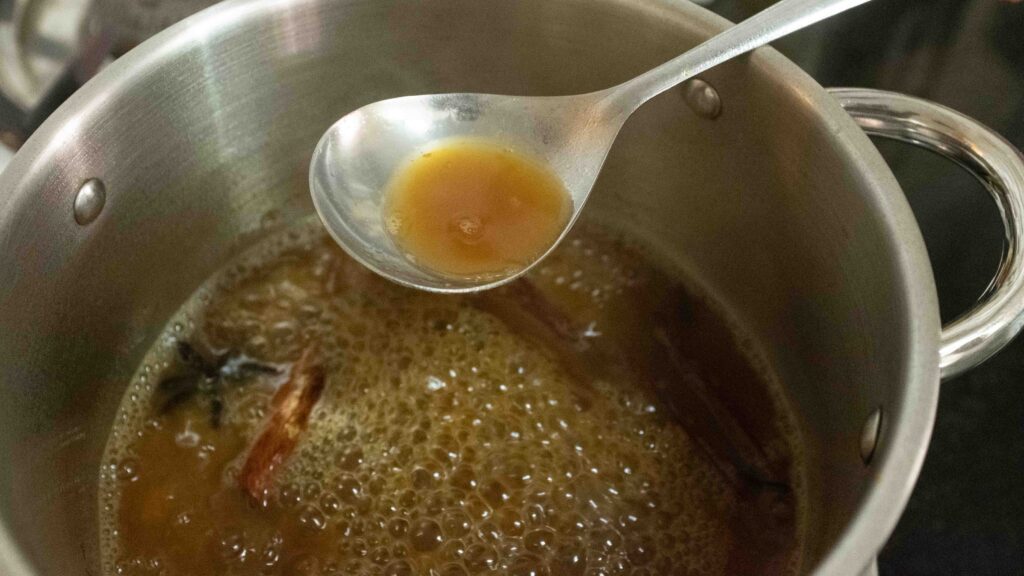
3 – In a 2-litre pot, combine the freshly brewed tea, orange juice, the orange zest, the honey, and the whole spices. Give everything a quick stir.
4 – Heat the pot over medium-high heat until you reach a boil. Continue to boil until the contents are reduced by half, about 10-12 minutes
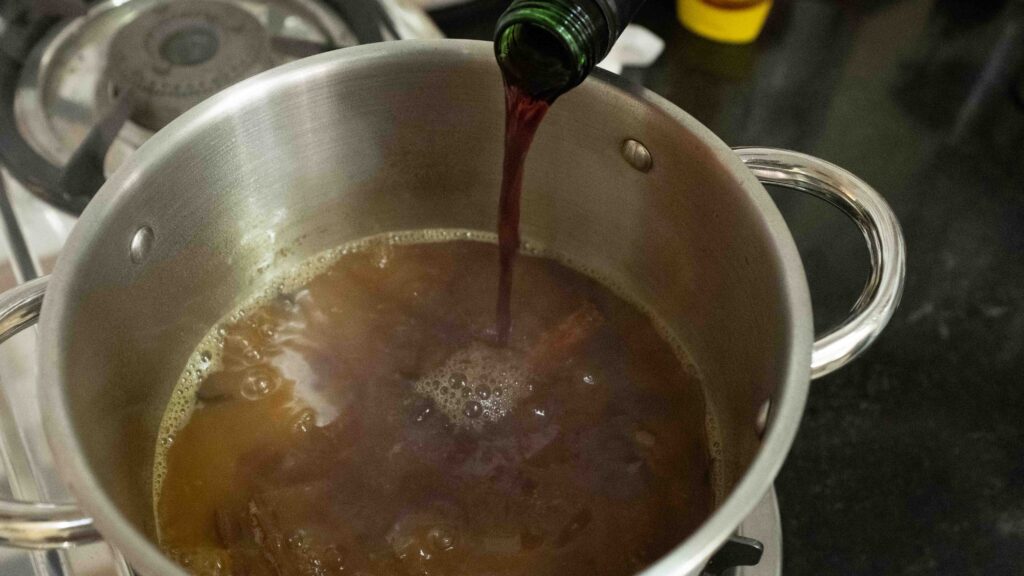
5 – Reduce the heat to low, pour in the merlot and add the raisins. Heat the brew on low until it just starts to steam, indicating it is completely heated through (you don’t want it to ever bubble or you will boil off the alcohol). Switch off the stove.
6 – Using tongs, remove the whole spices.
7 – Taste the mulled wine and stir in your desired amount of rum. We added 60 ml. Also add in more honey if desired.
8 – Serve the mulled wine hot or warm, garnished with some fresh orange slices and cinnamon quills.


You don’t need an expensive red wine to make mulled wine, but always pick one that you would enjoy drinking on its own. We used Sula Satori. When selecting a wine, look for the terms “jammy” or “notes of vanilla”, on the label. A Merlot, Grenache or Zinfandel are all good options for mulled wine, as they are fruity and full-bodied and won’t lose their flavour to the spices. Avoid very light red wines like Pinot Noir, because they don’t offer enough body to carry the spices. If storing mulled wine, it should be refrigerated until the next use and consumed within three days. Reheat on the lowest stove setting until steaming.