


Makes 12 standard sized cupcakes.
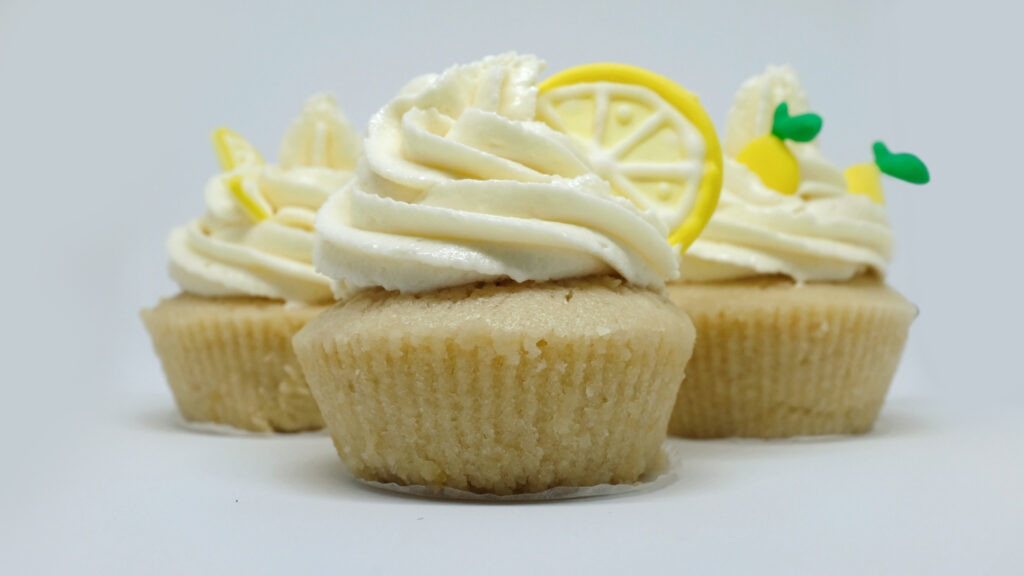
These aren’t just lemon cupcakes; they’re a rhapsodic lemon treble. The sponge hums with juice and zest. The curd filling rouses with fresh chords of tartness. And the decoration rounds it off with a citrus cadence. For those of you who find American buttercream too sweet and cloying, here’s something better. A whipped white chocolate ganache with just a hint of vanilla—simultaneously complementing and balancing out the omnipresent chorus of lemon.
At a glance
– This recipe comprises lemon cupcakes + lemon curd + whipped white chocolate ganache frosting + royal icing decorations (optional).
– You will need standard cupcake liners, a standard 12-cup cupcake pan, (or individual moulds), some piping bags, and a large star piping tip.
– This recipe has been broken into 5 stages for ease and comprehension. Please read the entire recipe from start to finish before beginning.
Stage 1: lemon cupcakes
Ingredients
1. 115 gm unsalted butter, at room temperature
2. 200 gm white granulated sugar
3. 2 large eggs (114 gm), at room temperature
4. 190 gm all purpose flour
5. 2 tsp baking powder
6. ½ tsp salt
7. 120 ml milk (whole, not low-fat)
8. 1 ½ tsp. vanilla extract
9. 1 ½ tbsp. finely grated lemon zest
10. 80 ml freshly squeezed lemon juice
Prep
1 – First zest, and then juice your lemons. Store the zest in an airtight container as it can oxidise very quickly.
2 – In a medium bowl, combine the flour, baking, powder, and salt. Sift them together and keep aside. This is your dry mixture.
3 – Line your cupcake pan or individual moulds with cupcake liners. Keep aside.
Method
1 – Start preheating your oven at 175OC.
2 – Place the butter and sugar in a large bowl. Using a handheld mixer, beat the butter and sugar together on high speed for roughly two minutes.
3 – Add in the eggs one at a time, and beat at high speed for roughly 20 seconds with each new addition.
4 – Add the vanilla extract and beat for another 20 seconds. Remember to periodically scrape down the sides of the bowl to ensure that everything is being mixed properly. Put the mixer down.
5 – Add the dry mixture to your bowl. Turn your mixer down to the lowest speed and begin to mix. Keeping the mixer on low speed, slowly pour in the milk, followed by the lemon juice, and lemon zest.
6 – Once just-combined (you should see no floury pockets or liquidy pools), stop mixing the batter! Overmixing will result in a dense, stodgy cupcake.
7 – Spoon the batter evenly into your 12 cupcake liners. Fill each only two-thirds full (roughly 3 tablespoons of batter per cupcake liner).
8 – Bake for 18-22 minutes at 175 OC. For perfectly even heating, rotate your pan at the 10 minute mark. Be sure to check for doneness at the 18 minute mark; that is, if a bamboo skewer inserted in the middle of a cupcake comes out clean, they’re done.
9 – Remove the pan from the oven and cool it on a wire rack. Don’t remove the cupcakes from the pan till they come to room temperature. Once no longer warm, your cupcakes are ready for the next stage. Store them in an airtight container while you move on to Stage 2. If you don’t plan on filling and frosting your cupcakes immediately, keep them in an airtight container in the fridge. They will stay fresh(ish) for 3 days, although you will lose some moistness. Bring them back to room temperature before proceeding with any of the other stages.
Always strive for even heating with cakes. My oven has both top and bottom heating sources, so I always place my cakes on the middle rack, unless a recipe specifies otherwise. If you’re serious about baking, get to know your oven, and all its “hotspots”. This is essential to evenly cooked baked goods. If just a few of your cupcakes tend to rise unevenly, or get cracks, or dome rapidly and then sink, their spot in the oven is too hot. To compensate for these irregularities, you’ll need to lower the temperature and/or move your pan around during the baking process. Keep in mind, if your oven has a convection mode, avoid using it for cakes if you can. Although it may speed up your overall bake-time, it will also dry out your sponge, and you definitely don’t want that.
Stage 2: lemon curd
Ingredients
1. 3 large eggs. 1 large egg = 57 gm
2. 2 egg yolks (from large eggs)
3. 220 gm superfine white castor sugar
4. 1 tbsp. finely grated lemon zest
5. 125 ml lemon juice
6. 150 gm cold, unsalted butter, chopped into ½ inch cubes
7. Pinch of salt
Method
1 – Take a large, heavy-bottomed steel saucepan. Put in the eggs, egg yolks, castor sugar, salt, lemon rind, and lemon juice, and whisk everything well to combine.
2 – Place the saucepan on your hob and cook the mixture over low-medium heat, stirring continuously, until the sugar has dissolved completely.
3 – Lower the heat to minimum and add 3-4 cubes of cold butter in batches, stirring continuously. Wait until one batch of cubes has melted and emulsified into the mixture; only then add in the next batch. Do this till you run out of butter.
4 – Continue to cook the mixture on low heat, stirring continuously until the mixture is viscous and coats the back of a spoon. This can take anywhere from 5-10 minutes.
5 – Strain the mixture immediately into a bowl and cover it with cling wrap, making sure to press the plastic down onto the surface of the curd. Refrigerate the mixture for at least one hour. Once it’s cold, it’s ready to use.
This quantity of ingredients yields roughly 1½ cups of lemon curd. You won’t need more than 12-14 teaspoons worth for the cupcake filling in this recipe. I make my lemon curd in advance, and keep it refrigerated in an airtight jar, ready for use, anytime. Leftovers make for a great spread on toast. Use up any leftovers within a week.
Stage 3: whipped white chocolate ganache
Ingredients
1. 200 gm high quality couverture white chocolate.
2. 67 gm heavy cream at room temperature
3. ½ tsp vanilla extract (leave out, if your chocolate already contains vanilla)
4. Pinch of salt
Method
1 – Chop the white chocolate into small shards.
2 – Place the chopped chocolate in a medium microwave-safe bowl. Pour the heavy cream onto the shards.
3 – Microwave this mixture at 450 watts for 30 seconds. Stir briefly with a spatula and then microwave it for another 20 seconds. Thereafter, keep heating the mixture in 10 second increments till the chocolate has completely melted into the cream, making sure to stir briefly each time. Do not overheat or over-stir! It’s better to go low and slow rather than have a split ganache on your hands. You’re looking to achieve a glossy, thick emulsion with zero lumps. It may look a bit beige and insipid at this stage, but it won’t later on.
4 – Add salt and vanilla extract to the warm ganache and stir.
5 – Cover your bowl with cling wrap, making sure to press the plastic down onto the surface of the ganache. Let it rest on your counter till it cools to room temperature.
6 – Once at room temperature, place the covered bowl inside the fridge, where it will need to set until it gets to the spreadable consistency of peanut butter. I like to chill mine overnight.
7 – When you’re ready to frost your cupcakes, take the ganache out of the fridge and let it sit on your counter for 5 minutes or so. Stir the mixture with a spatula to ensure that it’s smooth and homogenous.
8 – We’re now going to transform that beige, creamy emulsion into a fluffy, glorious white cloud. Using the whisk attachment on your handheld mixer, start at low speed and then whip on high for 30-60 seconds depending on how quickly the mixture becomes fluffy and holds its shape. The best way to tell if it’s ready, is the “whisk test”. If it falls or drips off the whisk, keep whipping. If it stays steadily on the whisk, stop. Do not over-whip, or the mixture could split.
9 – Your whipped white chocolate ganache is now ready to be piped. If you’re not going to frost your cupcakes right away, keep it covered in an airtight container in the fridge. When you’re ready to frost, you will need to take it out of the fridge and let it sit until it’s at a pipeable consistency again. If you’ve lost some volume, you can lightly re-whip it for 10-15 seconds.
Let’s talk ganache. White chocolate ganache is usually made in a chocolate to cream ratio of 3:1. In really hot and humid weather, you may need to use a 4:1 ratio for extra stability. To give yourself the best chance at success, use fresh, high quality couverture chocolate, always. Even when you source the best ingredients, things can still go wrong. A big enough difference in cream and chocolate temperatures, overheating your ganache in the microwave, or even whipping it for 10 seconds too long—anything can result in a mwunh mwunh mwunh moment. Err on the side of caution. Be mindful. Be vigilant. Be patient! You could frost your cupcake with anything really, but a ganache frosting is infinitely superior to a buttercream frosting.
Stage 4: royal icing decorations (optional)
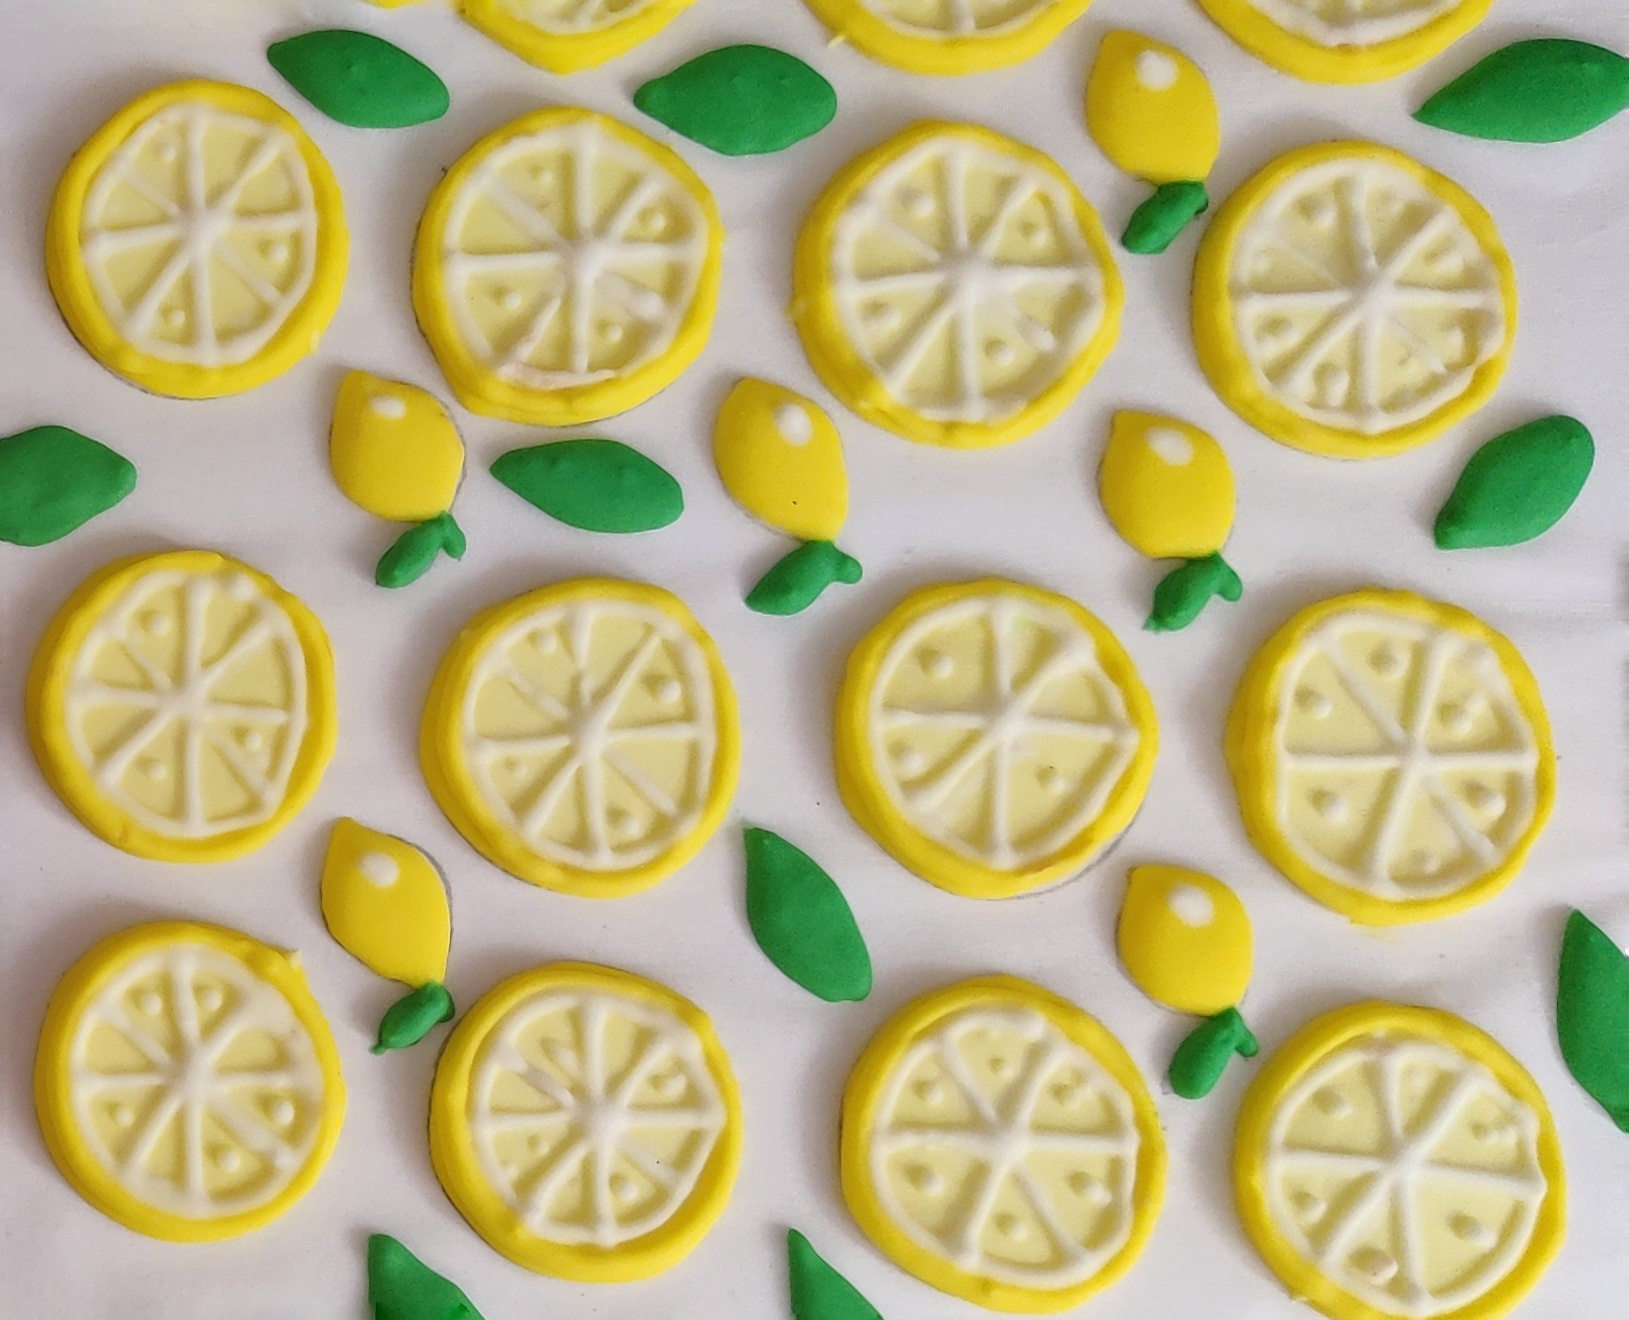
Some people top their cupcakes with sprinkles, or crushed candies, or candied lemon slices. I wanted to challenge myself by making an entirely edible topper from scratch and hit upon royal icing. Yes, I know. Royal icing can suck. It’s often sickly sweet, rock hard, and unpleasant to eat. However, if you make your own batch to your taste, it will turn out great. Not too sweet, and aromatic with citrus, these royal icing lemons look and taste a treat. New to royal icing? Please watch this video for a full masterclass on the basics. These particular decorations are known as royal icing transfers, because you can pipe them onto a non-stick sheet and then peel them off when they’re dry. Thereafter, they can be used as decorations on any dessert. Watch how transfers are made here. Don’t plan on making this? Skip the entire section and scroll straight to Stage 5. If you do take the plunge, make these 2-3 days in advance, as they can take that long to properly dry. Before you begin on your decorations, you’ll need to keep some materials ready to help you create them.
Part 1 – Make your Design Board
Materials
1. White A4 paper
2. White parchment paper, cut into A4 sheets
3. A pencil/printer
4. 3 binder clips
5. A standard writing clipboard
Method
1 – Print this template or trace out your lemon slice decorations on an A4 sheet of paper. You should be able to fit 20 slices in one sheet.
2 – Place an A4 parchment sheet on top of your template sheet. You should be able to see your template through it.
3 – Attach the sheets to your clipboard. Using binder clips, secure the sides and bottom of the sheets as well. This is your Design Board. You will pipe your decorations directly onto the parchment sheet. Keep this aside. It’s now time to make your royal icing.
Part 2 – Make the royal icing

Ingredients
1. 240 gm icing sugar plus extra for stiffening
2. 1/8th tsp cream of tartar
3. 2.2 tbsp. pasteurized egg whites
4. ½ tsp vanilla extract
5. 1 drop of pure lemon extract
6. A spritz of fresh lemon juice
Method
1 – Sift your icing sugar 2-3 times.
2 – Put the icing sugar and cream of tartar in a bowl. Whisk together to combine.
3 – Add in the egg whites. Using a spatula, stir briefly to moisten the sugar. It will look ‘soupy’.
4 – Using a handheld mixer, beat this mixture on low, to evenly mix everything. Thereafter, increase the speed to high and beat for 1-2 minutes. Add a spritz of lemon, vanilla extract, and lemon extract and continue to beat for another minute or until the mixture forms stiff peaks and is glossy and bright white. It is ready when the mixture adheres firmly to your whisk head. Do not whip or whisk the royal icing from this stage onwards, as you don’t want any air bubbles whatsoever. Your royal icing is ready. Cover your bowl with cling wrap and proceed to the next part.
Part 3 – Make the decorations
1 – Technique & Design guide here.
2 – After fully drying out your decorations, they’re ready to use on your cupcakes or to be stored for later.
This is enough royal icing to make 60-70 lemon slice decorations. Yes, that’s a lot of extra decorations, but it’s hard to make tiny amounts of royal icing without compromising the consistency. Besides, you can make as many lemon slices as you like and have them on hand for any future lemon cupcakes. Dried correctly, royal icing decorations have an indefinite shelf life. Just remember to store them in a cool dry place, in an airtight container. Unused royal icing must be stored in an airtight container in the fridge, and used up within a few days.
Stage 5: Finale; cupcake construction & assembly
Components
1. Lemon cupcakes
2. Lemon curd (cold is best)
3. Whipped white chocolate ganache
4. Lemon slice royal icing decorations
Prep
1 – Transfer ½ cup of lemon curd into a small piping bag. Keep it ready.
2 – Re-whip your cool white chocolate ganache if it’s lost some volume. Transfer it to a large piping bag with a star piping tip. Keep it ready.
3 – Keep an apple corer handy. If you have a cupcake corer, even better!
Method
1 – Using an apple corer, go 2 ½cm downwards into the cupcake and remove its core. Take care not to go in too deep. Repeat for all 12 cupcakes. Don’t discard the tops! They’ll come in handy in a bit.
2 – Snip off the tip of your lemon curd piping bag and squeeze about 1 teaspoon of lemon curd into each cupcake cavity, or until the curd just reaches the top.
3 – Trim the cored-out cupcake tops to a height of 1cm. Plug the cupcakes with the shortened tops (and eat the scraps, you’ve earned it!).
4 – Pipe a generous serving of frosting onto your cupcakes. Watch this to see how to frost a cupcake.
5 – Top each cupcake with a lemon slice royal icing decoration. Make sure you anchor it securely into the frosting. Now eat!
Fully constructed, these don’t do well, sitting around for hours, either on your counter or inside the fridge. You don’t want the water content from the lemon curd leeching into the sponge and making it gloopy. Nor do you want the whipped ganache frosting to get weepy at room temperature or to harden in the fridge. Oil/fat and royal icing don’t get along. Decorations left too long atop the cupcake will get oily stains from the fat in the ganache. Be sure to core, fill, frost, and decorate only the cupcakes you’re going to eat immediately.