


Makes 4 servings.
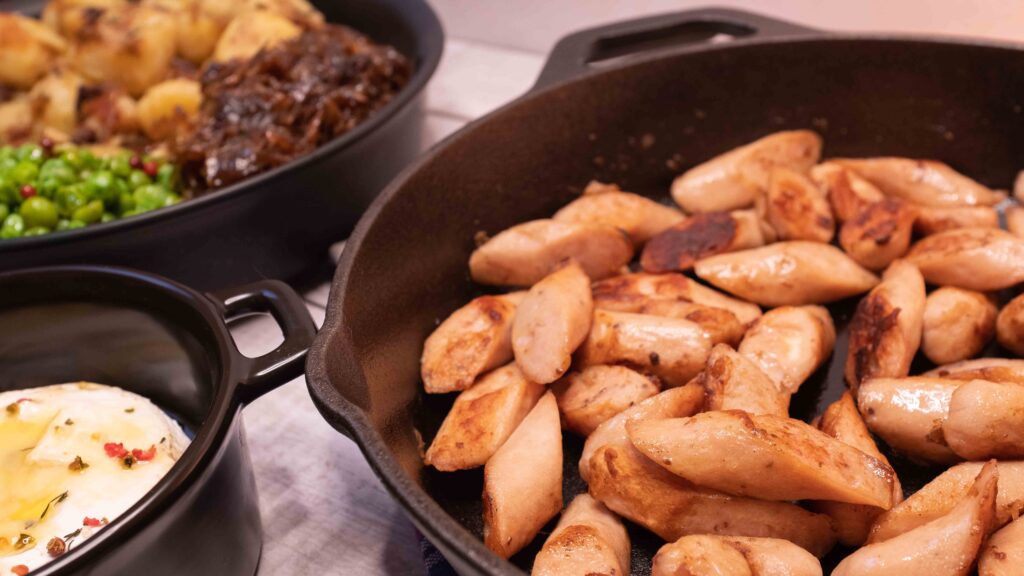
Fried sausages, roasted potatoes, caramelised onions, and sautéed peas snugly sit together in this tapas-inspired, family-style spread, served not with gravy, but with an entire wheel of oozy Camembert cheese! For this dish, I cook all the elements in cast iron, except for the baked cheese dip. That way, the outsides of the potatoes get properly crispy, the onions break down evenly and take on deep, umami notes, the peas retain their sweetness and texture, and the sausages get that perfect sear. And while you do not need cast iron cookware to make this version of Meat & 3 Veg, I guarantee it will taste heaps better if you do.
At a glance
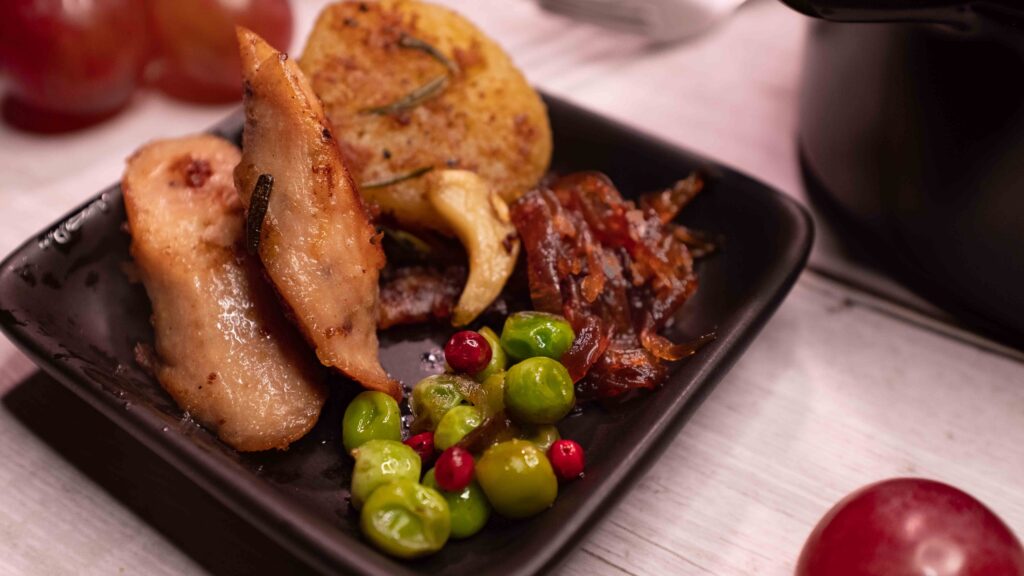
– This recipe comprises roast potatoes + caramelised onions + sautéed peas + baked camembert + fried sausages.
– You will need a 5 litre steamer basket and pot, some large cast iron skillets, and some baking pots.
– This recipe has been broken into 5 stages for ease and comprehension. Please read the entire recipe from start to finish before beginning.
Stage 1: Roast potatoes
Ingredients
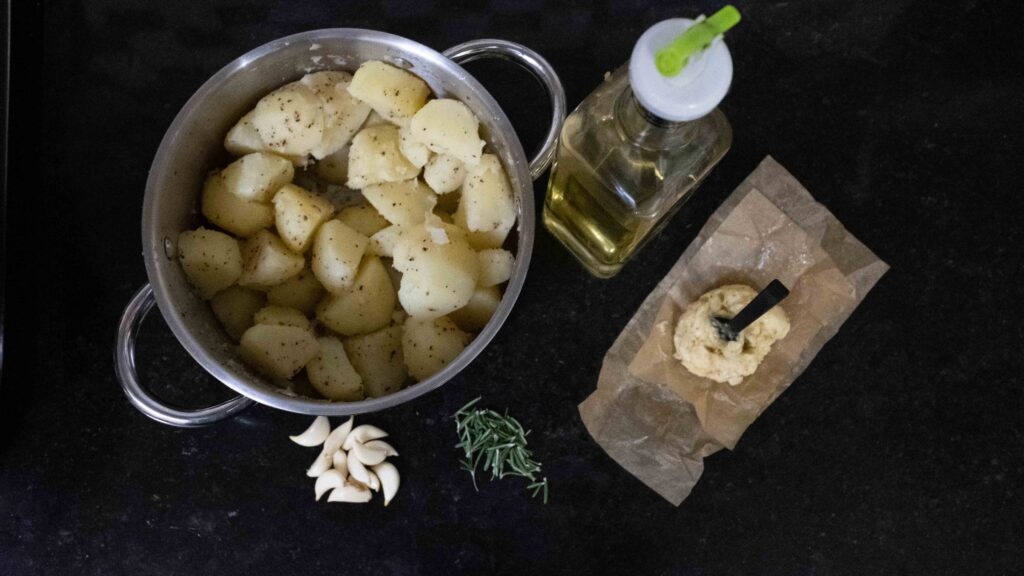
1. 1 kg starchy potatoes
2. Enough water to fill your 5 litre pot by 1-2 inches
3. 1 ½ tsp salt
4. ½ tsp freshly cracked black pepper
5. 1 kg steamed potatoes
6. 10-12medium garlic cloves, whole
7. 10 cm sprig of rosemary
8. 2 tbsp. vegetable oil/neutral flavoured oil or pork fat
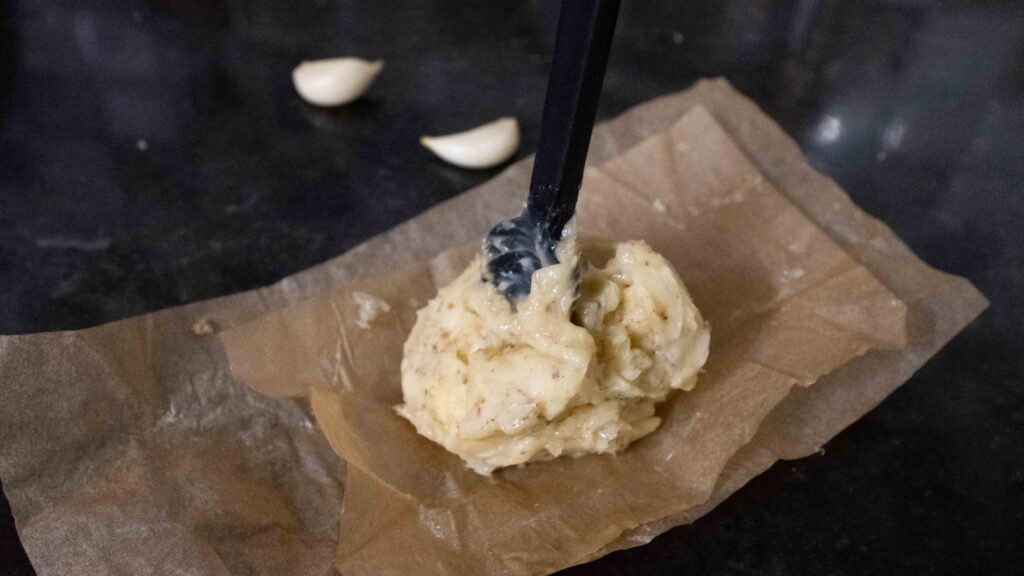
9. 50 gm garlic butter*
*To make garlic butter, mince 1 small clove of garlic and combine it with 50 gm softened, salted butter, and ¼ tsp dried oregano.
Prep
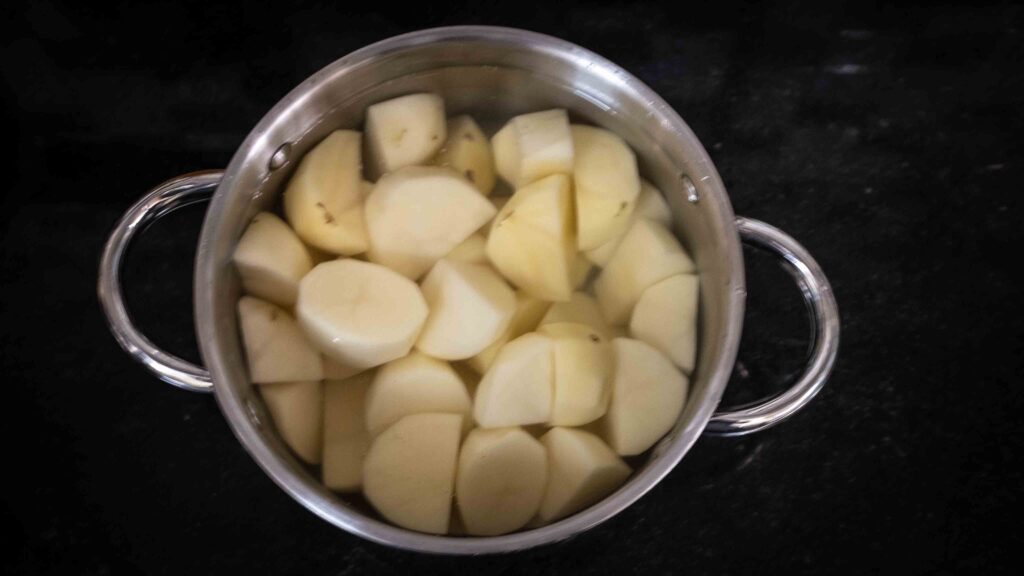
1 – Peel and cut your potatoes into 4 cm wide chunks. Then keep them soaked in cold water.
2 – Make your garlic butter. Keep it in the fridge until ready to use.
3 – Remove the leaves from your sprig of rosemary and give the leaves a rough chop.
Method
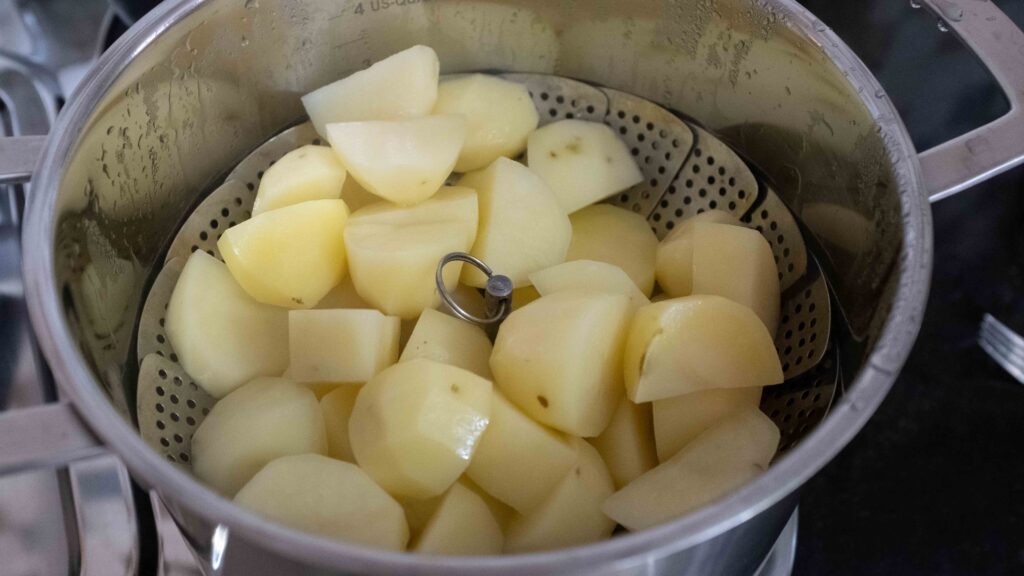
1 – Set your steamer to boil; fill a steamer pot with enough plain water to come just below the steamer basket, and bring it to a boil with the lid on.
2 – Once the water comes to a boil, place the peeled and cut potatoes on the steamer rack. Lower your steamer basket with the potatoes into the pot. Immediately put the lid on and steam on medium heat for 18-20 minutes or until you can easily pierce through the potatoes with a fork.
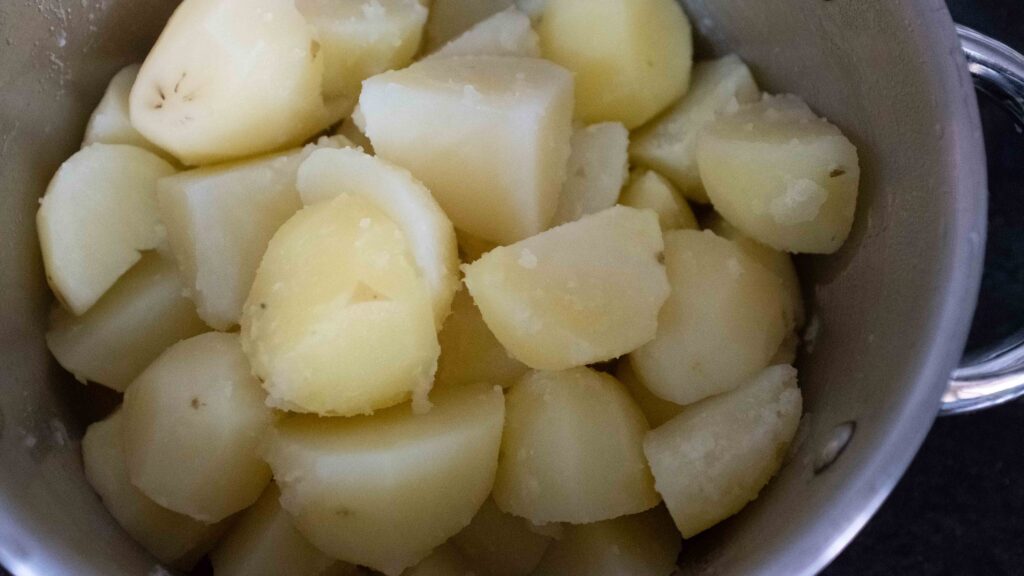
3 – The instant the potatoes are cooked (fork-tender), transfer them from the steamer to a large bowl with a lid and secure the lid tightly.
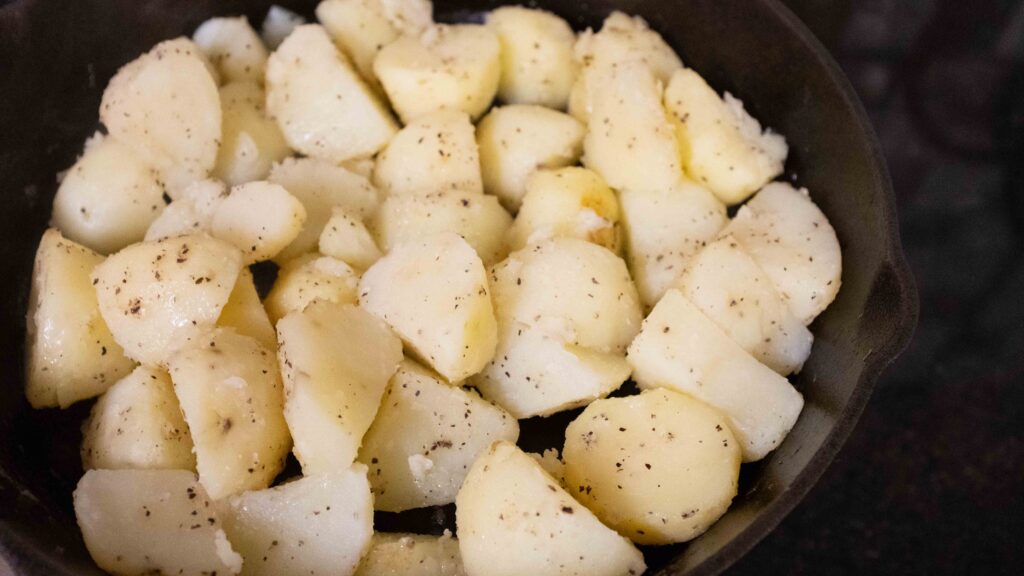
4 – Using moderate force, shake the bowl of steamed potatoes while they’re still hot. I do about 10 good shakes; this roughs up the surface of the potatoes, making them ‘fuzzy’ and ensures their outsides get crispy while roasting.
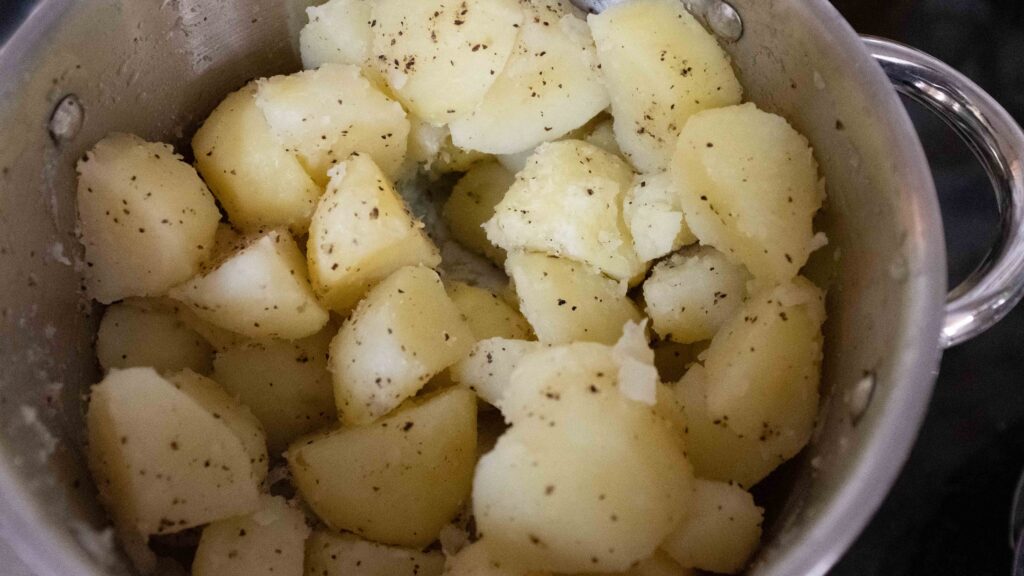
5 – Remove the lid (be careful, a gust of steam is about to blast out), add the salt and black pepper, secure the lid and toss the potatoes in the seasoning.
6 – Remove the lid again, and set the potatoes aside.
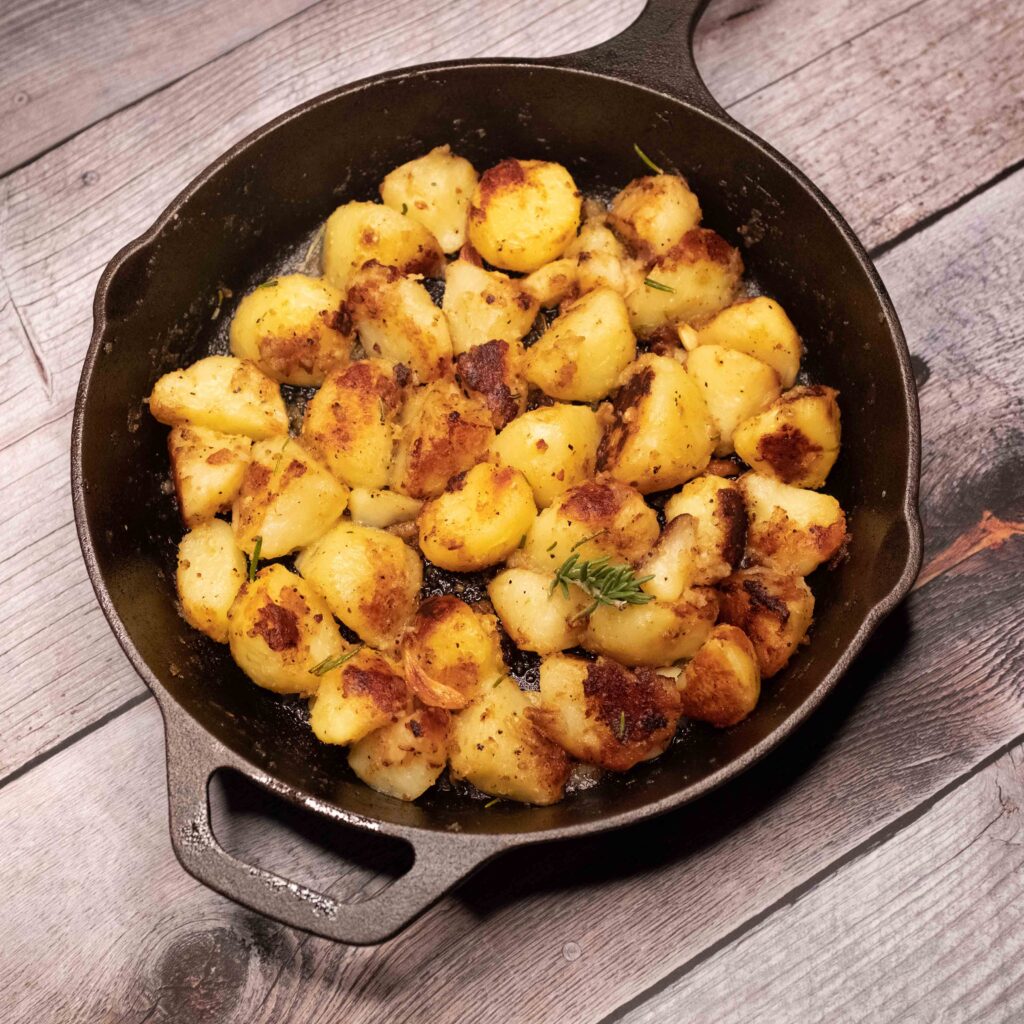
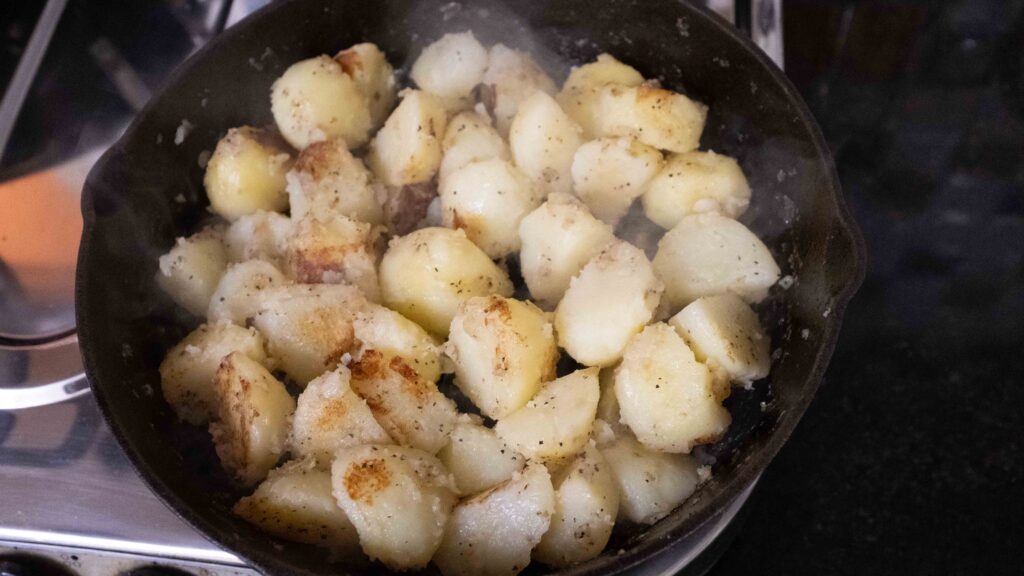
7 – Place a heavy skillet (cast-iron is perfect) on your stove-top and begin heating it on medium. When the pan is hot, add 2 tablespoons of oil and wait a few seconds for it to heat up.
8 – When the oil is hot and shimmering, toss the steamed potatoes into the skillet.
9 – Pan-roast the potatoes on medium heat for 25-30 minutes or until the outsides are crispy and golden. Toss the potatoes every 3-4 minutes for even browning, or go nuts and keep some sides pale and some sides super brown (that’s what I like to do).
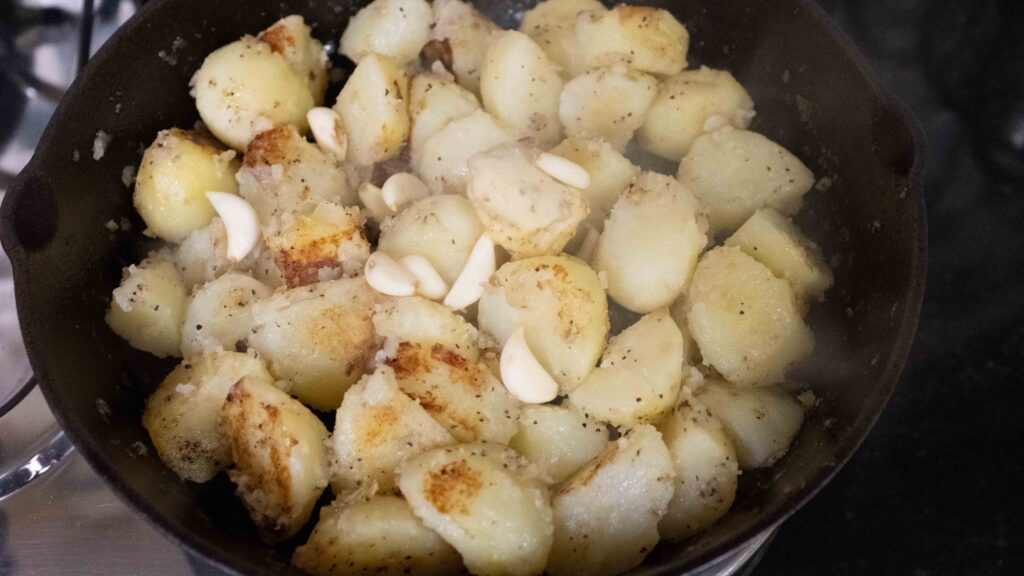
10 – After 20 minutes, add the cold garlic butter and all the garlic cloves to the skillet. Continue roasting on medium heat until the garlic is golden and crispy, 5-7 minutes. Toss the potatoes and garlic frequently for even browning. Garlic burns very quickly, so keep your eye on the skillet.
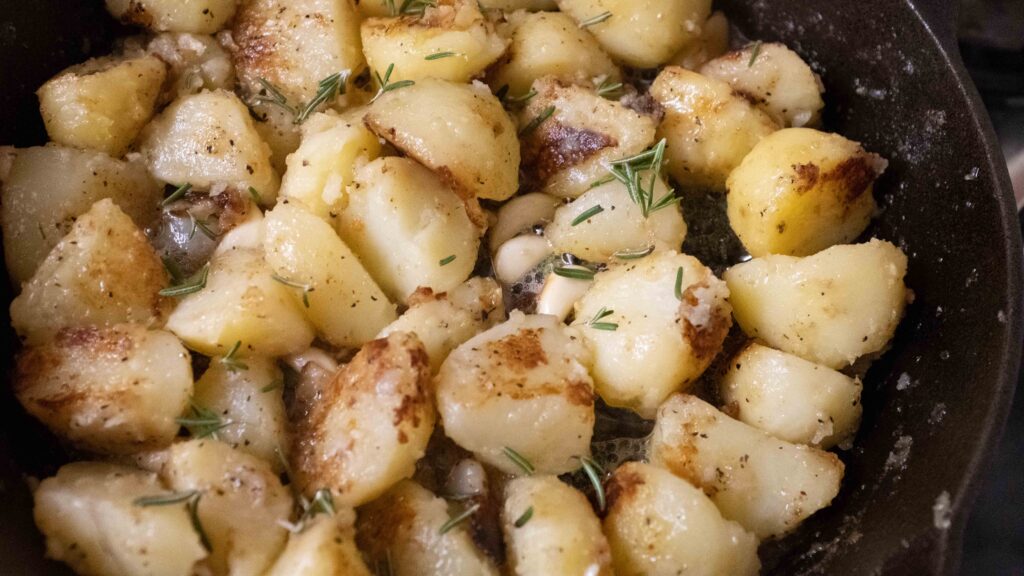
11 – Finally, add the roughly chopped rosemary to the skillet, and continue cooking and tossing everything together for a further 5 minutes. The rosemary will become very aromatic but shouldn’t brown. If not serving immediately, cover the potatoes loosely with some aluminium foil so that they don’t ‘sweat’. They re-heat really well in the same pan, so if they get cold, simply warm them up on low heat till they’re lovely and crispy again.
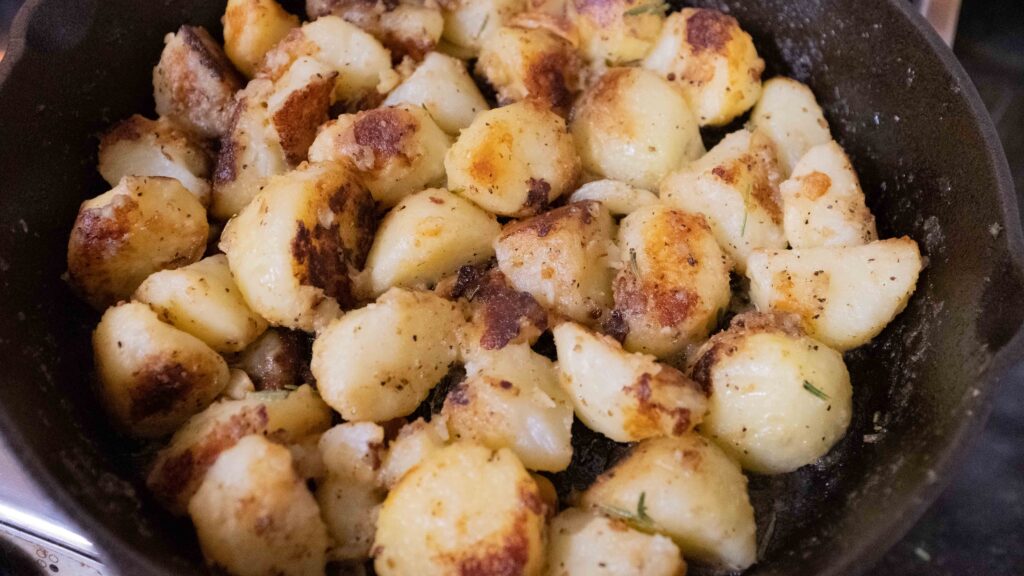
There’s something deeply satisfying about properly made roast potatoes. I have been making roast potatoes this way for years now and it’s never let me down! When cooked to perfection, each chunk should offer up just the right amount of golden crispiness on the outside and warm fluffiness on the inside. When cooking your raw potatoes before roasting them, steaming is always preferred to boiling so that the taste and nutrients are not discarded with the boiled water. Additionally, steaming makes the interior of the roast potato fluffier. I like to roast my potatoes on the stove as it’s faster and gives me more control over the browning and crisping than if I were to use the oven. Try to follow this recipe to the tee. I promise you, these roast potatoes will become a family favourite!
Stage 2: caramelised onions
Ingredients
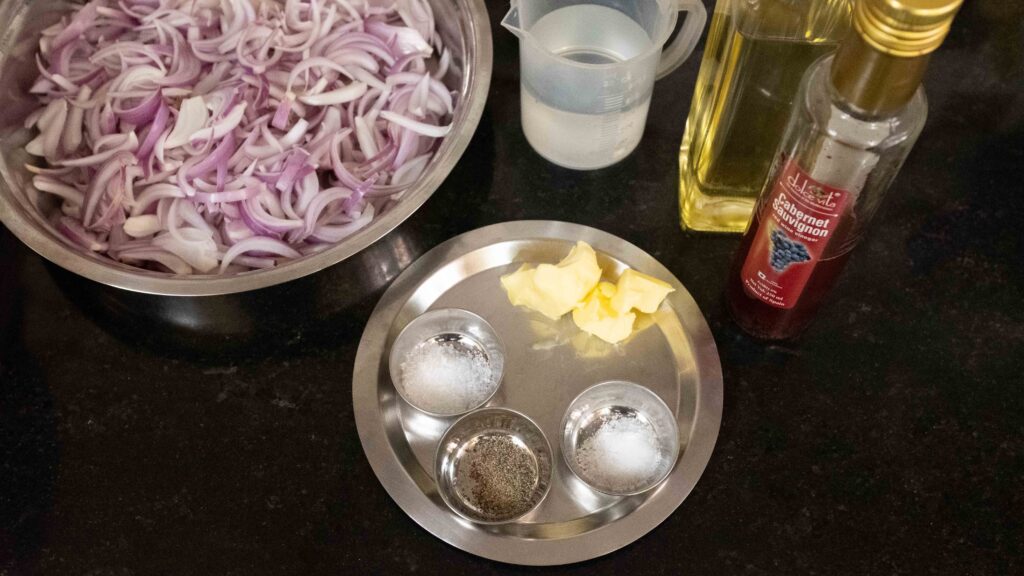
1. 5 large red onions or 500 gm equivalent
2. 1 tbsp. cooking olive oil
3. 30 gm salted butter
4. 1 tsp sugar (brown or white)
5. ½ tsp salt
6. 100-150 ml water
7. 1 tsp. red wine vinegar
8. ¼ tsp freshly cracked black pepper
Method
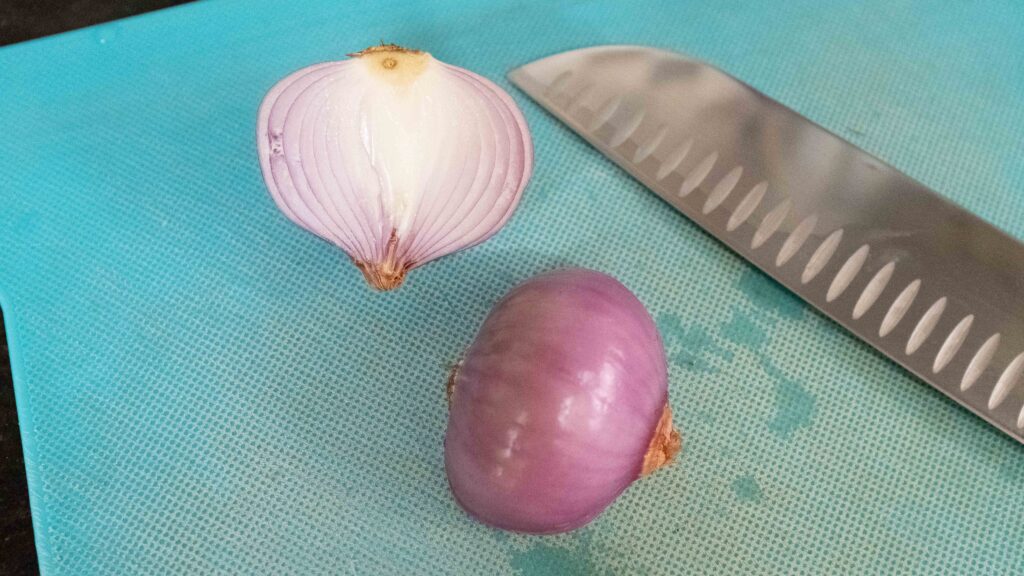
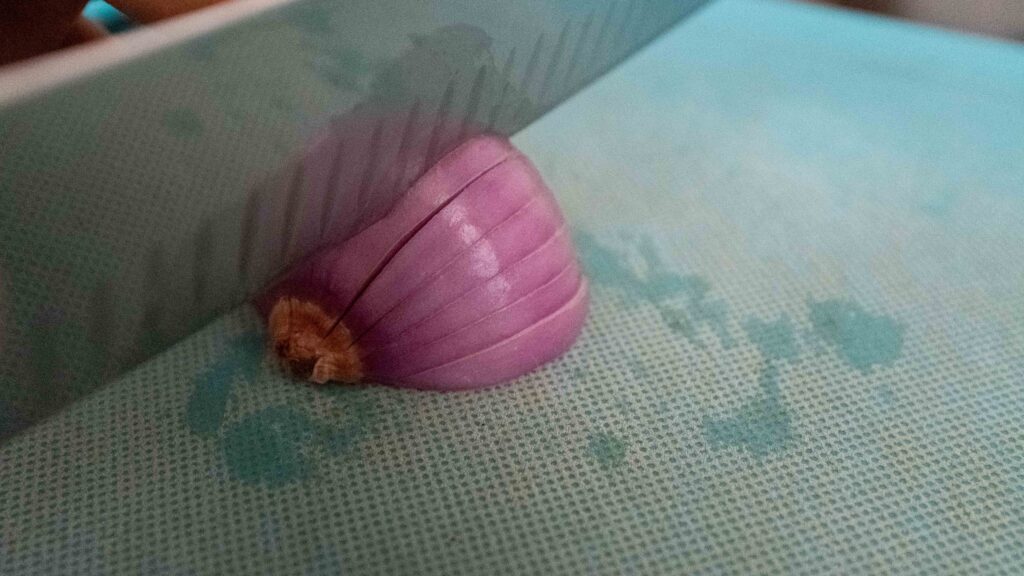
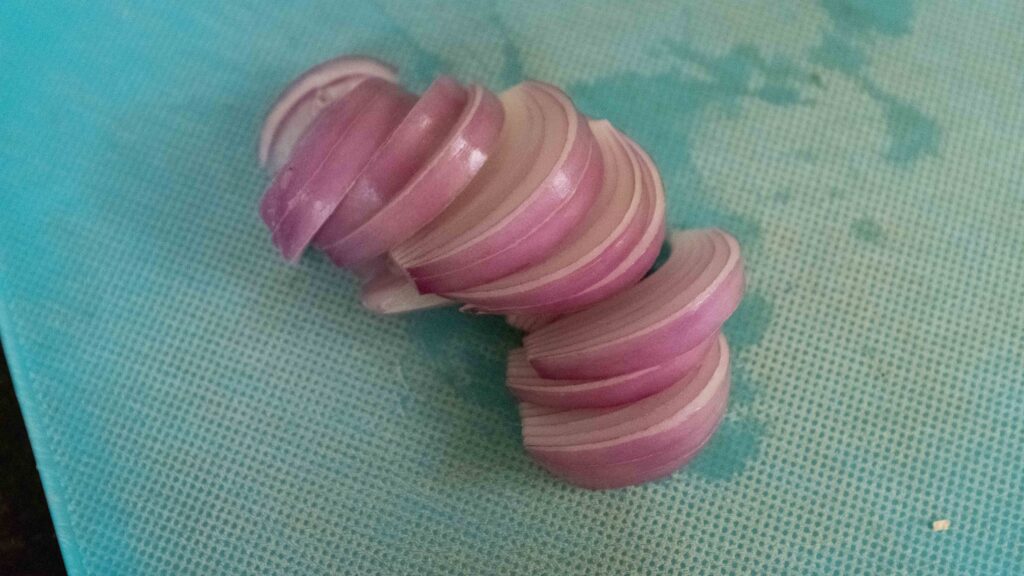
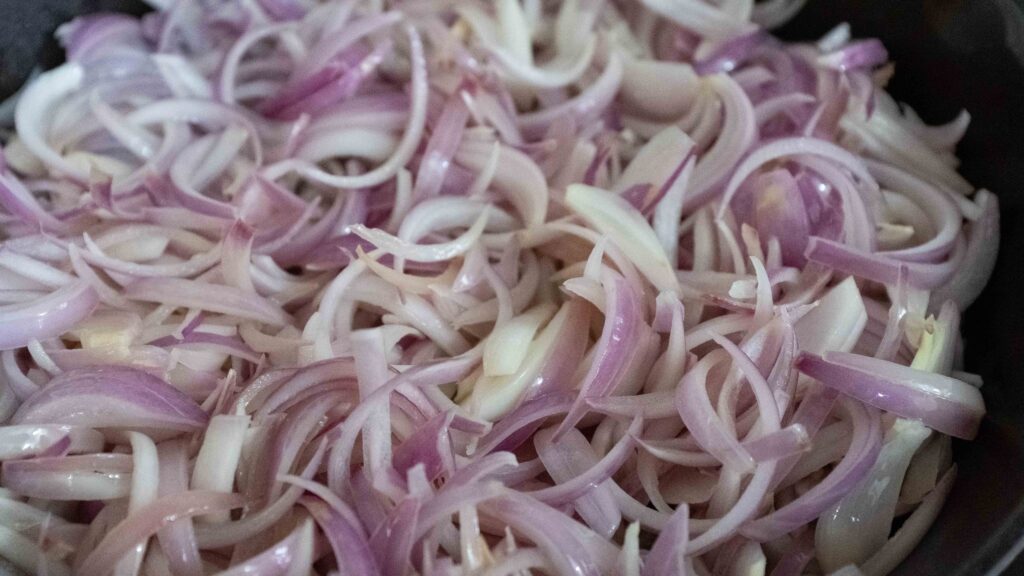
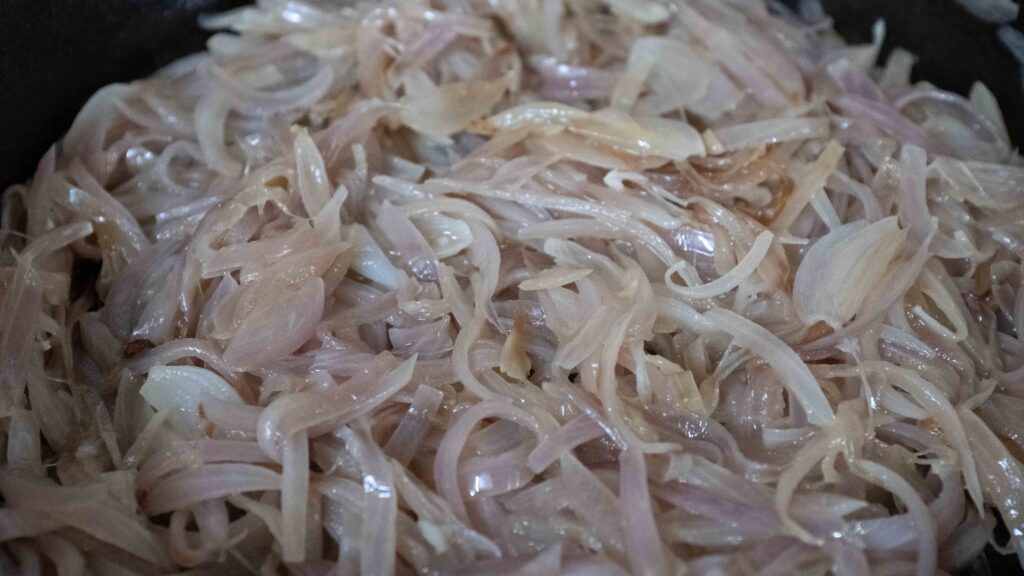
1 – Peel and then cut each onion in half down the middle from root to stem. Place the cut side down on your work surface and then slicing along the length of the onion, make ½ cm cuts into the onion, angled towards the centre of the onion (like thin, orange segments). Chop off the stem and root and then separate the segments of sliced onion.
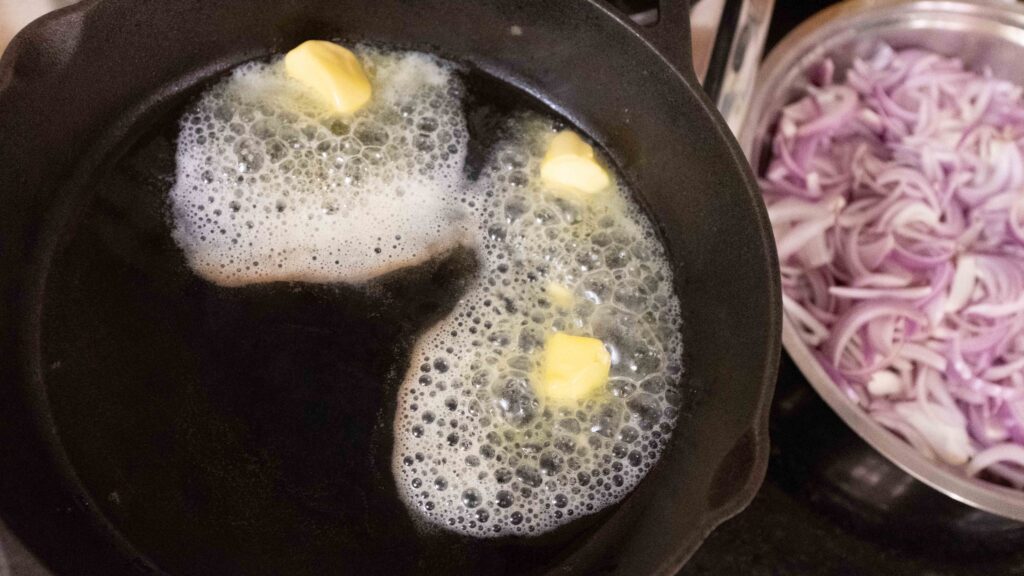
2 – Begin heating a wide, heavy-bottomed skillet (like cast-iron) on the stove over medium heat until hot, and then add 1 ½ tablespoons oil and the butter. Be careful! The butter will sizzle in the hot pan!
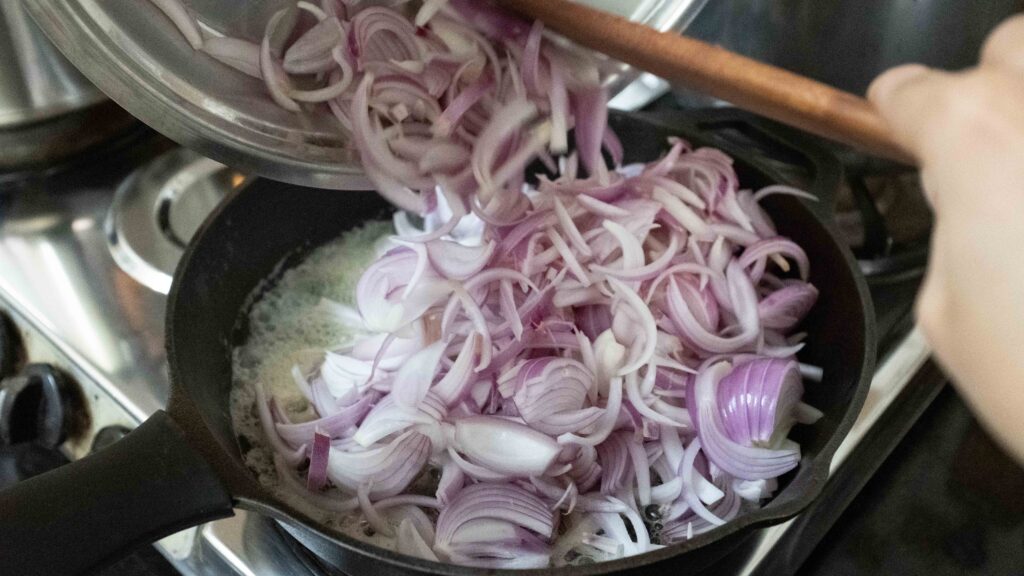
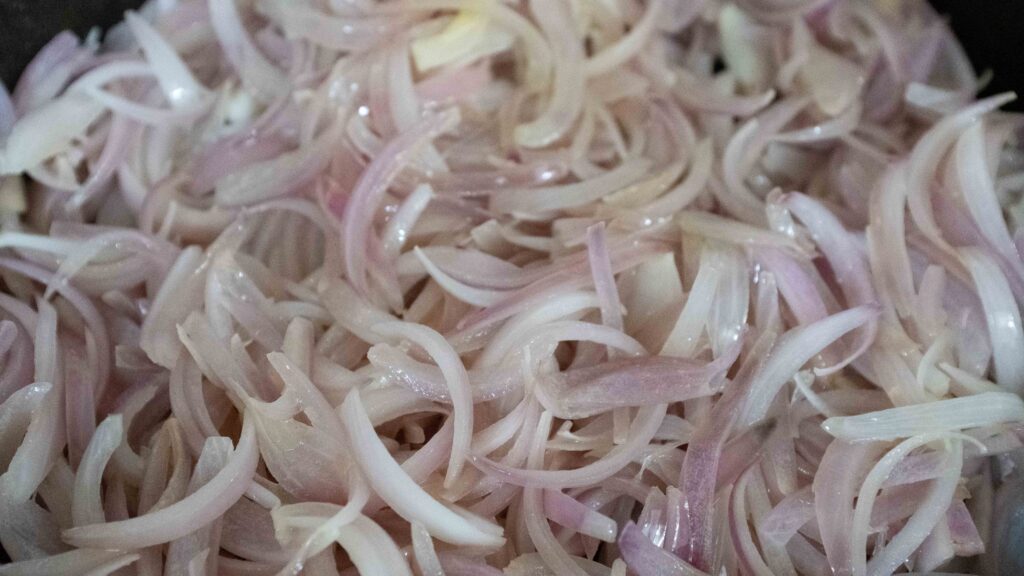
3 – Lower the heat and add all the sliced onions into the skillet. Toss them in the fat to coat, and then spread them out as much as possible for maximum surface area contact. Stir the onions and spread them out again evenly, every 2-3 minutes.
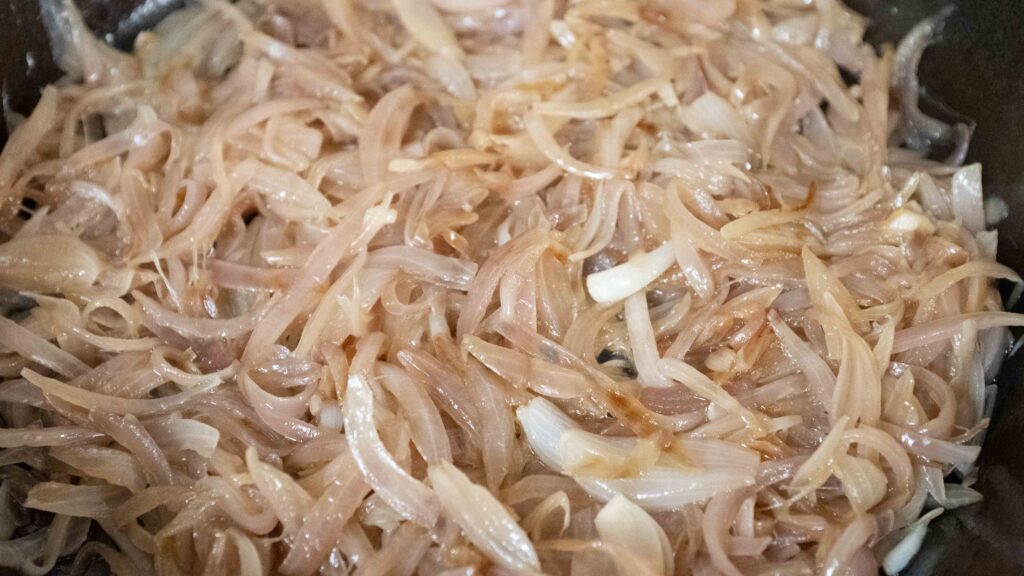
4 – After 10 minutes, add the salt and sugar to the onions, and stir once again. The sugar helps with the caramelisation process as well as enhances the taste of the onions.
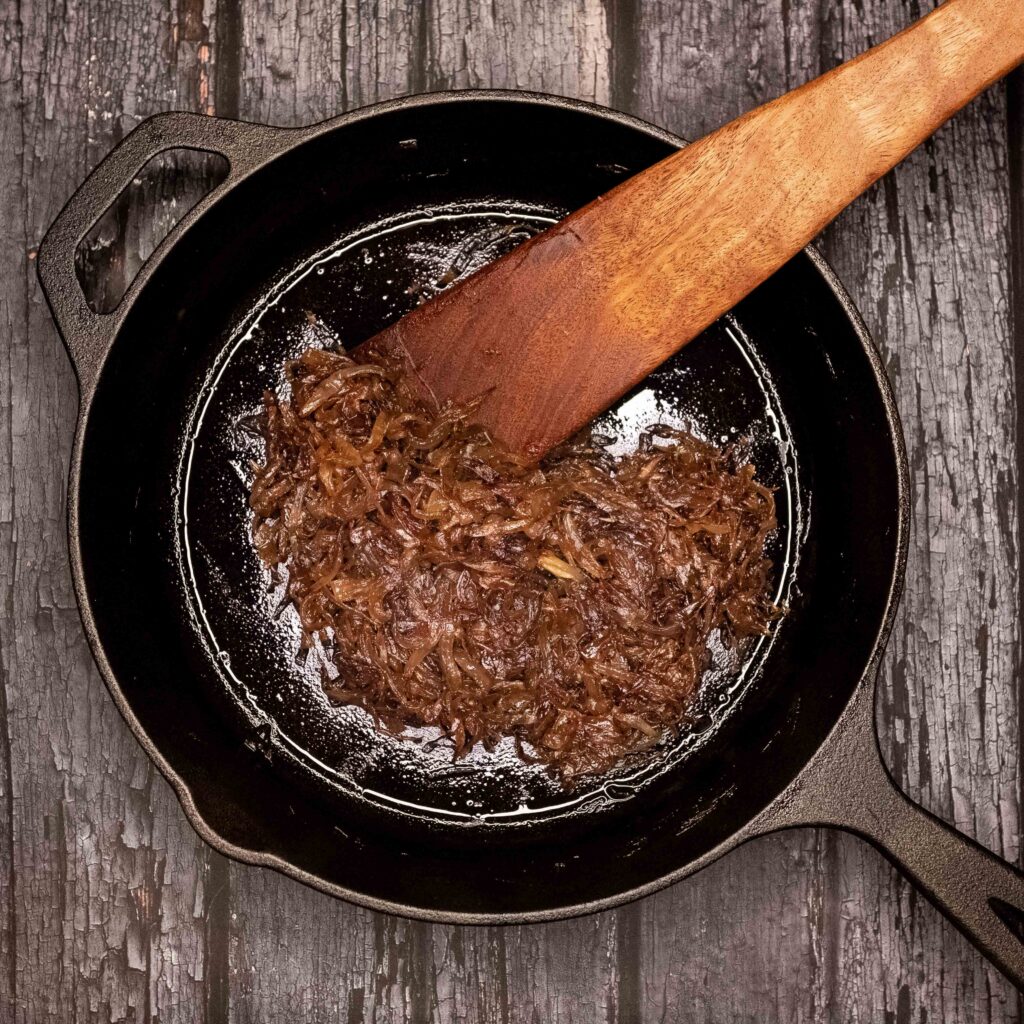
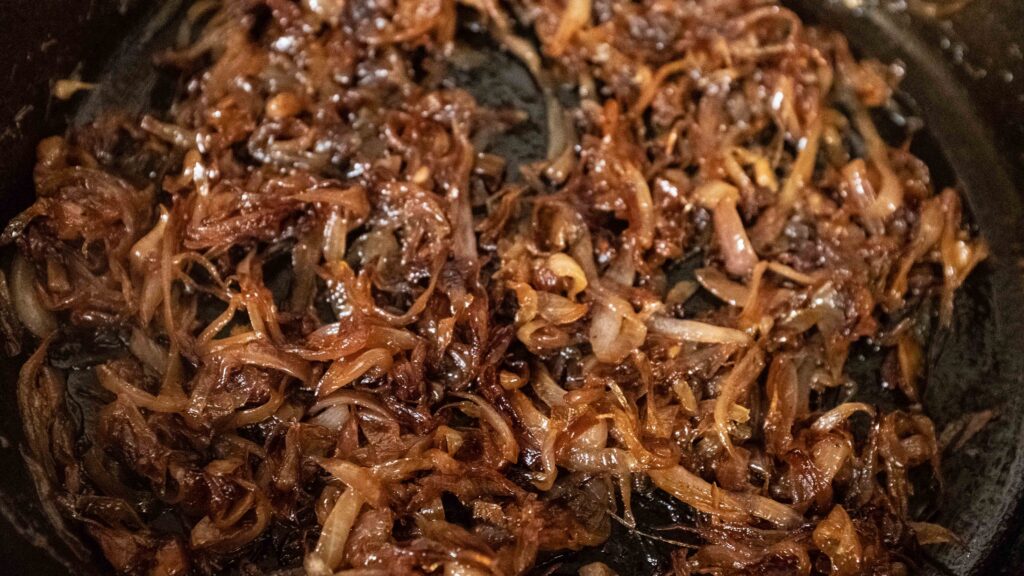
5 – Cook the onions for the next 30 minutes repeating the following sequence every 2-3 minutes; wait for the onions to start sticking to the pan, let them stick for 10 seconds or so (to lightly brown, but not fry), then add a tablespoon of water to the pan to deglaze it, and finally stir the onions and spread them out in the pan. The key to caramelising onions is to leave them be long enough to get some colour and brown, but not so long so that they fry or burn.
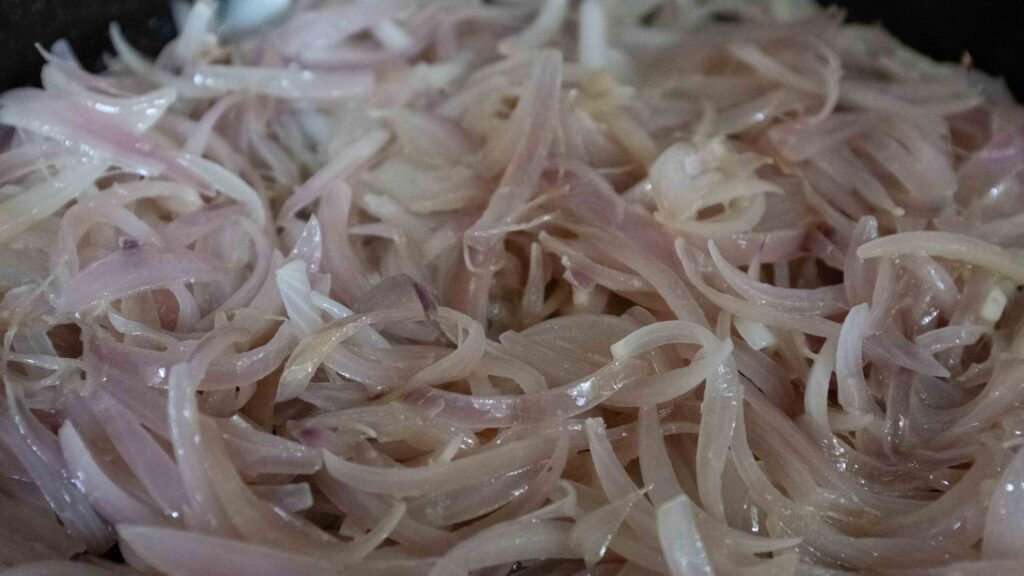
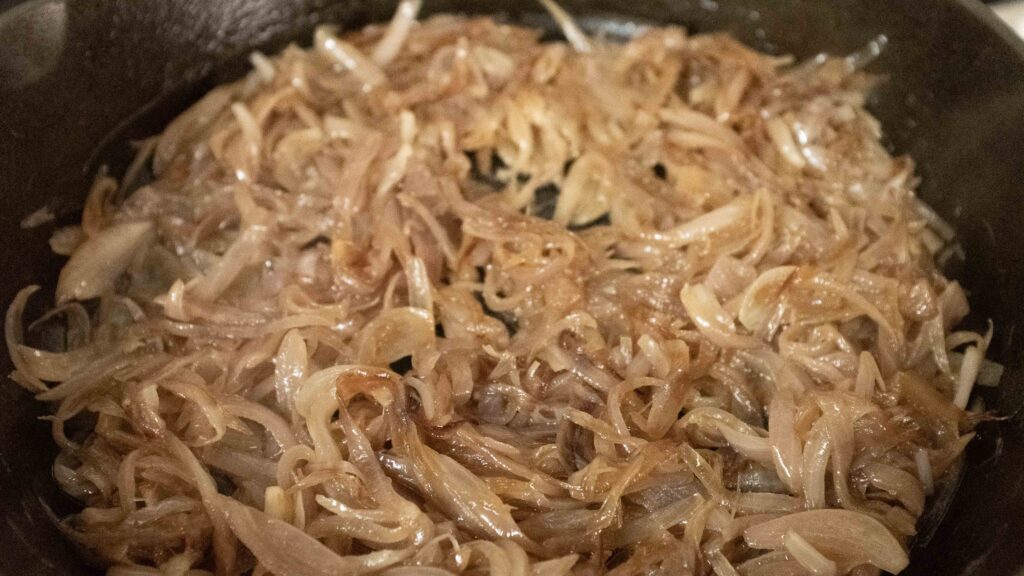
6 –After 30 minutes, stop adding water to the pan and continue cooking the onions for a further 30-40 minutes. From this point on, the onions will start to brown faster. As the onions lose more and more moisture while cooking down, you will need to scrape the pan every minute, instead of every 2-3 minutes. Continue to caramelise and scrape, caramelise and scrape, until the onions are a rich, brown colour and fully glossy and translucent.
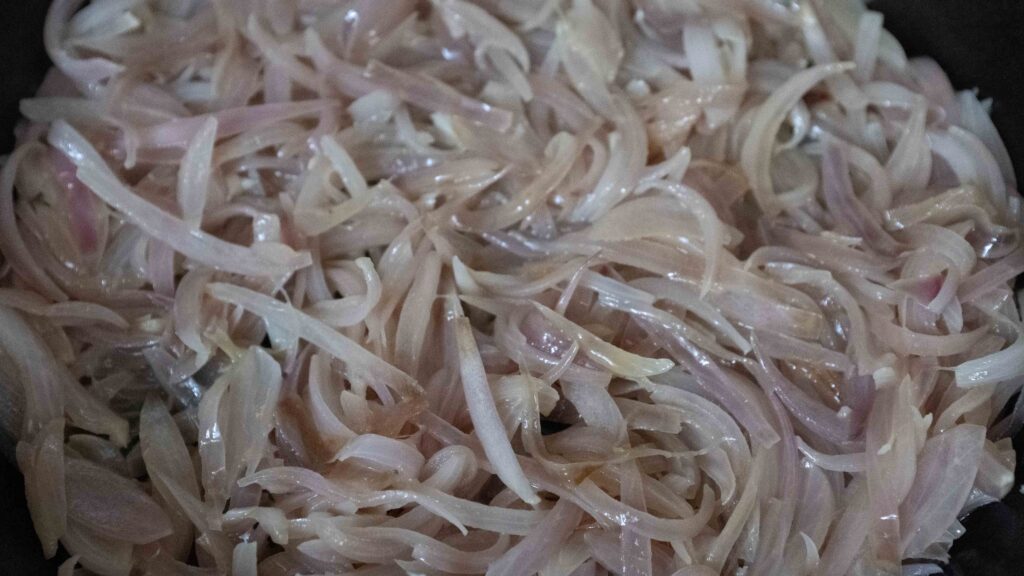
7 – When the onions are completely caramelised (my entire cook took 75 minutes from start to finish), turn off the stove and add the red wine vinegar to the pan. This will deglaze it as well as add a fruity-sweet note to the onions. Add the black pepper and mix.
8 – Set the onions aside until ready to use. They will need to be gently warmed before serving.
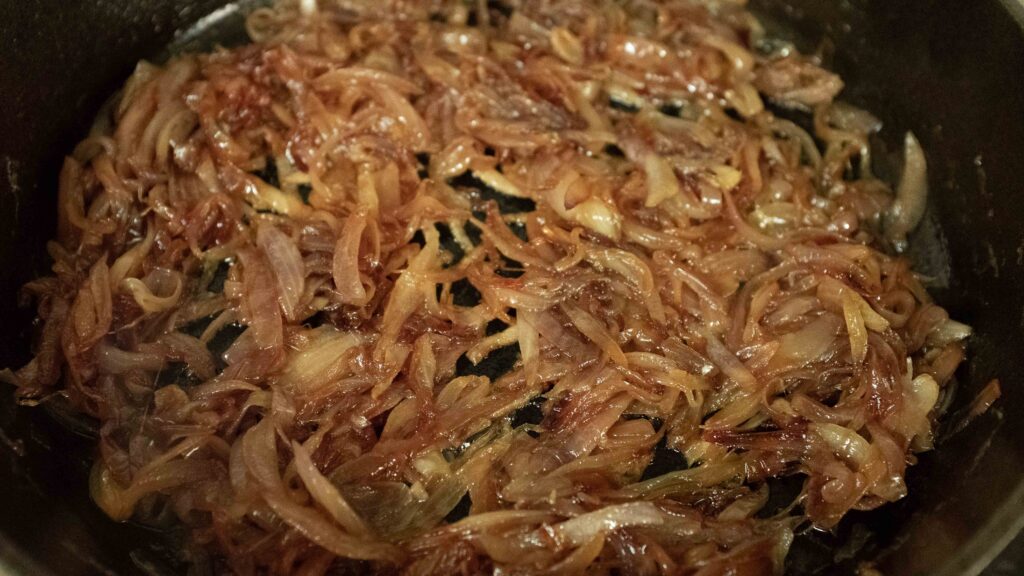
Caramelised onions can be prepared in advance and stored in an airtight container in the fridge for 2-3 days. They taste amazing cold and hot, and I like to like to make a big batch and keep it ready for anytime grilled cheese sandwiches! Caramelised onions are not just brown-looking onions. While fried onions taste sweet and get their brown colour fairly quickly (caused by actual caramelisation of sugars at high heat), caramelised onions get their colour and flavour by way of the ‘Maillard reaction’, which is a gradual browning caused by proteins reacting with sugars. See this to know more. To make proper caramelised onions, you must cook them low and slow to break down the sugars, soften them, and bring out their savoury, umami notes. How long this will take depends on the type of pan you use (non-stick will take aaaaaages).
Stage 3: sautéed peas
Ingredients
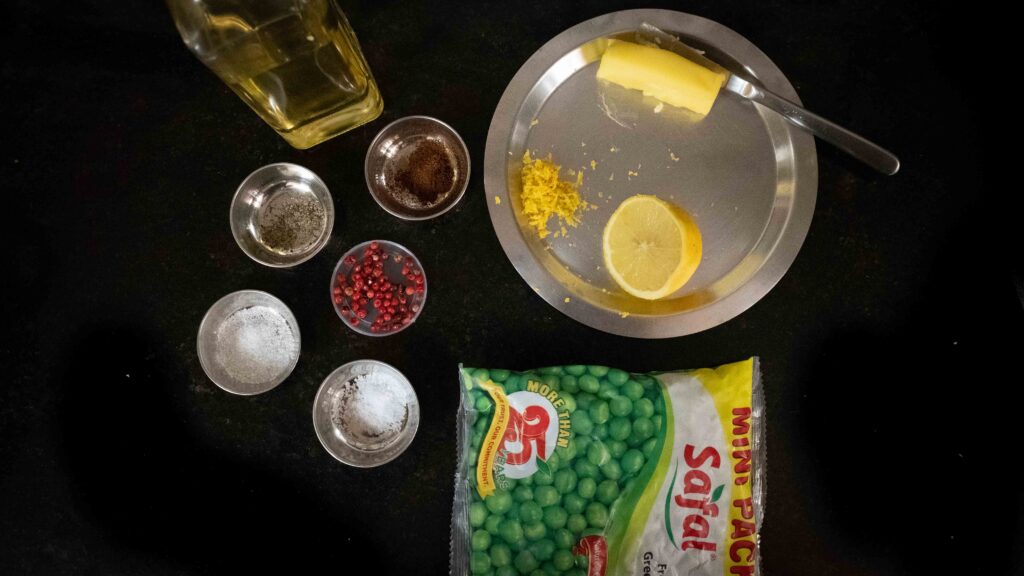
1. 200 gm frozen peas
2. 1 tsp cooking olive oil
3. 30 gm salted butter, cold
4. 1 tsp sugar
5. 2-3 tsp. freshly squeezed lemon juice according to taste
6. 1 tsp freshly grated lemon zest
7. ½ tsp salt
8. ½ tsp sweet paprika
9. ¼ tsp freshly cracked black pepper
10. 1 tsp whole pink peppercorns* like this
*Pink peppercorns are actually a variety of dried berry. And while they do pack some heat, their sweet, fruity flavour takes them closer to a fresh chilli than a dried peppercorn. Think of them as berries with a fiesty attitude. Their unexpected fruitiness plays well with cheese, which is why we’ve used them in this recipe.
Method
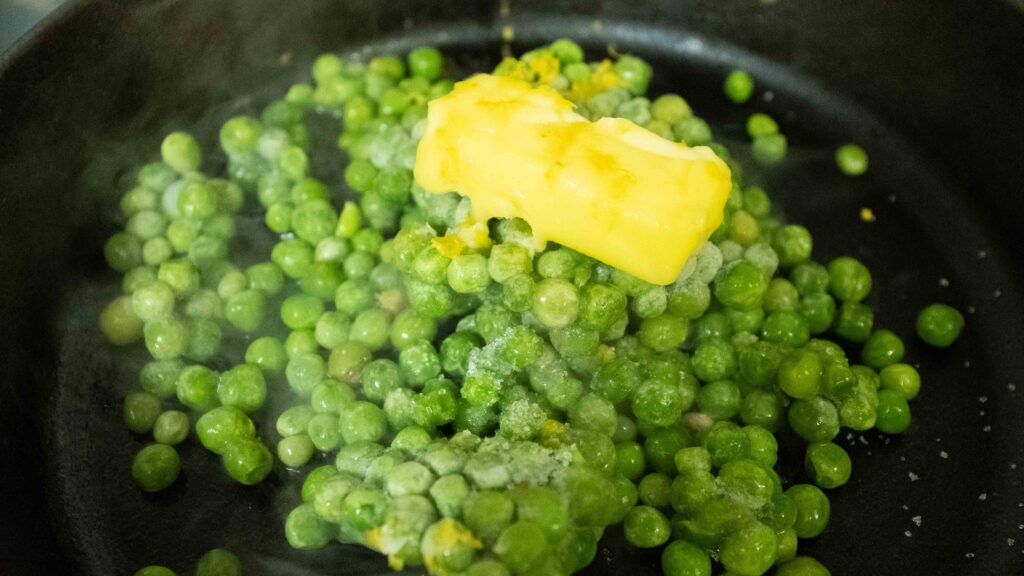
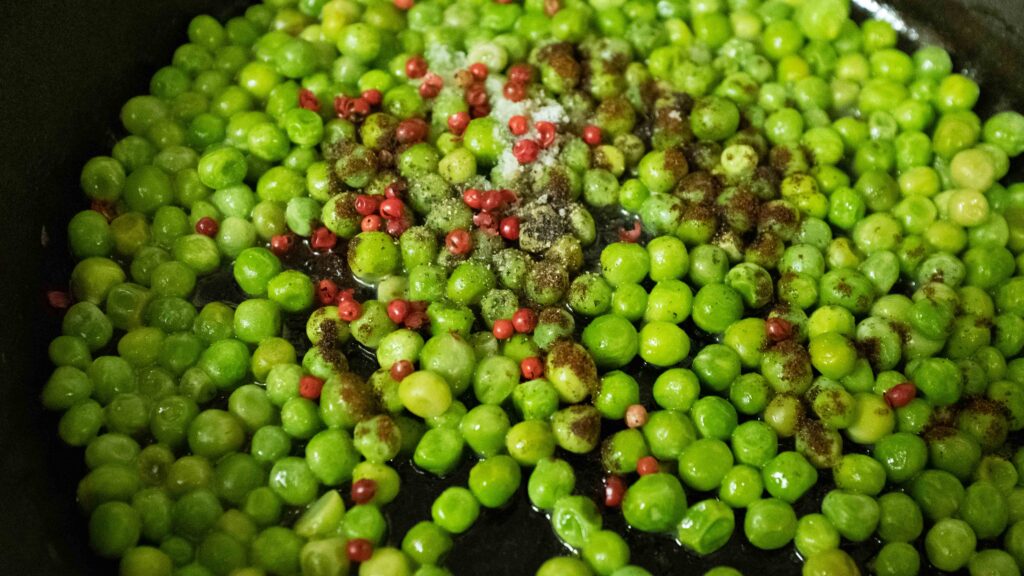
1 – Begin heating a wide, heavy-bottomed skillet (you guessed it, cast-iron) on the stove over medium heat until hot, and then add 1 teaspoon oil.
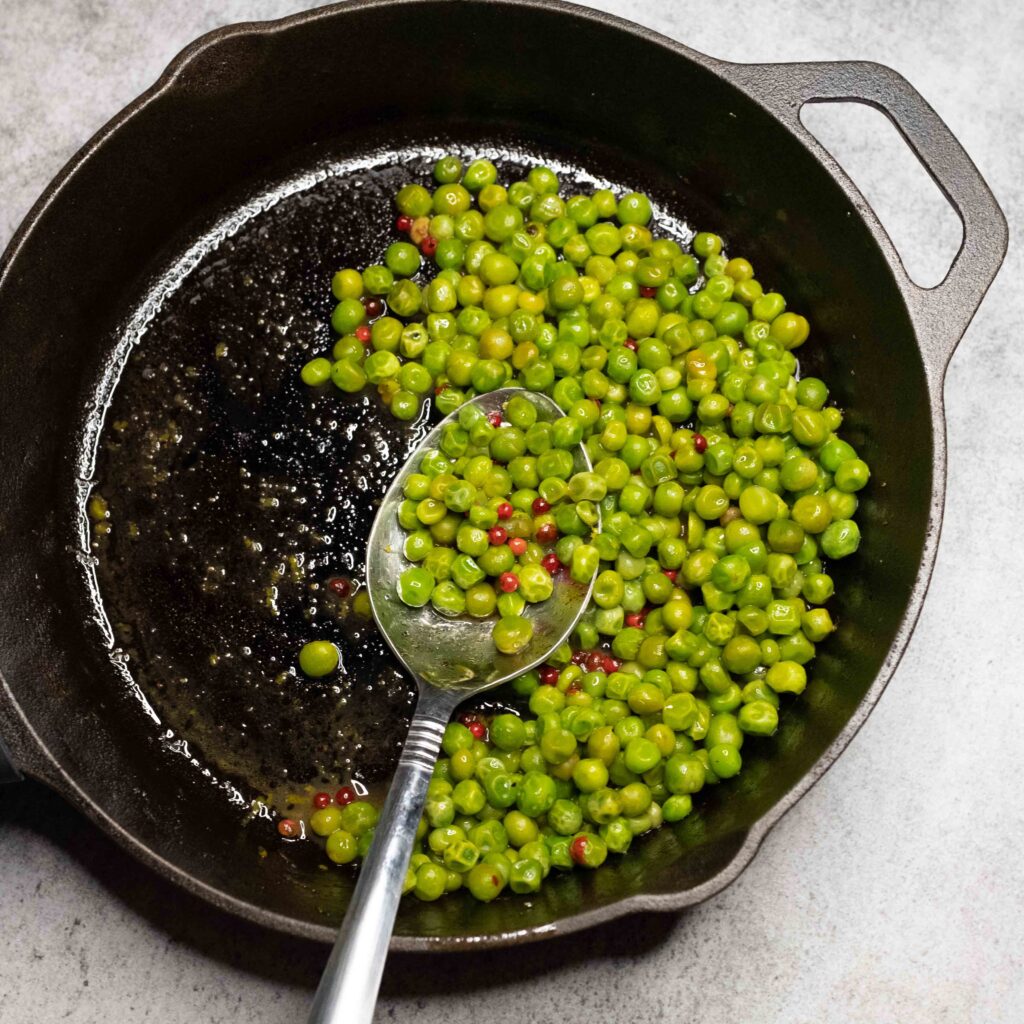
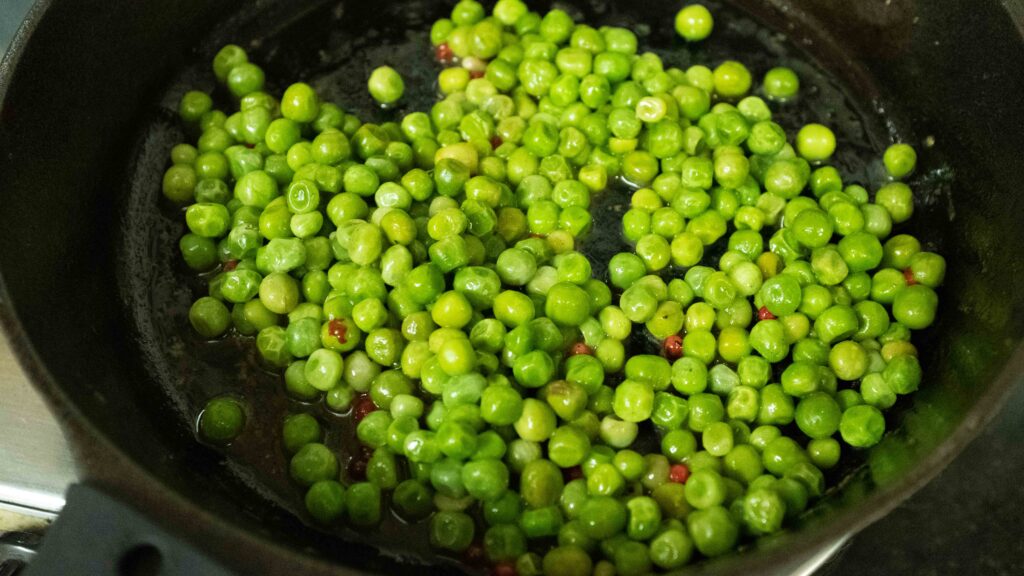
2 – Once the oil is shimmering, add the frozen peas, sugar, lemon juice lemon zest, and butter to the skillet and cook on medium heat until the butter has melted and the peas have defrosted and are heated through, about 2-3 minutes. Stir occasionally to evenly cook the peas.
3 – Turn off the heat and add the salt, paprika, black pepper, and pink peppercorns to the skillet. Toss together to combine. Set aside until ready to use. They will need to be gently warmed before serving.
When it comes to cooked peas, I prefer the taste and texture of packaged frozen peas over fresh peas—which take longer to cook and often turn out dry and mealy. Frozen peas are harvested and flash-frozen during peak ripeness, so they tend to be uniformly sweet. In some instances, frozen peas are first flash-steamed before they’re frozen—they’re essentially ready to eat—so you only need to cook them until they’re fully thawed and just warmed through to maintain their slight bounce and vibrant colour.
Stage 4: baked camembert
Ingredients
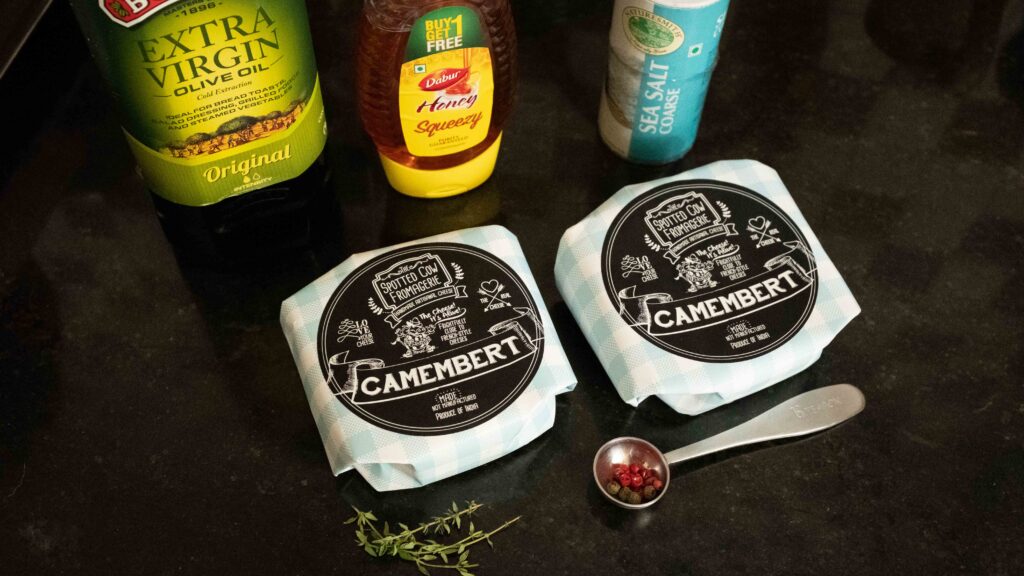
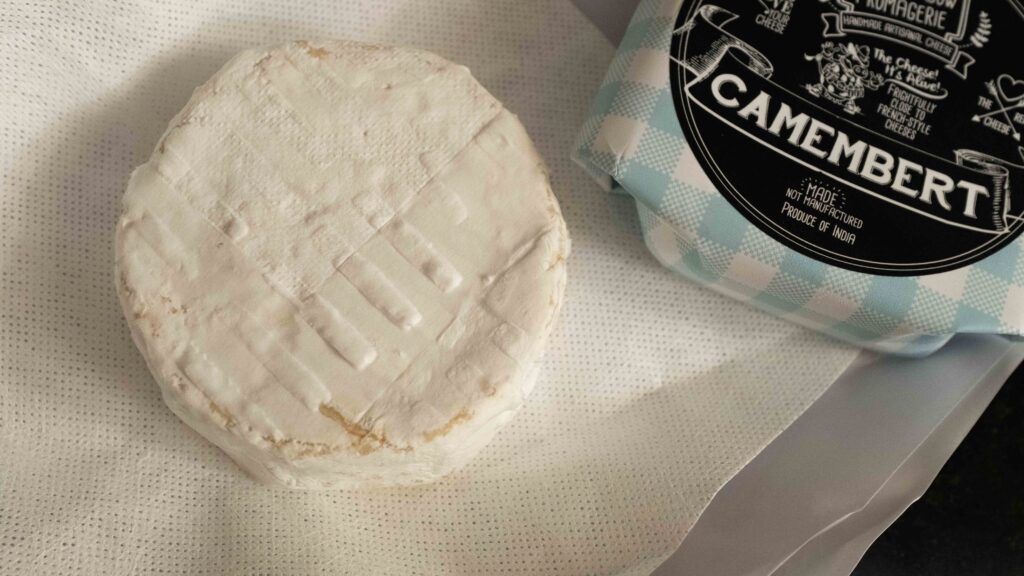
1. 2 x 200gm wheels of Camembert cheese* like this or 400 gm equivalent
2. 2 tbsp. extra virgin olive oil (divided)
3. 2 tbsp. honey (divided)
4. 2 x 10-cm sprigs of thyme
5. 1/2 tsp coarse sea salt (divided)
6. 12 pink peppercorns like this divided
7. 4 green peppercorns like this or 1/16 tsp freshly cracked black pepper, divided
As mentioned before, pink peppercorns are actually a variety of dried berry, so their spicy-fruitiness goes very well with cheese. Do try to get your hands on it! Green peppercorns are simply under-ripe black peppercorns. They have a mild peppery flavour and a bright aroma. Feel free to substitute them with black peppercorns. *We used this locally made, locally sold (made in Mumbai) Camembert style cheese, which only sells them in 200 gm wheels. Feel free to use whichever brand of cheese you can source. If you use a 400 gm wheel, add all the ingredients to that wheel without dividing them up.
Method
1 – Place a baking tray in the middle rack of your oven and begin preheating your oven to 180OC. 15 minutes should suffice.
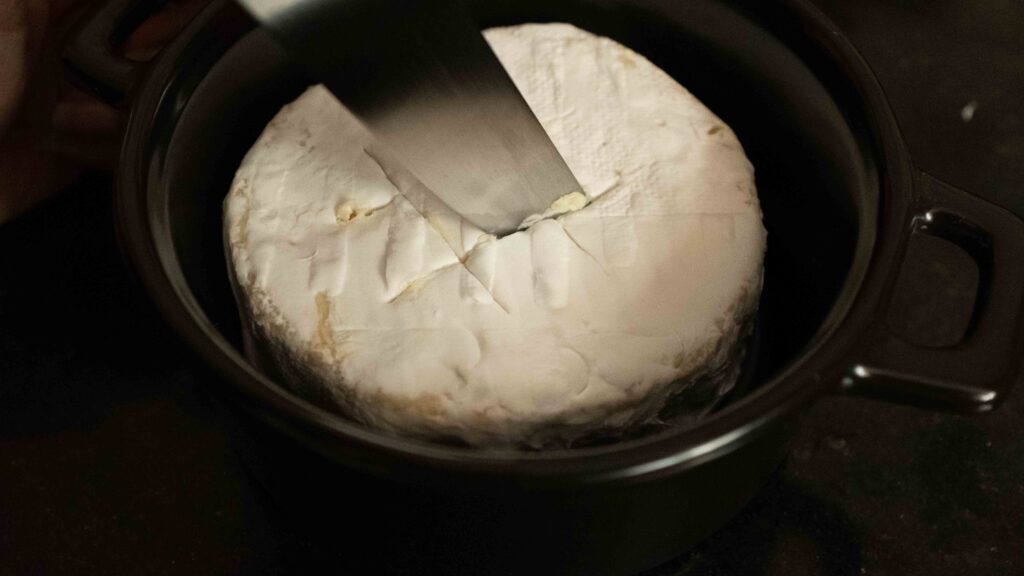
2 – Remove any plastic or paper packaging and place the wheels of Camembert into individual baking pots, that are just a tiny bit bigger than the wheels themselves. Don’t use wide or flat containers, else the cheese will flatten out while baking and you want them to hold their shape. I used these super cute baking pots for each 200 gm wheel.
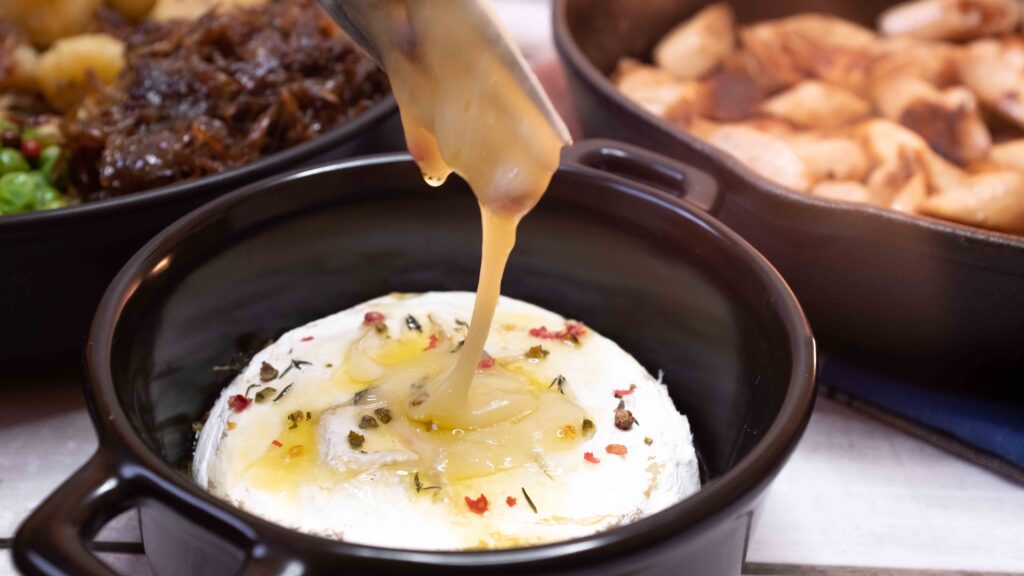
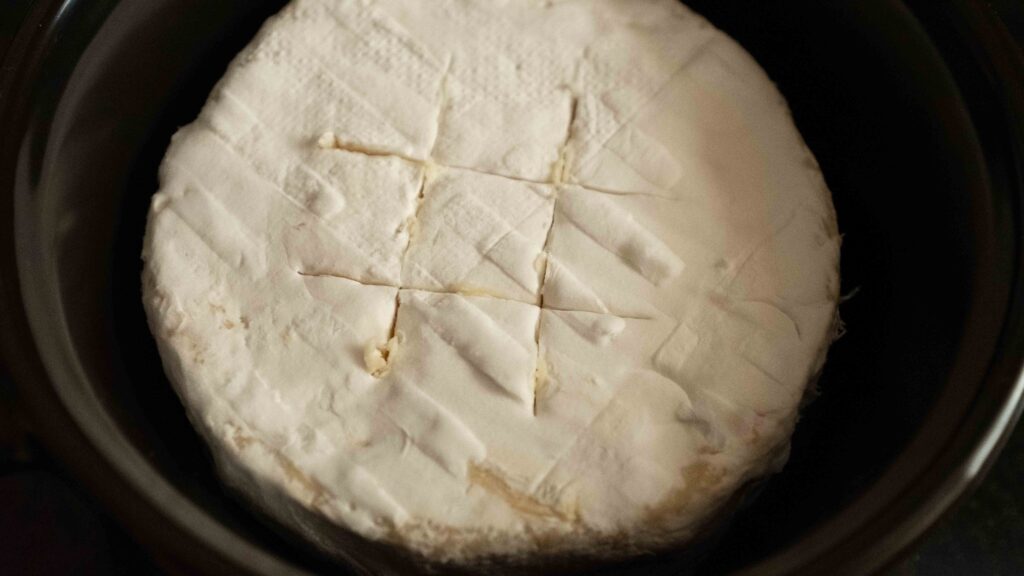
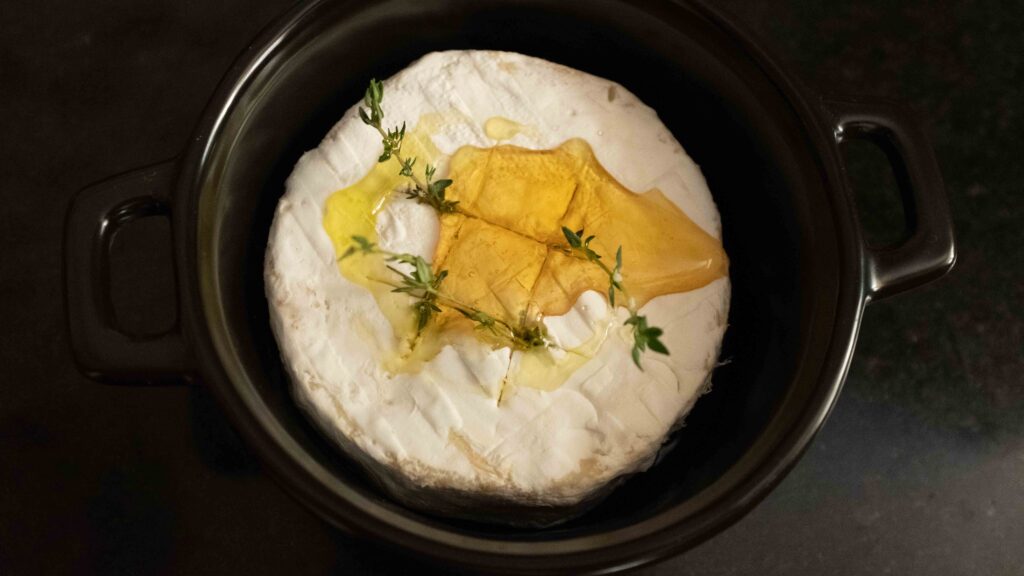
3 – Using a sharp knife, score a crosshatch pattern (think tic-tac-toe) on the top-side of each rind of cheese.
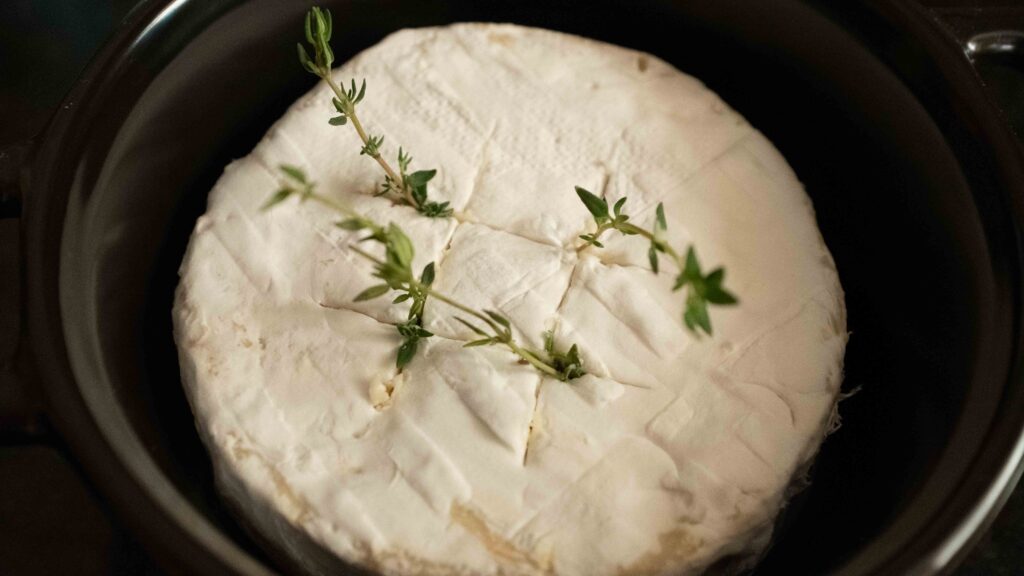
4 – Cut the sprigs of thyme into fours and insert them into the crosshatch cuts. Then drizzle the honey and extra virgin olive oil onto the crosshatch pattern.
5 – Place the pots of Camembert on the pre-heated tray inside the oven and bake them for 12 minutes at 180OC. When they’re ready, the wheels of camembert will puff up, feel soft under the rind, and jiggle like jelly when you jostle them.
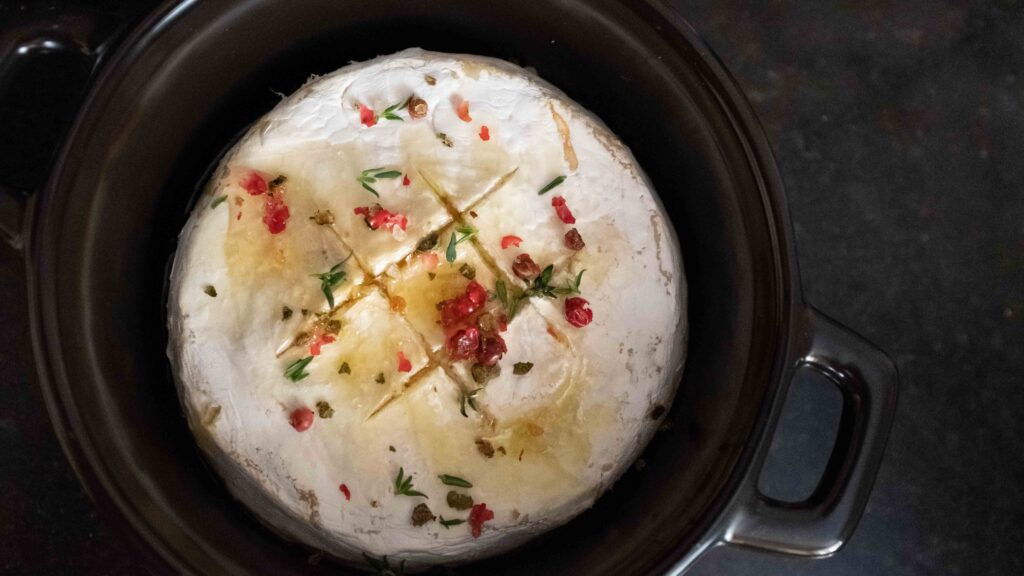
6 – While they’re baking, crush your peppercorns. Pink peppercorns are fragile and cannot be ground in a regular pepper mill. Use a knife or the back of a spoon to squish them. Green peppercorns can be pounded in a mortar and pestle. Proceed with Stage 5 so that everything is ready to serve at the same time.
7 – As soon as they’re baked, take the pots out of the oven, and immediately sprinkle their tops with the coarse salt, and crushed pink and green peppercorns. They should be served right away while hot, molten, and oozy. If you’re not ready to serve everything together just yet, keep them in the hot oven to stay oozy.
The next time you stress about making a gravy or sauce to serve with your meat and veg, consider a baked cheese into which stuff can be dunked! If you use a 400 gm wheel, up the bake time to 14-15 minutes. Keep an eye on it and take care not to overbake it, as it goes from molten and creamy to hard, and there’s no returning from that. While we used our baked camembert to dip our sausages and roast potatoes, it also pairs amazingly with so much more. Serve it hot with a variety of crudités, fruits, and breads.
Stage 5: fried sausages
Ingredients
1. 500 gm sausages* (2-3 sausages per serving)
2. 2.5 tbsp. cooking olive oil
* The wonderful team at Zorabian sent us these Chicken Cheese n Onion Sausages, around which we designed this entire recipe. The sausages came frozen, so as per the package instructions, we had to thaw them fully before using. Check out Zorabina’s complete range of products here.
Prep
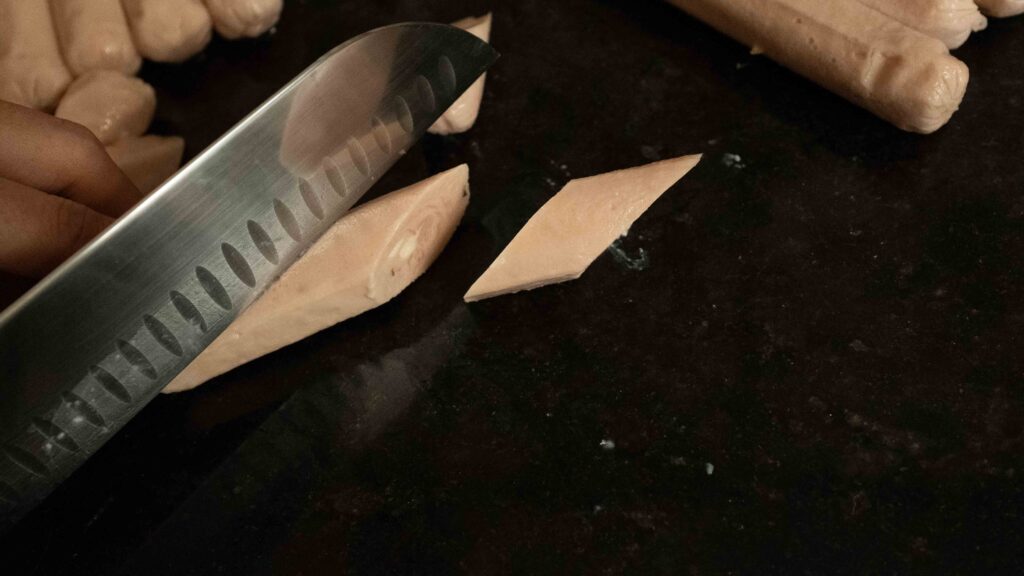
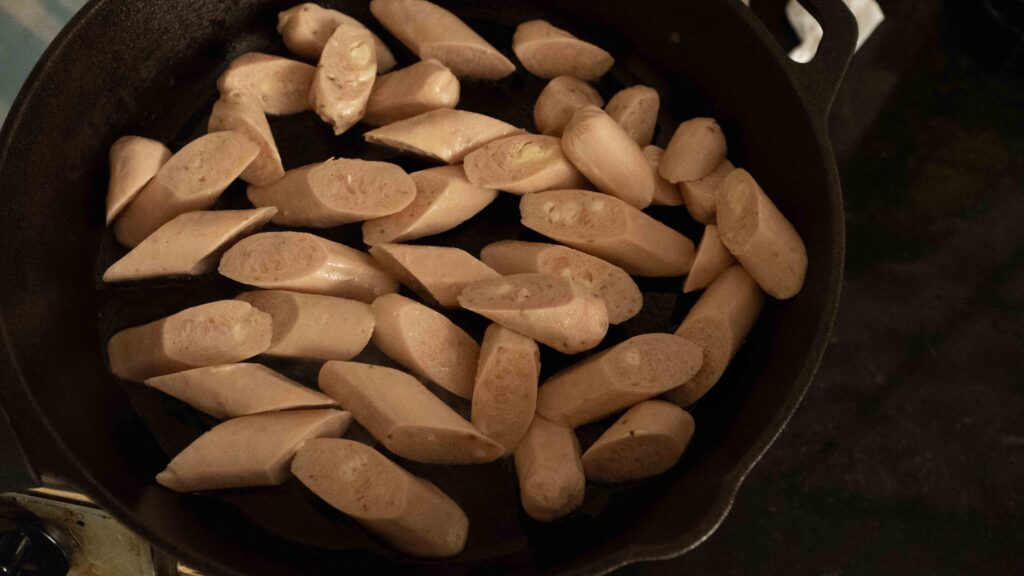
1 – Cut your sausages into 3 cm-wide rounds, on the dias.

Method
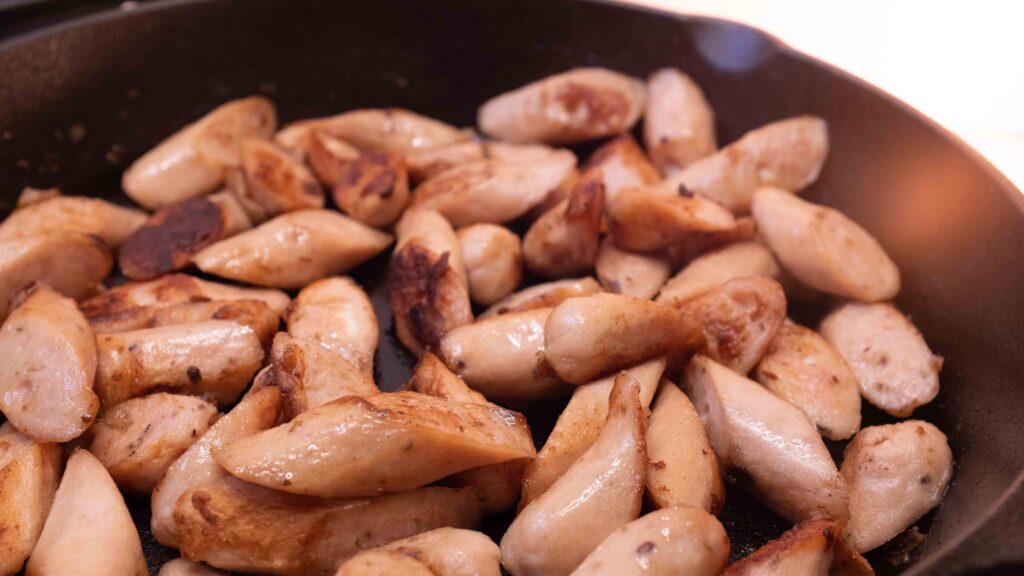
1 – Begin heating a wide, heavy-bottomed skillet (cast-iron for the win!) on the stove over medium heat until hot. Then add 2 tablespoons of oil.
2 – Add the cut sausages to the pan and fry them for 9-10 minutes until cooked through and evenly browned. Use this time to re-heat your roast potatoes, caramelised onions, and sautéed peas. Check on your baked Camembert, it should be ready by now!
3 – Serve all your hot components straight from stovetop and oven to table with some big fat red grapes on the side to balance out all the salty elements. We like to serve this meal family-style with little tapas plates, so that everyone can help themselves and graze at will. Now eat!
While we have used pre-cooked chicken sausages in this recipe—a variety of fresh (raw) and processed sausages(pre-cooked/fermented/cured/smoked) will pair wonderfully with the rest of the elements in the dish. Try to find continental cheese sausages that mirror or complement the flavours used in the other components; anything with a little rosemary, thyme, garlic, and black pepper will work. Avoid sausages that contain Indian or Mexican spices and herbs, as their flavours will clash with everything else. Some sausages need to be cooked for a long time, some need to be removed from their casing before being cooked, some are better kept in their casing, whole. Depending on what sort of sausages you use (breakfast, frankfurter, cocktail etc), always follow the cooking instructions on the package. All the cooked elements are heavy and savoury, so you definitely need to add some fruit to counteract the fat and salt. Red grapes are perfect.