


Makes 8-10 servings.
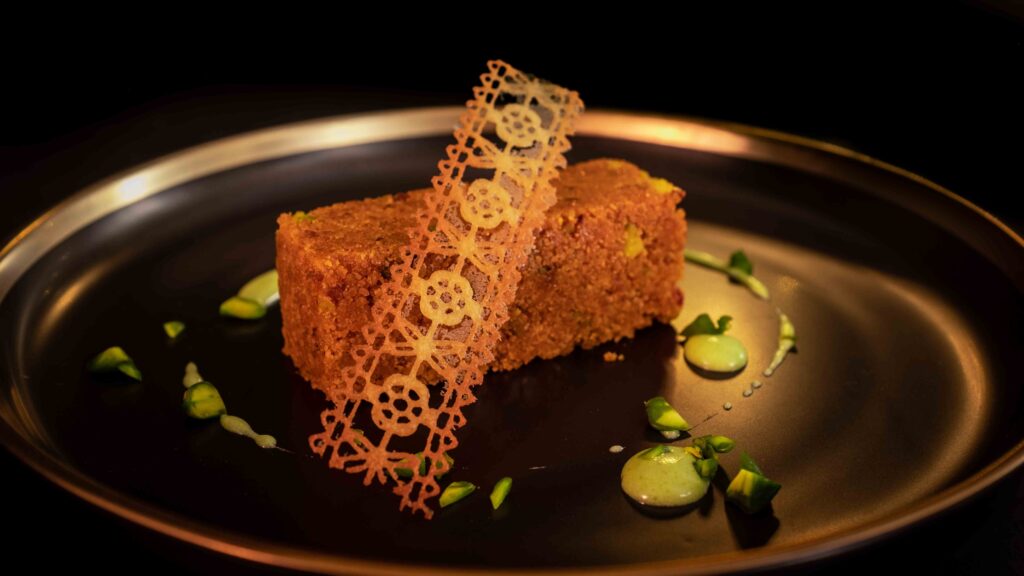
Gajar ka halwa (Indian carrot pudding) is to an Indian winter, what Pumpkin pie is to an American autumn. As soon as the weather cools down, the much-awaited, tender and sweet Delhi red carrot hits the market and the aroma of gajar ka halwa fills the air. My carrot pudding is a no-frills one, and uses just 5 ingredients. It’s wonderfully rich and extremely enjoyable solo—but paired with a creamy no-churn pistachio ice cream and crunchy cardamom lace tuile, this classic Diwali delight goes from popular festival fare to culinary haute couture.
At a glance
– This recipe comprises gajar ka halwa + pistachio ice cream + cardamom lace tuile.
– You will need a 3-litre heavy-bottomed cooking pot, a food processor, a hand mixer, an oven-safe silicon lace mould like this, baking parchment, and a baking tray.
– This recipe has been broken into 3 stages for ease and comprehension. Please read the entire recipe from start to finish before beginning.
Stage 1: gajar ka halwa
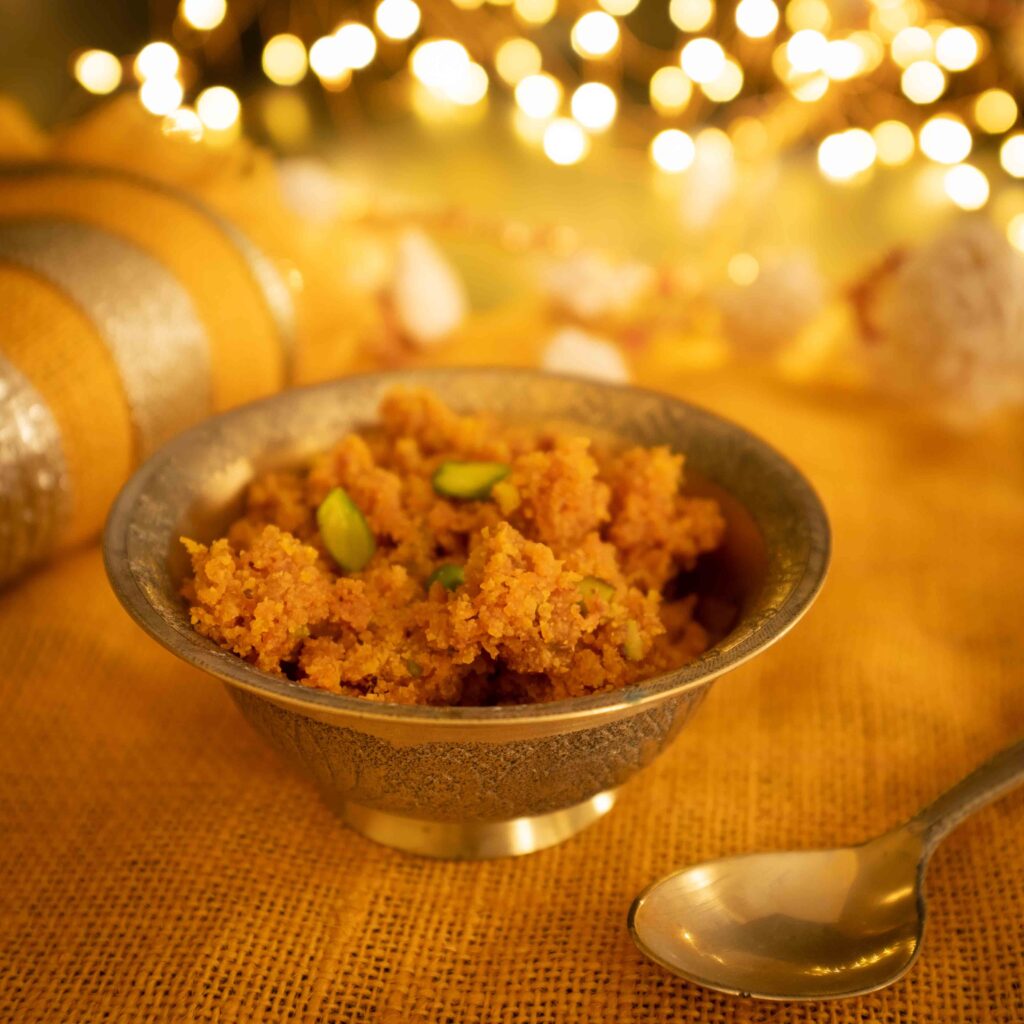
Made with just 5 ingredients, this is a variation of my mother in law’s recipe. She doesn’t use an ounce of spice, and the result is a super concentrated carrot flavour, that completely heroes the produce. Forget the khoya (evaporated milk solids) or condensed milk. For this recipe, all you need is just a little patience.
Ingredients
1. 800 gm (roughly 8) red Delhi carrots/desi gajar
2. 1 litre full fat milk
3. 100 gm ghee
4. 200 gm sugar
5. 30 gm (roughly ¼ cup) salted pistachios, roughly chopped
Since I made this dish at the end of October when red Delhi carrots had not hit the market yet, I used locally available orange carrots. If red Delhi carrots are not in season, feel free to use regular orange carrots to make this dish. You may have to add an extra tablespoon of sugar depending on the natural sweetness of the carrots. If you’re using unsalted pistachios, add 1/8 teaspoon salt to the recipe.
Prep
1 – Peel and then shred your carrots with a vegetable grater (small holes). Set aside.
Method
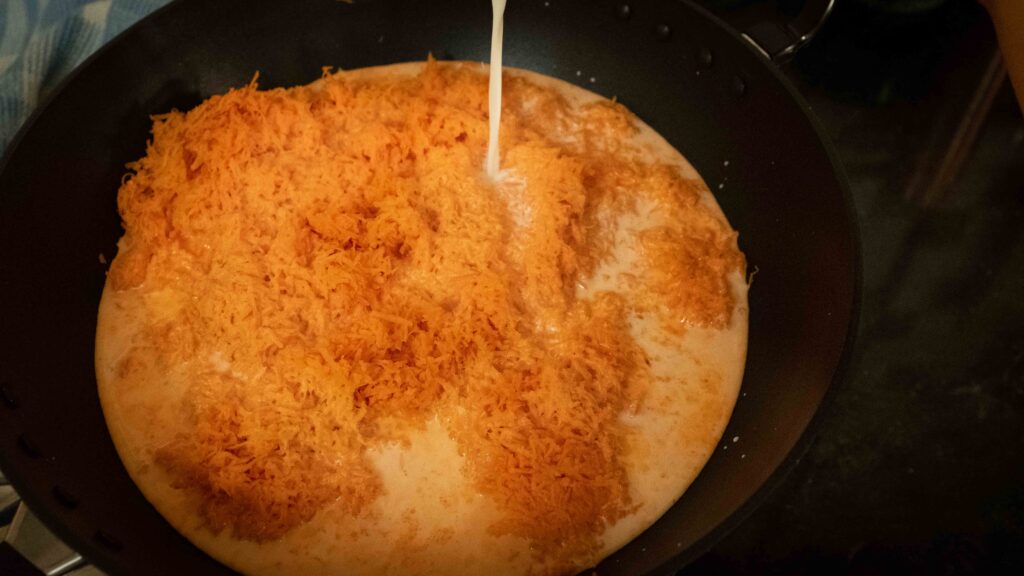
1 – Place a heavy bottom pot on your stove and add the grated carrots and the milk to the pot.
2 – Begin heating it on medium to bring the mixture to a boil and then lower the heat to minimum to maintain a simmer.
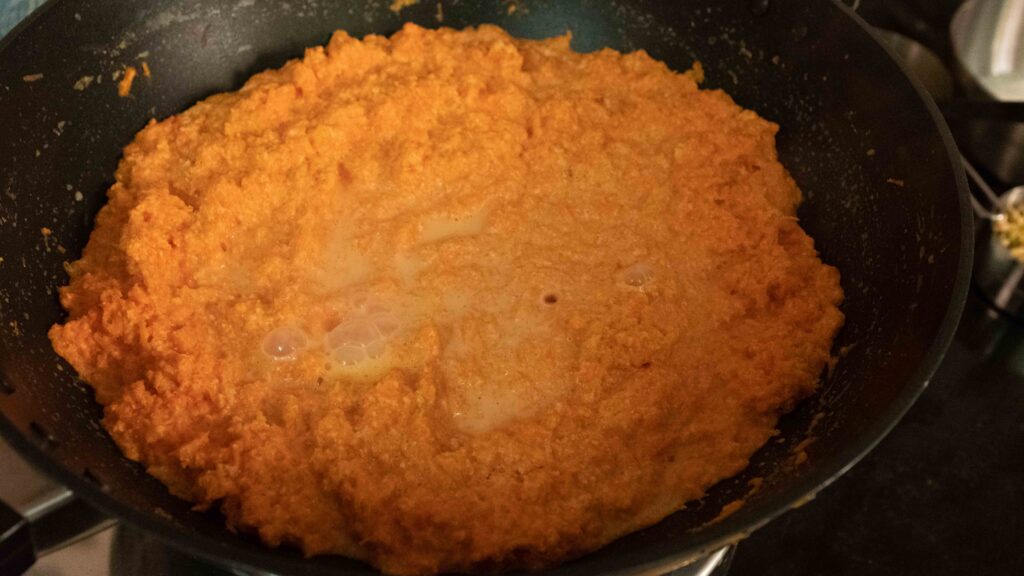
3 – Simmer the carrots in the milk for the next 50-60 minutes, stirring occasionally to prevent the milk from sticking to the bottom of the pot. Over the course of the cook, the milk will reduce and thicken.
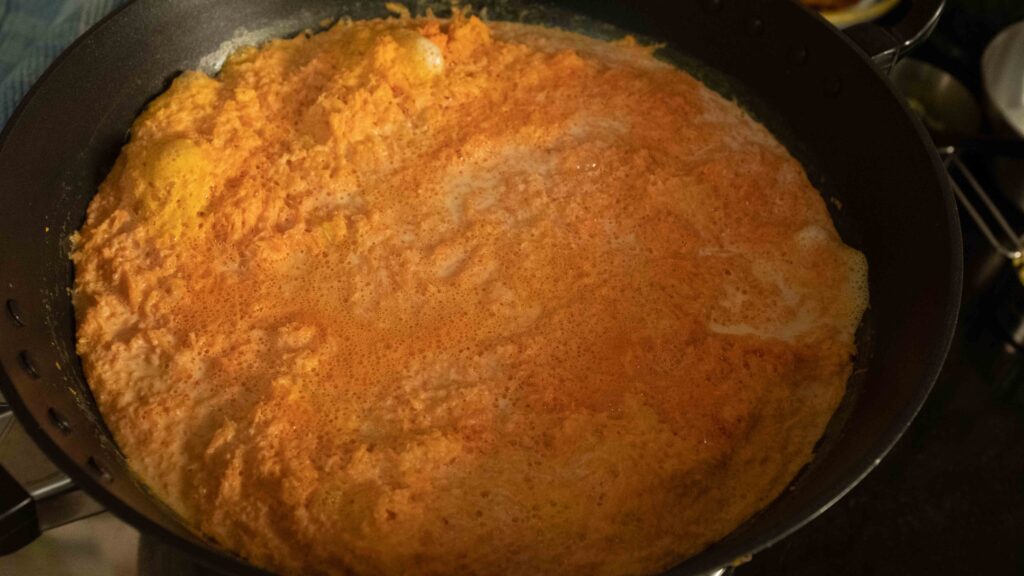
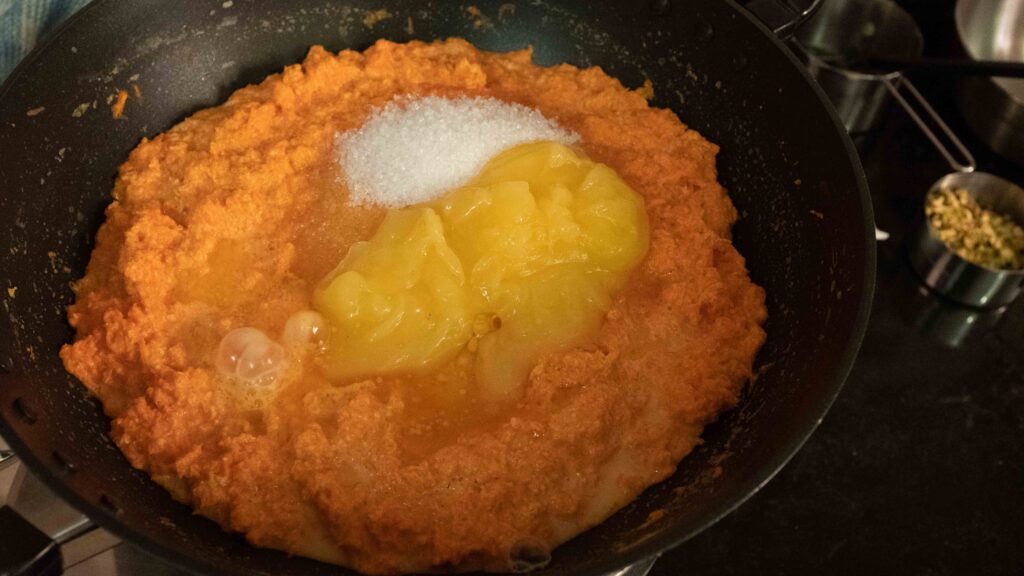
4 – When the milk has reduced by 90%, add the ghee and the sugar to the mixture. This will cause the mixture to become wet and loose once again. Stir well and continue to cook on low heat for the next 40-50 minutes, stirring frequently, until all the milk has reduced and the liquid content has evaporated. The mixture is very bubbly during this stage, so be careful.
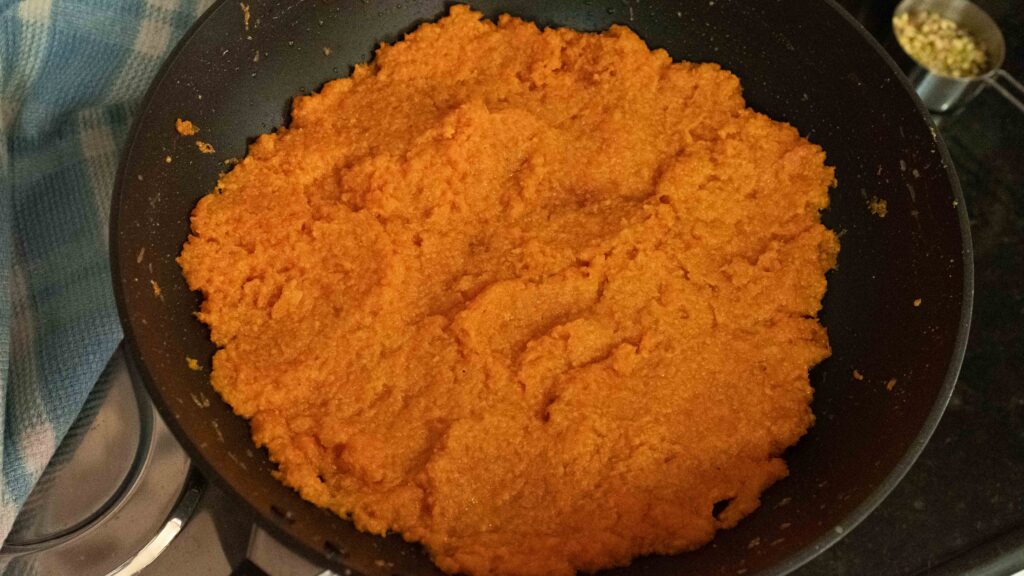
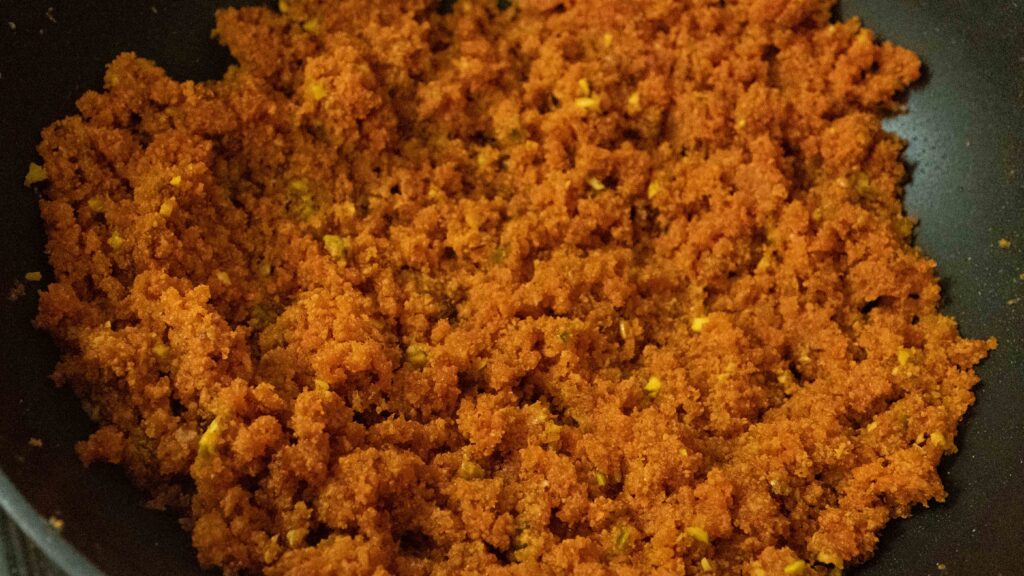
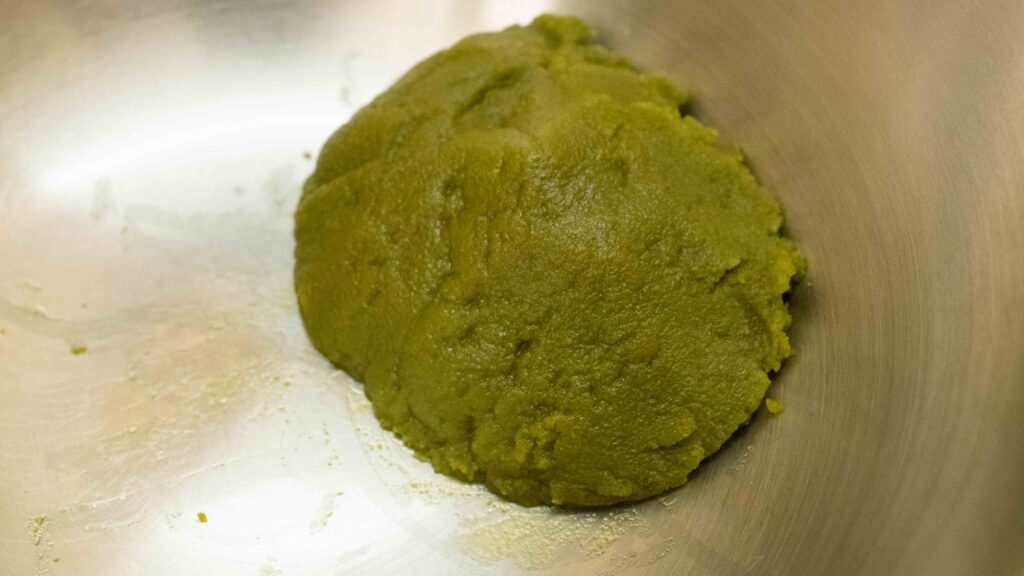
5 – Once the milk has completely reduced, the fats will separate, and the mixture will stop bubbling and start sizzling. You could do one of two things at this stage. If you like a wet halwa, add the chopped pistachios, fry the halwa for another 1-2 minutes and turn the heat off. Alternately, if you prefer a drier, crumbly halwa, fry the mixture on low heat for 15-20 minutes to caramelize the sugars. Take care not to burn the carrots by stirring frequently. Once you’re happy with the caramelisation, throw in your chopped pistachios and give the halwa a mix. Fry for another 1-2 minutes and then turn the heat off. This results in a halwa with richer, more nutty notes (we like it this way).
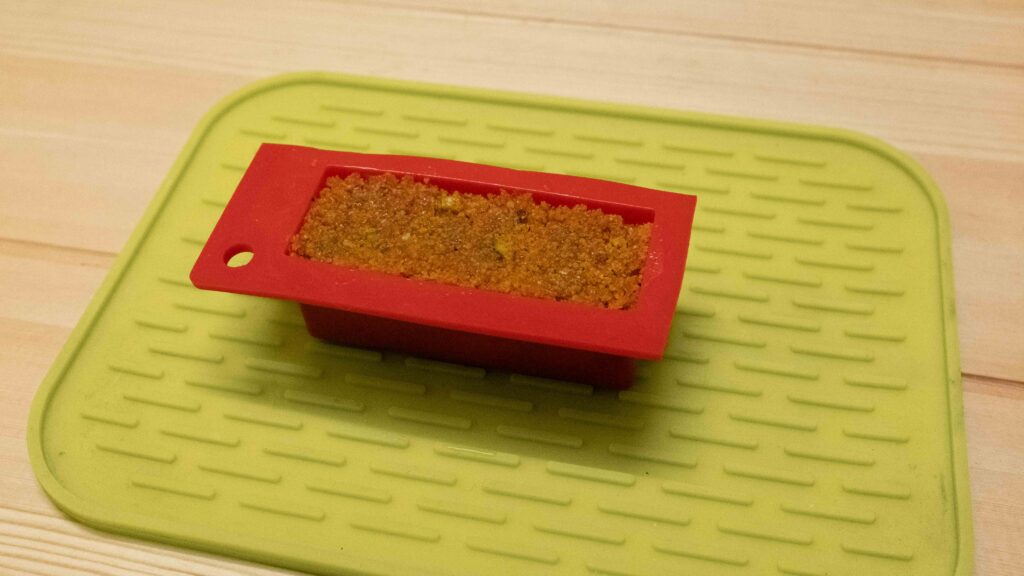
6 – Serve the gajar ka halwa hot, at room temperature or even cold. It’s delicious any which way! I spooned my gajar ka halwa into these silicon moulds and unmoulded them onto plates to get perfect rectangles of gajar ka halwa.

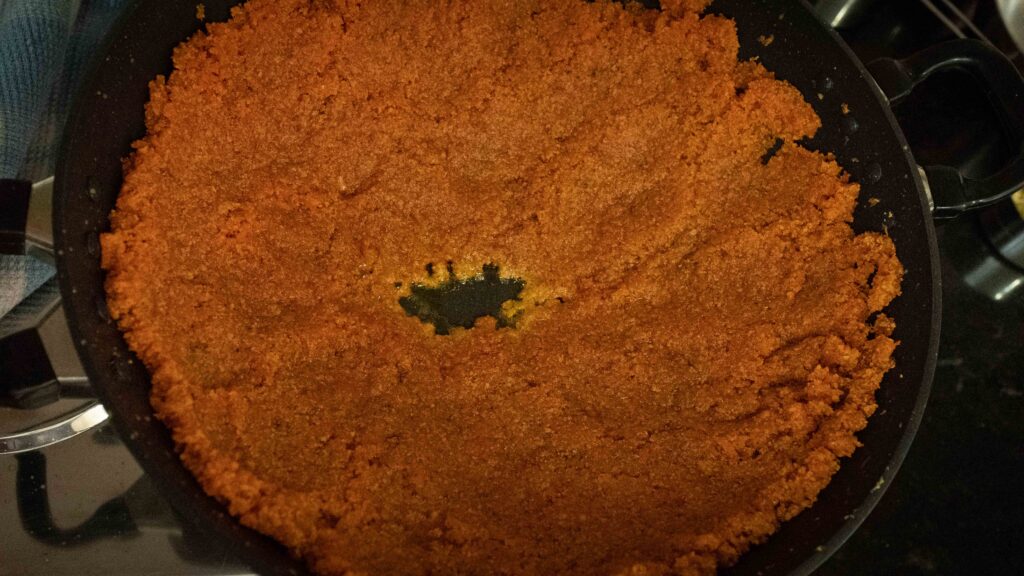

Cook-time depends on the type of vessel you use. Non-stick cookware lengthens the cook time, while stainless steel or anodized cookware shortens it. I made mine in a non-stick pan, so all timings are based on that. You can add cashews, raisins, almonds, or whatever dried fruits and nuts you like. I kept it very simple by using pistachios to mirror the pistachios in the ice cream. Store leftover halwa in the fridge for up to 2 weeks. It can be reheated in the microwave or served cold. It’s really is a matter of how you like it.
Stage 2: pistachio ice cream
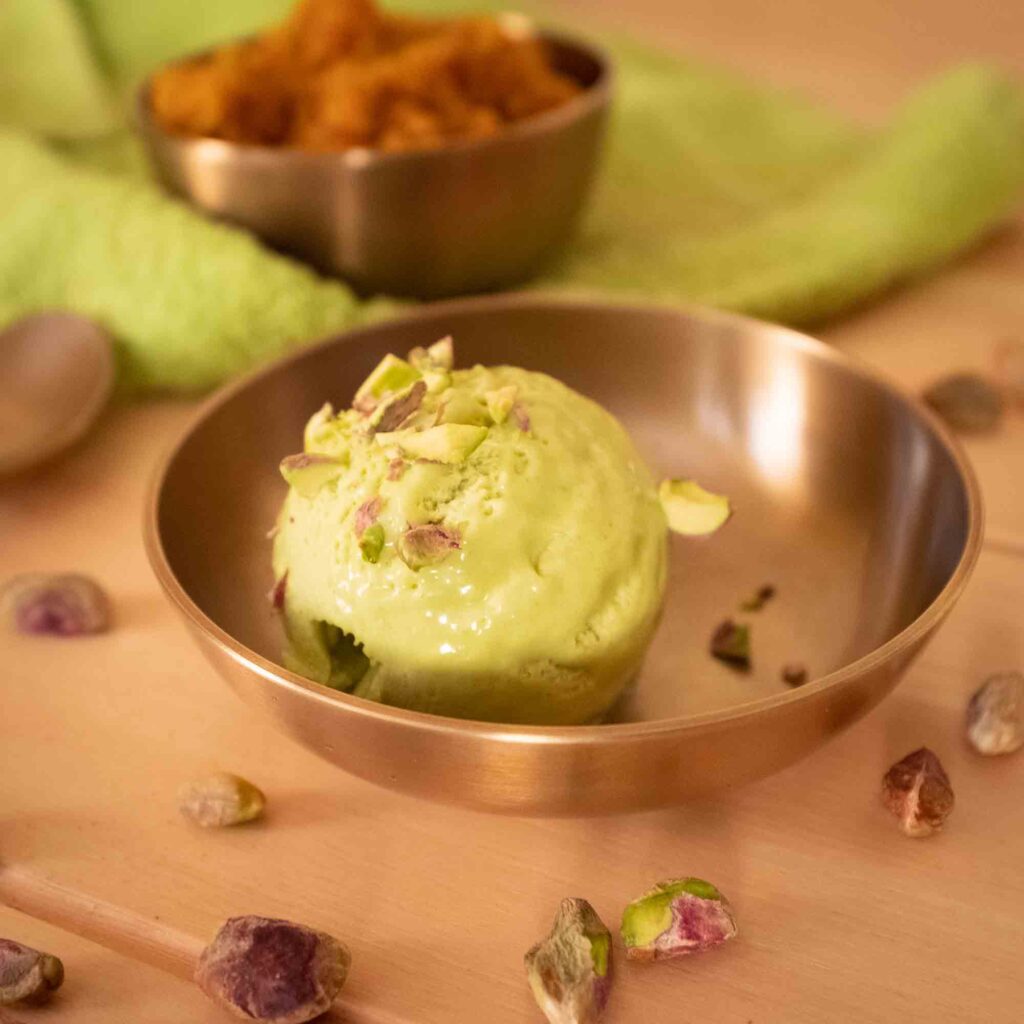
While gajar ka halwa is normally served hot with vanilla ice cream, I’ve opted to make this easy no eggs, no-churn pistachio ice cream to enhance the nutty notes in the carrot pudding. Lusciously creamy and thick, and in the prettiest pastel green—this one’s lighter than a kulfi but denser than regular ice cream.
Ingredients
1. 150 gm shelled pistachios
2. 400 gm sweetened condensed milk
3. 1 tsp pure vanilla extract
4. Optional; 1 drop green gel food colour like this
5. 1/8 tsp salt
6. 250 ml heavy whipping cream (chilled)
to blanch the pistachios:
1. 1 litre water for boiling
2. 1 litre ice water for rapid-cooling
Prep
1 – To start, bring 1 litre of plain water to a gentle boil.
2 – Add all the pistachio kernels to the simmering water and boil them for 1 minute.
3 – Remove the pistachios with a slotted spoon and immediately transfer them to a bowl of ice water.
4 – Let the pistachios sit in the chilled water for 1 minute and then strain them through a colander. Discard the water. This process of blanching and rapidly cooling the nuts will loosen their skins.
5 – To peel, pinch each nut and slip off the skin. See this for the technique.
6 – Spread the skinned pistachios on some kitchen paper to fully dry. Once they’re dry, store them in an airtight container in the fridge. Blanched pistachios ready, set aside.
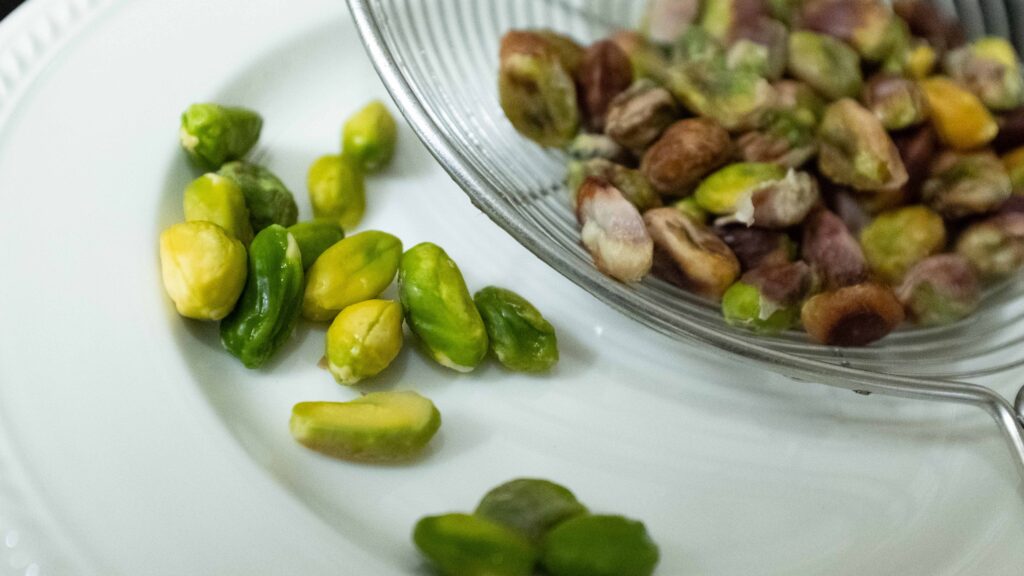
Do not skip this step, because it makes a huge difference! Removing the skins intensifies the pure pistachio flavour and eliminates any unsavoury mustiness from the skins. Plus, that intense green colour of a skinless pistachio is inimitable.
Method
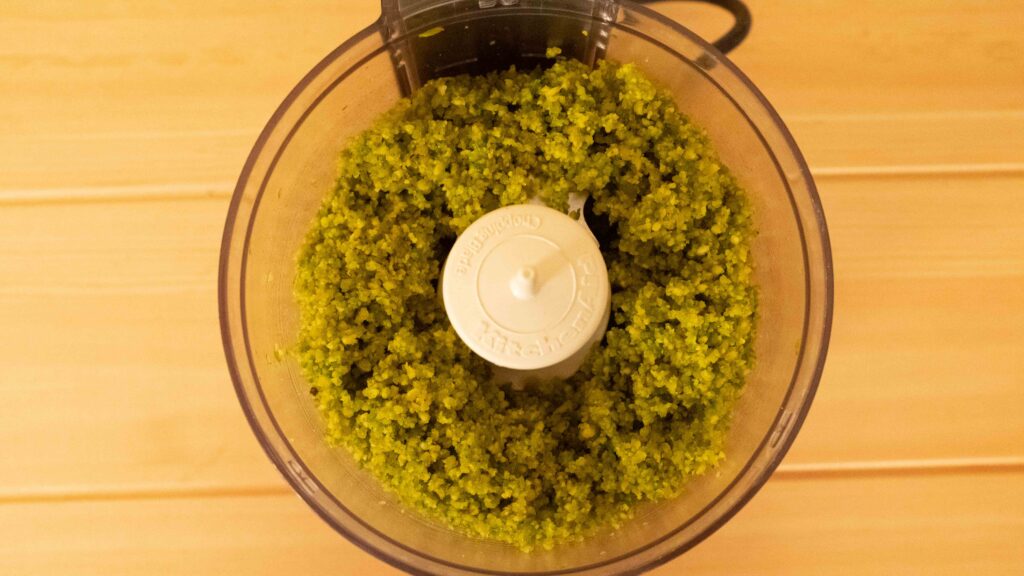
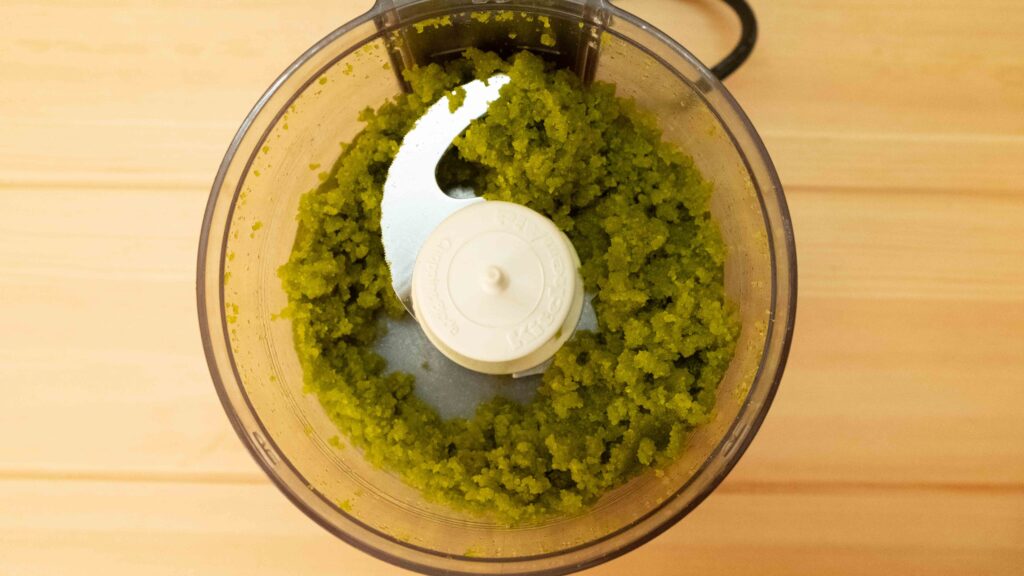
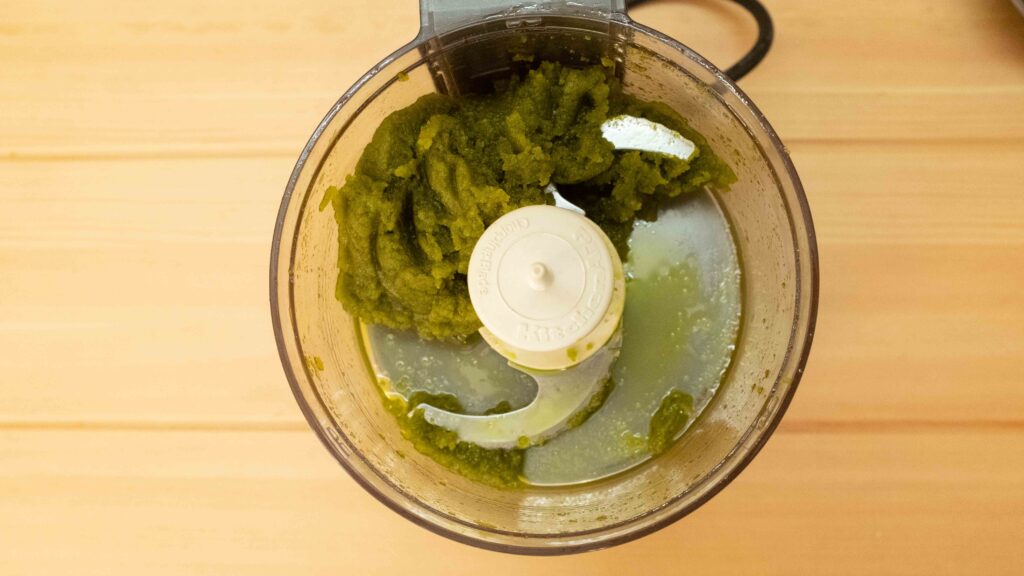
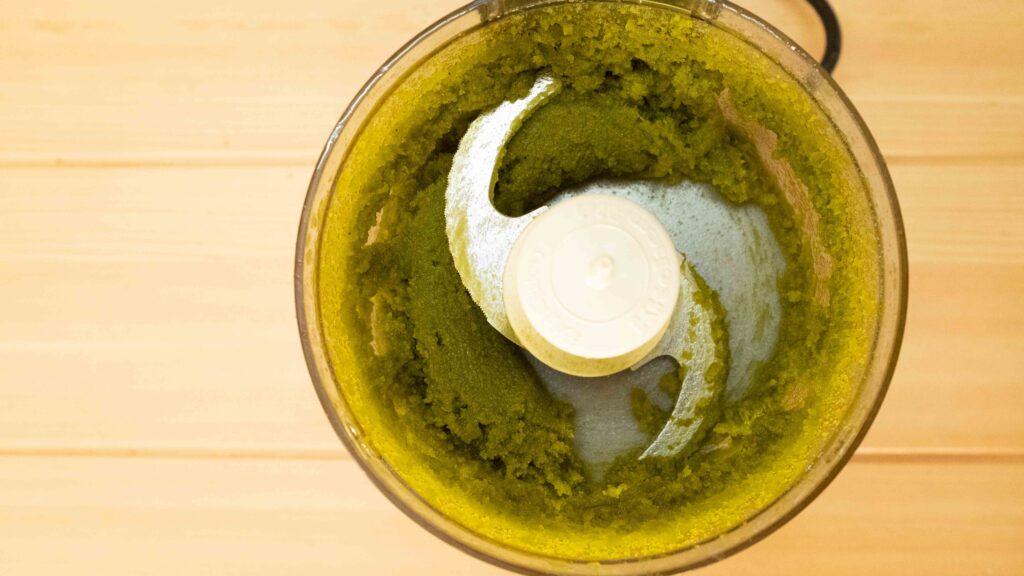
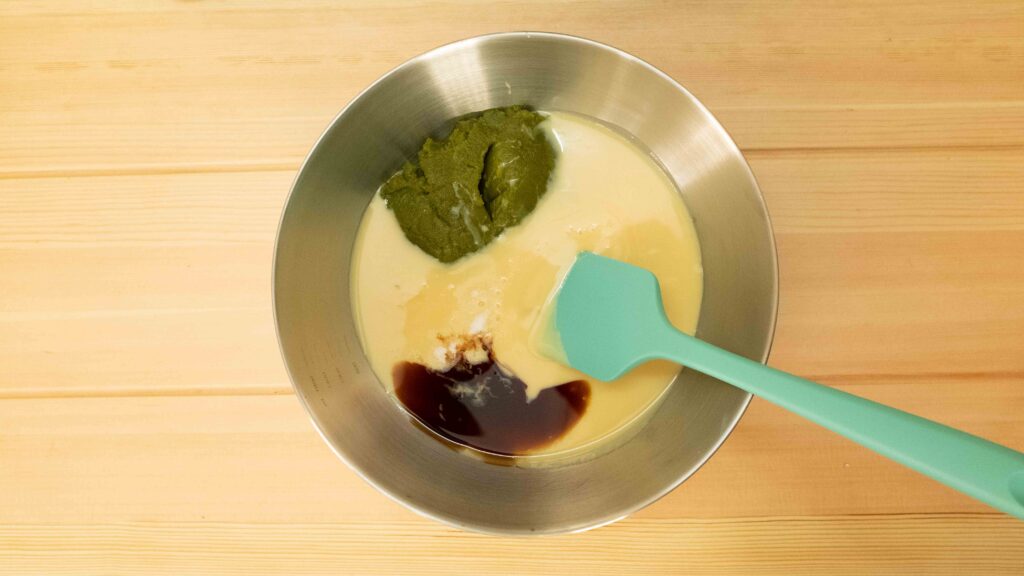
1 – To the jar of a food processor fitted with the blade attachment, add the blanched pistachios. Process until a smooth paste forms. At first, the mixture will be crumbly, then it will begin to come together in wet clumps, then the oils will start to separate and you will get an oily paste. Keep processing until the oils re-emulsify and a you have a smooth paste (takes anywhere from 5-20 mins depending on how powerful your processor is). 150 gm or roughly 1 cup blanched pistachios yields about ¾ cup pistachio paste. You will need all of it to make the ice cream.
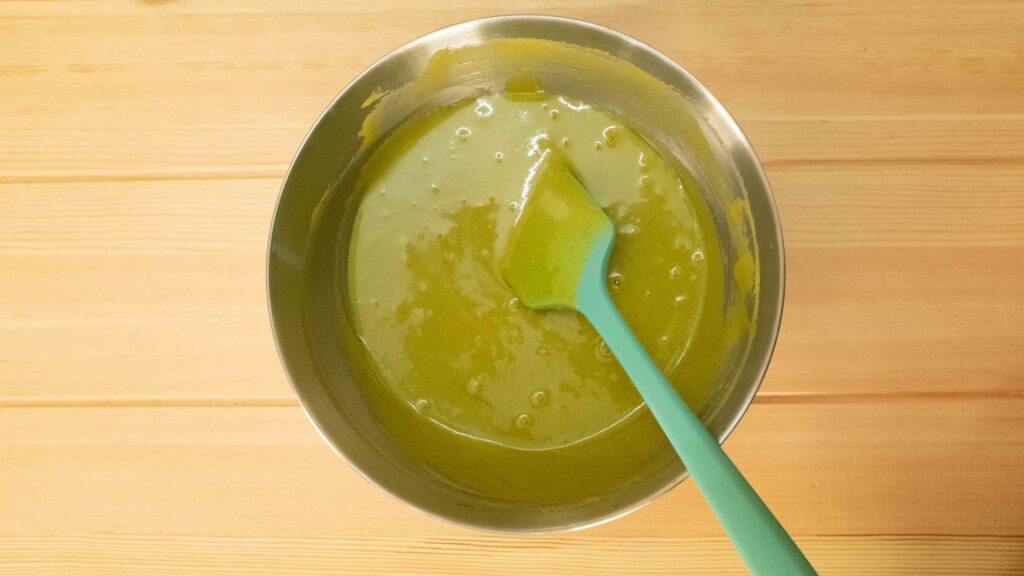
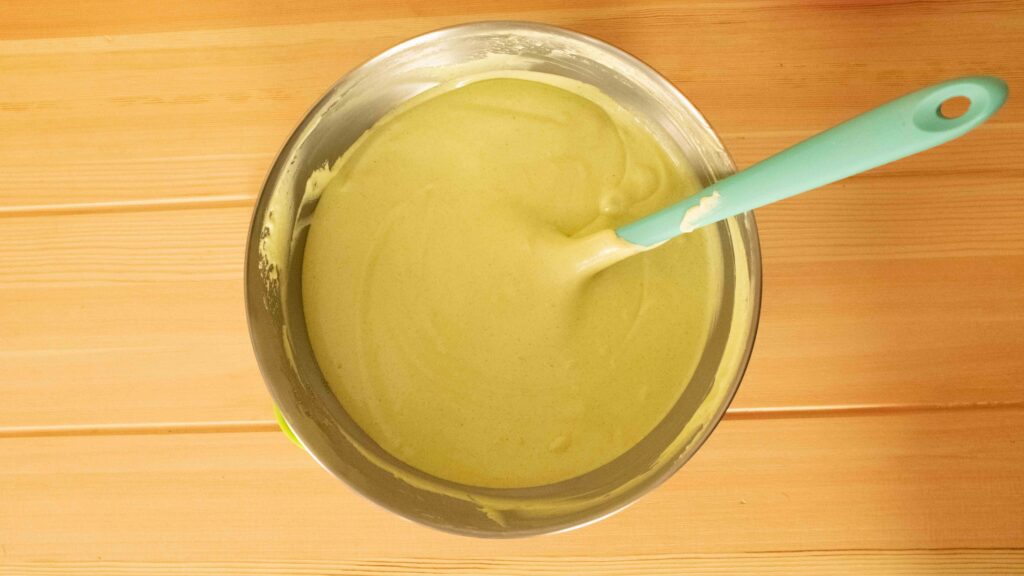
2 – In a large mixing bowl, combine the sweetened condensed milk, the pistachio paste, vanilla extract, and salt. You can add the green food colouring at this stage. I added 1 drop. Stir until evenly blended.
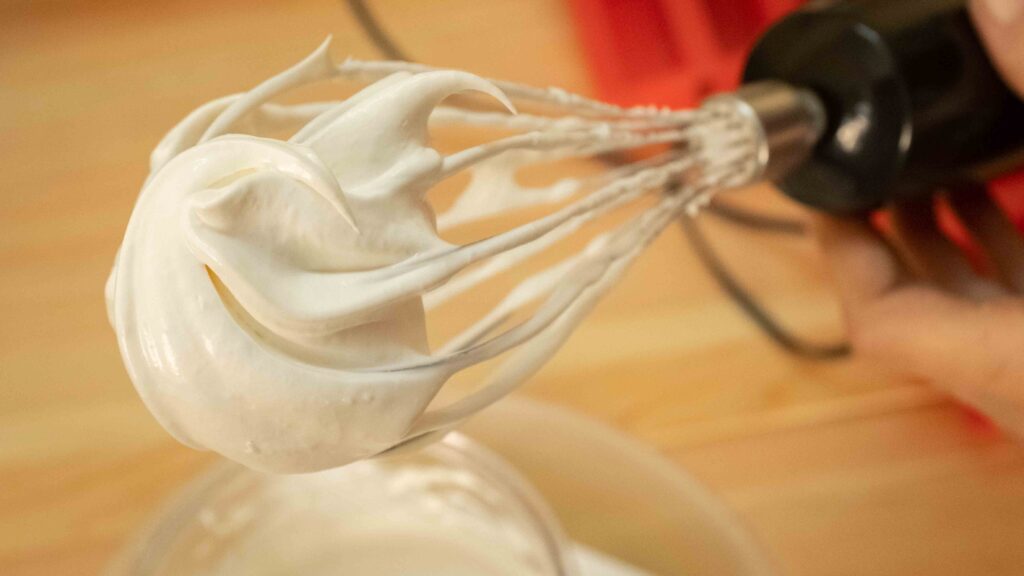
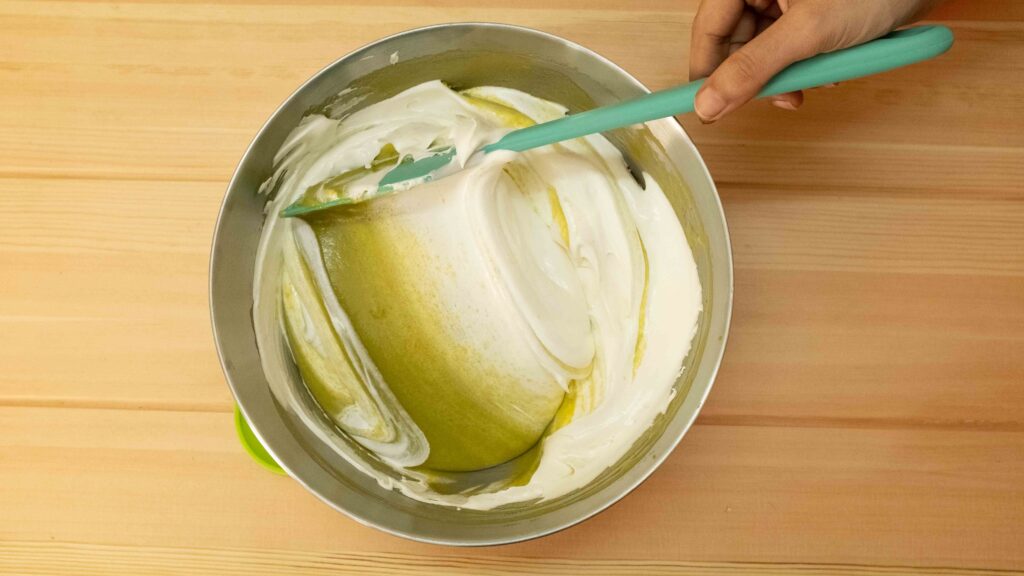
3 – Pour the chilled heavy whipping cream into a separate, pre-chilled mixing bowl. Using a hand-held mixer, whip the cream on high-speed until stiff peaks form.
4 –Using a large spatula, gently and carefully fold the whipped cream into the pistachio mixture, until no streaks remain.
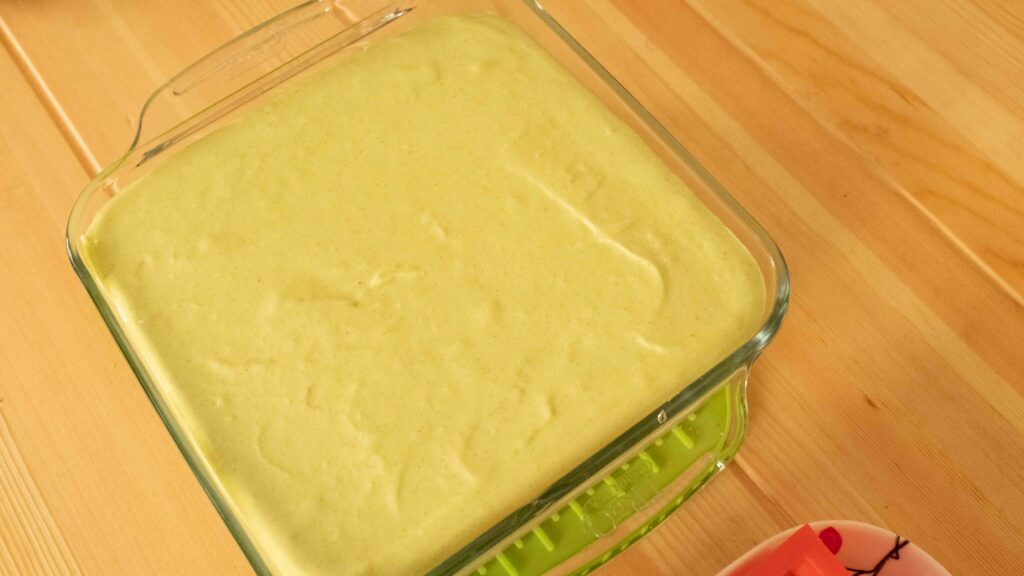
5 – Gently transfer the mixture to a freezer-safe dish. Cover the dish with plastic wrap and place it in the freezer for 12 hours or overnight for best results.
6 – Serve a small scoop of pistachio ice cream with each helping of gajar ka halwa.

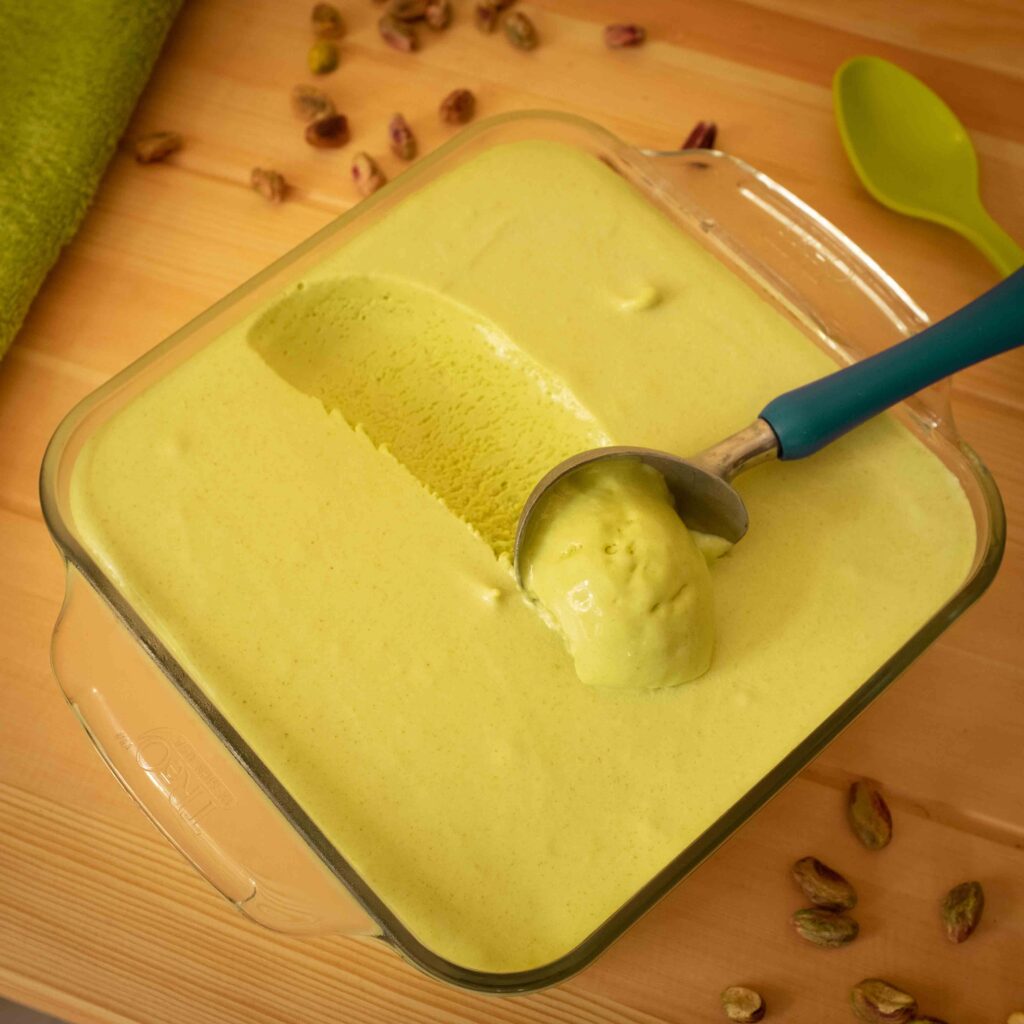
This delicious pistachio ice cream can be eaten all on its own or served with a range of Indian or Middle Eastern desserts from falooda and gulab jamun to my Turkish Baklava. Because it contains no eggs, it’s also suitable for vegetarians. Store leftover ice cream in the freezer for up to 6 months.
Stage 3: cardamom lace tuile
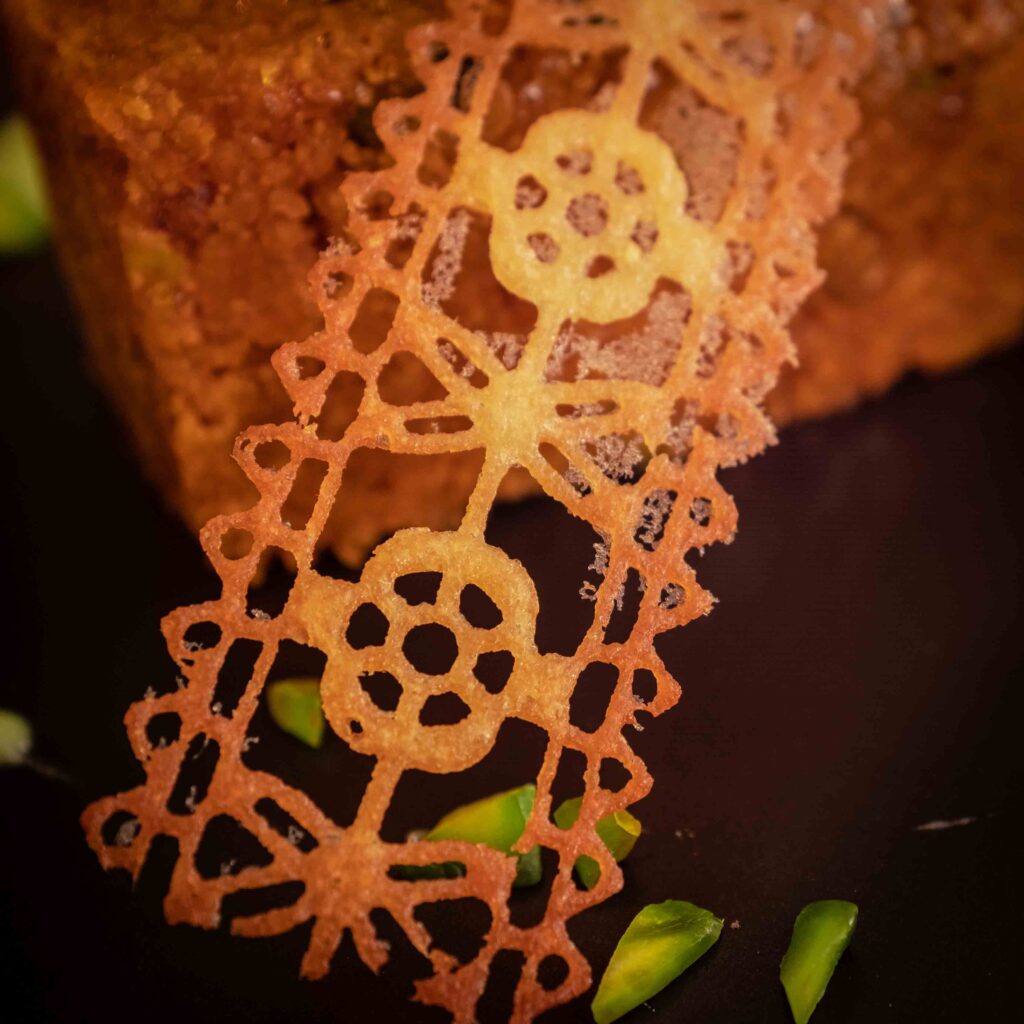
Melt-in-the-mouth delicate and speckled with spice, these crispy tuiles are a stunning addition to any festive dessert. A little finnicky to make, they require a gentle hand and some careful coaxing.
Ingredients
1. 30 gm unsalted butter, softened
2. 30 gm confectioner’s sugar
3. 30 gm all purpose flour
4. 30 gm egg whites
5. 1/8 tsp pure vanilla extract
6. 1/16 tsp cardamom powder
7. 1/16 tsp salt
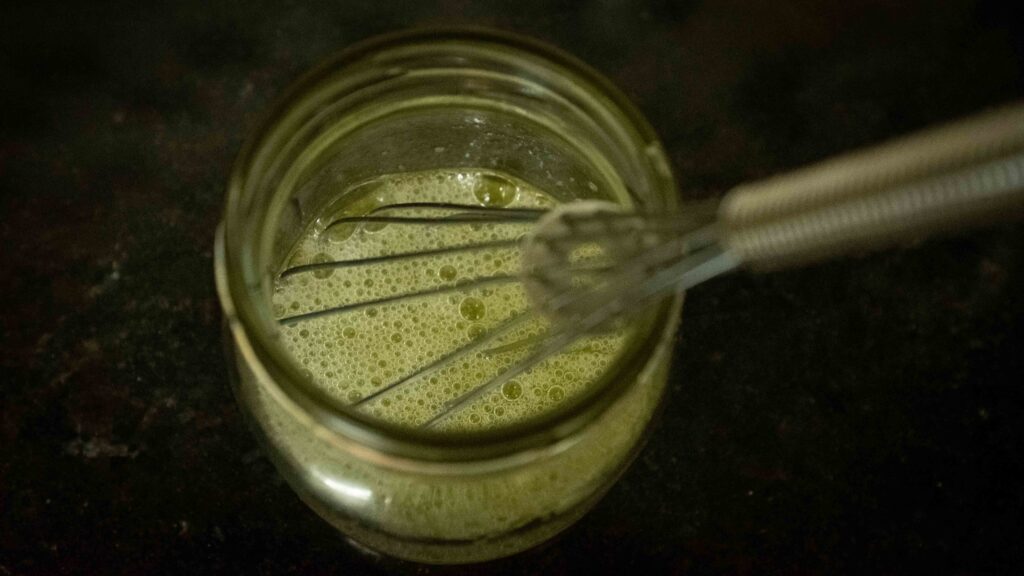
Method
1 – Lightly whisk the egg whites and set aside.
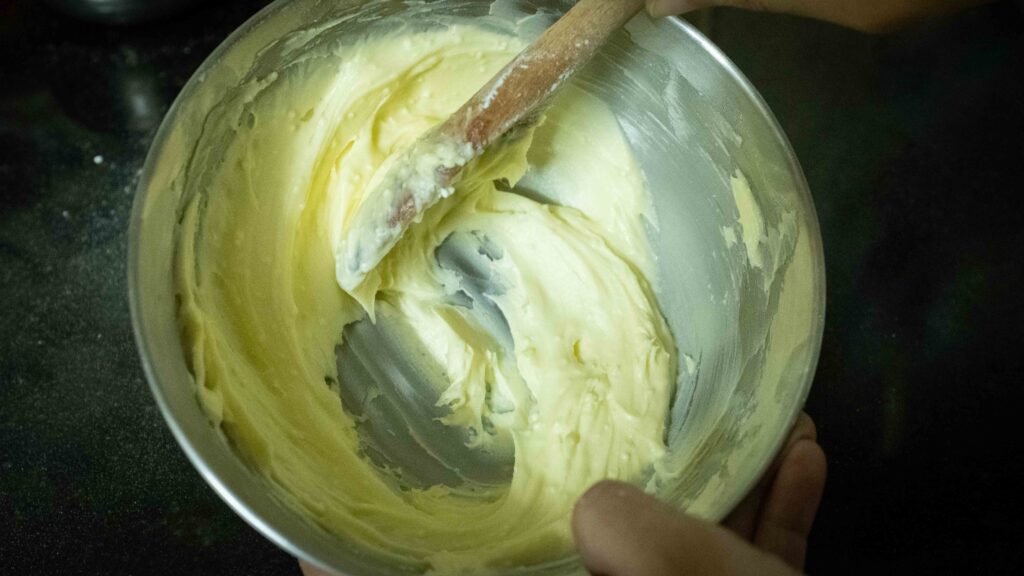
2 – Add butter to a medium bowl. Sift in the confectioner’s sugar and beat the butter and confectioner’s sugar together in a mixing bowl until pale, fluffy and smooth.
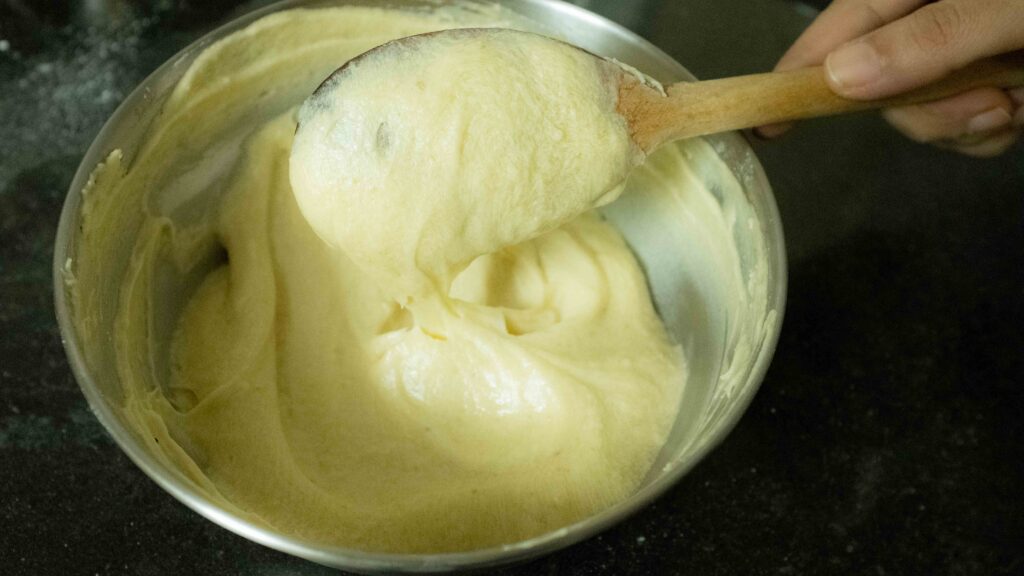
3 – Then add the whisked eggs whites, vanilla extract, cardamom, and salt. Give the mixture a stir to make it homogenous. Finally, gently fold in the flour. Stir together until you have a smooth, lump-free batter.
4 – Cover the bowl with plastic wrap and place in the fridge to chill for one hour. This will thicken the batter.
5 – Once the tuile batter is chilled, begin preheating your oven to 160OC.
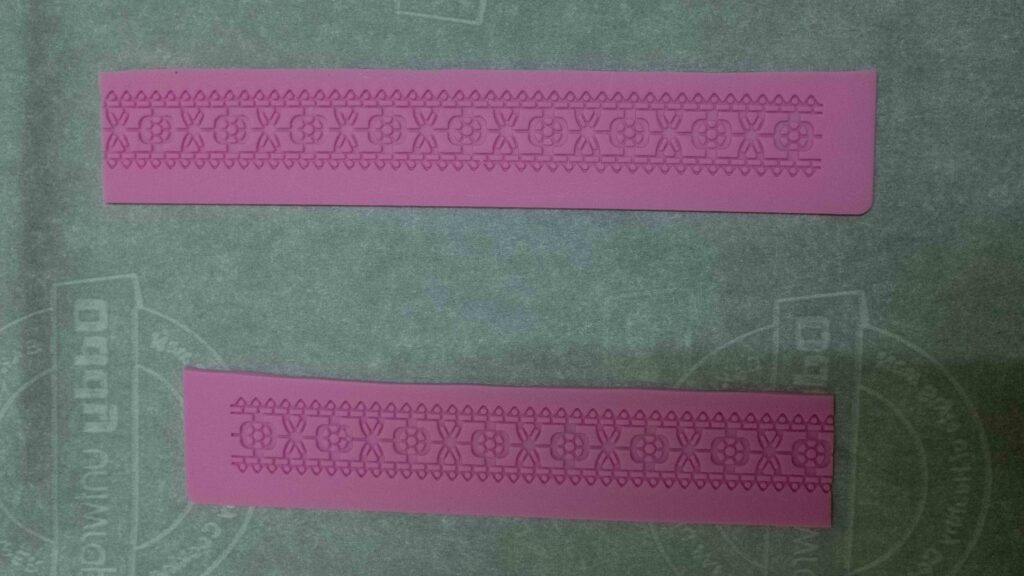
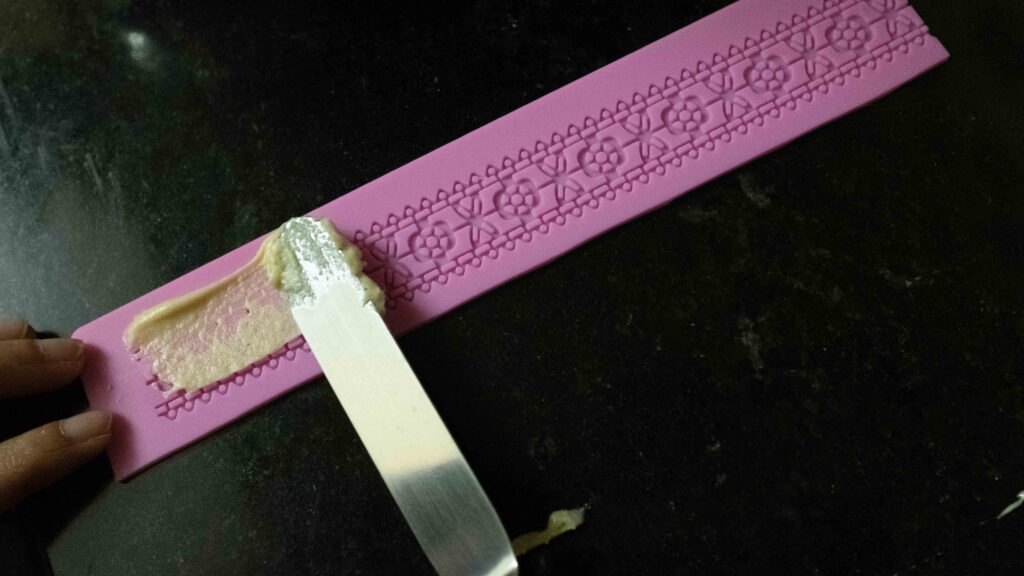
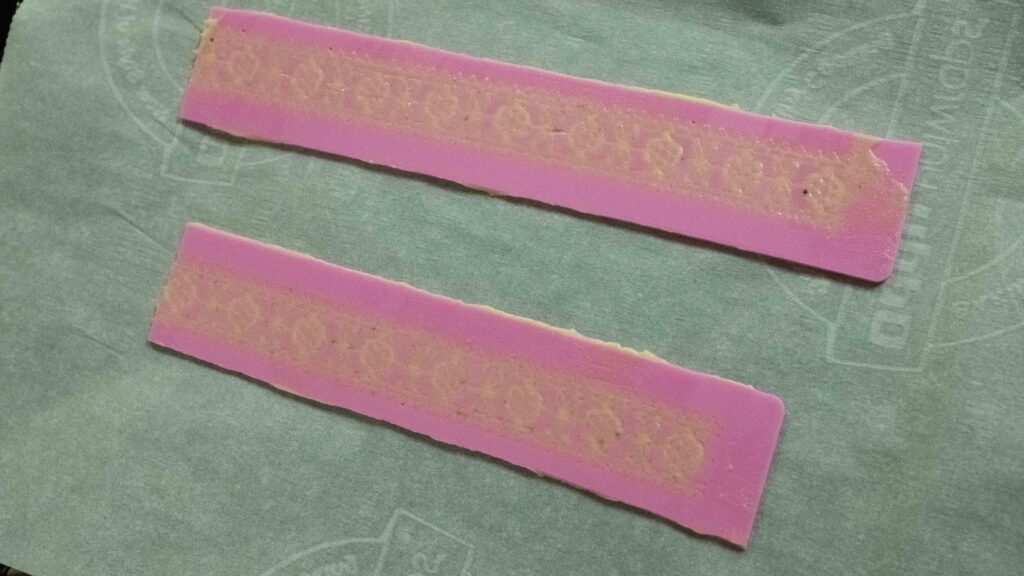
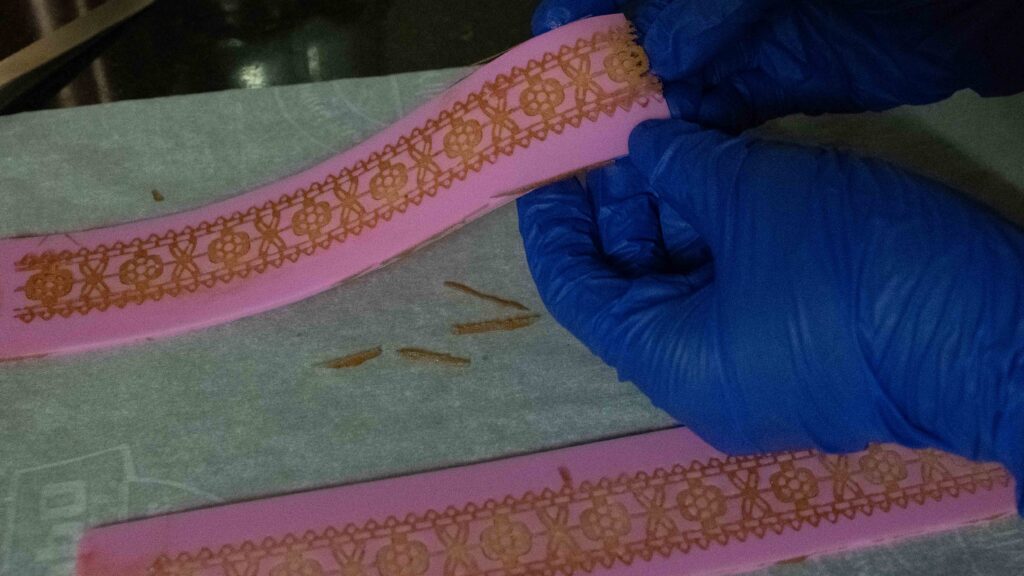
6 – Lay your lace mould on a flat surface. Using a palette knife, spread some of the batter into the crevices of the mould in 8 cm-long stretches. Thereafter, scrape off the excess with a bench scraper.
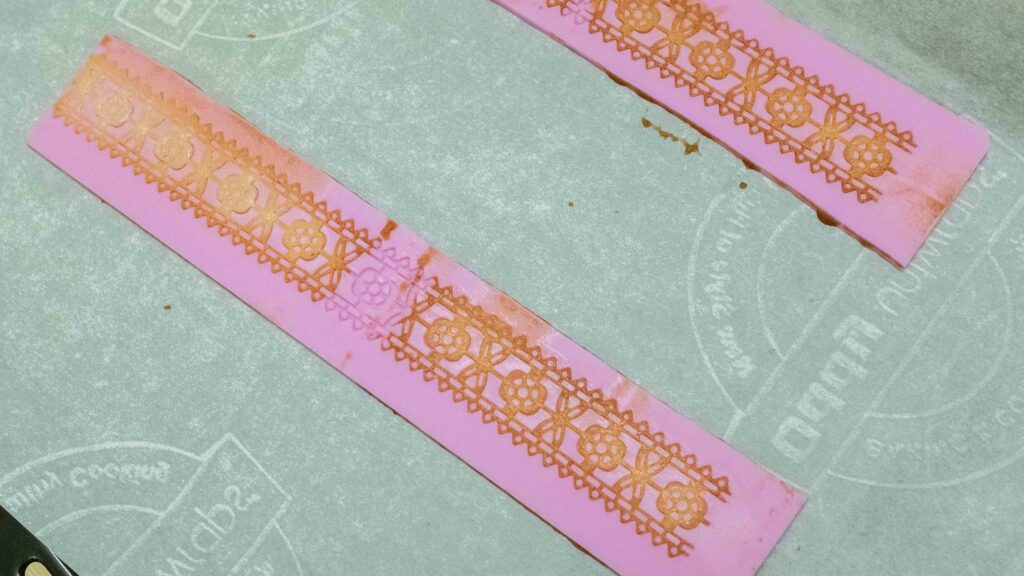
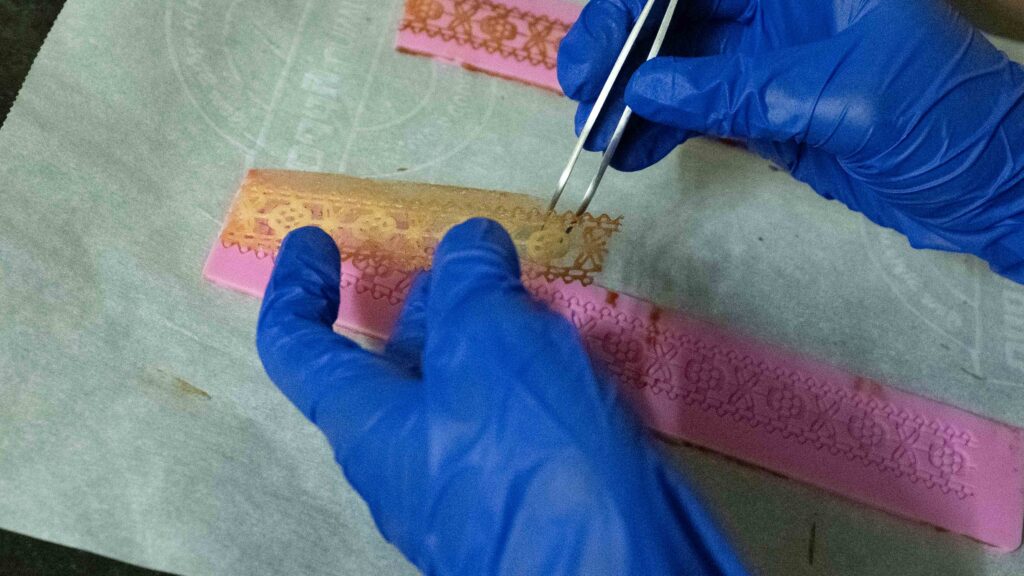
7 – Place the filled mould onto a parchment-lined baking tray and bake the cardamom tuiles in the oven for 5 minutes, or until golden-brown at the edges. Remove from the oven and allow to cool for 15 seconds in the mould before gently unmoulding with the help of tweezers. I highly recommend wearing gloves while handling the moulds as they will be hot. Store each tuile in an airtight box until you’re ready to serve.
8 – Repeat Steps 6 and 7 with the remaining tuile batter.
9 – Serve the cardamon tuiles with your gajar ka halwa and pistachio ice cream. Now eat!


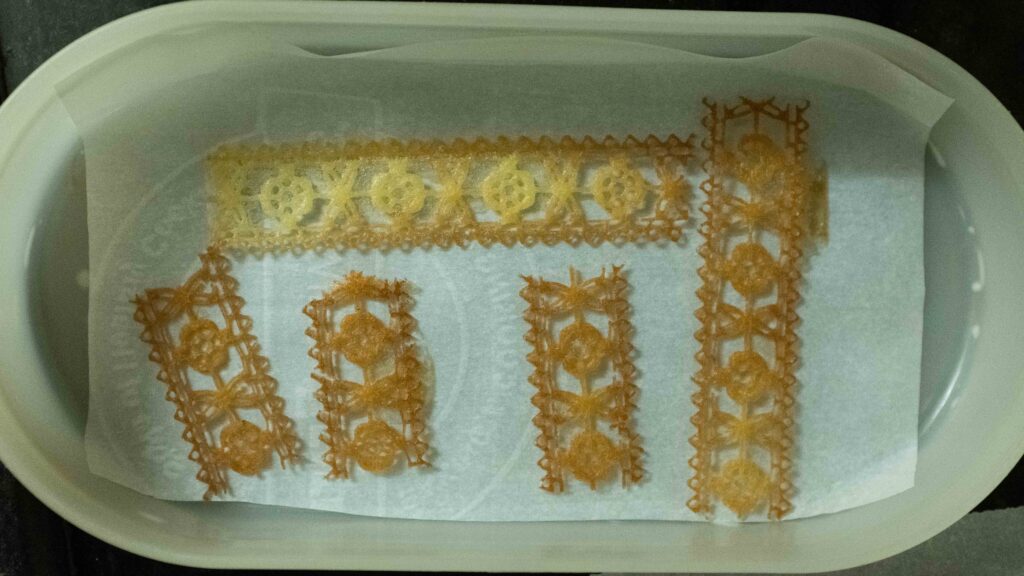
Tuiles pick up moisture very fast and won’t stay crispy for long. Store your tuiles in an airtight container for up to two days and use them up as quickly as possible.