


Makes one 8 inch round cake.
Since it’s so hot here, attempts to whip up a delicious no-bake mango cheesecake were made. But after countless taste tests, our palates have come to a conclusion. No matter how well-set or cold – unbaked cheesecake tastes like mousse and is never as good as its baked counterpart. This cheesecake heroes the best thing about an Indian summer – the glorious Aphonso mango. Possessing a rich, creamy mouthfeel and bursting with fruity-fresh sweetness – it is totally worth the effort of turning on the oven.
At a glance
– This cake comprises a biscuit crumb base + mango cheesecake filling + milk crumbs + mango coulis.
– You will need a blender, a 8 x 3 inch round springform pan, a deep roasting pan/baking pan that can contain the springform pan, a baking sheet, and baking parchment paper.
– This recipe has been broken into 6 stages for ease and comprehension. Please read the entire recipe from start to finish before beginning.
Stage 1: Master mango puree
Ingredients
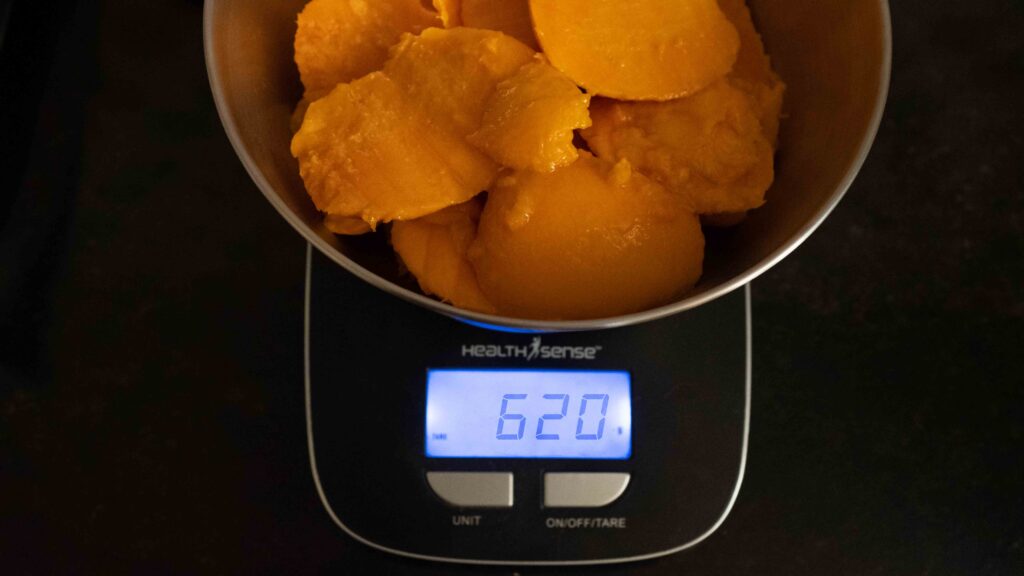
1. Enough ripe Ratnagiri/Devgad Alphonso mangoes to yield 620 gm mango pulp (I used 6 medium mangoes, weighing roughly 240 gm each)
For the master mango puree, wait till your mangoes are super ripe, as this will ensure maximum flavour and sweetness. When you press the fruit, it should be firm but have a little give (but not be squishy). It will also be super fragrant near the stem. Additionally, if you’re using Ratnagiri Alphonso mangoes, the skin will be juuuust a tad wrinkled. Once cut open, the flesh will be sunset yellow-orange and not pale yellow.
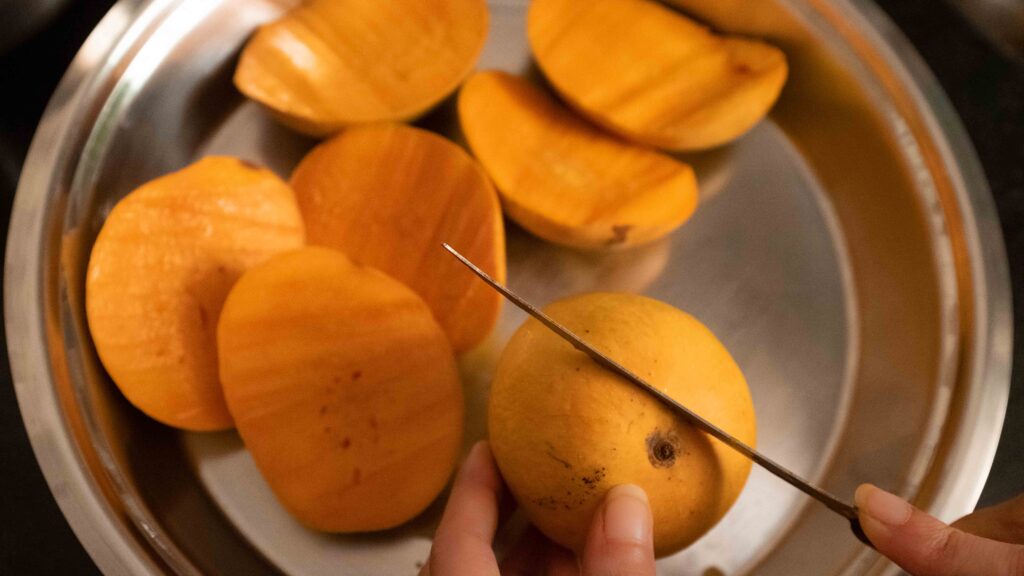
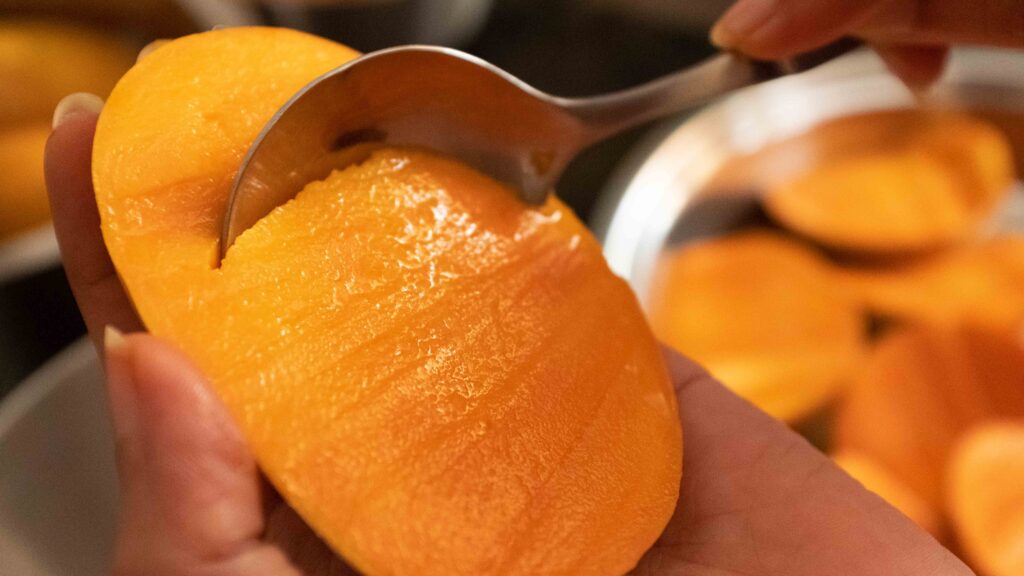
1 – Extract 620 gm mango pulp from your mangoes. I like to cut off the cheeks and then scoop out the flesh with a spoon. To remove the flesh from around the seed; peel off the skin, cut off the flesh around the seed, and then squish the seed along the grain. This method lets you extract all the pulp without pulling off the fibres attached to the seed.
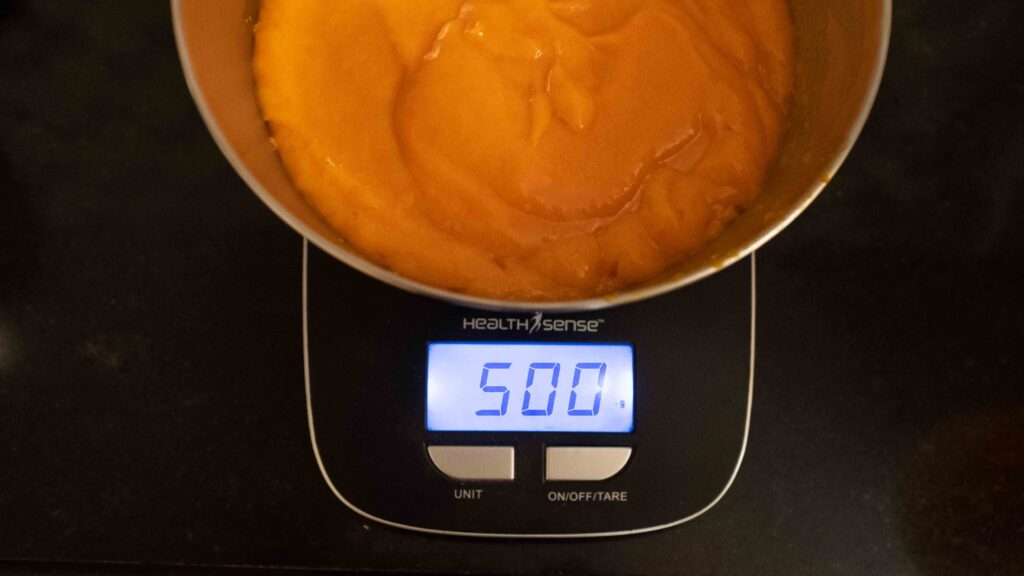
2 – Place the mango pulp into the jar of a blender and puree until completely smooth. This is the master mango puree.
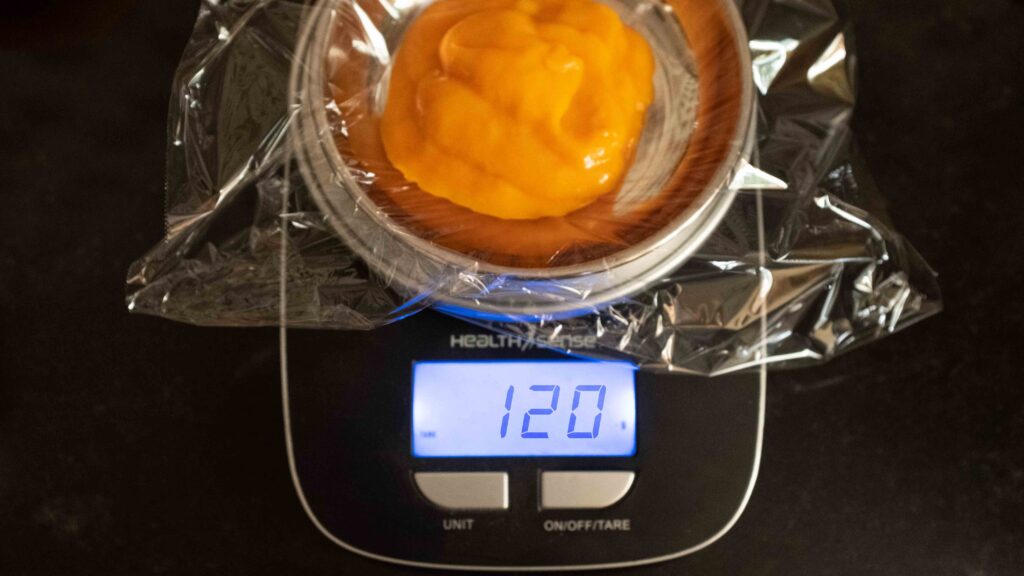
3 – Weigh out 120 gm of the master mango puree for the mango coulis. Store it in an airtight container in the freezer until ready to use in Stage 5.
4 – Set aside the remaining 500 gm for the mango cheesecake filling. Untreated mango begins to oxidise and blacken at room temperature and in the fridge. If you’re not going to make the cheesecake straight away, mix 4 tablespoons of sugar with the puree, then transfer the puree to an airtight container and store it in the freezer. To use it in Stage 3, keep the frozen mango puree in its container, place it on your counter to first thaw and then come to room temperature.
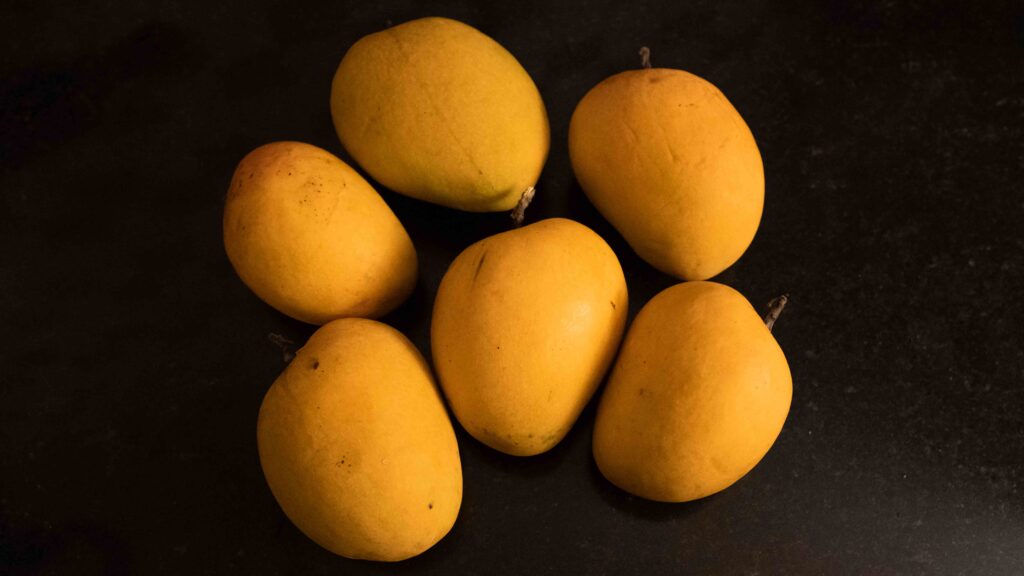
If the mango is the king of fruits, the Aphonso (aka Hapus) mango is arguably the king of mangoes. Further, the Ratnagiri Alphonso and Devgad Alphonso variants are the Kings of Alphonso! Grown on the West Coast of India, just north of Goa—these two varieties are available only from mid-April to late May. If you have the privilege, please try to source Alphonso mangoes only for this dessert. Why? Thin skin, small seed, non-fibrous, orange coloured flesh, firm but buttery texture, silky mouthfeel, sweet and juicy pulp, heady aroma, unmatched flavour. Phew! And while Himsagar and Langra mangoes can vie with the Alphonso for best-tasting mango, they’re not as suitable for desserts as the Alphonso. For best results, use ripe and fresh Alphonso mangoes. If you cannot source this variety locally, or they’re simply not in season when you’re making this cheesecake, I recommend using canned Alphonso like this over using any other variety. I sourced 2 dozen fully ripe Ratnagiri Alphonso mangoes in mid-May and immediately made and froze a batch of master puree to use in this cheesecake. If you’re going the frozen puree route, mix 2 tablespoons of sugar per 250 gm puree and then freeze it. Frozen puree will keep for at least 6-9 months if stored correctly! Thaw the frozen puree inside its container and then bring it to room temperature before using it in the recipe. Once thawed, it should not be re-frozen. Store thawed puree in the fridge for up to a day.
Stage 2: Biscuit crumb base
Ingredients
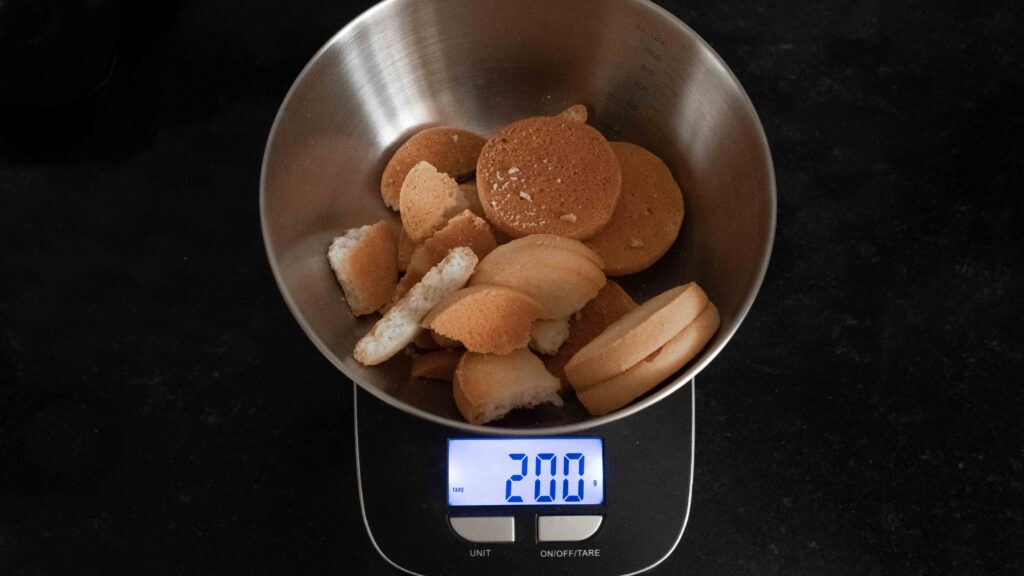
1. 200 gm Shrewsbury biscuits (about 11 ¼ biscuits)
2. 1 tbsp. castor sugar
3. 50 gm unsalted butter, melted and cooled.
Prep
1 – Preheat your oven to 180OC.
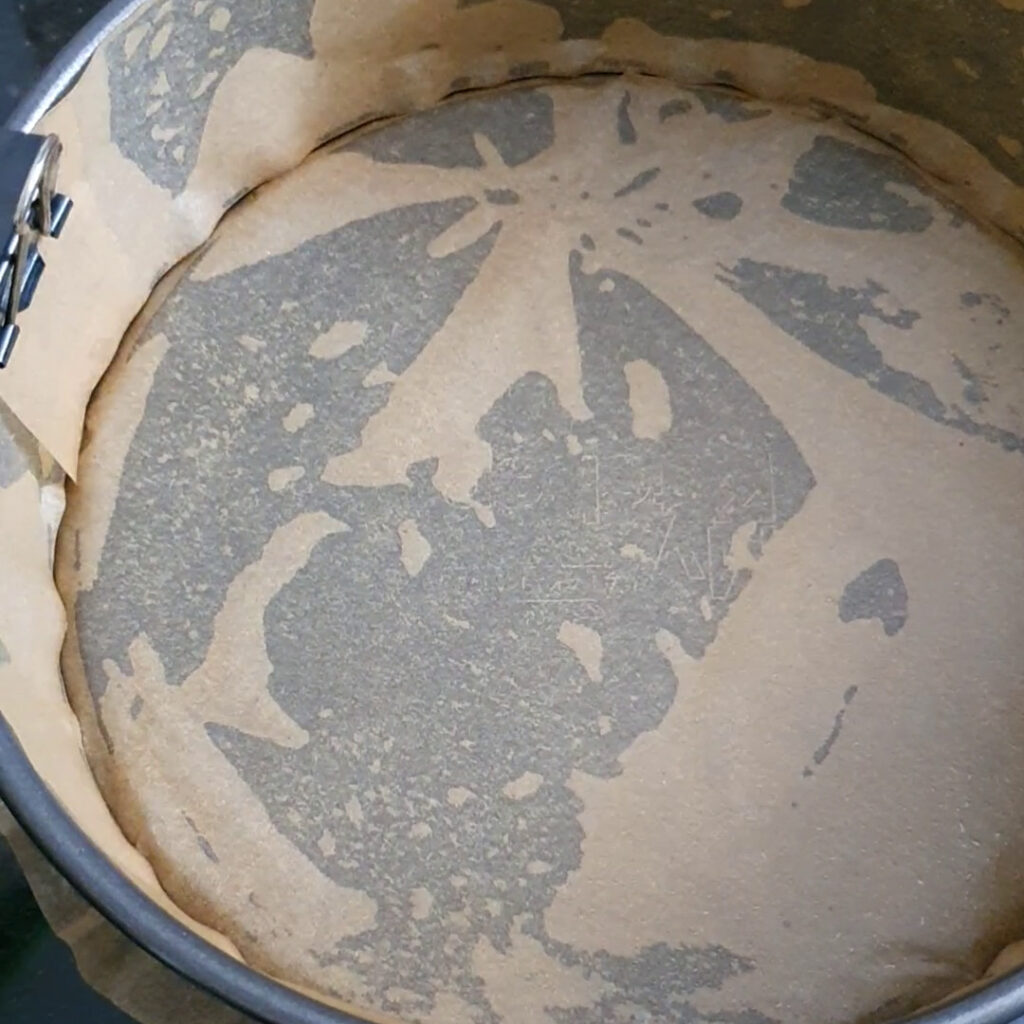
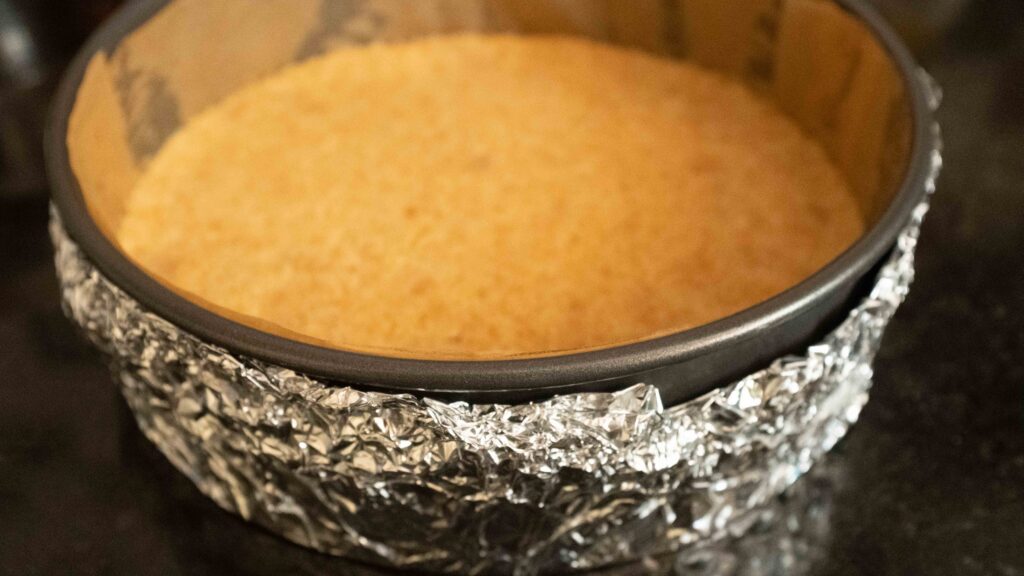
2 – Grease a 3 inches tall, 8-inch round springform pan with nonstick spray and line the bottom and inside edges with parchment paper. Your parchment should stick up ½ an inch taller than the pan’s height.
Method
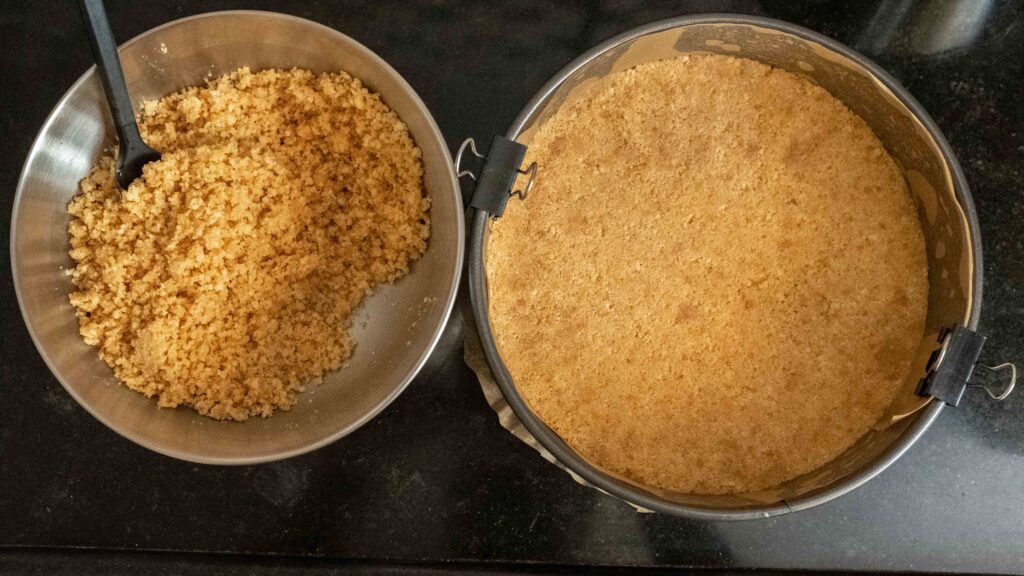
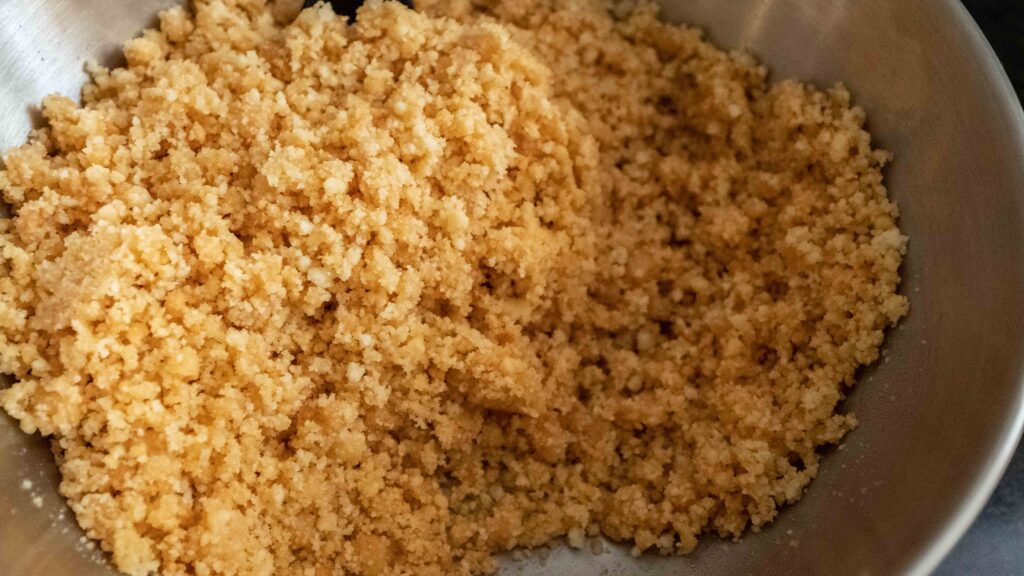
1 – Using a food processor, combine the Shrewsbury biscuits, castor sugar, and melted butter. Pulse until the mixture has the appearance and texture of wet sand.
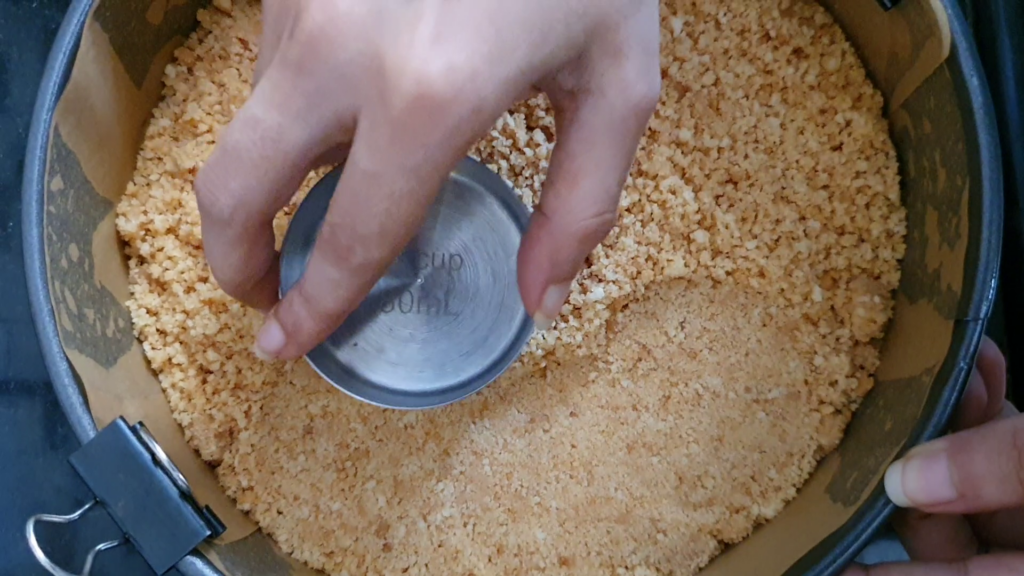
2 – Press this crumbly mixture into the base of your prepared springform pan, using a flat-bottomed glass/cup to compress it into an even layer.
3 – Bake the base for 8-10 minutes, or until golden brown. Remove it from the oven and let it cool to room temperature on a wire rack. Thereafter, store the pan it in the fridge if you live in a hot and humid location.
The reason the base is baked, is to prevent the liquidy filling from making it soggy. If you skip this step, you won’t get that great biscuit texture on the bottom. It’s so hot and humid in Mumbai, that I have to refrigerate the pan as soon as the base has come to room temperature. This is to prevent the butter content from separating from the crumbs. You won’t need to do this if you live in a cooler climate. If you cannot get Shrewsbury biscuits, you could use Scottish shortbread, French sable biscuits, or basic butter cookies. If you use the second two, leave out the sugar in the crust as they’re sweeter than shortbread. What you’re basically looking for is a mild-flavoured, buttery crumb, so don’t use graham crackers or digestive biscuits, or any sort of cookie that will compete with the mango flavour. This amount of biscuits will line an 8 inch round cake pan, or two 6 inch round cake pans. The bake time remains the same.
Stage 3: Mango cheesecake filling
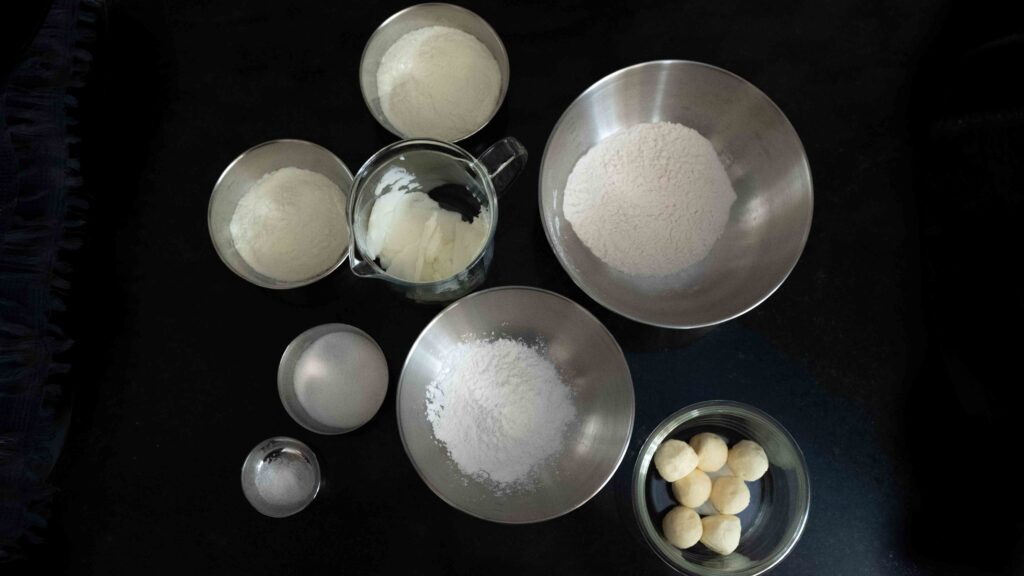
Ingredients
1. 500 gm master mango puree
2. 500 gm full fat cream cheese like this (not cream cheese spread or the whipped stuff)
3. 300 gm good quality couverture white chocolate (30-36% fat content)
4. 120 gm sour cream
5. 2 tbsp. all purpose flour (20 gm)
6. 3 large eggs (171 gm in-shell weight, total)
7. 1 tbsp. vanilla extract
8. 3/4 tsp mango flavour like this
9. ½ tbsp. freshly grated lemon zest (from 3-4 small lemons)
10. Pinch of salt
11. 30-50 gm of castor sugar (if your mango puree is not as sweet as you’d like)
12. 1 ½ ltr water for a water bath or baine-marie
The high dairy-fat content in this recipe is what makes it so delicious. If you use cream cheese spread (which is whipped, lighter, and has more water content than plain cream cheese) or low fat cream cheese, you will compromise the taste AND stability of your cheesecake. Look for cream cheese with at least 33% fat and a moisture content of no more than 55%. If you have blonde chocolate on hand, all you need to do is melt it using your microwave or a baine-marie. Otherwise, like the rest of us mortals, you will need to “caramelise” white chocolate until it becomes blonde. Why have I put caramelise within double quotation marks? Because chocolate can’t actually be caramelised. Caramelising involves high heat, which would flat out burn it. In truth, white chocolate becomes caramel coloured & flavoured due to the ‘Maillard reaction’. So, it would be more accurate to say we’re “Maillarding the chocolate”! See this to know more. In this step, you’ll subject your chocolate to prolonged heating. That’s why it’s essential to use high quality couverture chocolate. Compound chocolate or candy melts will not work, as they will get dry, chalky, and burn. Clueless about “caramelising” chocolate in the microwave? Watch this video for a quick tutorial.
Prep
1 – Before beginning, ensure that all your ingredients are at room temperature (roughly 22OC).
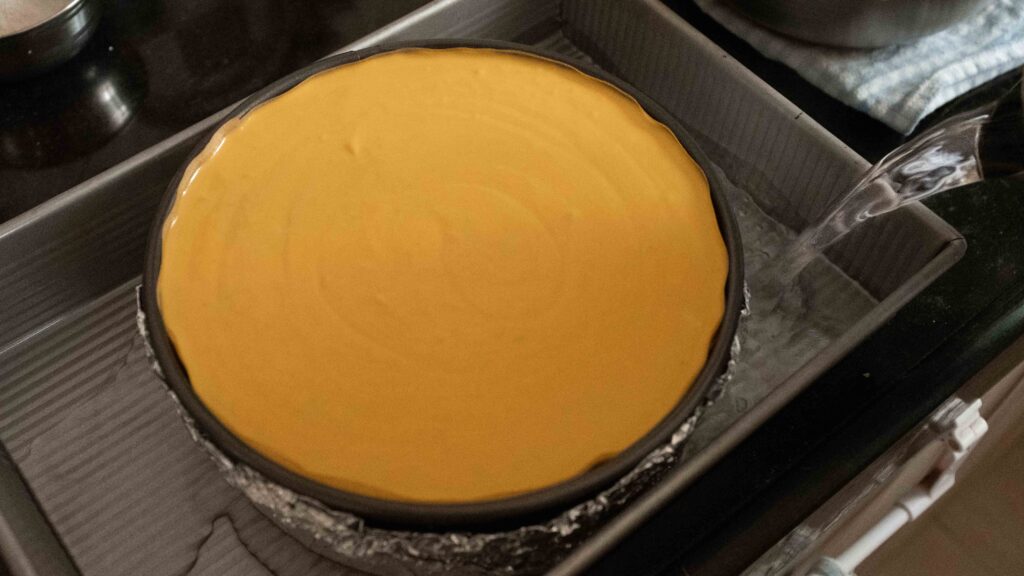
2 – Wrap the outside of your springform pan with heavy duty foil. Do three layers for good measure.
3 – Preheat your oven to 160OC.
4 – Zest your lemons.
5 – Chop the white chocolate into small shards. Place the chopped chocolate in a medium microwave-safe bowl and set your microwave’s power to 900 watts. Microwave your chocolate for 60 seconds. Pull out your bowl and give it a stir. Your chocolate should be completely melted. Keep returning the bowl of melted chocolate to the microwave for 30 seconds at a time; stirring between each additional 30 seconds. What you’re aiming for is a colour and texture akin to very smooth and runny peanut butter. I had to return my bowl to the microwave 60 times to get the desired colour and consistency! That’s 60 x 30 second bursts. Depending on your microwave, you may be able to do it faster/slower. As your chocolate gradually browns, it will go through some massive textural changes; thickening, catching, drying out, become grainy and eventually re-emulsifying. Do not panic, this is perfectly normal. As long as you use top quality chocolate, heat it for just 30 second increments, and stir well after each increment, nothing will burn and all will be well. When your melted chocolate is the colour of peanut butter, at pourable consistency and no longer hot to the touch, it’s ready to be used in the batter.
6 – Fill your kettle with 1 ½ litres of water and set it to boil
Method
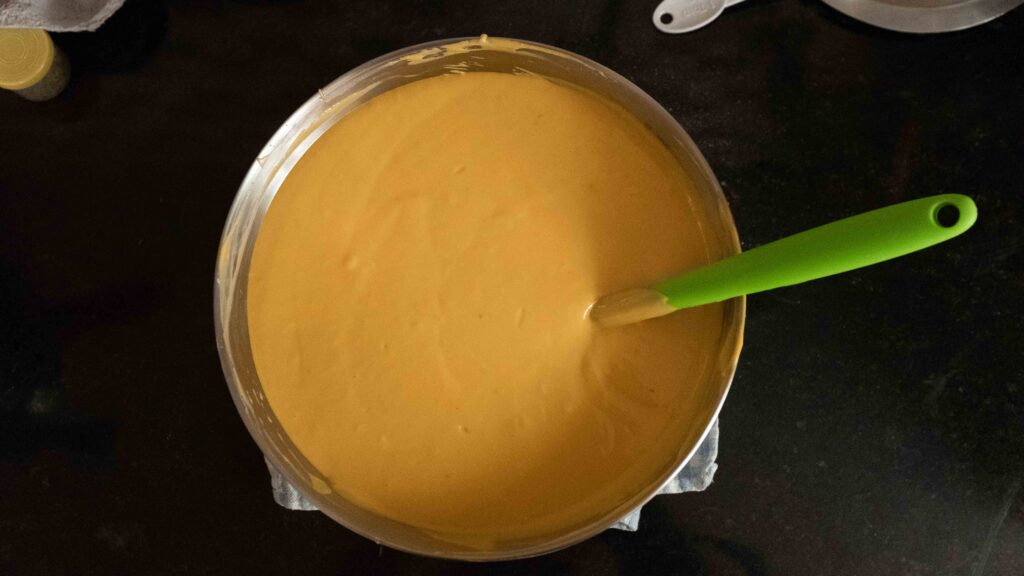
1 – In a large bowl, add the cream cheese. Using a handheld mixer, beat the cream cheese until soft and smooth (about 1 minute).
2 – Add the sour cream, the all purpose flour, the vanilla extract, and the mango flavour, and beat to combine (about 30 seconds).
3 – With the mixer on the lowest setting, add the eggs, one at a time, beating in each one until combined. As soon as the last egg has been combined, stop beating. Scrape your bowl down to ensure everything has been mixed in. The mixture should be smooth and creamy, but you must not over-beat it, as this will result in air bubbles and cracking.
4 – Pour 500 gm master mango puree and the cooled and melted blonde chocolate into the bowl. Then add the lemon zest and the salt, and beat the mixture until combined, smooth, and homogenous. Do not over-beat. Scrape your bowl down to ensure everything has been mixed in.
5 – Now, taste your batter, if you feel it’s not sufficiently sweet, add 30-50 gm of castor sugar and mix once again. I added no additional sugar.
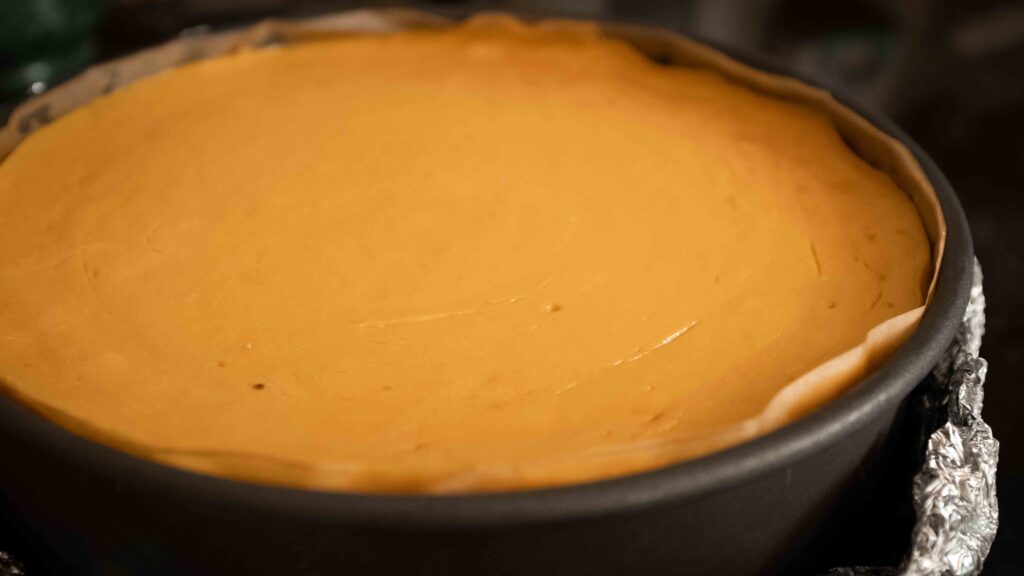
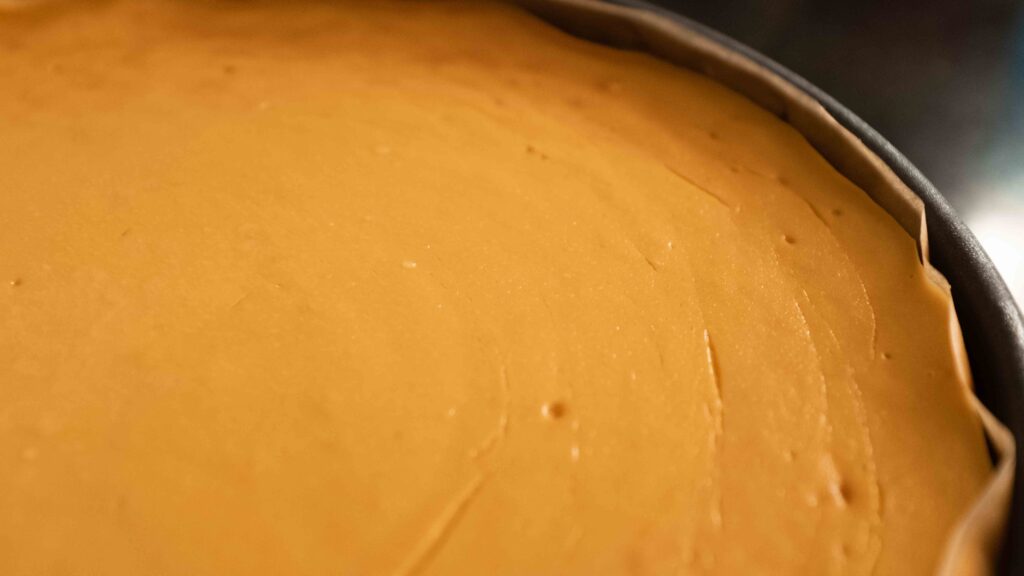
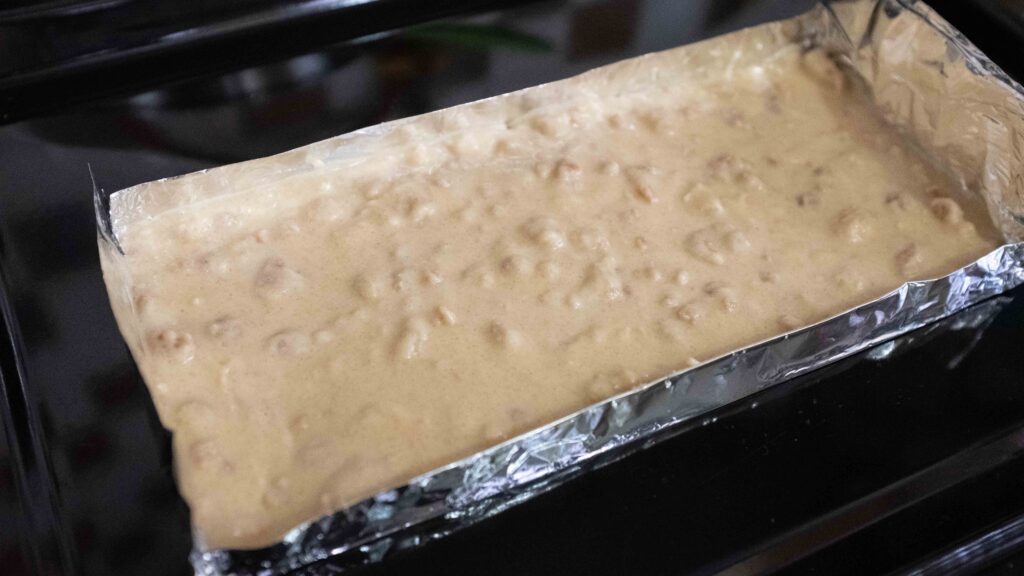
6 – Pour the mango cheesecake filling into your springform pan. Gently tap the pan on the counter a few times to level the surface and bring any hidden air bubbles to the top. Don’t be alarmed if the batter comes up higher than the tin, that’s what the extra parchment height is for.
7 – Place the wrapped pan inside your roasting pan/baking pan. Fill the roasting pan/baking pan with hot water, about 1 ½ inches up the sides of the springform pan. This is our water bath or baine-marie.
8 – Lower the oven temperature to 155OC. Carefully place the entire roasting pan/baking pan (containing the springform pan and hot water) into the oven and bake for 90-100 minutes at 155OC. The sides should be just a teensy bit puffy and centre should still have a decent wobble when you jiggle the pan.
9 – Turn off the heat, and keeping the oven door closed, let the cheesecake rest inside for 1 hour. Do not open the door before the hour is up. This is crucial to a flat cheesecake without any sinking or cracking.
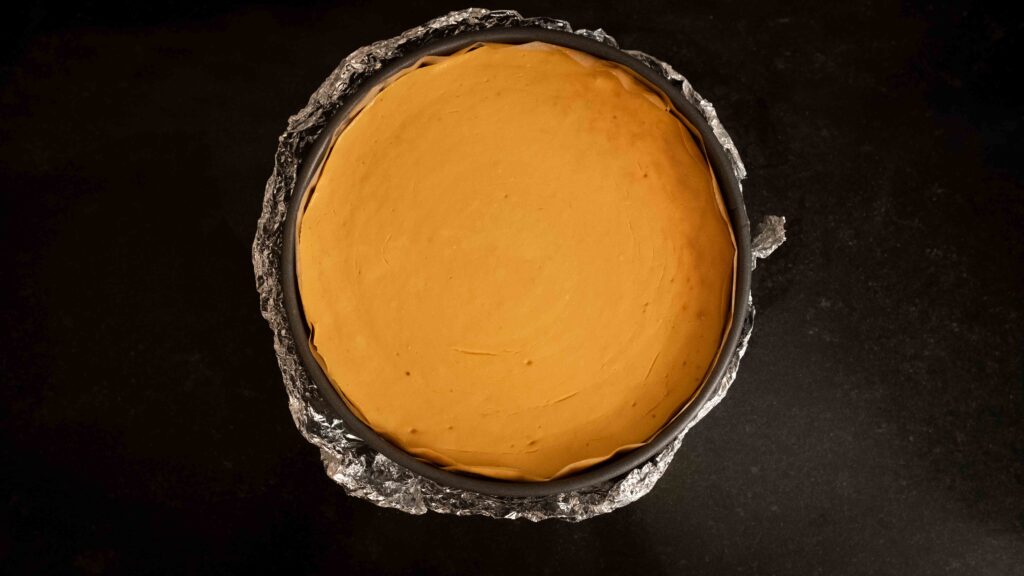
10 – Thereafter, remove the baking pan containing the springform from the oven. Take out the springform pan from the baking pan and place it on a wire rack. Your cheesecake needs to come to room temperature before you can refrigerate it. Discard the water bath.
11 – While it’s still warm to the touch, gently run a paring knife around the outside of the cheesecake to loosen the parchment from the sides of the pan. This prevents pulling, which can cause cracks as the cheesecake cools.
12 – Once sufficiently cool, remove the aluminium wrapping, cover the entire pan with plastic wrap, and transfer it to the fridge. The plastic should not touch the surface of the cheesecake. Chill it overnight or for 48 hours for best results.
When you’re pouring your cheesecake filling into your 8 inches wide x 3 inches tall springform pan, don’t be alarmed if the batter comes all the way to the top – it won’t rise, and the extra parchment lining will give your pan additional height. Because you’re using a water bath, your cake will cook evenly and gently, and sport zero cracks. Once it’s baked, don’t open your oven door for an entire hour. This will set your cheesecake fully and prevent it from sinking in the middle. When you do finally pull it out, it should look perfect. This amount of batter will also fill three 6 inch round cake pans that are 2 inches high. If you’re making smaller cheesecakes of this size, revise the bake-time to 70 minutes. You could stop right there. But. Your cheesecake needs 1-2 days to chill. Rather than idly waiting by the fridge, why not busy yourself with the little extras that will make this mango cheesecake extra? Scroll on!
Stage 4: Milk crumbs
Ingredients
1. 60 gm milk powder; divided into 40 gm and 20 gm
2. 40 gm all purpose flour
3. 15 gm corn flour
4. 25 gm castor sugar
5. ½ tsp salt
6. 55 gm butter, melted and cooled
7. 80 gm good quality couverture white chocolate (not chips)
Prep
1 – Preheat the oven to 110OC.
2 – Melt and cool your butter.
Method
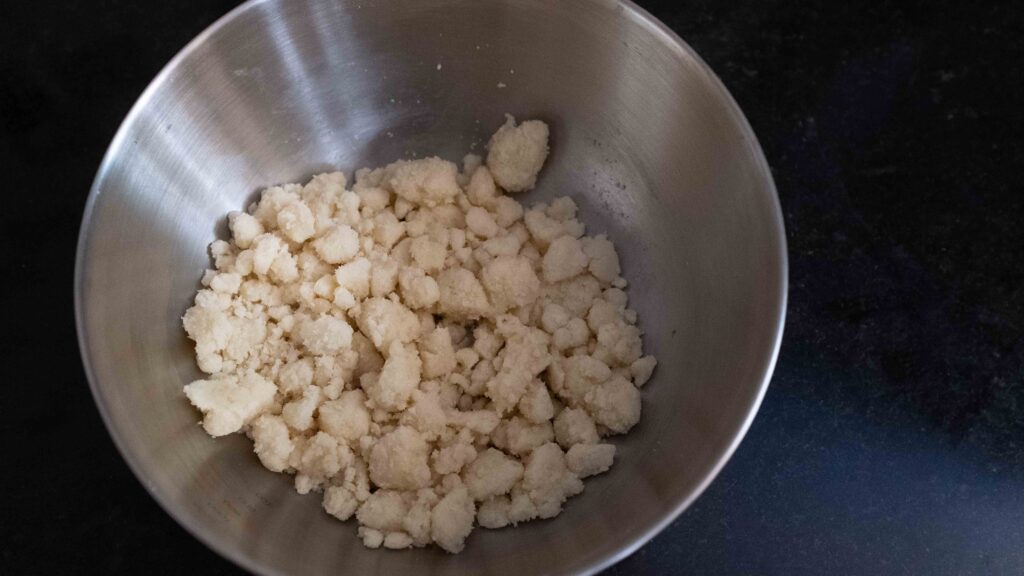
1 – In a medium bowl, combine 40 gm milk powder, the all purpose flour, the corn flour, castor sugar and salt.
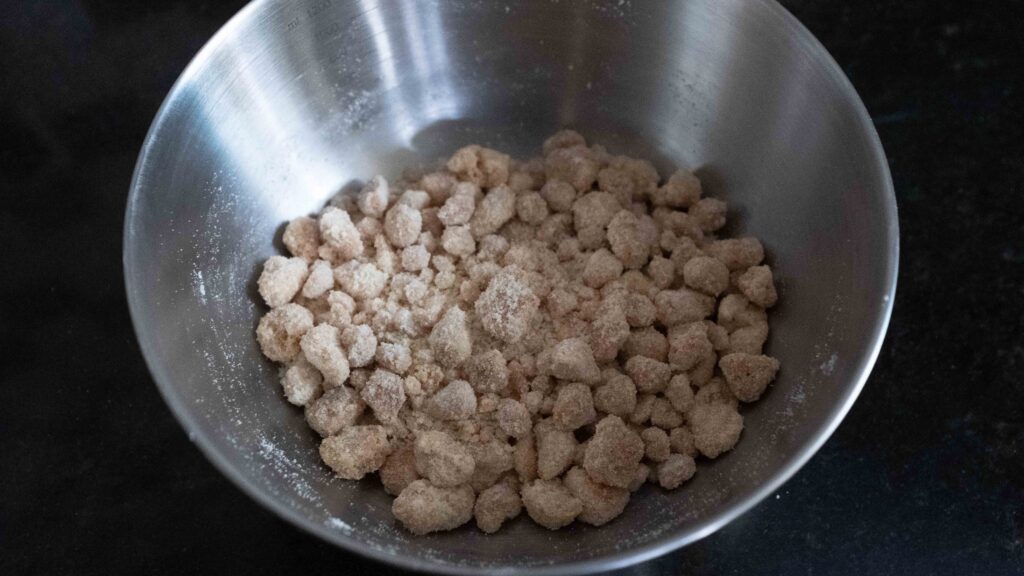
2 – Pour in the melted butter and stir together until you get a crumbly mixture with some wet clusters.
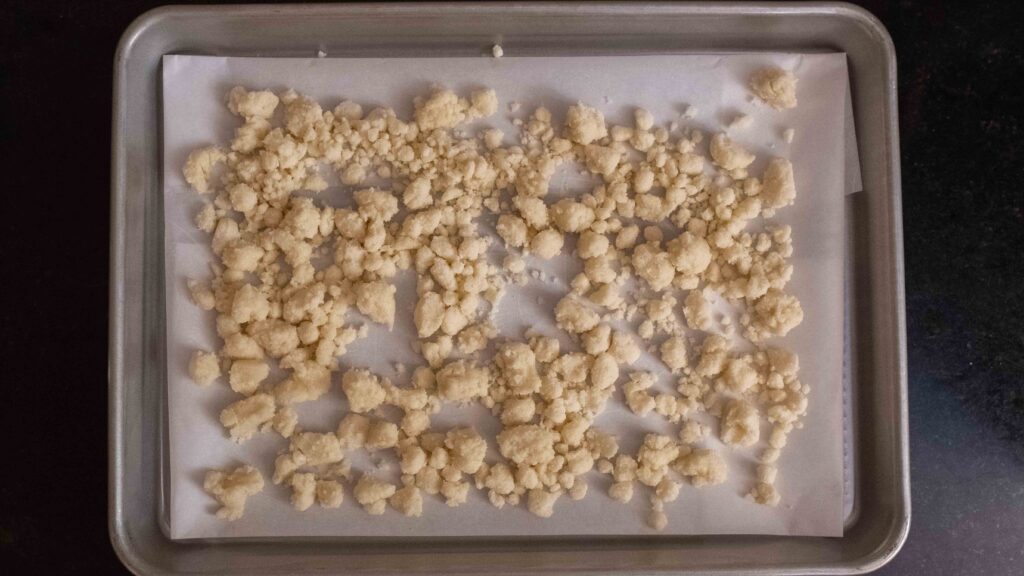
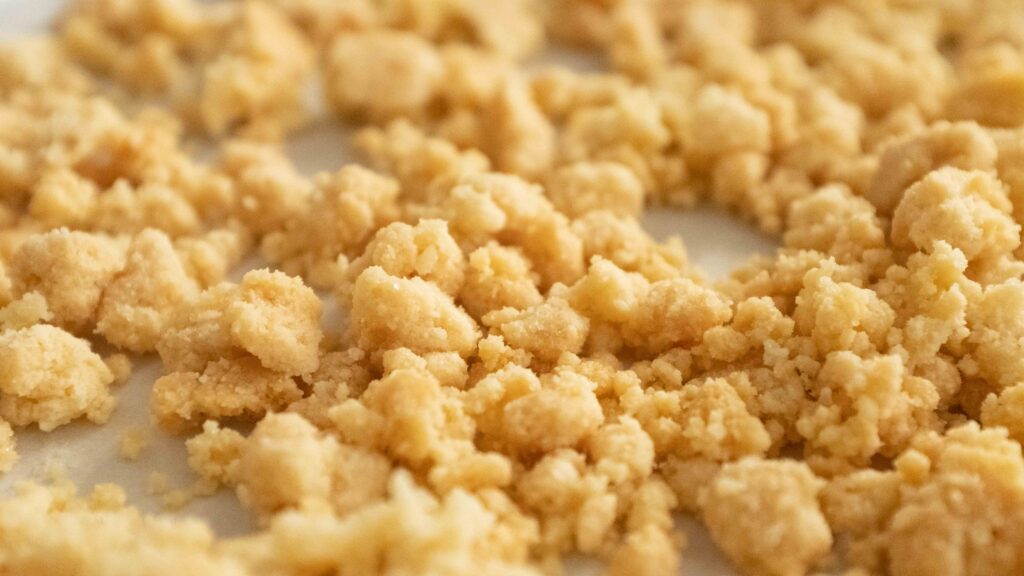
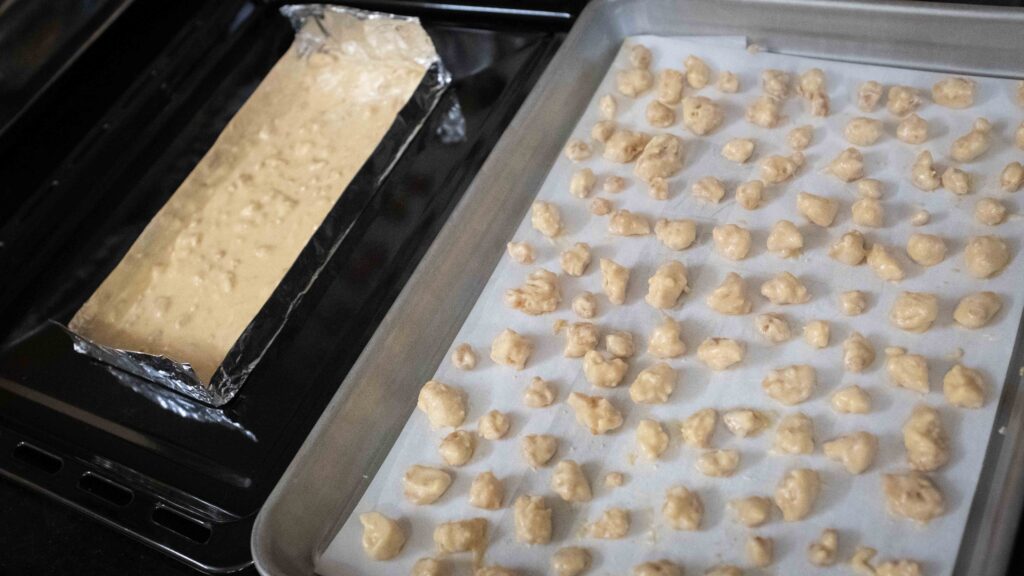
3 – Transfer the crumb clusters to a parchment-lined baking sheet and bake at 110OC for 45-55 minutes (or until they look mostly dried out). They will go from white to deep beige, but should not become brown. Remember to rotate the tray at the half-way mark for even cooking.
4 – Take the tray out of the oven and let it cool on a wire rack.
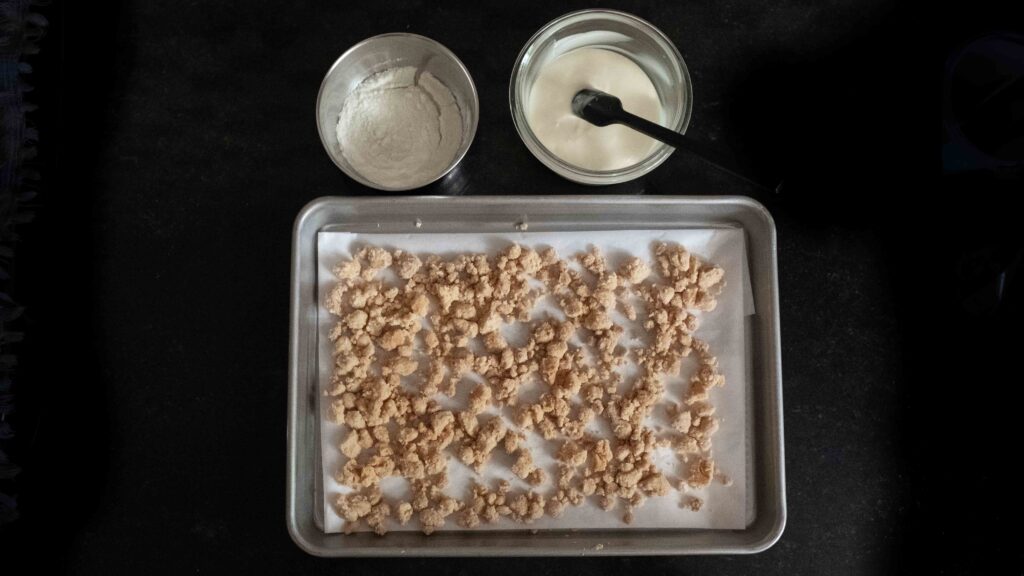
5 – While the crumb clusters are cooling, cut your white chocolate into small shards and place in a microwave safe plastic bowl. Microwave at 450 watts for 20 seconds. Stir briefly with a spatula and then microwave it for another 10 seconds. Thereafter, keep heating the mixture in 5 second increments until the chocolate has completely melted, making sure to stir briefly each time. The temperature of the white chocolate should reach no more than 29OC. It’s ready when most of it has melted and you can still see a few lumps, which will melt in the residual heat on stirring. Leave aside to cool. The chocolate should be pourable but not hot.
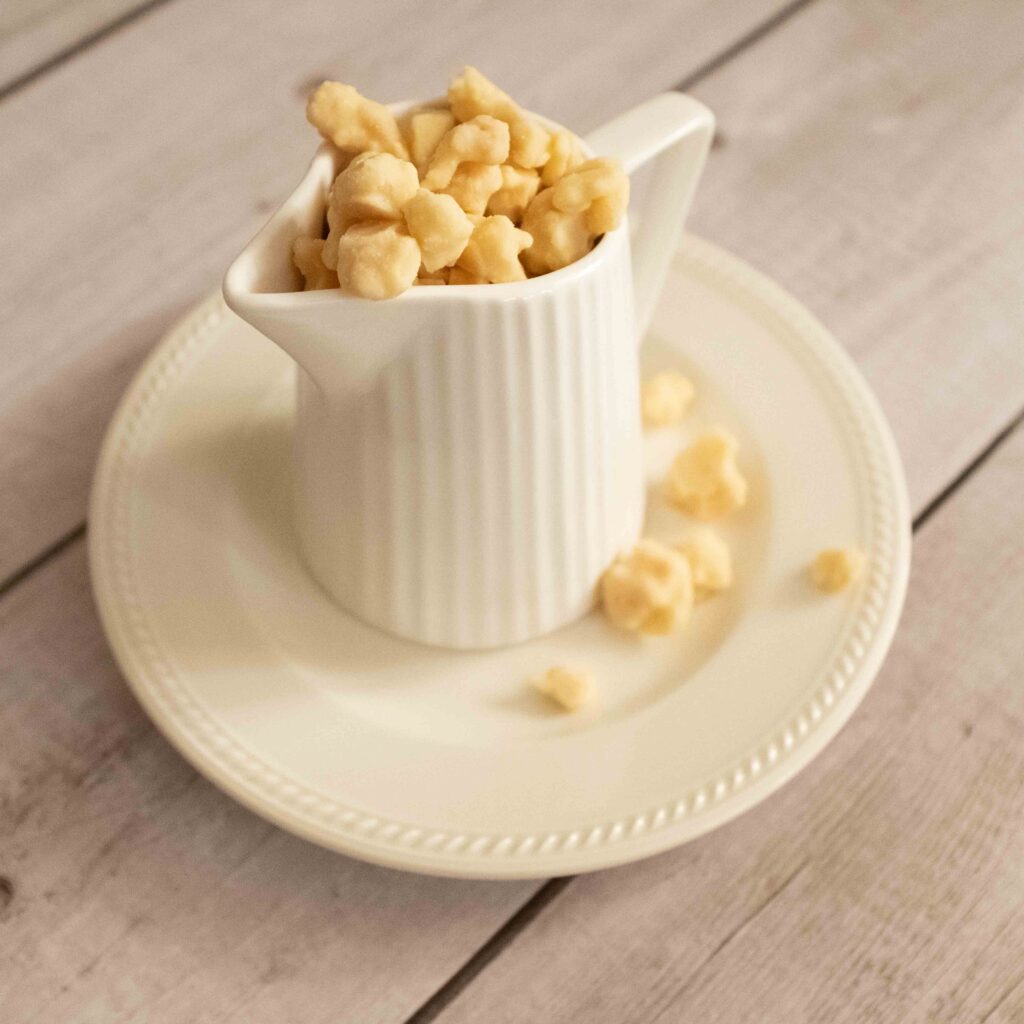
6 – Transfer the cooled crumb clusters to a bowl and break apart any that are larger than ½ inch chunks.
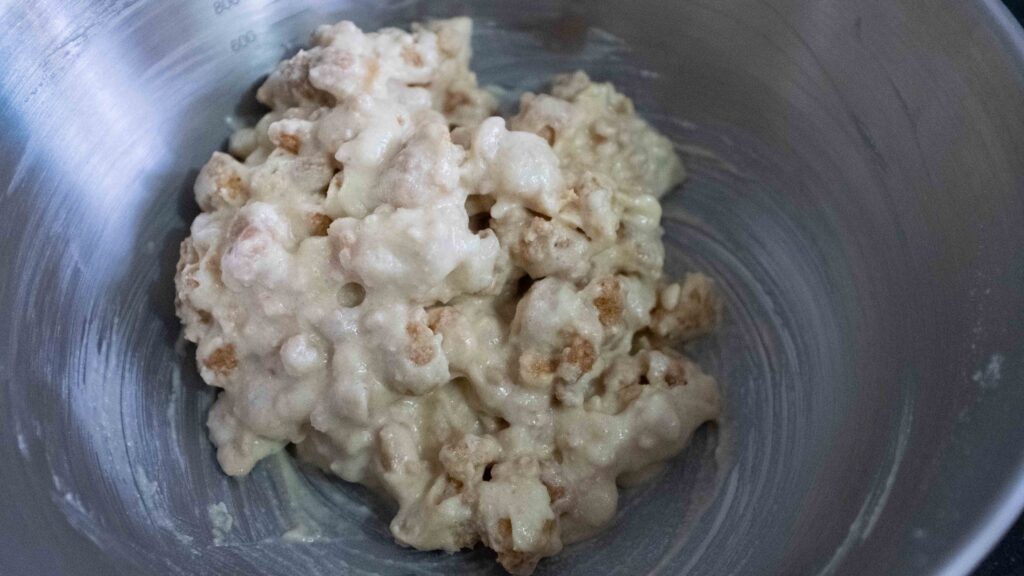
7 – Sprinkle the remaining 20 gm milk powder on top of the dried crumbs and toss together until evenly coated.
8 – Pour the melted white chocolate over the crumbs and toss with a spatula until evenly coated. They will now resemble pebbles.
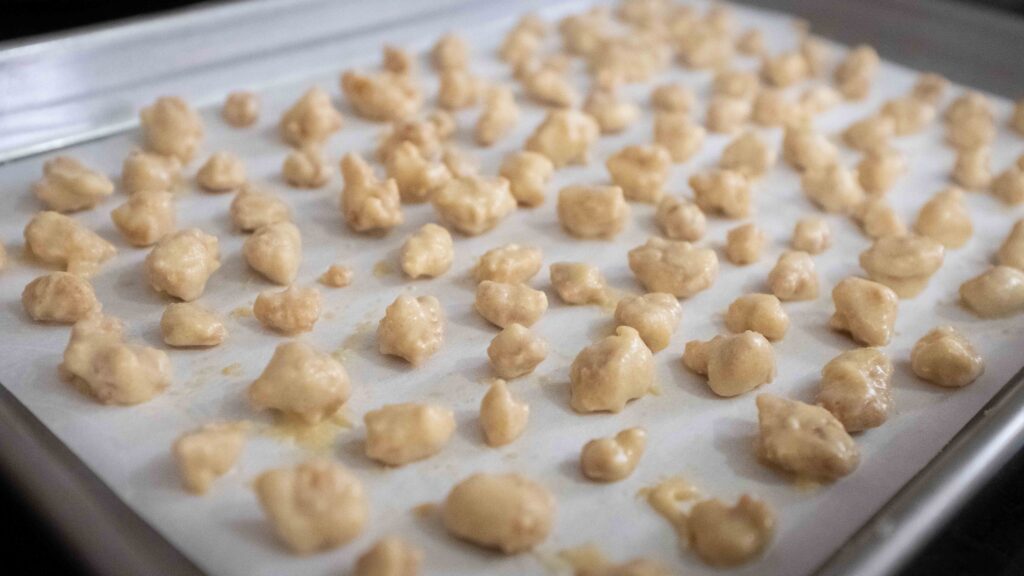
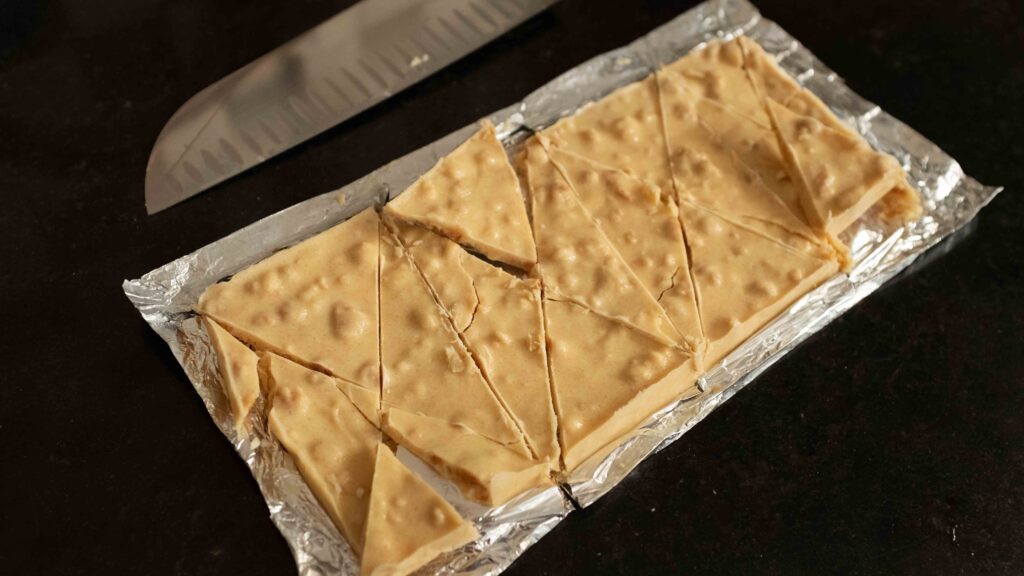
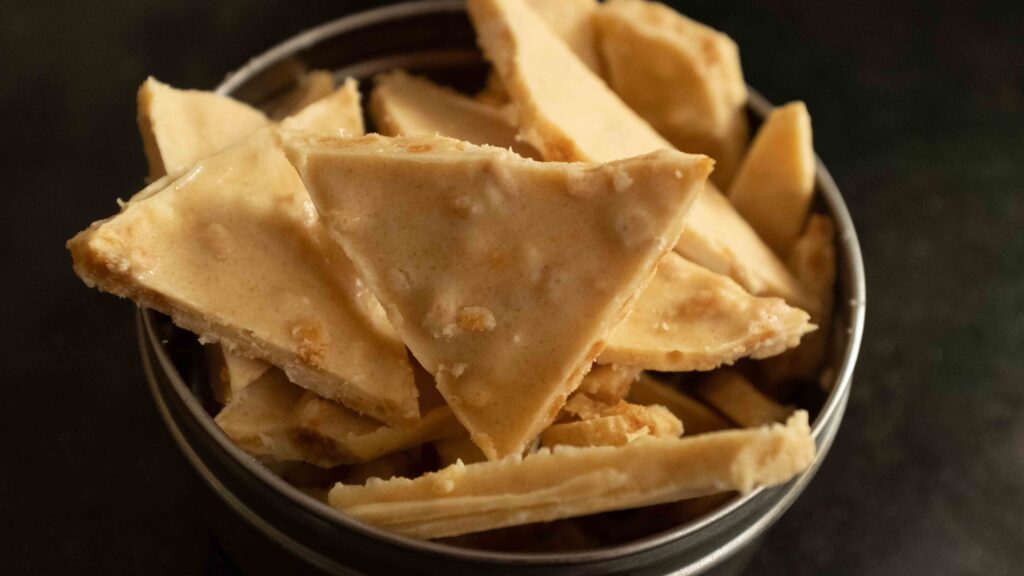
9 – Toss the mixture with a spatula every 5 minutes, until the chocolate is completely cool and no longer sticky. If you live in a humid and hot location like I do, the chocolate will not set at room temperature. In such a situation, you will need to transfer the coated crumbs to a parchment-lined tray and let them firm up in the fridge. Using a fork, I fish out the largest crumbs and space them out on a tray to set in the fridge for 15-20 minutes. I also tip the smaller residual pasty crumbs into a makeshift mold and spread them into a thin layer. It sets as a thin block in the fridge, which can then be broken into shards #hotweatherhacks.
10 – Once they’re set, transfer the crumbs to an airtight container and keep it stored in the fridge until ready to use.
We first tasted ‘milk crumbs’ when we ordered the baked mango cheesecake from Bastian. Holy deliciousness Bastianman! Officially our favourite “mango cheesecake” (that you can buy in Mumbai), it’s actually a New York style cheesecake topped with fresh mango and something called ‘milk crumbs’. The malty-sweet crumb paired with the fresh mango flavour elevated the classic cheesecake to another level. I wanted to recreate that crumb for our cheesecake because it added so much texturally and flavour-wise. Although it doesn’t have the same depth of ‘maltiness’ as the Bastian milk crumb, please don’t leave it off! It takes very little effort and brings huge rewards. The quantity mentioned here is perfect for this cake. If you want to make more to top other desserts, simply scale up the amounts and store the extra crumbs in the fridge for up to 1 week.
Stage 5: Mango coulis
Ingredients
1. 120 gm master mango puree
2. 1 ½ tsp castor sugar
3. 1/4 tsp lemon juice (from 1/4 of a small lemon)
4. 1/8 tsp citric acid
5. 1/16 tsp salt
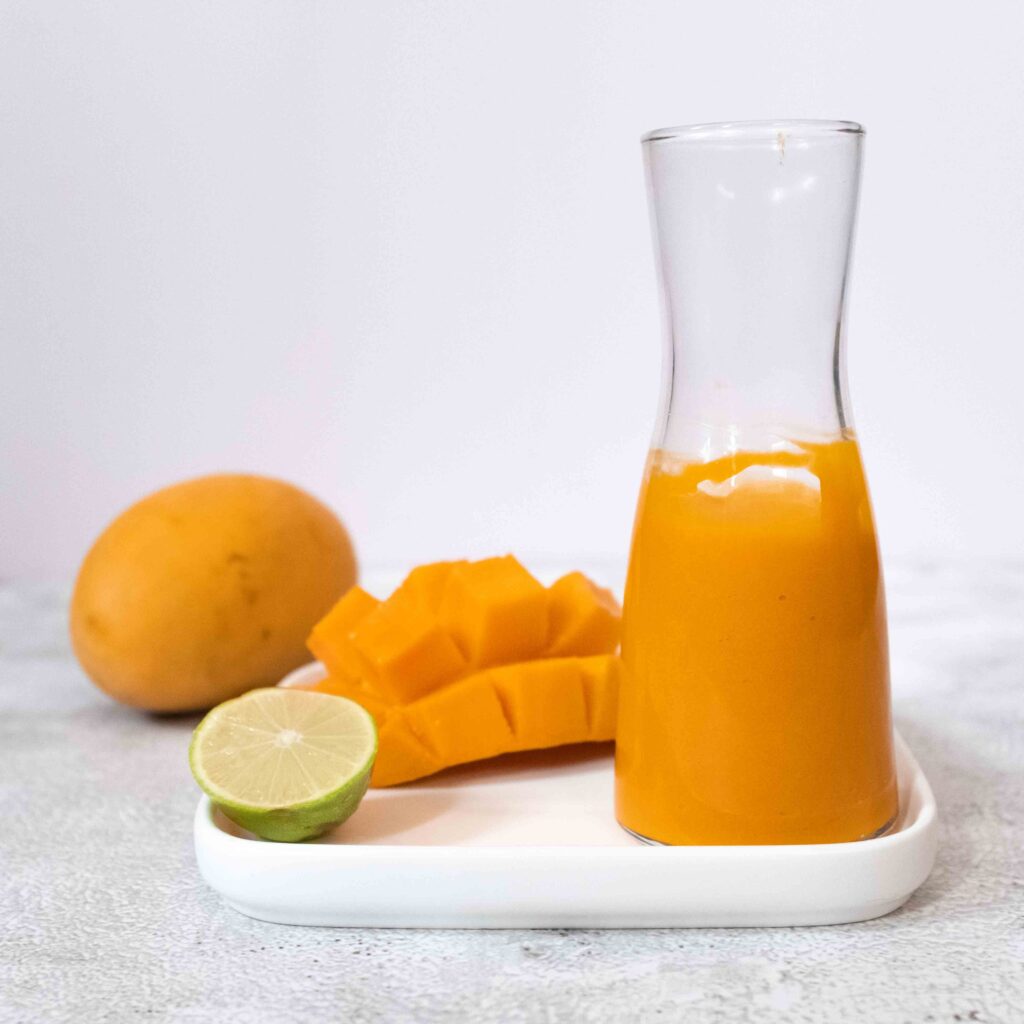
Thaw the frozen puree before making the coulis. If using fresh mango, simply pulp 1 medium Alphonso mango and weigh out 120 gm. Don’t leave out the citric acid. It really boosts the mango flavour as well as prevents the sugar from crystallising later.
Method
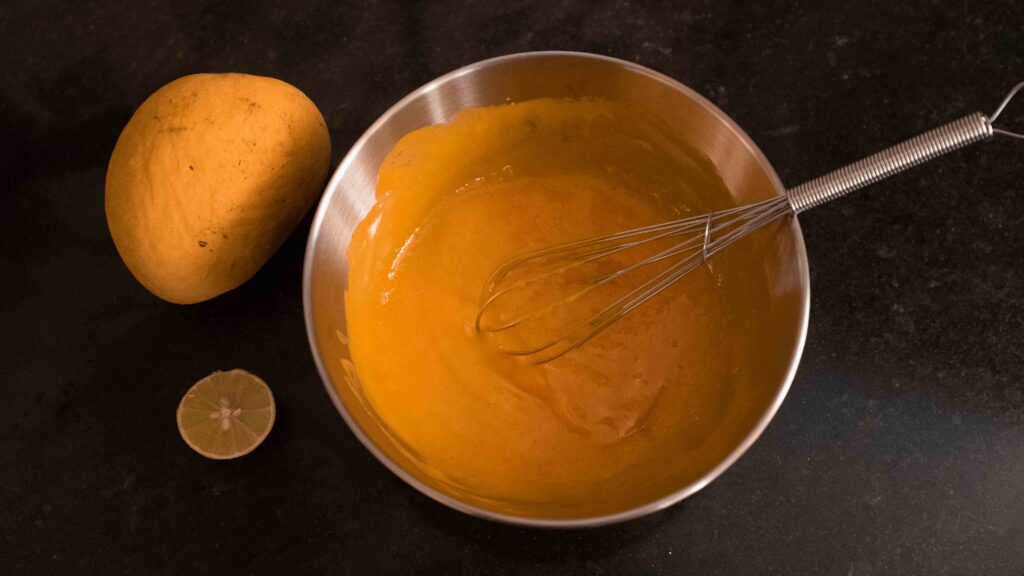
1 – Place all the ingredients in a medium bowl and whisk together until smooth and homogenous. That’s it! Taste and add more sugar and lemon juice if desired. You’re looking for a bright, fresh mango taste.
2 – Transfer the coulis to a sterilised airtight container and store it in the fridge until ready to use.
This super simple coulis is fresh and intensely mango-ey and amazing as a dessert topping. I make a batch when I want instant mango flavour in ice creams, yoghurts, and the like. The amounts mentioned here are just enough to top each slice of mango cheesecake. If you want more or leftovers, you can easily double or triple the recipe as needed. As it is made with fresh fruit and has very little sugar and contains no preservatives, it should be made on the day you plan to serve your cake and used up within a day or two.
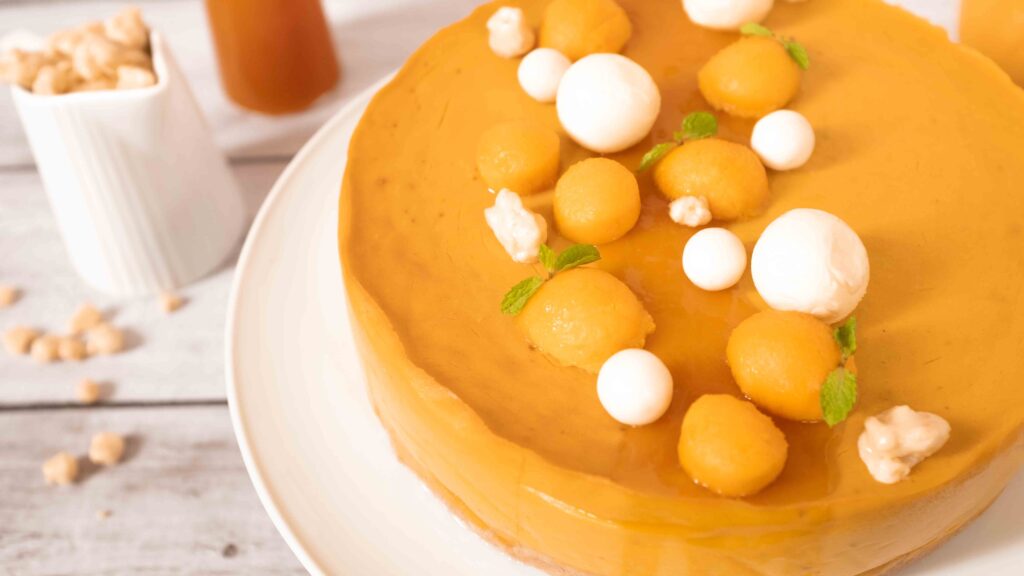
Stage 6: Finale; Unmoulding, decorating & serving
Decorating components
1. 8-inch mango cheesecake, cooled for 24-48 hours
2. 3-4 large milk crumbs from Stage 4
3. Mango coulis from Stage 5
4. 1 ripe Alphonso mango
5. 3 white chocolate truffles like this
6. 4 white chocolate crispies like this
7. 5 baby spearmint leaves
Serving components
8. More ripe Alphonso mangoes, to serve (½ a mango per serving of cheesecake)
9. Milk crumbs from Stage 4
10. Mango coulis from Stage 5
Prep
1 – Keep the cheesecake in the fridge until you’re ready with all your components.
2 – Transfer your mango coulis to a piping bag for easy application.
3 – Slice off the cheeks from the mango. Thereafter use a round teaspoon measure to scoop out half-spheres of mango from the cheeks. I got 4 scoops per cheek, or 8 scoops per mango.
Method
1 – When you’re ready to serve, take the cheesecake out of the fridge and release the springform. Very gently transfer the cake onto a serving platter/cake stand and carefully peel off the parchment from around it.
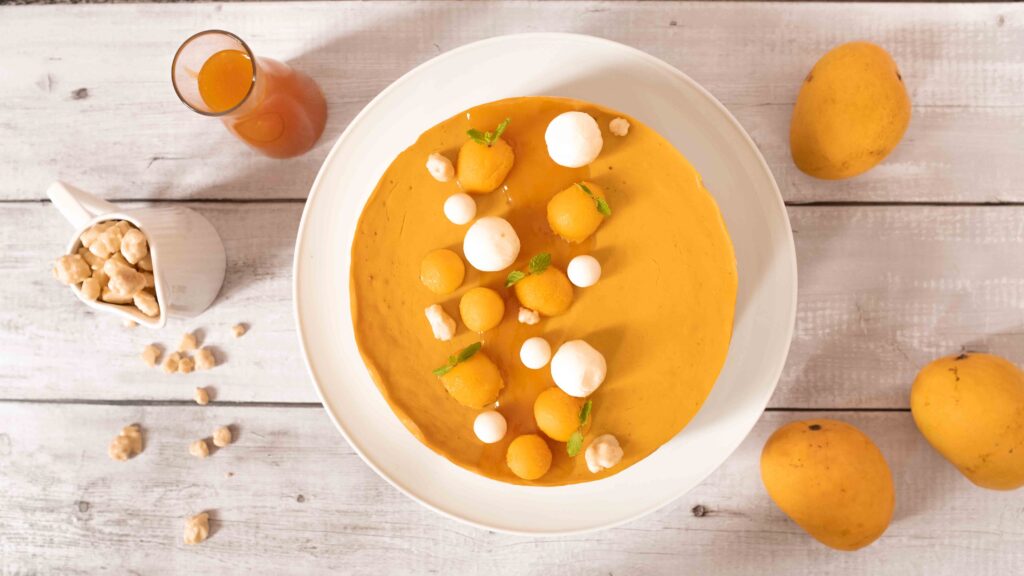
2 – To decorate, pour a 2-inch wide ‘river’ of mango coulis down the centre of the cake, letting it drip and pool down one edge.
3 – Arrange 8 mango half-spheres on top the coulis river.
4 – Stick the baby mint leaves into some of the mango half-spheres. They will look like mini mangoes!
5 – Dot the white chocolate truffles, the white chocolate crispies, and some milk crumbs between the mango half-spheres.
6 – Pop your cheesecake back in the fridge for half an hour. In the meantime, cut your mangoes into cubes. Watch this video to see how.
7 – Slice your cold mango cheesecake and serve each slice with fresh mango cubes, a generous drizzle of mango coulis, and some milk crumbs on the side. Now eat!
On its own, a baked mango cheesecake does not possess the bright flavours of fresh mango. It has the taste and texture of ‘bhapa aam doi’ (steamed mango-yoghurt pudding), where the mango flavour becomes somewhat dulled and muted (much like fresh strawberries baked into batters). To counter this, it absolutely essential to add some good quality mango flavour into the batter. Additionally, this baked mango cheesecake demands a generous topping of fresh Alphonso mango, to restore the pure mango flavour. If you’re not a fan of the baked mango taste, and prefer a classic cheesecake with a fresh topping, I recommend making our glorious New York Cheesecake, and topping it with our mango coulis and a generous heaping of fresh mango. That way, you can enjoy all the richness of a baked cheesecake as well as the flavour of fresh mango. To achieve the perfect cheesecake (taste-wise and visually), do try to follow this recipe to the tee. Make minor adjustments only if your oven runs hotter/colder than normal, or you’re using a 9 inch pan. To serve perfectly clean slices, dip your knife’s blade into a tall container of hot water, dry it off, and then cut downwards in one smooth motion. Wipe off the cake residue after each cut. Again; dip, dry, cut, wipe, repeat.
Tips & Tricks
How to line a springform:
How to cut a mango into cubes
How to slice a cheesecake: